· Kitchen Cleaning Tips · 14 min read
How To Clean Spaghetti Squash
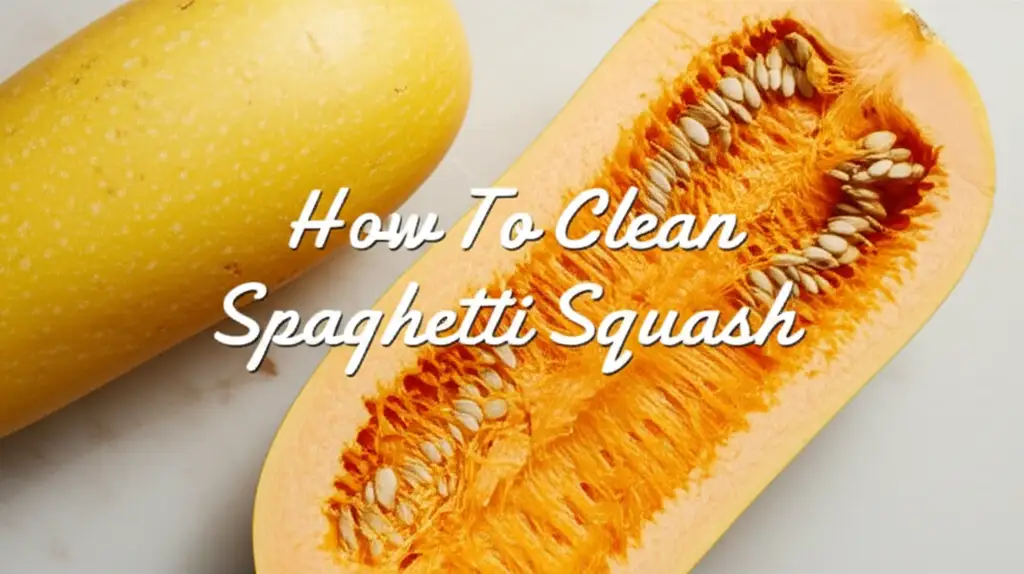
How to Clean Spaghetti Squash for Perfect Meals
Preparing spaghetti squash involves more than just cooking. Proper cleaning of your spaghetti squash is important. It ensures you remove dirt, debris, and potential residues. This step makes your meal safe and more enjoyable. Neglecting this part can compromise your dish.
We understand you want clean food for your family. This guide walks you through every step of cleaning spaghetti squash. We will cover necessary tools and methods. We will also share tips for a truly spotless result. You will learn how to handle tough spots and maintain kitchen cleanliness. Let us make your squash preparation a breeze.
Takeaway
- Always wash spaghetti squash before cutting or cooking.
- Use cool running water and a stiff brush for effective cleaning.
- Dry the squash thoroughly to prevent bacterial growth.
- Clean your kitchen tools and surfaces after handling produce.
- Proper cleaning enhances food safety and the final taste of your dish.
How to clean spaghetti squash? Begin by rinsing the squash under cool running water. Use a stiff-bristled brush to scrub the entire surface gently. Pay attention to crevices. Rinse again and then dry the squash completely with a clean towel. This removes dirt and ensures the squash is ready for preparation.
Why Cleaning Your Spaghetti Squash is Very Important
Cleaning spaghetti squash seems simple. Yet, it is a crucial step in food preparation. Squash grows in fields, often touching soil directly. This means it collects dirt, sand, and other natural debris. You bring these elements into your kitchen without washing.
Beyond visible dirt, produce can carry microorganisms. These germs are common in agricultural environments. Washing reduces the risk of foodborne illnesses. It is a simple action that protects your health. Proper cleaning removes these invisible threats.
Pesticide residues also concern many people. Growers use pesticides to protect crops. These chemicals can remain on the squash skin. Washing helps remove some of these residues. While not all are gone, a good scrub makes a difference.
Think about cross-contamination too. You cut the squash after washing its exterior. Any dirt or bacteria on the skin transfers to the edible flesh. This happens easily with your knife. A clean exterior prevents this transfer. It keeps the inside of your squash pure.
Cleaning spaghetti squash affects its taste. Dirt left on the skin can dull flavors. It may even introduce unwanted grittiness. A clean squash tastes fresh and vibrant. You want your culinary efforts to shine. Starting with a clean ingredient supports this goal. I always feel better knowing my ingredients are spotless.
Essential Tools and Supplies for Effective Squash Cleaning
Gathering the right tools makes cleaning spaghetti squash easy. You do not need many items. The basic supplies are probably in your kitchen already. Having them ready saves time and effort. This prepares you for an efficient cleaning process.
First, you need a sink with cool running water. Cold water helps firm up the squash. This makes it easier to handle and scrub. It also washes away dirt without cooking it onto the skin. Running water is key for rinsing away debris effectively.
A stiff-bristled vegetable brush is your main tool. This brush helps scrub off stubborn dirt. Its bristles reach into the squash’s ridges. Choose a brush dedicated to cleaning produce. This avoids transferring soap or chemicals from other cleaning tasks. I keep a separate brush just for vegetables.
You also need a clean towel for drying. Paper towels work well for this. You can also use a dedicated clean dish towel. Drying is just as important as washing. It removes moisture which can harbor bacteria. A dry surface also helps when cutting the squash.
Sometimes, a mild dish soap is helpful. Use it only if the squash seems unusually dirty or waxy. Choose an unscented, food-safe variety. A small drop goes a long way. Always rinse thoroughly to remove all soap residue. Most times, plain water and scrubbing are enough.
Consider a large bowl or basin if you prefer soaking. Soaking helps loosen dried-on dirt. This is useful for very muddy squash. Make sure the bowl is clean before use. These simple items prepare you for a comprehensive cleaning. You are now ready to tackle any spaghetti squash.
Step-by-Step Guide: How to Clean Spaghetti Squash Effectively
Cleaning spaghetti squash is a straightforward process. Follow these steps for a perfectly clean result. This method ensures all surfaces are free from dirt and impurities. You will feel confident serving your squash.
Initial Rinse for Surface Dirt
Start by placing the spaghetti squash under cool running water. Let the water flow over the entire surface. Use your hands to rub off any loose dirt. This first rinse removes most of the superficial debris. It prepares the squash for a deeper clean.
Look for any stuck-on mud or debris. If you see some, gently pick it off. This prevents it from spreading during scrubbing. A good initial rinse makes the next steps easier. It is like a pre-wash for your produce.
Gentle Scrubbing Techniques
Now, grab your stiff-bristled vegetable brush. Hold the squash firmly in one hand. Use the brush to scrub the squash’s skin thoroughly. Apply gentle pressure. Move the brush in small circles, covering all areas.
Pay special attention to the ends and the ridges. These areas often collect the most dirt. Scrubbing helps dislodge stubborn particles. Continue scrubbing under running water. This washes away the dirt as you work. For cleaning various items, always consider the right tools. Just as a good brush helps with squash, specialized tools help clean kitchenware, like when you need to clean the bottom of a pan or your baking steel.
Some people like to use a small amount of mild, food-safe dish soap at this stage. If you choose this, apply only a drop to your brush. Scrub the squash as usual. Rinse very thoroughly to remove all soap. I usually find that plain water and a good brush do the job perfectly well.
Drying Your Squash Properly
After scrubbing, rinse the squash one last time under cool running water. Make sure no visible dirt or soap remains. The surface should look clean and bright. Turn off the water when you are satisfied.
Now, dry the squash completely. Use a clean kitchen towel or paper towels. Pat the entire surface dry. Get into all the crevices. Moisture can encourage bacteria growth. A dry squash also makes cutting safer. It prevents your knife from slipping.
Proper drying also prepares the squash for storage. If you are not cooking it immediately, a dry surface helps preserve it. This simple step finishes the cleaning process. Your spaghetti squash is now ready for cooking or storage.
Special Considerations for Tougher Dirt or Waxy Surfaces
Sometimes, your spaghetti squash might present unique cleaning challenges. It could have extra stubborn dirt. Or, it might have a waxy coating. Knowing how to handle these situations ensures a truly clean result.
For very muddy squash, soaking is helpful. Fill a large clean bowl with cool water. Submerge the squash for about 5-10 minutes. This softens and loosens the dried mud. After soaking, proceed with the scrubbing steps described earlier. The dirt will come off much more easily.
Some growers apply a thin wax coating to produce. This coating helps preserve freshness and shine. While generally safe, some people prefer to remove it. A good scrubbing with your vegetable brush often suffices. The stiff bristles can break through the waxy layer.
If the wax is particularly persistent, consider a very dilute vinegar solution. Mix one part white vinegar with three parts water in a spray bottle. Spray the squash surface. Let it sit for a minute. Then, scrub with your brush under running water. Vinegar is a mild acid. It helps dissolve waxy films and acts as a natural cleaner for many surfaces, even to clean mold with vinegar in other areas of your home.
Always remember to rinse thoroughly after using any cleaning solution. You want no residue left on your squash. This ensures the best taste and food safety. Focus on effective scrubbing for these tougher situations. Your efforts will lead to a clean and safe squash.
Post-Cleaning Preparation: Cutting and Seeding Your Squash
Cleaning your spaghetti squash is the first step. Now, it is ready for preparation. Proper cutting and seeding techniques ensure you get the most out of your squash. This prepares it perfectly for cooking.
First, you need a sturdy cutting board. A large, stable board prevents slipping. You also need a sharp, heavy-duty knife. A chef’s knife or a large utility knife works well. A sharp knife is safer and more efficient. It makes cutting through the tough skin easier.
Place the clean, dry squash on your cutting board. Stability is important. You can cut the squash lengthwise or crosswise. Cutting lengthwise creates longer strands of “spaghetti.” Cutting crosswise yields shorter, ring-like strands. I usually cut it lengthwise for classic spaghetti-like texture.
Carefully cut off the stem end first. Then, slice the squash in half using your chosen method. The skin is firm, so apply steady, even pressure. If the squash rolls, you can cut a thin slice off one side to create a flat base. This helps stabilize it.
Once halved, you will see the seeds and fibrous pulp inside. Use a large spoon to scoop out these contents. A sturdy metal spoon works best. Scrape the insides clean until only the smooth, yellow flesh remains. Discard the seeds and pulp.
Your spaghetti squash halves are now clean inside and out. They are ready for roasting, steaming, or microwaving. This careful preparation ensures your squash is ready to absorb flavors. It sets the stage for a delicious meal.
Storing Cleaned and Uncleaned Spaghetti Squash
Knowing how to store spaghetti squash properly helps it last longer. This applies to both uncleaned and cleaned squash. Proper storage maintains freshness and quality. It prevents spoilage before you cook.
For uncleaned spaghetti squash, cool, dry storage is best. A pantry, cellar, or garage works well. Keep it away from direct sunlight. Ideal temperatures are between 50-60°F (10-15°C). Do not store it in the refrigerator before cutting. The cold can reduce its shelf life. Uncut, uncleaned spaghetti squash can last for 1-2 months or even longer in good conditions. I often store mine in a cool corner of my kitchen.
Once you clean and cut your spaghetti squash, storage changes. The exposed flesh needs refrigeration. Wrap the halves tightly in plastic wrap. You can also place them in an airtight container. This protects the squash from air and other food odors.
Store cut squash in the refrigerator. It will stay fresh for about 3-5 days. If you cook the squash, you can store the cooked “strands” as well. Place them in an airtight container in the fridge. Cooked spaghetti squash usually lasts for 3-4 days. This makes it a good option for meal prepping.
Freezing is another option for longer storage. Cook the spaghetti squash first. Then, scoop out the strands. Let them cool completely. Place the strands in freezer-safe bags or containers. Remove as much air as possible. Frozen spaghetti squash can last for up to 8-12 months. Thaw in the refrigerator before reheating. Proper storage helps you enjoy your squash longer.
Maintaining Kitchen Hygiene When Handling Produce
Cleaning spaghetti squash is part of broader kitchen hygiene. Safe food handling practices protect your family. A clean kitchen environment prevents the spread of bacteria. This is crucial when working with any produce.
Always start with clean hands. Wash your hands thoroughly with soap and warm water. Do this before and after handling raw produce. This simple step prevents cross-contamination from your hands to the food.
Ensure your cutting boards and utensils are clean. Wash them with hot, soapy water before and after use. If you use a wooden cutting board, make sure to clean it properly to prevent stains and odors. Learning how to clean stains on wood is a good skill for kitchen safety. Consider having separate cutting boards. Use one for raw meat and another for produce. This greatly reduces cross-contamination risks.
Clean your countertops before starting food prep. Wipe them down with a disinfectant spray or a solution of soap and water. After preparing the squash, clean surfaces again. This removes any potential juice or debris. Regularly cleaning your oven is also a good practice, especially if you roast vegetables. Knowing how to clean the bottom of your oven or how to clean your oven after self-clean ensures a sanitary cooking environment.
Dispose of vegetable scraps properly. Place them directly into your compost bin or trash can. Do not leave them on the counter. This keeps your kitchen tidy and reduces pest attraction.
These practices create a safe cooking space. They make your food preparation enjoyable and worry-free. A clean kitchen supports healthy eating habits. I always feel more relaxed cooking in a spotless environment.
Common Mistakes to Avoid When Cleaning Squash
Even simple tasks like cleaning spaghetti squash can have pitfalls. Avoiding common mistakes ensures your squash is truly clean. It also protects your kitchen from contamination. Pay attention to these points.
First, do not wash squash with hot water. Hot water can cook certain proteins on the squash skin. This makes dirt harder to remove. It also might encourage bacteria to spread. Always use cool or lukewarm water for washing produce. This keeps the squash firm and easy to clean.
Another mistake is using harsh soaps or chemicals. Products not designed for food can leave harmful residues. Stick to plain water and a vegetable brush. If soap is needed, use only a tiny amount of mild, food-safe dish soap. Always rinse extensively afterwards.
Neglecting to scrub properly is a common error. A quick rinse is not enough. The skin of spaghetti squash has many crevices. Dirt can hide there. A stiff brush is essential for reaching these areas. Scrub all sides thoroughly to dislodge everything.
Skipping the drying step is also a mistake. Moisture on the squash surface can promote bacterial growth. It also makes the squash slippery. This increases the risk of knife accidents during cutting. Always dry the squash completely with a clean towel.
Lastly, not cleaning your tools and surfaces is a major oversight. Cross-contamination is a real threat. Using dirty cutting boards or knives can transfer germs. Always wash all equipment that touches the raw squash. Clean your countertops before and after preparation. Proper hygiene protects your food and your health.
FAQ Section
How long does uncleaned spaghetti squash last at room temperature?
Uncleaned spaghetti squash stores well. Keep it in a cool, dry place. A pantry or cellar works best. Avoid direct sunlight. It typically lasts for one to two months. Sometimes, it can last even longer. Check for soft spots or mold before use.
Can I wash spaghetti squash with dish soap?
You can use a very small amount of mild, unscented dish soap. Ensure it is food-safe. Apply it to your scrub brush. Rinse the squash extremely well afterwards. Most often, plain cool water and a good scrub brush are enough. They remove dirt without residue.
Is it necessary to scrub spaghetti squash, or is rinsing enough?
Rinsing alone is not enough. Spaghetti squash has ridges and a textured surface. Dirt, debris, and potential residues can cling to these areas. A stiff-bristled brush helps dislodge these particles. Scrubbing ensures a thorough clean. It makes the squash safe for consumption.
What is the best way to dry spaghetti squash after cleaning?
After washing, dry the squash completely. Use a clean kitchen towel or paper towels. Pat the entire surface dry. Pay attention to the ends and crevices. Removing all moisture prevents bacterial growth. It also makes the squash easier and safer to cut.
How do I remove wax from spaghetti squash skin?
Many squashes have a food-grade wax coating. A good scrubbing with a vegetable brush under running water often removes it. For stubborn wax, you can use a diluted vinegar solution. Mix one part white vinegar with three parts water. Scrub and rinse thoroughly.
Should I clean the inside of spaghetti squash after cutting?
Yes, after cutting the squash, scoop out all seeds and fibrous pulp. Use a sturdy spoon for this. Scrape the inside walls clean. This makes the squash ready for cooking. It also ensures a clean, smooth base for your meal.
Conclusion
Cleaning your spaghetti squash is a simple but important step. It protects your health and makes your meals taste better. We covered everything from basic washing to tackling tough spots. You now understand the tools you need and the best methods to use.
Remember, a clean squash means a safe meal. Always scrub thoroughly and dry completely. These steps prevent germs and unwanted dirt from reaching your plate. Proper kitchen hygiene alongside produce cleaning protects your whole family.
Now you have the knowledge to prepare spaghetti squash confidently. Enjoy your delicious and clean meals! If you want to learn more cleaning tips for your kitchen or home, visit our website for more expert guides. Keep your home healthy and sparkling clean.
- Spaghetti Squash Cleaning
- Produce Preparation
- Food Safety Tips
- Kitchen Hygiene
- Vegetable Cleaning