· Home Appliance Maintenance · 15 min read
How To Clean Bissell Vacuum
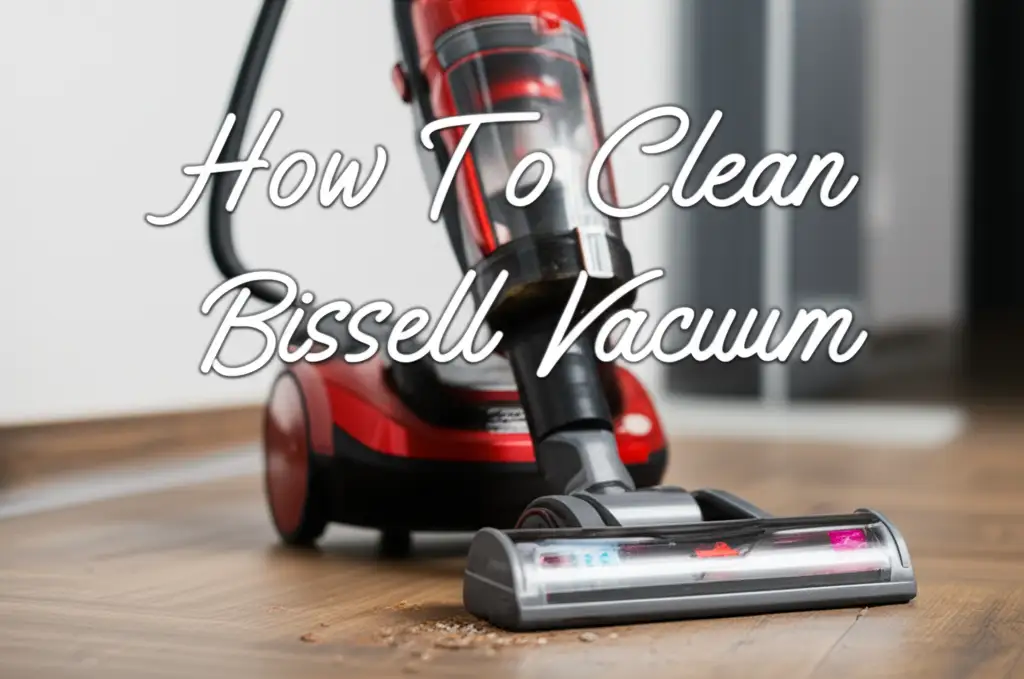
Clean Your Bissell Vacuum: A Complete Guide
Maintaining a clean home feels great. Your Bissell vacuum helps a lot with this. But what happens when your vacuum itself gets dirty? Dirt, dust, and hair build up inside the machine. This buildup stops your vacuum from working its best. Learning how to clean your Bissell vacuum is key for a truly clean home. It makes your vacuum last longer too.
This guide helps you understand how to clean your Bissell vacuum step-by-step. We cover everything from the dirt tank to the brush roll. You will learn about essential tools and smart cleaning practices. We also offer tips for specific Bissell models. Keep reading to bring your Bissell vacuum back to peak performance. A clean vacuum means a cleaner home for you.
Takeaway
Keeping your Bissell vacuum clean boosts its performance and extends its life.
- Regularly empty the dirt tank and clean filters.
- Remove tangled hair and debris from the brush roll.
- Check and clear blockages in hoses and attachments.
- Allow all washed parts to dry completely before reassembly.
- Follow a consistent cleaning schedule for best results.
How to Clean a Bissell Vacuum
Cleaning your Bissell vacuum involves emptying the dirt tank, washing filters, clearing the brush roll of tangled hair, and checking hoses and attachments for clogs. This routine maintenance helps restore suction power, remove odors, and ensure your vacuum operates efficiently.
Boost Performance: Why Clean Your Bissell Vacuum?
Your Bissell vacuum works hard to keep your floors clean. Over time, dust, dirt, and debris build up inside the machine. This internal grime affects how well your vacuum performs. Cleaning your Bissell vacuum regularly keeps it working like new. It helps maintain strong suction power.
A dirty vacuum loses suction. Its filters clog, stopping airflow. The brush roll gets tangled with hair and strings. This makes it less effective at picking up dirt. A clean vacuum works efficiently, saving you time and effort. It picks up more dirt with less passes.
Cleaning also extends the life of your vacuum. Dirt and debris can strain the motor. They can damage internal components. Regular cleaning prevents this wear and tear. It helps you avoid costly repairs. Your investment in a Bissell vacuum lasts longer when you care for it.
Finally, a dirty vacuum can smell bad. Dust and pet hair trapped inside develop unpleasant odors. These odors spread through your home as you vacuum. Cleaning your Bissell removes these smell sources. It leaves your home smelling fresh and clean. Regular cleaning makes a real difference in your home’s cleanliness and your vacuum’s health.
Gather Your Tools: Preparing to Clean Your Bissell
Before you start cleaning your Bissell vacuum, gather the right tools. Having everything ready makes the process smoother. It helps you clean thoroughly. Most of the tools you need are common household items.
First, safety is important. Always unplug your Bissell vacuum from the wall outlet. This prevents any accidental starts during cleaning. You do not want power running to the machine while your hands are inside it. This simple step keeps you safe.
Here is a list of tools you will need:
- Scissors or a seam ripper: These help cut tangled hair from the brush roll. Hair wraps tightly, and scissors make removal easy.
- A small, stiff brush: This brush is useful for scrubbing stubborn dirt from filters and inside compartments. An old toothbrush works well for this.
- Microfiber cloths: You will use these for wiping down surfaces. They are good at trapping dust.
- Mild dish soap: A small amount of soap mixed with water helps clean washable parts. Avoid harsh chemicals.
- Warm water: This is for rinsing dirt tanks and filters. It helps loosen grime.
- A dry towel or drying rack: You need a place for parts to air dry completely. Proper drying prevents mold and mildew.
- A garbage can: Have a bin nearby to dispose of the dirt and debris you remove.
Setting up your cleaning station is also helpful. Choose an area where you can make a bit of a mess. A garage, laundry room, or even an outdoor space works well. Lay down an old towel or newspaper to catch dirt. This preparation step makes the cleaning process much easier and more efficient.
Clean Filters and Dirt Tanks for Peak Suction
The dirt tank and filters are crucial for your Bissell vacuum’s suction power. If these parts are dirty, your vacuum cannot pull air effectively. This leads to poor cleaning performance. Cleaning them regularly is a top priority.
Start by emptying the dirt tank. Different Bissell models have different ways to do this. Most have a button or latch to release the tank. Take the tank to a garbage can. Open the bottom lid and dump out all the collected debris. Shake it gently to get everything out.
Next, focus on the filters. Many Bissell vacuums have two main types of filters: a pre-motor filter and a post-motor filter. The pre-motor filter often looks like foam or pleated paper. It sits before the motor. You can usually wash this filter. Remove it from the vacuum. Rinse it under warm water until the water runs clear. Gently squeeze foam filters to remove water. Do not twist or wring them. If your Bissell vacuum uses washable pleated filters, follow a similar process. Rinse them carefully without damaging the pleats. Some vacuum filters are not washable. Always check your vacuum’s user manual to confirm which filters you can clean with water. For example, some Dyson filters are washable, just like some Bissell ones. You can find more specific guidance on how to clean Dyson vacuum filter if you own one. Similarly, how to clean Shark vacuum filter cordless provides relevant instructions for another brand.
The post-motor filter, often called a HEPA filter, is usually not washable. This filter traps fine dust and allergens. You can tap it gently over a garbage can to remove loose debris. If it looks very dirty, you may need to replace it. Check your manual for replacement schedules.
After washing any filters or the dirt tank, let them air dry completely. This is very important. Putting damp parts back into the vacuum can cause mold. It can also damage the motor. Allow at least 24 hours for drying. Make sure they are bone dry before putting them back. A completely dry filter ensures your Bissell vacuum maintains its best suction.
Tackle the Brush Roll: Restore Your Bissell’s Agitation
The brush roll is a vital part of your Bissell vacuum. It agitates carpets and sweeps debris into the suction path. Over time, hair, strings, and other fibers get wrapped around it. This reduces its ability to clean effectively. It can also strain the vacuum’s motor.
To clean the brush roll, first, turn the vacuum over. Most Bissell models have a plate or cover that secures the brush roll. You may need a screwdriver to remove a few screws. Carefully lift off the cover. This exposes the brush roll. Some models allow easier access with latches or clips.
Now, you will see the tangled mess. Use scissors or a seam ripper to cut through the hair and fibers. Be careful not to cut the bristles of the brush roll. Slide the scissors under the tangled material. Cut it lengthwise. Then, pull all the cut hair and debris off the brush roll. You might be surprised by how much comes off. Remove any large pieces of lint or fabric too.
Inspect the brush roll for damage. Check if the bristles are worn down. Make sure the belt that drives the brush roll is still in place and not stretched or broken. If the bristles are too flat, the brush roll won’t agitate carpets well. If the belt is loose, the brush roll might not spin. If your vacuum uses a brush bar with a drive belt, similar care applies to other brands as well. For example, knowing how to clean Dyson vacuum head offers parallel insights into brush bar maintenance.
Clean the area around the brush roll. Use a microfiber cloth to wipe away any dust or grime in the housing. Make sure nothing is blocking the brush roll’s movement. Once clean, replace the brush roll. Secure the cover and any screws you removed. A clean brush roll spins freely. This helps your Bissell vacuum pick up dirt much better. It also protects the motor from overworking.
Clear Blockages: Hoses and Attachments Cleaning
Vacuum hoses and attachments are critical for flexible cleaning. They let you reach tight spots, clean upholstery, and tackle stairs. Unfortunately, these parts are prone to blockages. Larger debris or concentrated dust can get stuck inside. A blocked hose severely limits your vacuum’s suction.
Start by detaching all hoses and attachments from the main vacuum body. Inspect each piece. Look through the hose from both ends. If you see a blockage, try to reach it. Sometimes, you can pull it out with your fingers or a pair of pliers. Be gentle to avoid tearing the hose.
For deeper clogs, you might need a long, thin object. A broom handle or a straightened coat hanger can work. Carefully push the object through the hose. Gently dislodge the blockage. Do not use anything too sharp that could puncture the hose. Push from one end until the blockage moves out the other. You may need to work it from both ends if the clog is in the middle.
Clean the inside and outside of attachments. Dust and debris can cling to the surfaces. Use a damp microfiber cloth to wipe down crevice tools, dusting brushes, and upholstery tools. If an attachment has an opening that collects lint, clear it out. For example, an upholstery tool might gather pet hair that needs pulling off.
If your Bissell is a wet/dry vacuum or a carpet cleaner, like the Bissell Little Green or Revolution Pet Pro, its hoses might also accumulate residue. This residue can lead to odors and reduced flow. For these types of machines, flushing the hose with clean water can help. Be sure to completely dry these hoses before reattaching them. If you own a specialized carpet cleaner, understanding how to clean Bissell Little Green provides specific guidance for its internal cleaning processes. Similar detailed advice is available for other models, such as how to clean Bissell Revolution Pet Pro.
After clearing blockages and cleaning attachments, reattach them to your vacuum. Make sure all connections are secure. A clear hose ensures maximum suction power. Clean attachments work better and spread less dust around your home. This step is essential for your Bissell vacuum to perform at its best.
Model-Specific Care: Cleaning Different Bissell Vacuums
Bissell makes many types of vacuums. Each type has slightly different cleaning needs. Understanding these differences helps you clean your specific model effectively. Whether you have an upright, stick, canister, or carpet cleaner, some parts need special attention.
For Bissell upright vacuums, the main focus is usually the dirt tank, filters, and brush roll. These models handle large areas of carpet and hard floors. The brush roll collects a lot of hair. Pay close attention to removing tangled fibers from the brush. The filter type often includes washable foam and pleated filters. Always check your manual for exact instructions on removing and washing these parts. The upright’s hose can also get clogged, especially if you use attachments often.
Bissell stick vacuums are lightweight and compact. Their dirt bins are often smaller. This means you need to empty them more frequently. Their filters are also smaller and may require more frequent cleaning or replacement. Stick vacuum brush rolls are usually easier to access. Still, they collect hair just like uprights. Their narrow design means hoses and nozzles can clog quickly. Keep a close eye on these small openings for blockages.
Bissell wet/dry vacuums and carpet cleaners are different. Models like the Bissell Little Green or Bissell ProHeat Pet Turbo use water and cleaning solutions. They have separate clean water tanks and dirty water tanks. You must empty and rinse both tanks after every use. Leftover dirty water can cause mold and odors. The hoses and nozzles on these machines can also get clogged with dirty water residue. Flush them with clean water. Allow all parts to air dry completely. For deep cleaning upholstery with one of these machines, follow steps like those for how to clean couch with Bissell Little Green to prevent buildup in the hose. You can find specific cleaning steps for the Bissell ProHeat Pet Turbo by following our guide on how to clean Bissell ProHeat Pet Turbo.
Always refer to your Bissell vacuum’s user manual. It provides exact instructions for your specific model. The manual shows how to disassemble parts safely. It tells you which parts are washable and which need replacement. Following these specific guidelines ensures you clean your vacuum correctly. It helps your Bissell vacuum perform its best for a long time.
Routine Care: Your Bissell Vacuum Maintenance Schedule
Establishing a regular cleaning schedule for your Bissell vacuum helps maintain its performance. It also extends the vacuum’s lifespan. Consistent care prevents dirt and debris from building up into major problems. This schedule breaks down cleaning tasks into daily, weekly, monthly, and yearly routines.
After Every Use (Daily/As Needed):
- Empty the Dirt Tank: This is the most basic step. A full dirt tank reduces suction. Empty it every time you finish vacuuming.
- Wipe Exterior: Use a damp microfiber cloth to wipe down the outside of your vacuum. This removes surface dust and grime.
Weekly Maintenance:
- Clean Washable Filters: If your Bissell has washable pre-motor filters, remove and rinse them. Allow them to air dry for at least 24 hours. Always ensure they are completely dry before putting them back.
- Check Brush Roll: Turn the vacuum over. Inspect the brush roll for tangled hair, strings, or debris. Use scissors to cut and remove any wrapped materials.
- Inspect Hose and Attachments: Look for any visible clogs in the main hose and attachment tools. Clear them out if found.
Monthly Maintenance:
- Deep Clean Dirt Tank: Beyond just emptying, give the dirt tank a thorough wash with warm water and mild dish soap. Rinse well and let it air dry completely.
- Clean Brush Roll Housing: Remove the brush roll completely. Clean the area around it, including the housing and the agitator belt area. Wipe away any dust or grime.
- Check Post-Motor Filter: If your vacuum has a non-washable post-motor or HEPA filter, tap it gently over a trash can to remove loose dust. Note its condition.
Annually (or as needed):
- Replace Filters: Non-washable filters, like HEPA filters, need replacement annually or more often depending on use and pet hair. Replace washable filters if they show signs of damage or excessive wear.
- Inspect Belt: Check the drive belt that spins the brush roll. If it looks stretched, cracked, or loose, replace it. A worn belt affects brush roll performance.
- Professional Check-up: Consider a professional service check if your vacuum shows signs of severe performance loss not fixed by cleaning.
Sticking to this routine helps keep your Bissell vacuum running smoothly. It makes vacuuming easier and your home cleaner. Consistent maintenance is a small effort for a big reward.
FAQ Section
How often should I clean my Bissell vacuum?
You should empty the dirt tank after every use. Clean washable filters weekly or monthly, depending on how often you vacuum and if you have pets. Check the brush roll for hair weekly. A deeper clean of all parts should happen every few months.
Can I wash all Bissell vacuum filters?
No, not all Bissell vacuum filters are washable. Pre-motor foam or pleated filters are often washable. Post-motor or HEPA filters are usually not washable. Always check your Bissell vacuum’s user manual to see which filters are safe to wash and which need replacement.
What causes a bad smell in my vacuum?
A bad smell in your Bissell vacuum often comes from trapped dirt, pet hair, dust, or even mold. These materials can decompose or grow mildew, especially if washable parts are not fully dried. Regular cleaning of the dirt tank, filters, and brush roll helps remove these odor sources.
My Bissell vacuum has lost suction, what should I do?
Loss of suction is usually due to a clogged filter, a full dirt tank, or a blockage in the hose or brush roll. First, empty the dirt tank. Then, clean or replace all filters. Next, check the brush roll for tangled hair. Finally, inspect the hose and all attachments for any clogs.
Is it safe to use water to clean vacuum parts?
Yes, it is safe to use water for specific washable parts like the dirt tank and certain filters. Use warm water and mild soap for thorough cleaning. The most important step is to ensure all washed parts are completely, 100% dry before reassembling them. This prevents mold growth and damage to the vacuum’s motor.
How do I know when to replace my Bissell vacuum filters?
You should replace non-washable filters (like HEPA filters) annually or sooner if you notice a significant decrease in suction or increased dust escaping. Replace washable filters if they are torn, no longer clean effectively, or have a persistent odor even after washing and drying. Your manual provides specific replacement guidelines.
Conclusion
Keeping your Bissell vacuum clean is not just about aesthetics; it is about performance and longevity. Learning how to clean your Bissell vacuum ensures it continues to work efficiently. A well-maintained vacuum provides powerful suction. It makes your cleaning tasks easier. It helps your home stay truly clean.
We covered essential steps, from emptying the dirt tank to tackling tangled brush rolls. We also discussed clearing blocked hoses and caring for different Bissell models. Remember to always unplug your vacuum before starting any cleaning. Allow all washed parts to dry completely to prevent damage. A consistent cleaning routine saves you money on repairs and replacements. It also keeps your home free from unpleasant vacuum odors. Take these steps to enjoy the full benefits of your Bissell vacuum for many years to come. Your clean home starts with a clean vacuum.
- Bissell vacuum cleaning
- Vacuum maintenance tips
- Filter cleaning guide
- Brush roll care
- Home cleaning solutions