· Outdoor Cleaning · 19 min read
How To Clean Black Walnuts
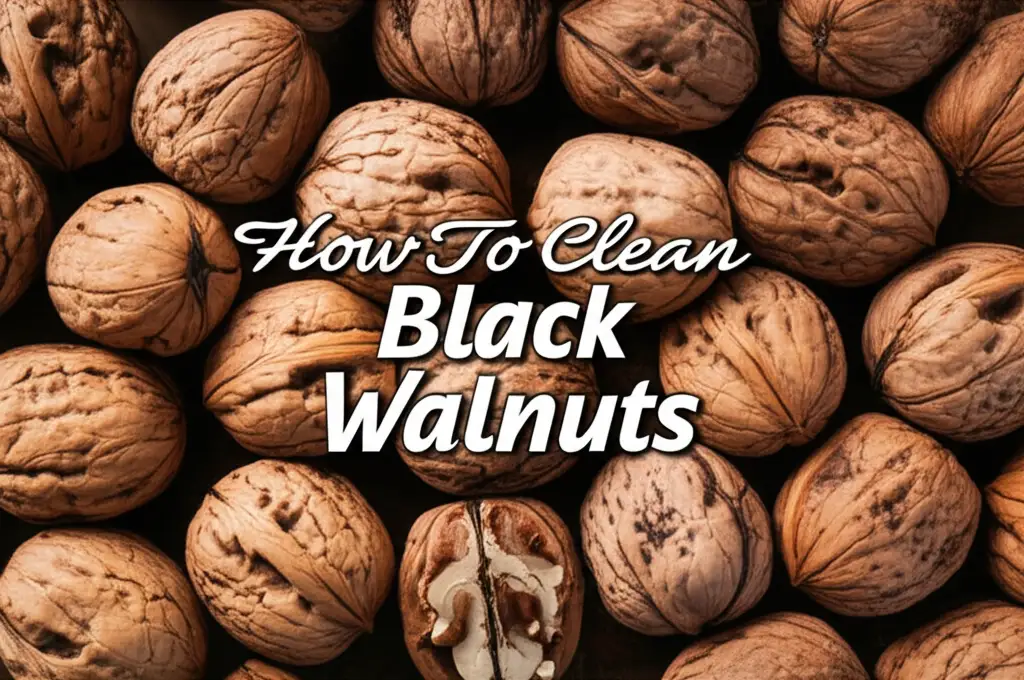
Clean Black Walnuts: Remove Stains & Prepare for Storage
Black walnuts offer a rich, distinctive flavor. They are a wonderful addition to baked goods, savory dishes, and snacks. However, harvesting and processing them can be messy work. Learning how to clean black walnuts properly is important. This guide gives you clear steps. You will learn to remove sticky hulls, wash the nuts, and dry them for storage. We make the process simple for you.
Black walnuts are special nuts. They come with a thick, green or black hull. This hull contains a strong dye called juglone. Juglone stains hands and surfaces easily. Cleaning black walnuts means getting rid of this hull and washing the inner shell. Proper cleaning makes sure the nuts taste great and last long. It also helps avoid common cleaning issues later. This guide will walk you through each vital step.
Takeaway:
- Wear protective gear to avoid walnut stains.
- Remove hulls promptly to prevent rot and mold.
- Wash nuts thoroughly to eliminate residue.
- Dry nuts completely to ensure long-term storage.
- Proper processing yields delicious, ready-to-use walnuts.
To clean black walnuts, first collect them. Next, remove their green or black hulls. Then, wash the nuts completely. Finally, dry them for several weeks. This method stops mold and makes cracking easier. It prepares them for safe storage and enjoyment.
Getting Started: Necessary Tools for Cleaning Black Walnuts
Cleaning black walnuts requires some specific tools and preparation. You need to protect yourself and your work area from stains. The hull contains a powerful dye. This dye can easily stain skin, clothes, and concrete. Gather your supplies before you begin.
You will need heavy-duty gloves. Regular gardening gloves might not be enough. Choose thick rubber or nitrile gloves. These gloves protect your hands from the dark stain. Old clothes are also smart. Do not wear anything you care about. An apron can add extra protection. A large bucket or wheelbarrow is useful. You will use it for collecting and soaking the walnuts. A stiff brush or power washer helps clean the husks. A hose with strong water pressure is good for rinsing. Wire mesh screens or old window screens are perfect for drying. These items make the process easier and cleaner. Protecting your surfaces is key. You may want to put down a tarp or old sheets. This prevents stains on your driveway or patio.
Choosing the right location matters too. An outdoor area is best. A place with good drainage is ideal. Avoid working on concrete if possible. The juglone can permanently stain it. A grassy area or dirt patch works well. Prepare your space for a bit of mess. Planning helps you handle the walnut mess.
- Essential Protective Gear:
- Heavy-duty rubber or nitrile gloves.
- Old clothes that you do not mind staining.
- A protective apron.
- Safety glasses (optional, but good for hulling).
- Cleaning Tools:
- Large buckets or wheelbarrows.
- Stiff bristle brush or power washer.
- Garden hose with a spray nozzle.
- A tarp or old plastic sheeting for ground protection.
- Drying Equipment:
- Wire mesh screens, old window screens, or drying racks.
- Plenty of space with good air circulation.
I always wear my oldest jeans and a long-sleeved shirt for this job. I have learned from experience about those stubborn stains. Once, I stained my favorite pair of sneakers. Now, I am extra careful. Make sure you have everything ready before you start handling the nuts. This step saves you time and frustration later on.
The Hulling Process: Removing the Outer Green Layer
Removing the green or black hull is the first major step to clean black walnuts. This step is also the messiest part of the entire process. The hull contains the dark dye, juglone. You must handle it with care to avoid staining. There are several ways to hull black walnuts. You can choose the method that best fits your tools and comfort level.
One common method is using a sturdy boot. Place the walnut on a hard surface, like a concrete slab or large rock. Step on the hull firmly with your boot. Twist your foot to break open the hull. This separates the nut from the fleshy outer layer. Be careful not to crush the nut itself. Another method uses a hammer or mallet. Gently tap the hull to crack it open. Then peel away the pieces by hand. Always wear your gloves for this. This method gives you more control. Some people use a corn sheller. A corn sheller can be effective for hulling large quantities of walnuts. You simply feed the walnuts through the machine. It strips away the hulls quickly. This reduces manual effort greatly.
For large batches, consider a mechanical huller. These machines are often found at farmers’ cooperatives. They use a rotating drum or abrasive surfaces to remove hulls. If you have many trees, this might be a good investment. Another simple way involves a bucket and a drill with a stirring attachment. Put walnuts in a bucket with water. Use the drill attachment to agitate the nuts. This helps loosen and remove the hulls. This method creates a slurry of hull material. Be ready for a dirty cleanup after using this method. No matter the method, remove as much hull material as you can. Any remaining hull will continue to stain the shell. It can also lead to mold growth. After hulling, you will have a pile of nuts covered in sticky residue. You will also have a mess on your ground.
- Manual Hulling Methods:
- Sturdy Boot Method: Place nut on a hard surface, step firmly and twist to break hull.
- Hammer/Mallet Method: Gently tap hull, then peel away pieces by hand.
- Mechanical/Assisted Hulling:
- Corn Sheller: Feed nuts through to strip hulls.
- Drill and Bucket Method: Agitate walnuts in water with a drill attachment.
- Dedicated Huller: For large quantities, these machines efficiently remove hulls.
After hulling, dispose of the hulls responsibly. They are high in juglone. This chemical can harm sensitive plants. Do not put them in your compost pile if you plan to use it on your vegetable garden. You can bury them or put them in a dedicated waste bin. Cleaning up the area after hulling is important. The dark liquid can stain concrete. You may need to scrub the surface well. If you have a black kitchen sink or a matte black sink, be careful about staining it. Rinse any tools immediately. This prevents the juglone from drying and becoming harder to remove.
Washing Black Walnuts: Getting Rid of Stains and Residue
Once the hulls are off, the walnuts still carry a dark, sticky residue. This residue is the remaining juglone dye. It can also contain dirt and bits of hull. Proper washing is essential to clean black walnuts. This step makes sure the nuts are truly clean. It also prepares them for the crucial drying process. You want to remove all this gunk before drying.
Start by placing the hulled walnuts into a large bucket. Fill the bucket with water. The walnuts will float at first. Stir them vigorously with a sturdy stick or paddle. You will see the water turn dark brown or black quickly. This is the juglone dissolving into the water. Let the nuts soak for a few minutes. This helps loosen any stubborn residue. After soaking, drain the dirty water. You will likely need to repeat this process several times. Use fresh water each time. Continue washing until the water runs mostly clear. This may take three to five rinses, or even more. I often use a garden hose with a strong nozzle. I spray the nuts directly in the bucket. This helps blast off the remaining bits.
For extra cleaning power, you can use a stiff brush. Scrub each nut individually under running water. This removes any clinging fibers or embedded dirt. It ensures the shell is as clean as possible. Some people use a pressure washer on a low setting. This can quickly clean a large batch of nuts. Be careful not to damage the shells. A gentle spray is all you need. You might find some walnuts that float after repeated washing. These nuts are often empty or have shriveled kernels. Discard them. They are not worth the effort of drying and cracking. Good walnuts should eventually sink when wet. This indicates a full kernel inside.
- Washing Steps:
- Place hulled walnuts in a large bucket.
- Fill with water; stir vigorously.
- Let soak briefly to loosen residue.
- Drain dirty water; repeat rinsing until water runs mostly clear.
- Use a stiff brush or gentle pressure washer for stubborn residue.
- Discard any nuts that continue to float after thorough washing.
This washing stage is critical. It removes the staining agent. It also cleans the shell itself. If you do not wash them well, the shells will remain stained. This can also affect the flavor of the nut over time. Thorough washing prevents mold from forming during drying. When cleaning up, watch for any black gunk from faucet or other fixtures. The juglone can leave a residue. Make sure to rinse all your tools and containers immediately. This prevents stains from setting. A good wash now saves a lot of trouble later.
Drying and Curing Black Walnuts: Essential Steps for Longevity
After washing, black walnuts are wet. They need to dry completely. This is a very important step to clean black walnuts. Proper drying, also called curing, prevents mold growth. It also helps the nuts develop their full flavor. Rushing this step can ruin your entire harvest. Walnuts need good air circulation to dry effectively.
Spread the washed walnuts in a single layer. Use wire mesh screens or old window screens. You can also use drying racks. Make sure air can flow around each nut. Do not pile them up. This traps moisture and encourages mold. Place the screens in a well-ventilated area. A garage, shed, or attic works well. The area should be dry and cool. Good air circulation is key. If you have a fan, you can use it to help move the air. This speeds up the drying process. Keep the nuts away from direct sunlight. Direct sun can cause the shells to crack prematurely. It can also dry the kernels too quickly, making them brittle.
The drying process takes time. It can take two to six weeks. The exact time depends on your climate and air conditions. Turn the nuts regularly, every few days. This promotes even drying. It also helps you check for any signs of mold. If you see any mold, discard those nuts immediately. Mold can quickly spread to other nuts. A good way to check if they are dry is to shake them. You should hear the kernel rattle inside the shell. This means the kernel has shrunk slightly and is dry. Another test is to crack a few nuts. The kernel should be crisp and break cleanly. It should not be rubbery or soft.
- Drying Steps:
- Spread washed walnuts in a single layer on screens.
- Ensure good air circulation around each nut.
- Place in a cool, dry, well-ventilated area.
- Avoid direct sunlight.
- Turn nuts every few days to ensure even drying.
- Allow 2-6 weeks for complete drying.
- Check for dryness by shaking (kernel rattles) or cracking (crisp kernel).
Do not store walnuts in sealed containers while they are curing. They need to breathe. If you store them too early, moisture will get trapped. This leads to mold. Mold on walnuts is a big problem. If you notice mold on your drying surfaces, clean them. You might also want to check for black mold off wood if you are drying them on wooden racks. Make sure your drying area stays dry. Proper drying ensures that your clean black walnuts are ready for storage and consumption. This step is critical for a successful harvest.
Cracking and Storing Your Clean Black Walnuts
Once your black walnuts are fully cured, they are ready for cracking. Black walnuts have extremely hard shells. Standard nutcrackers often struggle with them. You need a specialized tool for this job. A lever-style black walnut cracker is ideal. These crackers provide significant leverage. They can crack even the toughest shells. Some people use a hammer. Place the walnut on a sturdy, hard surface. Hit it firmly with a hammer. Be careful not to hit your fingers. This method works but can be messy. It also tends to shatter the kernels.
After cracking, separate the kernels from the shell pieces. This can be time-consuming. Black walnut kernels often break into smaller pieces. They rarely come out in whole halves like English walnuts. Use a small pick or a nut tool to extract the kernel pieces. A small bowl is useful for collecting the clean kernels. Discard all shell fragments. The shells are not edible. You want only the clean, edible kernel.
Now, it is time to store your freshly cracked black walnut kernels. Proper storage keeps them fresh and flavorful for a long time. Shelled black walnuts are prone to spoilage if not stored correctly. The natural oils in the nuts can go rancid. This happens if they are exposed to air and warmth.
- Cracking Methods:
- Lever-style Black Walnut Cracker: Provides leverage for hard shells.
- Hammer Method: Place nut on hard surface, hit firmly (use caution).
- Specialized Tools: Nut picks for extracting kernels.
- Storing Shelled Walnuts:
- Short-term (weeks): Store in an airtight container in the refrigerator.
- Long-term (months to a year): Store in an airtight freezer bag or container in the freezer.
- Check for Freshness: Smell and taste a small piece before using.
For short-term storage (a few weeks), place the kernels in an airtight container. Keep them in the refrigerator. For longer storage (several months to a year), freeze them. Put the kernels in a freezer-safe bag or container. Squeeze out as much air as possible. Label the container with the date. Freezing extends their shelf life significantly. It locks in their unique flavor. When you need them, you can use them directly from the freezer. They thaw quickly. Always check the nuts before using them. They should smell fresh and nutty. If they smell bitter or like paint, they have gone rancid. Discard them if they are rancid. Properly clean black walnuts, when stored well, provide a delicious treat all year.
Dealing with Black Walnut Stains: Protecting Yourself and Your Surfaces
Cleaning black walnuts often means dealing with their notorious stains. The juglone in the hulls is a strong dye. It can leave persistent dark brown or black marks. These marks appear on skin, clothing, and hard surfaces. Preventing these stains is always easier than removing them. If stains do happen, act quickly.
Prevention is your best defense. Always wear heavy-duty gloves when handling black walnuts. Nitrile or thick rubber gloves work best. Avoid cotton gloves; the dye can soak through them. Wear old clothes. Choose items you do not mind staining permanently. An old apron also helps. Lay down tarps or old plastic sheets if you work on concrete. This protects your driveway or patio from permanent discoloration. Do not hull walnuts directly on light-colored concrete. The stains are very hard to remove. If you must work on concrete, wet it first. A wet surface may absorb less stain.
Despite your best efforts, stains might occur. If you get stains on your skin, wash immediately. Use soap and warm water. A pumice stone or a scrub brush can help. Some people use a paste of baking soda and a little water. Rub it on the stain. Lemon juice or vinegar can also help lighten fresh stains. Be gentle with your skin. Repeated scrubbing can cause irritation. Stains on skin usually fade within a few days. They disappear as new skin cells form.
- Preventing Stains:
- Wear heavy-duty gloves (nitrile or thick rubber).
- Wear old clothes and an apron.
- Protect surfaces with tarps or plastic sheeting.
- Avoid hulling on light-colored concrete.
- Wet concrete before working on it.
- Removing Stains:
- Skin: Wash immediately with soap and water, use pumice stone or baking soda paste.
- Clothing: Pre-treat with stain remover, wash in hot water. (Note: Stains may be permanent).
- Hard Surfaces (e.g., black kitchen sink, tools):
- Rinse immediately with water.
- Scrub with soap and a stiff brush.
- For stubborn stains, try a diluted bleach solution (test first) or an abrasive cleaner.
- Consider checking for black gunk from faucet if water runs over fixtures.
For stained clothing, act fast. Rinse the fabric with cold water. Apply a stain remover directly to the stained area. Let it sit for a few minutes. Then wash the item in the hottest water safe for the fabric. Unfortunately, black walnut stains on fabric are often permanent. It is why old clothes are a must. For tools and hard surfaces, rinse them immediately after use. This prevents the juglone from drying. Scrub them with soap and water. For persistent stains on tools or a matte black sink, a mild abrasive cleaner or a diluted bleach solution can help. Always test cleaners in an inconspicuous area first. This prevents damage to the surface. Cleaning up promptly after processing black walnuts minimizes staining issues.
Other Considerations for Black Walnut Processing
Processing black walnuts goes beyond just cleaning them. There are other aspects to consider. These elements ensure a smooth and successful harvest. Thinking about these details can save you time and effort. They also help you get the best quality nuts.
First, consider the timing of your harvest. Black walnuts typically fall from the trees in late September and October. They are ready to harvest when the hulls are still green or just starting to turn black. Do not wait too long. If you wait, the hulls can become mushy and harder to remove. They also attract insects. Prompt collection is important for quality.
Second, understand flotation. As mentioned before, some nuts float during washing. Discard these. They are usually empty or contain shriveled kernels. These bad nuts will not taste good. They also take up valuable drying space. It is better to remove them early. This saves you effort in the long run.
Third, think about pests. Insects can be a problem. Black walnut curculio larvae sometimes infest the nuts. These small grubs burrow into the kernels. Inspect your nuts as you hull and wash them. If you find signs of pests, discard those nuts. You do not want to dry and store infested nuts. This prevents further spread. Proper storage after cleaning also deters pests. Airtight containers are your best defense.
- Harvest Timing:
- Harvest in late September/October.
- Look for nuts with green or slightly black hulls.
- Collect promptly to avoid mushy hulls and pests.
- Floating Nuts:
- Discard nuts that float during washing.
- Floating indicates an empty or shriveled kernel.
- Pest Inspection:
- Inspect nuts for signs of insect damage (e.g., small holes, larvae).
- Discard infested nuts immediately.
- Kernel Quality:
- Proper drying ensures crisp, flavorful kernels.
- Rancidity can occur with improper storage.
- Always taste a small piece before using a large batch.
Finally, consider the uses for your black walnuts. These nuts are stronger in flavor than English walnuts. They are excellent in baked goods like cookies, breads, and cakes. They also work well in savory dishes, such as salads or pestos. Some people roast them lightly to enhance their flavor further. Knowing how you plan to use them can influence your processing speed. You might want to crack a smaller batch for immediate use. You can store the rest in their shells until needed. The shells protect the kernels. Whole, unshelled walnuts can store for up to a year in a cool, dry place. This comprehensive approach to clean black walnuts ensures you get the most out of your harvest.
Frequently Asked Questions About Cleaning Black Walnuts
Q1: Why do black walnuts stain so much?
Black walnuts contain a natural dye called juglone. This chemical is highly pigmented. It easily transfers to skin, clothing, and surfaces upon contact. The staining is part of the walnut’s defense mechanism. It protects the nut from pests and other plants while on the tree. You should always wear gloves and old clothes when handling them.
Q2: Can I compost black walnut hulls?
It is generally not recommended to compost black walnut hulls for garden use. Juglone, the chemical responsible for staining, is also a powerful herbicide. It can inhibit the growth of many plants, especially nightshades like tomatoes. If you do compost them, use a separate pile and let them break down for at least a year.
Q3: How do I know when black walnuts are ready to be harvested?
Black walnuts are ready for harvest when they fall naturally from the tree. This usually happens in late September or October. The outer hulls should be green or just starting to turn black and soft. Collect them promptly from the ground. Do not wait for the hulls to become completely black and mushy, as this can make cleaning harder.
Q4: What happens if I do not clean black walnuts properly?
If you do not clean black walnuts properly, several issues can arise. Remaining hull material can continue to stain the shells and even the kernels. More importantly, improper washing and drying can lead to mold growth. Mold makes the nuts unsafe to eat and ruins the flavor. The nuts might also taste bitter or rancid more quickly.
Q5: Can I eat black walnuts directly from the tree?
While you can theoretically eat black walnuts directly from the tree, they are not ready. They still have the green hull and the nut inside is fresh. The hull must be removed. The nut then needs to be washed and thoroughly dried. This drying process, called curing, improves their flavor and texture. It also makes them suitable for long-term storage.
Q6: How long do black walnuts last after cleaning and cracking?
Properly cleaned and shelled black walnuts can last for different durations based on storage. In an airtight container in the refrigerator, they stay fresh for several weeks. For longer storage, freeze them in an airtight container or freezer bag. Frozen kernels can last for up to a year or even longer without losing flavor or quality.
Conclusion: Enjoying Your Clean Black Walnuts
Learning how to clean black walnuts is a rewarding process. It turns a wild harvest into a culinary treasure. We covered every step. First, we talked about gathering your nuts and preparing your workspace. Then, we discussed the messy but necessary hulling process. We highlighted the importance of thorough washing to remove all residue and stains. Finally, we emphasized proper drying and storage to preserve your harvest.
Remember, patience is key, especially during the drying phase. That patient effort pays off with delicious, crisp black walnut kernels. They are ready for your favorite recipes. By following these steps, you not only clean black walnuts effectively, but also ensure their longevity and amazing taste. Now you have the knowledge to tackle your next black walnut harvest with confidence. Go ahead and enjoy the unique flavor of your hard-earned nuts!
- black walnut cleaning
- walnut hull removal
- processing black walnuts
- preparing walnuts
- walnut stain removal