· HVAC Maintenance · 16 min read
How To Clean Blower Motor
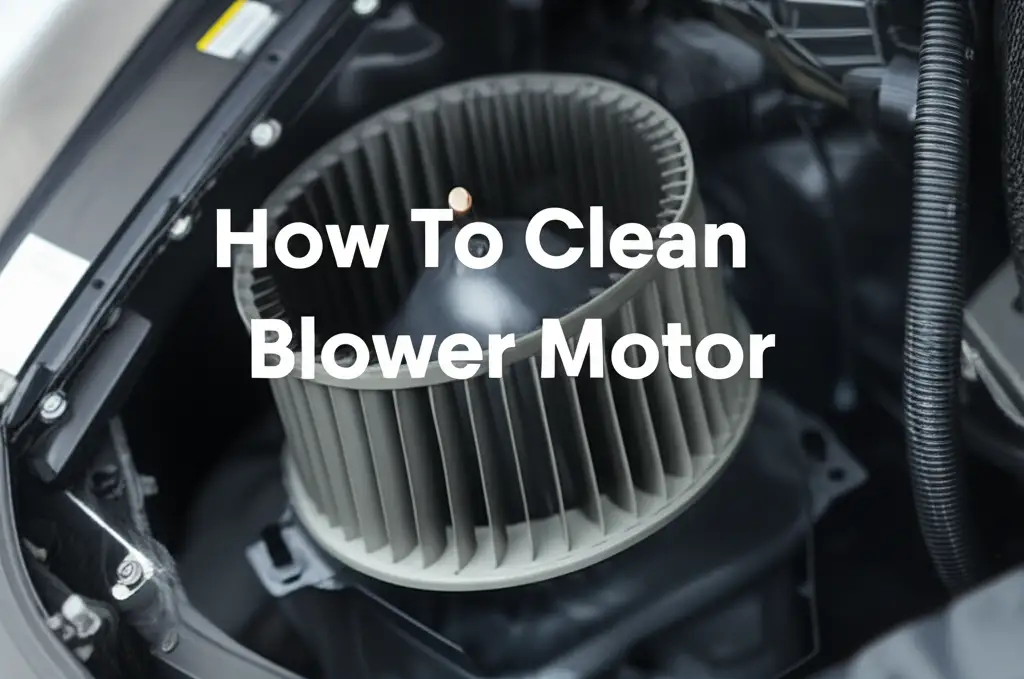
Clean Your Blower Motor: A Detailed Guide
Your home’s heating and air conditioning system works hard year-round. Hidden away, a vital component powers air circulation: the blower motor. This motor, along with its fan, pushes air through your ducts. Over time, dust, dirt, and debris build up on the motor and fan. This buildup hurts performance and air quality. Knowing how to clean blower motor components ensures your HVAC system runs well.
I will explain why cleaning your blower motor is important. This guide gives you the steps needed to do the job safely. You will learn about the right tools and how to access the motor. I will also cover how to clean the blower wheel and housing. Maintaining this part of your HVAC system saves energy and improves indoor air. Let’s get started on improving your home’s air.
Takeaway
Keeping your blower motor clean is vital for home comfort and energy savings. Here is what you need to know:
- A dirty blower motor uses more energy.
- Cleaning improves airflow and air quality.
- Safety first: Always turn off power before starting.
- Regular cleaning prevents costly repairs.
- You can do this job yourself with the right tools and steps.
To clean a blower motor, first, turn off power to your HVAC unit at the circuit breaker. Locate the blower motor housing in your furnace or air handler. Remove the motor and fan assembly carefully. Use a vacuum, brushes, and a coil cleaner to remove all dirt and debris from the squirrel cage fan and motor housing. Reassemble everything once clean and dry.
Why Cleaning Your Blower Motor Matters for Your Home
Your blower motor is the heart of your heating and cooling system. It moves air throughout your home. When this motor gets dirty, many problems can arise. Dust, pet hair, and other debris stick to the blower wheel and motor housing. This buildup acts like a blanket, covering vital parts. The motor then works harder to push air.
A dirty motor uses more electricity. This means higher energy bills for you. It also wears out the motor faster. Regular cleaning helps your system last longer. Think of it like a car engine; you clean it to keep it running smoothly. The same applies to your HVAC blower motor. Clean parts move air more freely.
Good airflow is key to comfort. If your blower motor is dirty, it cannot move enough air. This leads to uneven temperatures in your home. Some rooms might be too hot, others too cold. A clean blower ensures steady, strong airflow. This keeps your home comfortable year-round. It also helps your air filter work better. A clean system filters air more effectively.
Moreover, a dirty blower motor affects your indoor air quality. Dust and allergens collect on the fan blades. When the system runs, these particles blow into your living spaces. This can worsen allergies and breathing issues. Cleaning the blower motor reduces these airborne irritants. It makes your home a healthier place to live. I always feel better knowing my air is clean.
Safety First: Essential Precautions Before You Begin
Before you touch any part of your HVAC system, safety is most important. Working with electricity or moving parts can be dangerous. Taking the right steps prevents accidents. I always follow these rules myself. Your safety comes before anything else. Do not skip these precautions.
First, turn off the power. Find your furnace or air handler’s circuit breaker in your home’s electrical panel. Flip the switch to the “off” position. This stops electricity from reaching the unit. You might also find a power switch directly on the furnace unit. Turn that off too. Double-check that the system is completely off before proceeding. This step prevents electric shock.
Next, allow the unit to cool down if it has been running. Heating components can be hot. Give the system about 15-30 minutes to cool. Wear proper safety gear. This includes work gloves to protect your hands. The edges of metal components can be sharp. Safety glasses also protect your eyes from dust and debris. Dust masks are helpful if you have allergies or lung sensitivity.
Ensure you have good lighting. A flashlight or headlamp helps you see inside the unit. The spaces can be cramped and dark. Work in a well-ventilated area. Cleaning products can have fumes. Open windows and doors if possible. Always read labels on any cleaning chemicals you plan to use. Follow their instructions for safe use.
If you are unsure about any step, stop. It is better to call a professional than to risk injury or damage. HVAC systems are complex. Some parts are very delicate. This guide provides steps for safe cleaning. Always prioritize your safety throughout the process.
Gathering Your Tools and Supplies for the Job
Having the right tools makes the cleaning process easier and safer. You do not need many specialized items. Most of these tools you might already have around your house. Preparing everything beforehand saves time. I always lay out all my tools before I start any project.
Here is a list of what you will need:
- Screwdrivers or nut drivers: You will need these to remove access panels and motor mounting screws. Have a variety of sizes and types (Phillips, flathead, hex) ready.
- Shop vacuum with hose attachments: A strong vacuum is key to remove loose dust and debris. The narrow attachments reach into tight spaces.
- Soft brushes: A paint brush or a stiff-bristled brush helps dislodge stuck-on grime from the fan blades. An old toothbrush can work for small crevices.
- Coil cleaner or mild detergent: These break down grease and heavy dirt. Use a cleaner specifically for HVAC coils or a mix of dish soap and water. Always check the cleaner’s safety for motor parts.
- Spray bottle: If using a liquid cleaner or a soap-and-water mix, a spray bottle helps apply it evenly.
- Clean rags or old towels: These are for wiping down surfaces and catching drips. Keep plenty on hand.
- Flashlight or headlamp: The inside of an HVAC unit is often dark. A strong light helps you see every spot.
- Camera or smartphone: Take pictures of wiring and connections before you disconnect anything. This helps you remember how to put it back together correctly.
- Safety gear: As mentioned, work gloves, safety glasses, and a dust mask are important.
- Plastic sheeting or newspaper: Lay this down around your work area. It catches dust and dirt, making cleanup easier.
Make sure all your tools are clean and in good working order. A dull screwdriver or a clogged vacuum can make the job harder. Prepare a space where you can work comfortably. This makes the whole process smoother. Having everything ready means you can focus on the cleaning itself.
Locating and Accessing the Blower Motor Assembly
Finding the blower motor is the next step after gathering your tools and ensuring safety. The blower motor usually sits inside the furnace or air handler unit. This unit is often in your basement, utility closet, or attic. I usually find it near the furnace’s air filter slot. The exact location can vary by system type.
First, identify your HVAC unit. It is a large metal box with ducts attached. The blower motor is commonly located in the lower compartment of a vertical furnace unit. For horizontal units, it might be in a side compartment. Look for a large, removable access panel. This panel might be held by screws or clips.
Use your screwdriver or nut driver to remove the screws holding the access panel. Some panels might just slide up and off. Be careful not to drop screws into the unit. Put them in a safe place, like a small container. Once the panel is off, you will see the blower motor and its fan, often called a squirrel cage. It looks like a cylindrical wheel with many small blades.
Before you pull anything out, take a moment to observe. Notice how the wires connect to the motor. If there is a wiring harness, it usually unplugs. Take pictures of the wiring. This helps greatly during reassembly. I take multiple photos from different angles. This reduces confusion later.
The entire blower motor assembly, which includes the motor and the squirrel cage fan, often sits on rails. It can usually be pulled out. Some models might have a single screw holding the assembly in place. Remove any mounting screws or clips. Gently slide the assembly out of the housing. It might be heavy, so be prepared to support its weight. Place it on the plastic sheeting you laid down earlier. This prevents spreading dust in your home. Accessing this part means you are ready for deep cleaning.
Step-by-Step Guide to Cleaning the Blower Motor
Now you have the blower motor assembly out. This is where the real cleaning begins. Take your time with each step. A thorough cleaning makes a big difference. I clean one section at a time to make sure I do not miss anything.
Removing the Blower Assembly for Thorough Cleaning
With the access panel off, find the blower assembly. It slides out on rails or is secured with a few screws. Disconnect any electrical wires. Remember those pictures you took? Use them to guide you. Wires usually connect with a plug or quick-disconnect terminals. Pull the assembly straight out. It can be heavy, so be ready to support it. Place it on your prepared work surface.
Once out, inspect the assembly. You will likely see layers of dust and grime on the fan blades and inside the housing. This is normal. This is what you are cleaning. Look for any loose parts or damaged wires. If you see damage, note it down. You may need professional help for repairs later.
Cleaning the Blower Wheel (Squirrel Cage)
The squirrel cage fan gathers the most dirt. Its many blades trap dust efficiently. This buildup can greatly reduce airflow. Start by using your shop vacuum. Vacuum all loose dust from the blades and between them. Use a narrow attachment to get into tight spaces.
After vacuuming, you will likely find stubborn dirt. Use a soft brush or a stiff-bristled paint brush. Scrub the blades to dislodge caked-on grime. You can also use a small, damp rag to wipe each blade. For very stubborn buildup, spray a little coil cleaner or a mild soap-and-water solution directly onto the blades. Let it sit for a few minutes. Then, scrub again and wipe clean. Ensure the cleaner does not drip into the motor itself. The motor is not designed for wet cleaning.
When cleaning the squirrel cage, pay attention to balance. Clean each blade evenly. Uneven dirt removal can unbalance the fan. An unbalanced fan causes vibration and noise. This also wears out bearings faster. Wipe everything dry with a clean rag. Some blower wheels can be cleaned without full removal, especially in smaller units or if the dirt is light. For example, specific methods exist for cleaning your AC blower wheel without removing it, or when cleaning a mini-split blower wheel where space is limited. However, for a deep clean of the motor, removing the assembly is often best.
Cleaning the Motor Housing and Fan Blades
The motor housing is the metal casing that holds the motor and fan. It also collects dust. Use your shop vacuum to clean the inside of the housing where the assembly sits. Remove any debris from the bottom. Wipe down the interior surfaces with a damp rag. For tough spots, use a little cleaner on the rag. Make sure to dry it completely.
Do not spray liquid directly onto the motor itself. The motor contains electrical components that water can damage. If the motor exterior is dusty, wipe it gently with a dry cloth or use compressed air. If you use compressed air, be careful not to force dust into the motor bearings. A light dusting is usually enough for the motor itself.
Clean around the motor mounts and any visible wiring. Look for dirt on the fan blades attached to the motor shaft, if your system has a separate fan blade on the motor. Use a brush or damp cloth to clean them. Ensure all components are completely dry before reassembly. I usually let parts air dry for an hour or two, especially if I used any liquid cleaners.
Inspecting and Reassembling
Before putting everything back, inspect all parts. Check the blower wheel for any cracks or bent blades. Look at the motor wires for fraying or damage. Ensure all connections are clean. If everything looks good, you are ready to reassemble.
Slide the blower assembly back onto its rails. Ensure it locks into place properly. Reconnect all electrical wires. Refer to your pictures to ensure wires go to the correct terminals. Secure the assembly with any mounting screws you removed. Do not overtighten screws. Put the access panel back on. Tighten its screws.
Finally, return to your electrical panel. Flip the circuit breaker for your HVAC unit back to the “on” position. Go to your thermostat and turn on your fan. Listen for any unusual noises or vibrations. A clean blower motor should run smoothly and quietly. You should also feel stronger airflow from your vents. This means the job is complete and successful.
Troubleshooting Common Issues and Tips
Even with careful cleaning, you might encounter issues. Or, you might just want extra tips to keep things running smoothly. I have learned a few things over the years that help. These common problems have simple solutions.
If the blower motor is still noisy after cleaning, check for imbalance. Uneven dirt removal can cause the squirrel cage to wobble. You may need to remove it again and ensure all blades are equally clean. Sometimes, a loose mounting screw can cause vibration. Check all screws you tightened during reassembly. If the noise persists and sounds like a grinding, the motor bearings might be worn. This often requires professional service.
What if the airflow does not improve much? First, check your air filter. A dirty air filter can restrict airflow even with a clean blower. Replace it if needed. Also, check your ductwork. Leaks or blockages in ducts can reduce airflow. This is a bigger job, but worth noting. Sometimes, air systems, like a dryer vent that needs cleaning with a leaf blower, also rely on clear pathways for efficient operation. Ensuring all related vents are clear is part of a complete home maintenance approach.
If the blower motor does not turn on after reassembly, recheck the power. Is the circuit breaker on? Is the furnace switch on? Did you reconnect all wiring correctly? Refer to your photos. If all looks good and it still does not run, the motor might be faulty. Or a safety switch might be tripped. This requires a professional technician. Do not try to fix electrical issues if you are not qualified.
For very dirty blower motors, sometimes a single cleaning is not enough. You might need to repeat the process. Or, if the dirt is extremely caked on, a stronger, professional-grade cleaner might be needed. If you feel uncomfortable or the job seems too big, hiring an HVAC technician is always an option. They have specialized tools and knowledge. Getting professional help for tough jobs is a wise choice.
Frequency and Maintenance Schedule
Regular cleaning of your blower motor prevents major problems. It keeps your HVAC system running at its best. How often should you clean your blower motor? It depends on several factors. I consider these points when planning my schedule.
Generally, homeowners should inspect their blower motor every 1-2 years. A thorough cleaning might be needed every 2-3 years. This schedule works for most average households. However, some conditions require more frequent cleaning. If you have pets, especially those that shed a lot, dust and pet hair accumulate faster. In this case, consider cleaning every year.
If you live in a dusty area, like near construction sites or unpaved roads, your blower motor will get dirty quicker. Homes with many occupants also tend to produce more dust. If anyone in your household has severe allergies or asthma, more frequent cleaning improves air quality. I always recommend a yearly check-up for these situations.
The most important maintenance step for your HVAC system is regular air filter replacement. A clean air filter traps dust and debris before it reaches the blower motor. This greatly extends the time between blower motor cleanings. Check your air filter every month. Replace it every 1-3 months, depending on filter type, household activity, and pet presence. A dirty filter makes the blower motor work harder, similar to a dirty motor itself.
Consider a professional HVAC tune-up once a year. During this service, technicians often inspect and lightly clean the blower motor. They can spot issues you might miss. This proactive approach saves money in the long run. It prevents breakdowns and keeps your system efficient. Combining DIY cleaning with professional tune-ups gives your HVAC system the best care. This schedule keeps my home comfortable and energy bills low.
FAQ Section
How often should I clean my blower motor? Clean your blower motor every 2 to 3 years for typical homes. If you have pets, live in a dusty area, or have allergies, clean it yearly. Regular air filter changes help keep it clean longer. I find a consistent schedule works best for preventing buildup and maintaining efficiency.
What are signs of a dirty blower motor? Signs include weak airflow from vents, unusual noises like squealing or rattling, and higher energy bills. You might also notice more dust in your home. These issues point to a motor working too hard because of dirt. Addressing them quickly prevents further problems.
Can I clean the blower motor without removing it? For light dust, you can sometimes clean the blower motor and wheel in place using a vacuum and brush. However, for a deep clean of caked-on dirt, removing the assembly is often necessary. Cleaning an AC blower wheel without removing it or a mini-split blower wheel without removal might involve different techniques for those specific units.
What happens if I do not clean my blower motor? Ignoring a dirty blower motor leads to several problems. It will use more energy, increasing your utility bills. The motor can overheat and fail sooner. Airflow will decrease, making your home less comfortable. Poor indoor air quality from circulating dust and allergens also becomes an issue.
Is it okay to use water on the blower motor? Do not spray water or liquid cleaner directly onto the electrical motor components. Water can cause shorts or rust. You can use a damp cloth or mild cleaner on the metal blower wheel blades or housing, but ensure all parts are completely dry before reassembly. Always keep electrical parts dry.
**Should
- how to clean blower motor
- HVAC cleaning
- furnace maintenance
- AC blower motor
- home improvement
- DIY cleaning
- energy efficiency

