· Automotive Maintenance · 19 min read
How To Clean Brake Rotors Without Removing Wheel
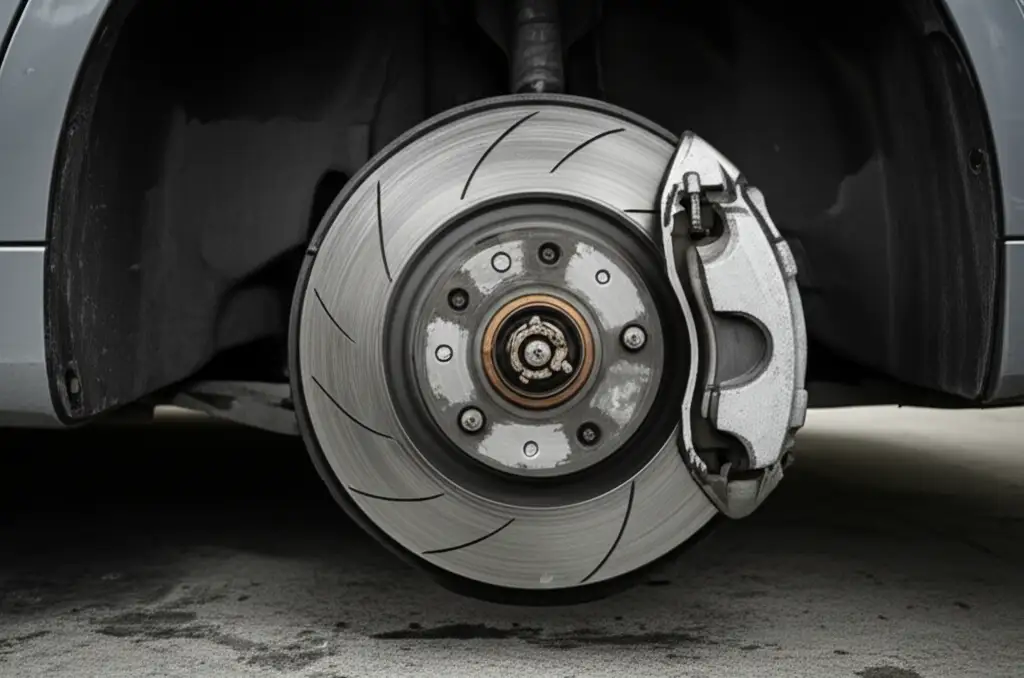
Clean Brake Rotors Without Removing Wheels: Your Guide
Have you ever looked at your car’s wheels and noticed unsightly rust or dirt on the brake rotors? It is a common problem, making your car look less than its best. More importantly, dirty brake rotors can impact your vehicle’s performance. Many people think you need to remove the wheels to clean brake rotors properly. This is not always true.
I am here to tell you cleaning brake rotors is possible without taking off your wheels. This method saves time and effort. It is perfect for regular maintenance and keeping your car in top shape. You can improve your car’s appearance and even its braking efficiency with some basic tools and clear steps.
In this guide, I will show you how to clean brake rotors effectively without removing the wheel. We will cover the tools you need and the step-by-step process. I will also share tips for handling common issues like rust and brake dust. By the end, you will have the knowledge to keep your rotors clean and your vehicle safe.
Takeaway
Cleaning brake rotors without removing the wheel is a practical DIY task.
- Gather proper tools like brake cleaner and brushes.
- Prioritize safety by wearing protective gear.
- Focus on removing rust and brake dust.
- Regular cleaning improves appearance and brake function.
- This method saves time and simplifies routine car care.
How to clean brake rotors without removing the wheel? To clean brake rotors without removing the wheel, spray them thoroughly with a dedicated brake cleaner. Use a stiff brush, like a wire brush, to scrub away rust and brake dust. Rinse the rotors with water if the cleaner allows, then wipe them dry. This simple process keeps your brakes healthy and looking good.
Why Clean Your Brake Rotors? Importance of Rotor Health
Your car’s brake rotors are crucial for stopping. They are the large metal discs behind your wheels. When you press the brake pedal, the brake pads squeeze these rotors, creating friction that slows your car. Over time, rotors collect dirt, brake dust, and rust. This buildup can cause several problems.
First, dirty rotors look bad. They can make even the cleanest car appear neglected. Rust spots are especially visible through alloy wheels. This impacts your vehicle’s overall aesthetic. If you care about your car’s appearance, clean rotors are a must.
Second, dirt and dust affect brake performance. Brake dust is a fine, black powder from the pads wearing down. It sticks to the rotors and calipers. A thick layer of dust can reduce friction between the pads and rotors. This means your brakes might not work as efficiently. You might feel a slight vibration or hear squealing sounds.
Rust is another major enemy. It forms on the rotor surface, especially after rain or if the car sits for a while. Minor surface rust usually gets scraped off by the brake pads when you drive. However, if rust builds up, it can create uneven spots on the rotor. This leads to brake shudder or pulsing. It also wears down your brake pads unevenly.
Maintaining clean rotors helps extend the life of your entire brake system. It prevents premature wear on brake pads and calipers. Regular cleaning also allows you to inspect your rotors for deeper issues. You can spot cracks, deep grooves, or excessive wear early. This awareness helps ensure your vehicle remains safe on the road. Clean rotors contribute to consistent and reliable stopping power. This gives you peace of mind during your drives.
Gathering Your Gear: Essential Tools for Rotor Cleaning
Before you start cleaning, you need the right tools. Having everything ready makes the job easier and safer. You do not need many specialized items for this task. Most of these tools are affordable and available at any auto parts store.
First, you will need a good quality brake cleaner. This is a powerful solvent designed to cut through grease, oil, and brake dust. Make sure it is safe for all brake components. Some cleaners are non-chlorinated and dry quickly, leaving no residue. Look for a spray can with a strong stream. This helps blast away loose dirt.
Next, get a stiff brush. A wire brush is ideal for removing rust and caked-on brake dust. Choose one with a comfortable handle. You might also want a smaller detail brush for tighter spots. This helps reach areas behind the rotor hat or inside the caliper.
A bucket of water and some mild soap (like dish soap) can be helpful. While brake cleaner does most of the work, a soapy water rinse might be necessary depending on the type of cleaner you use. Always check the brake cleaner instructions. Some cleaners require a water rinse, while others do not. You also need clean rags or microfiber towels. These are for wiping down the rotors and absorbing excess cleaner.
Safety gear is critical. Always wear safety glasses to protect your eyes from brake dust and cleaner spray. Brake dust contains metallic particles and other harmful substances. The cleaner itself can irritate skin and eyes. Gloves are also a must. Nitrile gloves offer good protection against chemicals. A dust mask or respirator is highly recommended, especially if you expect a lot of brake dust. Breathing brake dust can harm your lungs.
Finally, consider a wheel cleaning brush if you plan to clean your wheels too. While not directly for rotors, it is smart to clean the wheels when you clean the rotors. The wheels often accumulate a lot of brake dust. A jack and jack stands are also useful, though not strictly required if you can reach the rotors without lifting the car. However, lifting the car gives better access and is safer. If you choose to lift the car, ensure you use the jack stands for stability.
Preparing Your Vehicle for Brake Rotor Cleaning
Proper preparation makes the cleaning process smooth and safe. It also ensures you get the best results. Do not skip these initial steps. Taking a few minutes to prepare will save you time and potential problems later.
First, park your car on a level, hard surface. A garage floor or a paved driveway works best. Avoid working on grass or soft ground. This ensures stability if you need to lift the vehicle. Engage the parking brake firmly. This prevents the car from rolling while you work.
Next, allow your brakes to cool down completely. If you have been driving, the rotors can be extremely hot. Hot rotors can cause brake cleaner to evaporate too quickly. They can also burn your skin. Wait at least 30 minutes to an hour after driving. You can feel the rotors to check their temperature. They should be cool to the touch.
Now, consider lifting the car. You do not have to remove the wheels for this method. However, lifting the car off the ground gives you much better access to the brake rotors. It also allows you to spin the wheel freely. This makes scrubbing and spraying far easier. If you decide to lift the car, use a sturdy floor jack. Lift one wheel at a time. Once lifted, immediately place jack stands under the vehicle’s frame. Never rely solely on the jack to support the car. Always use two jack stands per wheel. This ensures maximum safety. If you are unfamiliar with lifting a car, refer to your car’s owner manual for jacking points.
If you cannot or choose not to lift the car, you can still clean the rotors. You will need to turn your steering wheel to expose more of the rotor. For example, turn the wheel full lock to the left to expose the right front rotor. Turn it full lock to the right for the left front rotor. This gives you better angles to work with.
Finally, protect your wheels and painted surfaces. Brake cleaner can sometimes strip wax or damage certain finishes. Cover your wheels with plastic bags or towels. You can also use painter’s tape around the caliper and wheel spokes. This prevents overspray from damaging delicate parts. This simple step ensures only the rotors get cleaned, and your car’s finish stays protected.
Step-by-Step: The Cleaning Process for Brake Rotors
Now that you have prepared your vehicle and gathered your tools, you are ready to clean the brake rotors. Follow these steps carefully for an effective and safe cleaning process. Remember to wear your safety glasses, gloves, and dust mask throughout.
Applying Brake Cleaner
Start by liberally spraying the brake rotor with your brake cleaner. Aim the spray directly at the rotor surface. Get both sides if possible. The cleaner will immediately start dissolving brake dust, grease, and grime. Watch as dirty liquid drips off the rotor. Make sure to spray the inner hub area as well. This area often collects rust and dust. Do not be shy with the spray. Use enough to thoroughly saturate the rotor.
Scrubbing the Rotor Surface
Immediately after spraying, grab your stiff brush, such as a wire brush. Begin scrubbing the rotor surface. Apply firm pressure. Focus on areas with visible rust or heavy brake dust buildup. Scrub in circular motions or back and forth. The wire brush helps to physically remove stubborn rust and caked-on deposits. If your car is lifted, spin the wheel slowly to access all parts of the rotor. If not, reposition your steering wheel as needed to reach different sections. Pay attention to the ventilation holes on vented rotors. Dirt can hide there. You might need a smaller brush for these areas. This step is critical for removing contaminants that spray alone cannot dislodge.
Reaching Behind the Rotor
Cleaning the front of the rotor is easy. However, dirt and rust also build up on the back. For better access, turn your steering wheel. For example, to clean the right front rotor, turn the steering wheel all the way left. This exposes the back of the rotor and the inner caliper area. Spray the back of the rotor and caliper thoroughly. Use your brush to scrub these hidden surfaces. Many people forget this step. A thorough cleaning ensures overall brake system cleanliness. This helps prevent future buildup. Consider using a long-handled brush to reach difficult spots. For other engine components that collect grime, you might find it helpful to learn how to clean spark plugs without removing them or even how to clean fuel injectors without removing them. These tasks also aim for effective cleaning without disassembly.
Rinsing and Drying
Check your brake cleaner instructions. Some formulations require a water rinse, while others dry on their own. If a rinse is needed, use a low-pressure spray of water to wash away the dissolved dirt and cleaner. Avoid high-pressure washers, as they can force water into sealed bearings. Let the rotors air dry, or use clean microfiber towels to dry them. Ensure no moisture remains on the rotor surface. Moisture can promote new rust. Wipe the rotor until it is completely dry and clean. A clean, dry surface is essential for proper brake function.
Repeat if Necessary
For very dirty or rusty rotors, one round of cleaning might not be enough. If you still see rust or heavy deposits, repeat the process. Re-spray with brake cleaner, scrub again, and then rinse and dry. Continue until the rotors look visibly cleaner. The goal is to remove as much surface contamination as possible. A second pass often makes a big difference in appearance and performance. This thorough approach ensures your brake rotors are genuinely clean.
Tackling Stubborn Issues: Rust and Brake Dust Removal
Brake rotors face two main enemies: rust and brake dust. Both can be stubborn. However, with the right techniques, you can remove them effectively without taking off your wheels. Understanding these specific cleaning challenges helps you achieve a truly clean brake system.
Removing Surface Rust
Surface rust is common on brake rotors, especially after rain or periods of inactivity. It forms quickly, sometimes overnight. A wire brush is your best friend here. After a generous spray of brake cleaner, use the wire brush to scrub the rusty areas vigorously. The bristles of the wire brush scrape off the rust. Apply firm pressure. If the rust is deep, you might need to repeat this process several times. Spin the wheel to get full access to all rusted spots. For particularly persistent rust, you can try a rust-dissolving spray. Apply it as directed, let it sit, then scrub and rinse. Always ensure these products are safe for brake components. Remember, a little driving also helps. Your brake pads will naturally scrub off minor surface rust during your first few stops. This method focuses on what you can clean off before driving.
Dealing with Stubborn Brake Dust
Brake dust is a fine, dark powder made of carbon and metal shavings from your brake pads. It sticks like glue, especially when mixed with moisture. Brake cleaner is excellent for dissolving it. Spray a heavy coat onto the rotor. Let it sit for a moment to break down the dust. Then, use a stiff bristle brush or a dedicated wheel cleaning brush to scrub it away. The brush’s bristles help agitate and lift the dust. For really caked-on dust, try using a plastic scraper (not metal) very gently. Scrape off the thickest layers before spraying and scrubbing. You can also use an old toothbrush for tight spots around the caliper and rotor hat. Regularly cleaning helps prevent this buildup from becoming a problem. Maintaining clean rotors also prevents excessive dust accumulation on your wheels. For other components in your car that accumulate dirt, consider how to effectively address them, similar to learning how to clean a catalytic converter without removing it for exhaust system health, or even how to clean a fuel filter without removing it to keep your fuel system clear.
Preventing Future Buildup
Once your rotors are clean, you can take steps to slow down future rust and dust accumulation. After cleaning, apply a thin layer of brake protective spray. These sprays create a clear coating that helps repel moisture and reduce rust formation. They also make future brake dust easier to clean off. Some products specifically market themselves as “rotor coatings.” Always choose products safe for brake components. Driving your car regularly is also a good preventative measure. Consistent use of brakes prevents rust from settling in for long periods. If your car sits for weeks, rust will form. Parking in a dry garage can also help. Keep your wheels clean too. Regular wheel washing prevents brake dust from caking onto them, which can make rotors look dirtier.
Post-Cleaning Care: Protecting Your Rotors and Wheels
Cleaning your brake rotors is a great start. But the job is not over. Proper post-cleaning care protects your hard work and maintains the benefits. This final step helps prevent quick re-accumulation of dirt and rust. It also keeps your entire wheel assembly looking great.
After you have thoroughly cleaned and dried your brake rotors, consider applying a protective coating. There are specialized sprays available for brake components. These sprays create a clear, thin barrier on the rotor surface. This barrier helps repel water and reduce the formation of new surface rust. It also makes brake dust less likely to stick. Read the product labels carefully to ensure the coating is safe for brake rotors and pads. You do not want to use anything that could reduce friction or harm your braking ability. A good coating can keep your rotors looking cleaner for longer.
While you are working on the rotors, take time to clean your wheels thoroughly. Brake dust from the rotors often coats the inside of your wheels. This dust can be corrosive and difficult to remove once it bakes on. Use a dedicated wheel cleaner spray. Follow the product instructions. Often, you spray it on, let it dwell for a few minutes, then agitate with a soft wheel brush. Rinse thoroughly with water. Pay attention to the barrel of the wheel, the area behind the spokes. This is where most brake dust collects. Keeping your wheels clean complements your clean rotors.
Inspect your brake pads. While you cannot remove them for this cleaning, you can often see their condition through the wheel. Check the thickness of the brake pads. If they look very thin, it might be time for new ones. Also, look for any uneven wear on the pads. This could indicate a caliper issue. This quick visual inspection helps you catch potential problems early.
Finally, after everything is clean and dry, take your car for a short test drive. During this drive, make a few light to moderate stops. This “beds in” the freshly cleaned rotors. It helps remove any lingering residue from the cleaning process. It also ensures your brakes feel normal before you hit the road for longer journeys. Avoid hard braking immediately after cleaning. A gentle initial drive allows everything to settle back into place. This quick drive confirms your brakes are ready for regular use.
Beyond Cleaning: General Brake System Health Tips
Cleaning your brake rotors is an important part of car maintenance. However, your brake system is complex. Regular cleaning is a good habit. But you also need to understand overall brake health. These tips go beyond just cleaning. They help ensure your entire brake system works well and keeps you safe.
Regular Visual Inspections
Make it a habit to visually inspect your brake components. Do this when you wash your car or rotate your tires. Look at your brake pads through the wheel spokes. Check their thickness. Most pads have wear indicators. These are small metal tabs that squeal when the pads are low. Also, check for uneven wear on the pads. Uneven wear means the pad is thinner on one side than the other. This can signal a problem with the caliper or rotor. Look at the brake lines for cracks, leaks, or frayed sections. Hoses can degrade over time. These quick checks can identify problems before they become serious safety issues.
Listen for Warning Sounds
Your brakes often tell you when something is wrong. Pay attention to any unusual noises. A high-pitched squeal often means your brake pads are worn down. A grinding noise usually indicates metal-on-metal contact. This means the pads are completely worn. It is serious and requires immediate attention. A clicking noise might suggest a loose caliper or brake pad. Any new or consistent noise from your brakes needs investigation. Do not ignore these sounds. They are your car’s way of telling you it needs help.
Monitor Brake Feel
How your brake pedal feels is another important indicator. Does it feel soft or spongy? This could mean air in the brake lines or low brake fluid. Does the pedal go almost to the floor before the car slows down? This is a serious issue. Does the steering wheel shake when you brake? This is often a sign of warped rotors. This happens when rotors get too hot and cool unevenly. Pulsing in the pedal also points to warped rotors. Any change in brake pedal feel warrants immediate attention.
Check Brake Fluid Levels
Brake fluid is essential for your braking system. It transmits the force from your pedal to the calipers. Check your brake fluid reservoir regularly, usually under the hood. The reservoir has “min” and “max” lines. The fluid level should be between these marks. If it is low, add the correct type of brake fluid specified by your car manufacturer. Low fluid can mean a leak. It can also mean worn brake pads. As pads wear, the calipers extend, which uses more fluid. If the fluid is dark or murky, it is time for a brake fluid flush. This removes old, contaminated fluid and replaces it with fresh fluid. This ensures your brakes respond correctly.
Professional Inspections
Even if you do DIY maintenance, regular professional brake inspections are vital. Most mechanics recommend a brake check once a year or every 12,000 miles. Professionals can spot issues you might miss. They have specialized tools to measure rotor thickness and check caliper function. They can also inspect the brake lines and master cylinder more thoroughly. Consider professional help for issues like unusual noises, vibrations, or a spongy pedal. Your brakes are your car’s most important safety system. Do not take chances with them. Timely professional service ensures your brakes perform optimally.
FAQ Section
How often should I clean my brake rotors?
You should clean your brake rotors every few months, or whenever you notice significant brake dust or surface rust. If you live in an area with high humidity or use your car for short trips, more frequent cleaning might be beneficial. Regular cleaning helps prevent buildup and maintain appearance.
What is the best product to clean rusty brake rotors?
A dedicated automotive brake cleaner is the best product. These cleaners dissolve grease, oil, and brake dust. For stubborn surface rust, use a wire brush in conjunction with the brake cleaner. Some specialized rust removers also exist, but ensure they are safe for brake components before use.
Can I use WD-40 on brake rotors?
No, do not use WD-40 or similar lubricants on brake rotors. WD-40 is an oil-based product. It can contaminate your brake pads and rotors. This significantly reduces braking friction and can make your brakes dangerously ineffective. Stick to products specifically designed for brake cleaning.
Is it normal for brake rotors to rust?
Yes, it is completely normal for brake rotors to develop surface rust, especially after rain, washing, or if the car sits for a few days. This light surface rust usually gets scrubbed off by the brake pads during the first few stops. However, excessive or deep rust indicates a problem or prolonged inactivity.
What causes excessive brake dust?
Excessive brake dust is usually caused by the type of brake pads used. Organic or semi-metallic pads often produce more dust as they wear. Driving habits, such as frequent braking or hard braking, can also increase dust production. Some high-performance pads also create more dust.
Will cleaning rotors fix brake squeal?
Cleaning rotors can sometimes reduce or eliminate brake squeal, especially if the squeal is due to brake dust buildup on the rotor surface or between the pad and
- brake rotor cleaning
- car maintenance
- DIY auto repair
- brake dust
- rust removal
- vehicle cleaning
- automotive care tips