· Home Cleaning, Metal Care, Home Decor · 19 min read
How To Clean Brass Candlesticks
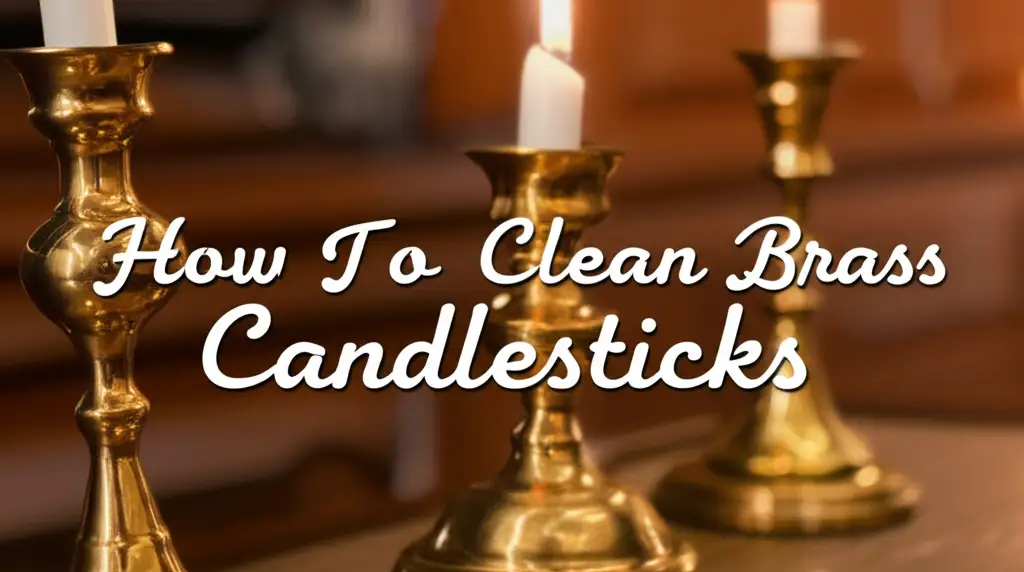
Restore Shine: How to Clean Brass Candlesticks Easily
There is a timeless beauty in brass candlesticks. They add warmth and elegance to any home setting. Over time, however, brass can lose its luster. It develops a dull, dark layer known as tarnish. This happens when the metal reacts with air and moisture. Do not worry if your cherished pieces have lost their gleam. Cleaning brass candlesticks is a straightforward process. With the right tools and techniques, you can restore their original shine. This guide will help you bring your brass back to life.
Candlesticks often accumulate wax drips and soot. These need special attention during the cleaning process. I will show you how to handle these common issues. We will explore various methods, from simple home remedies to commercial solutions. You will learn how to clean both lacquered and unlacquered brass. By the end, your brass candlesticks will look bright and beautiful again. Let us get started on this cleaning journey together.
Takeaway
- Identify if your brass candlesticks are lacquered or unlacquered. This determines your cleaning approach.
- Start with gentle cleaning methods. Use soap and water for routine dirt.
- Apply natural acidic cleaners like lemon and salt or vinegar for light tarnish.
- Address stubborn tarnish or corrosion with specific techniques or commercial products.
- Remove wax drips carefully before cleaning the brass surface.
- Protect cleaned brass to prevent future tarnishing.
How do you effectively clean brass candlesticks?
You effectively clean brass candlesticks by first removing wax and then addressing tarnish. Use mild soap and water for light dirt. For tarnish, natural acids like lemon and salt work well. For severe discoloration, consider stronger brass cleaners. Always test a small, hidden area first to ensure no damage occurs.
Understanding Brass and Tarnish on Candlesticks
Brass is a metal alloy. It consists mainly of copper and zinc. Its golden appearance makes it popular for decorative items. Candlesticks are a common example of brass items in homes. Over time, brass reacts with oxygen and sulfur compounds in the air. This reaction creates a layer on the surface. This layer is called tarnish. Tarnish appears as a dull, dark film. It can range from light discoloration to a deep black or green patina.
The presence of tarnish does not mean your brass is ruined. It is a natural process. Tarnish protects the underlying metal from further corrosion. Some people prefer this aged look. They call it a patina. Others want their brass to shine brightly. Knowing the difference between lacquered and unlacquered brass is important. This distinction affects how you clean your candlesticks.
Lacquered brass has a clear protective coating. This coating prevents tarnish from forming. If a lacquered piece looks dull, the lacquer itself is likely damaged or worn. You clean lacquered brass differently than unlacquered brass. Unlacquered brass tarnishes freely. This type of brass requires regular polishing to maintain its shine. Most antique brass items are unlacquered. Knowing your candlestick type helps you choose the correct cleaning method. Understanding these basic facts helps you make good cleaning decisions.
If you are unsure whether your brass is lacquered, you can perform a simple test. Find an inconspicuous spot on the candlestick. Apply a small amount of brass polish. If the polish turns dark, your brass is unlacquered. If the polish does not change color, your brass likely has a lacquer coating. This quick test prevents damage during cleaning. You can learn more about general brass care on our site, including how to clean copper and brass. This helps broaden your knowledge of metal cleaning techniques.
Gathering Your Brass Candlestick Cleaning Arsenal
Before you start cleaning your brass candlesticks, gather your supplies. Having everything ready makes the process smoother. The right tools ensure effective cleaning without damage. You do not need many items to begin. Most supplies are common household goods. Some specific cleaners may be useful for tougher jobs.
Here is a list of essential items:
- Soft cloths: Microfiber cloths work best. They are gentle and non-abrasive.
- Mild dish soap: Use a gentle soap for initial washing.
- Warm water: For rinsing and mixing solutions.
- Lemon: A natural acid for tarnish removal.
- Salt: Used with lemon to create an abrasive paste.
- White vinegar: Another effective natural acid.
- Baking soda: Forms a paste with vinegar or water.
- Soft-bristle brush: An old toothbrush is perfect for intricate areas.
- Cotton swabs: Useful for small crevices.
- Protective gloves: Protect your hands from cleaners.
- Old newspapers or towels: To protect your work surface.
- Optional: Commercial brass polish or cleaner.
- Optional: Wax paper or soft cloth for buffing.
Make sure your work area is well-ventilated. This is especially important if you use commercial cleaners. Lay down newspapers or old towels. This protects your table or counter from drips and spills. Having these items on hand prepares you for any cleaning challenge. Proper preparation saves time and effort during the cleaning process.
You might also consider specialized tools for hard-to-reach areas. Dental picks or wooden skewers can gently remove stubborn grime. Avoid using steel wool or abrasive scrubbers. These can scratch the brass surface. Always prioritize soft materials for cleaning brass. This preserves the candlestick’s finish and value. For similar brass items, you might find tips on how to clean brass door handles helpful too, as the principles are similar.
Basic Cleaning Methods for Light Tarnish
For brass candlesticks with light tarnish or everyday dirt, simple methods work wonders. These methods use common household ingredients. They are gentle on the brass. Always start with the least abrasive cleaning solution. This prevents unnecessary wear on your candlesticks. I like to begin with a basic wash. This removes surface dust and grime.
First, wipe down your candlesticks with a damp cloth. This gets rid of any loose debris. Next, fill a basin with warm water. Add a few drops of mild dish soap. Dip a soft cloth into the soapy water. Gently wipe the entire surface of the candlestick. Pay attention to any visible dirt. Rinse the candlestick thoroughly under running warm water. Make sure no soap residue remains. Dry it immediately with a soft, clean cloth. This prevents water spots. For lacquered brass, this might be all you need.
If tarnish remains on unlacquered brass, try a natural acid cleaner. A popular method uses lemon and salt. Cut a lemon in half. Sprinkle a generous amount of salt onto the cut surface of the lemon. Rub the lemon directly onto the tarnished areas of the brass candlestick. The acidity of the lemon works with the abrasive action of the salt. This helps lift the tarnish. You can also make a paste. Mix lemon juice with salt until it forms a thick paste. Apply the paste to the brass. Let it sit for a few minutes. Then, rub gently with a soft cloth. Rinse the candlestick thoroughly and dry it well.
Another effective natural cleaner is white vinegar. Mix equal parts white vinegar and water. You can also add a tablespoon of salt to this mixture. Apply the solution to the brass with a soft cloth. For tougher spots, you can make a paste with vinegar and baking soda. Apply the paste and let it sit for 10-15 minutes. Gently scrub with a soft brush or cloth. Rinse well and dry completely. These methods are simple and safe for many brass items. You might find similar advice on how to clean brass with ketchup if you are looking for more natural options.
Tackling Stubborn Tarnish and Corrosion on Brass
Sometimes, brass candlesticks develop heavy tarnish or even corrosion. Light cleaning methods may not be enough for these stubborn spots. When brass has turned black or shows signs of green corrosion, it needs a stronger approach. Do not despair. There are effective ways to restore even heavily discolored brass. Always test any new cleaning method on an inconspicuous area first. This ensures no damage will occur.
For very dark or black brass, commercial brass cleaners can be highly effective. These products are formulated to dissolve tarnish quickly. Follow the product instructions carefully. Most require you to apply the cleaner with a soft cloth. Rub it gently onto the tarnished areas. The tarnish will often lift away easily. Then, buff the brass to a shine. Always wear protective gloves when using commercial cleaners. Ensure good ventilation in your work area. These cleaners often contain strong chemicals. They work quickly but require caution.
You can also try a slightly more aggressive natural method for severe tarnish. Create a paste using flour, salt, and white vinegar. Mix one part flour, one part salt, and enough vinegar to form a thick paste. Apply this paste generously to the tarnished brass. Let it sit for several hours. Some suggest letting it sit overnight for extremely stubborn cases. The paste slowly reacts with the tarnish. After the waiting period, rinse the candlestick thoroughly with warm water. Use a soft brush to help remove the paste from intricate details. Dry and buff the brass to reveal the restored shine. This method is effective yet gentle.
If your brass candlesticks show signs of corrosion, which appears as green or blue patches, specialized cleaners might be needed. Sometimes, this heavy corrosion means the brass is significantly damaged. However, gentle removal is often possible. Using the flour, salt, and vinegar paste can help. Alternatively, some commercial products are designed for heavily corroded metals. Be careful not to scratch the brass surface during cleaning. Always use soft tools. This protects the original finish. If your brass has turned black, or you are dealing with significant damage, our article on how to clean brass that has turned black offers more in-depth solutions. Similarly, if you are confronting more severe issues, consider checking out our guide on how to clean heavily corroded brass. These resources provide specific steps for difficult situations.
Special Considerations for Antique Brass Candlesticks
Antique brass candlesticks hold historical value. They require careful handling during cleaning. The most important consideration for antiques is patina. Patina is a natural green or brownish layer that forms on brass over many years. It is often seen as a desirable characteristic. Patina shows the age and authenticity of a piece. Removing it can decrease an antique’s value. My advice is to approach antique brass with extreme caution.
First, determine if your antique candlestick is solid brass or brass-plated. Solid brass is heavy and uniform in color when scratched. Brass-plated items are lighter. They may show a different metal underneath if scratched. If it is brass-plated, do not use abrasive cleaners. These can wear away the thin brass layer. For solid antique brass, decide if you want to preserve the patina. If you do, clean only the dirt and light grime. Avoid harsh polishes.
To clean antique brass while preserving patina, use very mild methods. A simple wash with warm water and mild dish soap is often enough. Use a soft cloth to gently wipe the surface. Rinse thoroughly and dry completely. This removes surface dirt without affecting the aged finish. If there are small areas of tarnish you wish to remove, apply a small amount of lemon and salt paste to only those spots. Rub very gently. Rinse and dry quickly. Do not soak antique brass.
If your antique brass candlesticks are heavily tarnished, and you decide the patina is not important for their value, you can use stronger methods. However, proceed with caution. Commercial brass polishes can strip patina. This leaves the brass with a bright, new appearance. Some collectors prefer this look. It is a personal choice. Always remember that once patina is gone, it cannot be easily restored. It takes many years for natural patina to form again. For deep cleaning of antique brass, or if you are unsure, consult a professional. They can offer expert advice. Our article on how to clean antique brass hardware provides more details on cleaning old brass pieces. If your goal is to clean without removing this desirable layer, our guide on how to clean brass without removing patina offers specific techniques.
Removing Built-Up Wax and Residue
Brass candlesticks often suffer from wax drips and burnt-on residue. These substances can be tricky to remove. They must be handled before you clean the brass itself. Attempting to clean brass with wax still present makes the job much harder. Wax can smudge and interfere with polishing agents. I have found a few simple methods that work well.
The easiest way to remove wax is by chilling the candlestick. Place the candlestick in a freezer for about 15-30 minutes. The wax will harden and become brittle. Once chilled, gently chip off the wax. Use a plastic scraper, a credit card edge, or your fingernail. Avoid using metal tools. Metal can scratch the brass surface. The cold makes the wax less sticky. It comes off in larger pieces. This method is safe and effective for most wax types.
For wax in intricate details, use a soft, blunt tool. A wooden skewer, a toothpick, or an old credit card can reach into small crevices. Be patient and work slowly. Do not force the wax. If a small amount of wax remains, you can try softening it. Use a hairdryer on a low setting. Direct the warm air at the wax from a distance. As the wax softens, gently blot it with a soft cloth or paper towel. Be careful not to overheat the brass. Overheating can damage the finish.
Burnt-on residue or soot around the candle cup can be stubborn. First, try scraping it gently with a plastic tool after chilling. If that does not work, dampen a cotton swab with rubbing alcohol. Gently rub the affected area. Alcohol can help dissolve some types of wax and soot. Another option is a paste of baking soda and water. Apply it to the residue. Let it sit for a few minutes. Then, gently scrub with a soft-bristle brush. Rinse the area thoroughly with water. Dry the candlestick immediately. Always ensure the candlestick is fully dry before applying any brass cleaner. This prevents water spots and ensures cleaners work effectively. These steps prepare your brass candlesticks for a proper tarnish removal process.
Polishing and Protecting Your Cleaned Brass
Once your brass candlesticks are clean and free of tarnish, the final step is polishing and protection. This brings out their true brilliance. It also helps prevent future tarnishing. Polishing enhances the natural shine of brass. Protecting it keeps that shine for longer periods. I always find this step very satisfying. It is rewarding to see the brass transform.
After cleaning, buff the brass with a clean, dry, soft cloth. Microfiber cloths are excellent for this. Rub the surface in small, circular motions. This brings out a deep luster. Continue buffing until you achieve the desired shine. Make sure to remove any remaining cleaner residue. This residue can attract dust and cause new tarnishing. A good buffing reveals the warm, golden glow of the brass. It makes your candlesticks look new again.
To protect your brass candlesticks from future tarnish, you have a few options. One popular method is to apply a thin layer of wax. Carnauba wax or a specialized metal wax can be used. Apply the wax with a soft cloth. Let it dry for a few minutes. Then, buff it to a shine. The wax creates a barrier. This barrier prevents air and moisture from reaching the brass surface. It slows down the tarnishing process. This protection is effective for unlacquered brass. Reapply the wax every few months. This keeps the barrier intact.
Another protection method is applying a clear lacquer. This is typically done by professionals. Lacquering provides a durable, long-lasting protective coating. It completely seals the brass. This prevents any tarnish from forming. However, if the lacquer chips or scratches, moisture can get underneath. This causes tarnish to form under the lacquer. You would then need to remove all the old lacquer before re-lacquering. For most home users, a wax coating is simpler and sufficient. Always store cleaned and protected brass in a dry environment. Avoid areas with high humidity. This further reduces the rate of tarnish formation. Proper protection ensures your efforts last.
Maintaining the Luster of Your Brass Candlesticks
Regular maintenance is key to keeping your brass candlesticks shining. Prevention is often easier than extensive cleaning. Once you have cleaned your brass, a little ongoing care goes a long way. I make it a habit to give my brass pieces a quick wipe-down. This helps them stay bright between deeper cleans. It prevents tarnish from building up quickly.
Dusting your brass candlesticks frequently is a simple step. Dust particles can hold moisture and accelerate tarnishing. Use a soft, dry cloth or a duster. Gently wipe the entire surface. This removes surface dirt before it can cause problems. Do this weekly or bi-weekly, depending on your home environment. Consistent dusting is a small effort with big results. It keeps your brass looking its best.
Avoid exposing your brass candlesticks to harsh conditions. High humidity can speed up tarnishing. If you live in a humid climate, consider using a dehumidifier. Keep brass away from open windows. Air pollution and cooking fumes can also contribute to tarnish. Place your candlesticks in areas with stable temperatures and humidity levels. Direct sunlight can also cause some finishes to fade over time. Choose a location where the candlesticks are admired but also protected.
When handling brass, wear cotton gloves if possible. The oils from your skin can leave fingerprints. These fingerprints can eventually lead to localized tarnish spots. If you do touch them directly, give them a quick buff afterward with a clean cloth. For lacquered brass, simply dust it regularly. If the lacquer wears off, you will see tarnish forming in patches. At that point, you might consider removing all the old lacquer. Then, you can clean and re-lacquer or regularly polish the unlacquered brass. Consistent, gentle care ensures your brass candlesticks maintain their beautiful luster for years to come.
Common Issues and Troubleshooting
Even with the best cleaning methods, you might encounter specific challenges. Brass candlesticks can present unique problems beyond simple tarnish. Knowing how to troubleshoot these issues saves you time and effort. I have come across several common concerns from people trying to restore their brass. Let’s look at some of them.
One common issue is pitting or deep scratches. Pitting occurs from prolonged tarnish or corrosion that eats into the metal. Scratches are often from abrasive cleaning or accidental damage. Unfortunately, severe pitting or deep scratches are hard to remove at home. They require professional polishing or resurfacing. For minor scratches, a very fine-grit metal polishing compound might help. Apply it gently with a soft cloth. Rub in the direction of the grain. This can minimize their appearance. Always test on an inconspicuous area first.
Another problem is the residue left by cleaning products. Sometimes, after cleaning, a hazy film remains on the brass. This often happens if the cleaner was not fully rinsed off. It can also occur if the brass was not dried quickly enough. To fix this, rinse the candlestick again thoroughly with clean water. Make sure to dry it immediately and completely with a soft cloth. Buff the surface vigorously to remove any remaining haze. For stubborn residue, a very dilute solution of white vinegar (one part vinegar to ten parts water) might help. Apply it, then rinse and dry.
Uneven cleaning is also common. You might have bright spots next to dull areas. This means the tarnish was not removed uniformly. Go back to the cleaning method you used. Apply the cleaner more evenly. Pay extra attention to the dull patches. Ensure consistent pressure when rubbing. For intricate details, use a soft-bristle brush or cotton swabs. These tools help cleaners reach all surfaces. Take your time to cover every part of the candlestick. Consistent effort across the entire piece yields the best results.
Finally, some brass items are not solid brass but brass-plated. If you clean a brass-plated item too aggressively, you might wear through the brass layer. This reveals the underlying metal, often silver-colored. If this happens, there is no easy fix. Re-plating is an option, but it can be costly. This is why testing your brass for plating is important before you start. Use gentle methods for plated items. Understanding these common issues helps you react properly. It also helps prevent problems during future cleaning sessions.
FAQ Section
How often should I clean my brass candlesticks?
Clean your brass candlesticks as needed. If they are lacquered, simple dusting is enough. For unlacquered brass, clean them when tarnish becomes noticeable. This might be every few months or once a year. It depends on humidity and air quality in your home. Regular dusting helps reduce the frequency of deep cleaning.
Can I use toothpaste to clean brass candlesticks?
Yes, you can use plain white toothpaste to clean brass candlesticks. Toothpaste contains mild abrasives. Apply a small amount to a soft cloth. Rub it gently onto the tarnished areas. Rinse thoroughly with water afterwards. Dry and buff the brass. Avoid gel toothpastes or those with whitening agents.
Is it safe to put brass candlesticks in the dishwasher?
No, never put brass candlesticks in the dishwasher. The harsh detergents and high heat can damage the brass. They can strip away any protective lacquer. This also makes the brass more prone to tarnishing. Hand washing with mild soap and water is always the safest method.
What is the best way to remove old wax from a brass candlestick?
The best way to remove old wax is by chilling the candlestick. Place it in the freezer for 15-30 minutes. The wax will become brittle. You can then gently chip or scrape it off with a plastic tool. Avoid using metal tools that can scratch the brass surface.
How do I know if my brass candlestick is solid brass or plated?
To check if your candlestick is solid brass or plated, look for scratches or worn areas. If you see a silver-colored metal underneath, it is likely brass-plated. Solid brass is heavy. You can also use a magnet. A magnet will not stick to solid brass. It might stick to a steel core if it is plated.
Conclusion
Cleaning brass candlesticks can transform dull, tarnished pieces into sparkling accents for your home. We have explored various methods for cleaning brass candlesticks, from simple soap and water for routine dirt to natural acids like lemon and salt for light tarnish. We also covered tackling stubborn black tarnish and corrosion. Remember to identify if your brass is lacquered or unlacquered. This crucial step guides your cleaning approach. Antique brass requires special care to preserve its valuable patina. Always handle wax drips before addressing the metal itself.
The journey to restoring your brass pieces is rewarding. With the right tools and techniques, you can easily bring back their natural luster. Regular cleaning and proper protection are essential. They help maintain the shine and prevent future tarnishing. By following these guidelines, your brass candlesticks will remain beautiful for years. Keep them polished and protected. Your home will benefit from their timeless elegance. Start cleaning your brass candlesticks today. Let their golden glow brighten your space. Visit beacleaner.com for more helpful cleaning tips and guides.
- brass cleaning
- candlestick care
- metal polishing
- antique brass
- tarnish removal
- home maintenance
- brass polish