· Home Improvement · 19 min read
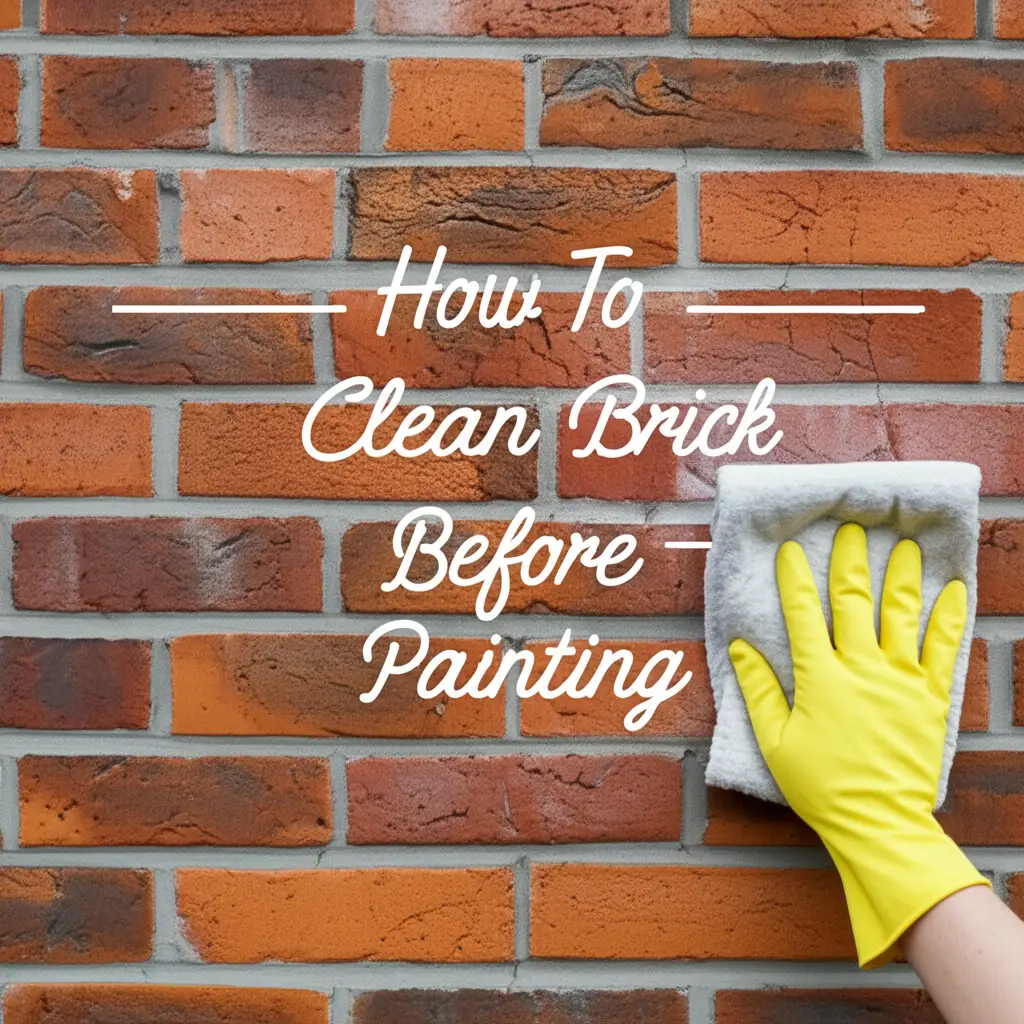
How To Clean Brick Before Painting
Have you considered giving your brick a fresh coat of paint? Painting brick is a smart way to update your home’s look. It can add curb appeal and protect your masonry. But before you open a paint can, there is a crucial step. You must clean the brick surface thoroughly. Proper cleaning ensures your paint job lasts for years. It also makes sure the paint looks smooth and professional.
Skipping this cleaning step leads to big problems. Paint will not stick well to dirty surfaces. It can peel, chip, or crack soon after drying. This means more work and costs later. This guide shows you exactly how to clean brick before painting. We cover everything from assessing your brick to tackling tough stains. You will learn about the right tools and cleaning solutions. Follow these steps for a perfect painted brick finish.
Takeaway
To ensure paint lasts on brick, you must clean it well first.
- Inspect brick for dirt, mold, efflorescence, or old paint.
- Gather correct tools like brushes, cleaners, and safety gear.
- Clean the surface thoroughly, often with a simple detergent.
- Address specific issues like mold or efflorescence with targeted solutions.
- Allow the brick to dry completely before applying primer and paint.
To clean brick before painting, first inspect the surface for dirt, mold, efflorescence, or loose debris. Then, use a stiff brush and a mild detergent solution to scrub the brick clean. Rinse it thoroughly with water and allow it to dry completely, ensuring no moisture remains. This prepares the surface for proper paint adhesion and a durable finish.
How to Clean Brick Before Painting for a Lasting Finish
Cleaning brick before painting seems simple, but it is a vital step. A clean surface helps paint bond well. Paint lasts longer when it has a good foundation. We want your painting project to be a success. This section explains why cleaning is so important for your brick painting.
Paint does not adhere to dirt, grime, or loose particles. Imagine painting over dust; the paint would just flake off. Brick surfaces collect a lot of things. Dust, pollen, bird droppings, and spiderwebs are common. These prevent good adhesion. If you paint over them, your paint will bubble or peel. This happens because the paint cannot get a firm grip on the brick itself.
Moisture is another enemy of paint. Brick can absorb water. If your brick has mold or mildew, it means there is moisture present. Painting over damp brick or existing mold traps the moisture. This leads to bigger problems. Mold can grow under the new paint. The paint will also fail to bond correctly, leading to blisters and cracks. Proper cleaning removes these moisture-loving organisms. It also allows the brick to dry fully.
Finally, a clean surface makes the paint look better. Any bumps, specks, or uneven textures from dirt will show through the paint. This gives a patchy, unprofessional look. Cleaning creates a smooth canvas. It lets the paint lay evenly. This results in a beautiful, uniform finish you can be proud of. Cleaning now saves you from redoing the job later.
Assessing Your Brick: What Needs Cleaning?
Before you start cleaning, look closely at your brick. Not all brick surfaces have the same problems. Different types of dirt need different cleaning methods. Knowing what you face helps you pick the right approach. Take time to inspect the entire area you plan to paint.
Walk around your home or the area with the brick. Look for visible signs of contamination. Is there a layer of dust? Do you see dark green or black spots? Are there white, powdery deposits? Each of these indicates a different cleaning need. This initial check saves you time and effort. It helps you avoid using the wrong cleaner.
Identifying Common Contaminants
Several common substances can dirty brick. Each one requires a specific cleaning strategy.
- Dirt and Grime: This is the most common issue. It comes from wind, rain, and general outdoor exposure. It looks like a dull, brownish film. Often, a good wash with a simple cleaner removes this.
- Mold and Mildew: These appear as green, black, or sometimes pinkish patches. They thrive in damp, shady areas. Mold is often fuzzy. Mildew is flatter. These organisms hold moisture against the brick. They also break down paint over time. Removing mold is critical for paint adhesion and health. You can find more specific advice on how to clean mold off various surfaces if this is a major problem for you. A mild bleach solution or specialized mold cleaner works well.
- Efflorescence: This looks like white, powdery, crystalline deposits. It happens when water moves through the brick and mortar. The water dissolves salts inside the masonry. When the water evaporates on the surface, it leaves the salts behind. Efflorescence prevents paint from sticking. It must be removed completely. For detailed help, check out our guide on how to clean efflorescence off brick.
- Soot and Smoke Damage: If you are painting an indoor brick fireplace, soot is a big concern. Soot is oily and very difficult to remove. It will bleed through new paint if not cleaned properly. This leaves dark streaks. Special degreasers are needed here. We have a helpful resource on how to clean soot off brick if this applies to your situation.
- Old Paint or Peeling Finish: If the brick was previously painted, check for peeling or loose paint. Any loose paint must be scraped or sanded off. New paint will not stick to old, failing paint. It will just peel off with it. Sometimes a pressure washer can help remove very loose paint.
- Mortar Smears or Spills: Especially on newer brick installations, you might find excess mortar. This looks like dried gray patches. Mortar is hard to remove. It needs specific tools or acidic cleaners. Our article on how to clean mortar off brick gives detailed steps.
By identifying these issues, you can plan your cleaning attack. This prepares your brick for the best possible paint adhesion.
Gathering Your Tools and Supplies for Brick Cleaning
Having the right tools makes the cleaning process easier and safer. Do not start until you have everything ready. This prevents interruptions and ensures a thorough clean. You want to protect yourself and get the job done right.
First, think about safety. Brick cleaning involves dirt, dust, and sometimes strong cleaners. Always wear eye protection, like safety goggles. Dust and cleaning solutions can splash into your eyes. Gloves protect your hands from chemicals and rough brick. A dust mask or respirator is smart, especially if you are scrubbing dry, dusty brick. If you are pressure washing, wear sturdy, closed-toe shoes. These items are non-negotiable for your safety.
Next, consider your cleaning equipment. You will need a stiff-bristled brush. A wire brush works well for tough spots but use it carefully on softer brick. A long-handled brush helps reach higher areas. Buckets are essential for mixing cleaning solutions and rinsing. A garden hose with a spray nozzle is good for rinsing. For larger areas, a pressure washer can save a lot of time. However, use it carefully on brick. We discuss pressure washing more later in this guide.
For cleaning agents, start simple. Mild dish soap or laundry detergent mixed with water is often enough for general dirt. For mold and mildew, a solution of bleach and water (1 part bleach to 3 parts water) is effective. There are also commercial mold and mildew removers. For efflorescence, a specialized efflorescence cleaner is best. Vinegar solutions can also work for light efflorescence or mold. You might need a degreaser for soot. For stubborn stains or heavy efflorescence, muriatic acid might be necessary. But use muriatic acid with extreme caution. Always read and follow product instructions for any chemical cleaner. How to clean brick with muriatic acid offers specific safety guidelines.
Other useful items include drop cloths or plastic sheeting to protect plants or nearby surfaces. A scraper or putty knife helps remove loose paint or stubborn gunk. A scrub brush with a handle can make scrubbing less tiring. Gather all these items before you begin your cleaning mission.
Step-by-Step Guide to Cleaning Brick Surfaces
Once you have your safety gear and supplies, you are ready to start cleaning. This process works for most general dirt and grime. Follow these steps to ensure a thorough clean. Remember to work in sections, especially on large areas.
Initial Dry Cleaning
Start by removing loose debris. Use a stiff brush to sweep away dust, cobwebs, and loose dirt. A broom also works for large areas. If there are any large pieces of debris, pick them up by hand. This step prevents turning dry dirt into muddy streaks when you add water. It also helps expose any deeper stains that need more attention. Do not skip this dry cleaning step. It makes the wet cleaning much more effective.
After brushing, you can use a shop vacuum with a brush attachment. This helps suck up finer dust particles from the brick’s surface and crevices. Ensure the vacuum is suitable for outdoor use or a wet/dry model if you plan to use it later with water. This pre-cleaning sets the stage for a better wash.
Washing with Mild Detergent
Now, prepare your cleaning solution. Mix a mild dish soap or laundry detergent with warm water in a large bucket. About 1/4 cup of detergent per gallon of water is a good starting point. You want suds but not so many that rinsing becomes hard. Test a small, hidden area first to ensure it does not stain or discolor your brick.
Apply the solution to the brick using a garden sprayer or a brush. Let the solution sit on the brick for about 5-10 minutes. This allows the soap to break down dirt and grime. Do not let it dry on the surface. Work in small sections to prevent drying. If it starts to dry, re-wet it. For general cleaning of surfaces before painting, learning how to clean walls before painting can give you broader context on proper surface preparation.
After soaking, scrub the brick vigorously with your stiff-bristled brush. Pay attention to mortar joints and textured areas. These spots often hold more dirt. Use circular motions. Apply good pressure to lift away the grime. The goal is to remove all visible dirt and film from the surface. If you are cleaning an indoor fireplace, consider consulting our article on how to clean brick fireplace before painting for specific advice.
Rinsing Thoroughly
Rinsing is just as important as scrubbing. Use a garden hose with a strong spray nozzle to rinse the brick. Start from the top and work your way down. Make sure to rinse all traces of the cleaning solution. Any soap residue left on the brick can prevent paint from sticking. It can also cause streaking or discoloration under the paint.
Rinse until the water running off the brick is clear and free of suds. This might take several passes. Do not rush this step. Proper rinsing ensures a clean, residue-free surface for painting. Once rinsed, allow the brick to dry completely. This can take several days, depending on weather and humidity. The brick must be bone dry before you apply any primer or paint.
Tackling Tough Stains: Specific Brick Cleaning Challenges
Sometimes, a simple soap and water wash is not enough. Brick can suffer from specific, stubborn stains. These require more targeted cleaning agents and methods. Addressing these issues before painting is crucial. Ignoring them will lead to paint failure or visible blemishes.
Removing Efflorescence
Efflorescence is that white, powdery salt deposit on brick. It looks like a dusty film. It forms when water moves through the brick and carries salts to the surface. As the water evaporates, it leaves the salts behind. Painting over efflorescence is a bad idea. The salts will push the paint off the surface.
To remove efflorescence, start by dry brushing the area with a stiff brush. This removes the loose, powdery layer. Then, use a specialized efflorescence cleaner. You can buy these at hardware stores. Follow the product instructions carefully. Many of these cleaners contain mild acids. Always test a small, hidden area first. Apply the cleaner, let it sit, then scrub and rinse thoroughly. For stubborn cases, a solution of white vinegar (1 part vinegar to 1 part water) can also work. Apply, scrub, and rinse well. Ensure the brick dries fully after treatment. For more detailed instructions on dealing with this common brick issue, consult our guide on how to clean efflorescence off brick.
Eliminating Mold and Mildew
Mold and mildew appear as green, black, or dark fuzzy patches. They thrive in damp, shady conditions. They are living organisms that can break down paint. They also trap moisture against the brick. You must kill and remove them completely.
A bleach solution is effective against mold and mildew. Mix 1 part household bleach with 3 parts water. Apply this solution to the affected areas using a spray bottle or brush. Let it sit for 15-20 minutes. Do not let it dry. Then, scrub the areas with a stiff brush. Rinse the brick thoroughly with clean water. Ensure all traces of bleach are gone. You can also use commercial mold and mildew removers. Always wear appropriate safety gear when working with bleach or chemical cleaners. Our general advice on how to clean mold with vinegar can offer an alternative, less harsh method for lighter mold issues.
Cleaning Soot and Smoke Damage
Soot is particularly tricky because it is oily. It can bleed through layers of new paint if not removed. This leaves dark, unsightly stains. Soot commonly affects fireplace brick.
For soot, start by dry brushing as much loose soot as possible. Wear a respirator to avoid inhaling particles. Then, use a heavy-duty degreaser or a specialized soot cleaner. These products are designed to break down oils. Apply the cleaner according to instructions. Let it dwell for the recommended time. Scrub the brick vigorously with a stiff brush. You might need to use a strong cleaner to penetrate the soot. Rinse thoroughly with hot water if possible. You may need to repeat this process several times for heavy soot stains. For specific techniques and cleaner recommendations, check out our article on how to clean soot off brick.
Dealing with Mortar Smears or Spills
New construction often leaves mortar smears on the brick face. These are hard and adhere strongly. Old mortar spills can also be a problem. Paint will not stick smoothly over these raised areas.
For small, light smears, you can try scrubbing with a stiff brush and water. If that does not work, carefully chip away larger lumps with a chisel or scraper. Be careful not to damage the brick. For stubborn, thin smears, a specialized masonry cleaner that contains mild acid might be needed. Muriatic acid is very strong and should be used as a last resort. If you plan to use it, read our guide on how to clean brick with muriatic acid for critical safety information and application tips. Always dilute acid properly and neutralize it after use. Thorough rinsing is essential after using any acidic cleaner.
Power Washing Brick: When and How
A power washer can be a powerful tool for cleaning brick. It saves time and effort, especially on large outdoor surfaces. However, it requires careful use. Improper power washing can damage your brick or mortar. You need to know when to use it and how to use it safely.
Power washing is ideal for removing heavy dirt, grime, and loose paint. It can blast away surface contaminants quickly. It is less effective on deep stains like efflorescence or very ingrained mold without a cleaner. If your brick is very old, soft, or has crumbling mortar, avoid power washing. The high pressure can erode the mortar joints. It can also chip or damage the brick face itself. Always inspect your brick’s condition before deciding to power wash.
If you decide to power wash, follow these steps:
- Protect Nearby Areas: Cover plants, windows, and anything you do not want to get wet or sprayed. Use plastic sheeting or tarps.
- Wear Safety Gear: Always wear eye protection, gloves, and sturdy shoes. The spray can kick back debris.
- Start with Low Pressure: Begin with the lowest pressure setting on your power washer. Use a wide-angle nozzle (25-degree or 40-degree tip). This spreads the water force.
- Test a Small Area: Choose an inconspicuous spot. Test your pressure and technique there. See how the brick reacts. This helps prevent damage to the main surface.
- Maintain Distance: Hold the nozzle at least 12-18 inches from the brick surface. Closer distances increase pressure and risk damage.
- Use Consistent Strokes: Work in overlapping, even strokes. Keep the nozzle moving constantly. Do not focus the stream on one spot for too long. This prevents etching or streaking.
- Work Top to Bottom: Start at the top of the wall and work your way down. This helps dirty water run off cleanly.
- Apply Detergent (Optional): Some power washers have a detergent tank. You can use a masonry-specific cleaner or mild detergent. Apply it at low pressure, let it dwell, then rinse with clear water at a slightly higher pressure.
- Rinse Thoroughly: After cleaning, rinse the entire surface with clear water. Ensure no detergent residue remains.
Remember, power washing is a powerful tool. Use it with caution and respect. If unsure, a gentler scrub with a brush and hose is always a safer option for your brick.
Final Preparations After Cleaning Brick
Your brick is now clean. This is a big step. But before you pick up your paint roller, there are a few more critical preparations. These final steps ensure your hard work cleaning truly pays off. They help create a durable and beautiful paint job.
The most important step is to allow the brick to dry completely. This cannot be stressed enough. Brick is porous. It absorbs and holds water. Even after a thorough rinse, the brick can retain a lot of moisture. Painting over damp brick causes major problems. The paint will not bond properly. It can bubble, peel, or blister. This happens as trapped moisture tries to escape. Depending on humidity, temperature, and sun exposure, drying can take several days. Some experts recommend waiting up to 72 hours after cleaning. You can use a moisture meter to check the brick’s dryness. The surface should feel completely dry to the touch.
Next, inspect the brick for any necessary repairs. Cleaning often reveals hidden issues. Look for loose mortar joints. Check for cracks in the brick itself. Loose mortar needs repointing. Cracks should be filled with appropriate masonry caulk or patching compound. Address these issues before painting. Paint cannot fix structural problems. It will simply bridge over them, and they will reappear later. Repairing these now ensures a smooth, stable surface for your paint. This also helps seal the brick, reducing future moisture penetration.
Finally, consider applying a masonry primer. While not always strictly required for some modern masonry paints, it is highly recommended. A good quality primer seals the porous brick surface. It creates a uniform base for the paint. It helps the paint adhere better and more evenly. Primer also blocks stains from bleeding through, especially on older brick. Choose a primer designed for masonry or brick. Apply it according to the manufacturer’s instructions. This usually involves one coat, allowed to dry fully. Priming helps achieve a consistent color and a longer-lasting finish.
Following these final preparation steps ensures your brick is truly ready. You have invested time in cleaning. Now invest a little more in these steps. This prepares your brick for a painting project that looks great and lasts for many years.
FAQ Section
How long does brick need to dry after cleaning before painting?
Brick needs to dry completely after cleaning. This usually takes 2-3 sunny, dry days. Humid or cool weather can extend this to 72 hours or more. Painting damp brick causes adhesion problems. Use a moisture meter or touch test to ensure no moisture remains inside the brick before applying paint or primer.
Can I use a pressure washer to clean brick before painting?
Yes, you can use a pressure washer, but with caution. Start with a low-pressure setting and a wide-angle nozzle. Keep the nozzle at least 12-18 inches from the brick. High pressure can damage mortar or chip brick. Always test a small area first to ensure it does not cause harm.
What is efflorescence, and how do I remove it from brick?
Efflorescence is a white, powdery salt deposit on brick. It forms when water moves through brick and leaves salts on the surface as it evaporates. To remove it, dry brush the area first. Then use a specialized efflorescence cleaner or a 1:1 vinegar-to-water solution. Scrub and rinse thoroughly.
What kind of cleaner is best for mold and mildew on brick?
For mold and mildew on brick, a solution of 1 part household bleach to 3 parts water works well. Apply it, let it sit for 15-20 minutes, then scrub and rinse. Commercial mold removers are also effective. Always wear protective gear and ensure good ventilation when using bleach.
Is priming necessary after cleaning brick and before painting?
Priming is highly recommended after cleaning brick. A masonry primer seals the porous surface, promotes better paint adhesion, and creates a uniform base. It also helps block stains from bleeding through. This step leads to a more durable and professional-looking paint finish.
Can I paint over old paint on brick?
You can paint over old paint on brick if the old paint is in good condition. It must be clean, dull, and firmly adhering. Scrape off any peeling, blistering, or loose paint. Sand rough areas smooth. If the old paint is failing, it needs to be completely removed before applying new paint.
Conclusion
Cleaning brick before painting is not just a suggestion; it is a fundamental requirement for a successful, long-lasting finish. We have covered why this step is so vital. It prevents peeling, bubbling, and premature paint failure. We also walked through how to assess your brick for different types of dirt. Each contaminant needs a specific method.
You now understand the tools and supplies you need. From simple brushes to pressure washers and specialized cleaners. You know the step-by-step process for general cleaning. You also have the knowledge to tackle tough stains like efflorescence, mold, soot, and mortar smears. Remember the importance of allowing the brick to dry completely. Do not rush this critical drying period. Make any necessary repairs and apply a quality primer.
By following these guidelines, you prepare your brick surface correctly. This careful preparation ensures your new paint job looks fantastic and endures for many years. Your efforts now will save you headaches later. Get ready to transform your home with a beautifully painted brick finish. Take the time to clean brick before painting. You will be glad you did. Your home will thank you!
- brick cleaning
- painting preparation
- masonry cleaning
- surface prep
- home painting
- exterior cleaning
- efflorescence removal