· Home Improvement · 18 min read
How To Clean Cabinets Before Painting
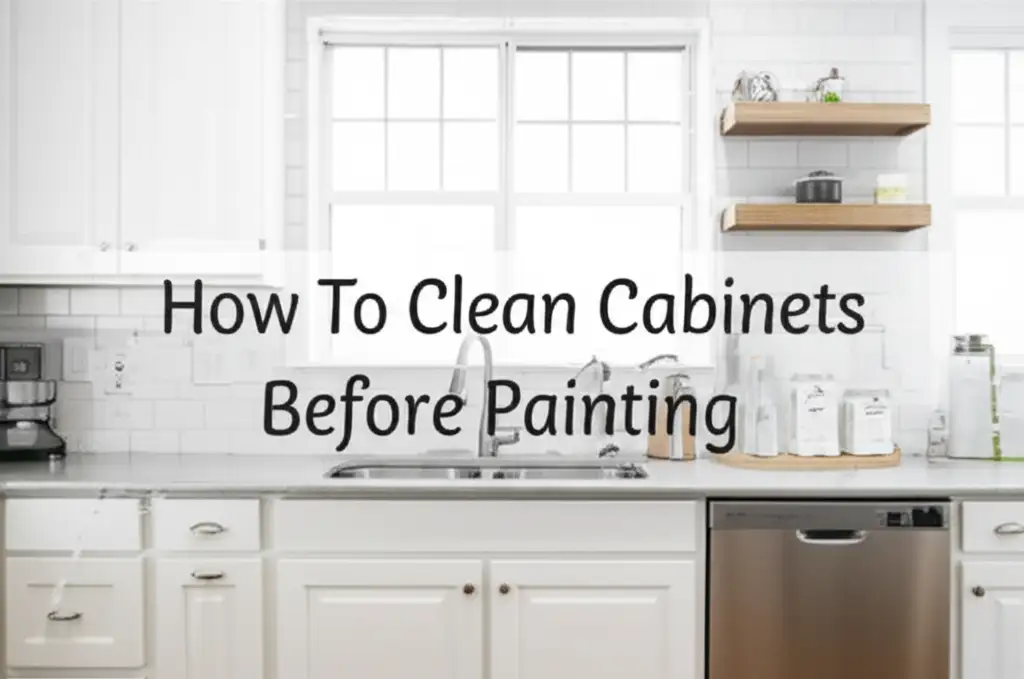
Preparing Your Cabinets: The Right Way to Clean Before Painting
Thinking about giving your cabinets a fresh coat of paint? That is an excellent project. A successful paint job starts long before you open the paint can. The key step often missed is proper surface preparation. You must clean cabinets before painting. This article helps you understand why cleaning is critical. We will explain how to clean cabinets before painting. We cover tools, methods, and final checks. Get ready to transform your space with confidence.
Takeaway:
- Remove everything: Clear cabinet contents and hardware.
- Degrease thoroughly: Use strong degreasers for oil and grime.
- Clean completely: Wash all surfaces to remove dirt and residue.
- Rinse and dry: Ensure no cleaner remains and surfaces are dry.
- Light sand: Create a textured surface for paint adhesion.
To clean cabinets before painting, first empty them and remove all hardware. Next, use a strong degreaser like TSP or a specialized cabinet cleaner to remove grease, grime, and old finishes. Rinse all surfaces thoroughly with clean water, then allow them to dry completely before any sanding or priming. This prepares the surface well for paint.
Why Cleaning Cabinets Before Painting Matters for Success
Cleaning cabinets before painting is not an optional step; it is essential. Paint needs a clean surface to bond well. Imagine trying to stick tape to a dusty wall. It would not hold. The same applies to paint on cabinets. Dirt, grease, and old grime prevent new paint from adhering properly. These contaminants can cause immediate paint peeling.
Grease is a big problem, especially in kitchen cabinets. Cooking often leaves a sticky film on cabinet surfaces. This film attracts dust and dirt. Painting over this layer makes the new paint bubble or chip. It also gives an uneven finish. This looks poor and wastes your time and money. A clean surface means the paint lasts longer. It provides a smooth, professional look. It helps the paint color look its best too.
Many people skip this step, thinking a quick wipe is enough. This is a common mistake. Hidden grease or dust can ruin your hard work. Paint needs to grab onto the cabinet material itself. A barrier of dirt stops this. Proper cleaning removes these barriers. It opens up the pores of the cabinet material for better grip. This makes the new paint job durable. It also helps achieve a flawless finish. Starting with a truly clean base saves you problems later.
When you clean your cabinets well, you prepare them for the next steps. These steps include sanding and priming. Sanding helps smooth surfaces and creates a texture for paint to stick. But sanding dirty surfaces pushes dirt deeper. Primer also works best on a clean base. It seals the cabinet and promotes paint adhesion. Cleaning is the foundational step. It ensures every subsequent step works as it should. Without it, your painted cabinets will not last. You will see chips and peeling sooner than expected.
Gathering Your Essential Cleaning Tools and Solutions
Before you start cleaning, gather all necessary supplies. Having everything ready saves time and effort. You will need more than just soap and water. Different types of dirt require specific cleaning agents. We aim for a truly clean surface. This section guides you through the essential tools and solutions. These items will help you properly clean your cabinets.
First, you need protective gear. Always wear rubber gloves to protect your hands from harsh chemicals. Safety glasses are also important. They shield your eyes from splashes. Ventilation is key when using strong cleaners. Open windows or use fans. This helps clear fumes. Your safety comes first in any cleaning project.
Next, consider your cleaning agents. For general dirt and light grime, a mild detergent mixed with warm water often works. Dish soap is a simple choice. However, kitchen cabinets usually have stubborn grease. For this, you need a stronger solution. Tri-sodium phosphate (TSP) is a powerful degreaser. It is very effective for heavy grease build-up. Read the TSP instructions carefully before use. Another excellent option is a specialized cabinet cleaner. Many brands offer degreasing solutions made for cabinets. These cleaners often contain agents that cut through grease without damaging the finish. You might also consider products like denatured alcohol for specific spots. Ensure your chosen cleaner is safe for your cabinet material.
Finally, gather your cleaning tools. You will need several clean rags or sponges. Microfiber cloths work well for wiping and rinsing. They absorb dirt and water effectively. A stiff brush might be useful for textured areas or corners. Have a bucket for mixing cleaning solutions. Also, keep a separate bucket for clean rinse water. Make sure you have a supply of paper towels or clean, dry cloths for drying. Remember, you want to remove all residue. So, having plenty of clean materials is important. By gathering these items, you set yourself up for a successful cleaning process.
Step-by-Step Guide to Degreasing Kitchen Cabinets
Kitchen cabinets often collect a lot of grease and grime. This build-up comes from cooking vapors. Degreasing is a critical part of how to clean cabinets before painting. Skipping this step means your new paint will not stick well. Here is a clear guide to help you tackle this tough job. Follow these steps for the best results.
Start by preparing the area. Remove all items from inside the cabinets. Take off all doors and drawers. Place them on a protected flat surface. Use drop cloths or old sheets to cover countertops and floors. This protects them from cleaner splashes. Next, remove all hardware like hinges, handles, and knobs. Keep these items safe in a labeled bag. You will reattach them later. This makes cleaning all surfaces much easier. You can then access all edges and corners of the cabinets.
Now, prepare your degreasing solution. If using TSP, mix it according to the package directions. Always add TSP to water, not water to TSP. Wear your protective gloves and safety glasses. For a less harsh option, you can use a strong mixture of dish soap and warm water. Another good choice is a dedicated cabinet degreaser. Many people find a solution of dish soap and warm water works well for initial lighter grease. If grease persists, switch to a stronger agent like TSP. For more detailed instructions on removing stubborn grease, consider reading our guide on how to clean grease from kitchen cabinets.
Dip a clean sponge or rag into your degreasing solution. Squeeze out excess liquid. You do not want the cabinets to be soaking wet. Wipe down all cabinet surfaces. This includes the front, back, and sides of doors. Clean the inside and outside of cabinet boxes. Pay extra attention to areas around the stove and sink. These spots usually have the most grease. You might need to scrub stubborn areas gently with a stiff brush. Work in small sections. Do not let the solution dry on the surface. For areas with sticky residue, our guide on how to clean sticky kitchen cabinets offers additional tips.
After applying the degreaser, immediately rinse the area. Use a separate sponge or rag dipped in clean, warm water. Wipe off all traces of the degreaser. It is vital to remove all cleaner residue. Leftover cleaner can interfere with paint adhesion. Change your rinse water often. You want pure water for rinsing. Once rinsed, dry the cabinets thoroughly with a clean, dry cloth. Do not let them air dry. This prevents water spots and ensures complete dryness. Ensure every surface is clean and dry before moving to the next prep step. This meticulous degreasing makes a big difference.
Thorough Cleaning Methods for Different Cabinet Materials
Cabinets come in various materials. Each material may need a slightly different cleaning approach. The goal remains the same: a perfectly clean surface for paint. Understanding your cabinet material helps choose the best method. This ensures effective cleaning without damage. We will cover common cabinet types here.
Cleaning Wood Cabinets Before Painting
Wood cabinets are common. They can absorb grease and dirt. For most wood types, starting with a mild degreaser is best. Mix warm water with a few drops of dish soap. Wipe the wood grain. For tougher spots, a diluted solution of TSP is effective. Always test TSP on an inconspicuous area first. Wood can react differently. Apply the cleaner with a damp cloth. Do not soak the wood. Too much water can cause swelling or warping. Wipe down all surfaces. Then, rinse immediately with a clean, damp cloth. Dry the wood thoroughly. Allow plenty of time for all moisture to evaporate. This prevents issues with paint later. If your wood cabinets are heavily lacquered or have an old finish, you might need to use a liquid deglosser after cleaning. This product helps remove the sheen and prepares the surface for paint. Remember, cleaning wood before painting ensures proper paint absorption and a lasting finish.
Cleaning Laminate or Melamine Cabinets Before Painting
Laminate and melamine cabinets have a synthetic surface. These materials are less porous than wood. They are generally easier to clean. Grease and grime sit on top of the surface. A strong cleaner like TSP works very well here. You can also use a mixture of dish soap and warm water. For very sticky residues, a citrus-based cleaner can be effective. Wipe down the surfaces with a sponge or cloth. Apply gentle pressure. Laminate surfaces generally tolerate more moisture than wood. Still, avoid excessive soaking. Rinse the cabinets completely with clean water. Make sure no cleaner residue remains. Dry the surfaces thoroughly with a clean cloth. Laminate and melamine need to be scuffed slightly after cleaning. This creates a surface texture for the paint. A light sanding after cleaning is crucial for these materials to help paint stick.
Cleaning Metal or Thermofoil Cabinets Before Painting
Metal cabinets are durable but can show fingerprints and grease easily. Thermofoil cabinets have a vinyl film applied over a core material. For metal, a strong degreaser like TSP is often suitable. Ensure it is safe for the specific metal type. Some metals might react to harsh chemicals. Always test in a hidden spot first. Wipe with a damp cloth. Rinse well and dry completely. For thermofoil, be gentle. The film can be delicate. Use a mild degreaser or dish soap solution. Avoid abrasive scrubbers. They can scratch or tear the film. Wipe softly with a damp cloth. Rinse with clean water and dry immediately. Excess heat or strong chemicals can cause thermofoil to peel. So, be cautious. Proper cleaning for these materials prevents paint peeling later. For specific advice on cleaning metal before painting, refer to our guide on how to clean metal before painting.
No matter the material, the principle is the same. Remove all contaminants. Rinse thoroughly. Dry completely. This prepares the surface for optimal paint adhesion. This attention to detail saves work in the long run.
Final Preparations: Rinsing, Drying, and Light Sanding
After the main cleaning and degreasing, you are almost ready for paint. But two critical steps remain. These are rinsing thoroughly and ensuring complete dryness. The last step is light sanding. These final preparations create the perfect foundation for your new paint. Do not rush these stages.
First, let’s talk about rinsing. This step is vital. Any residue from your cleaning agents will prevent paint from sticking. Even small amounts of soap or degreaser can cause issues. Use a separate bucket filled with clean, warm water. Take a fresh, clean cloth or sponge. Dampen it with the pure water. Wipe down all cabinet surfaces again. Think of it as a final rinse. Change the rinse water often. You want to see no suds or streaks. Your cloth should come away clean. Repeat this process until you are confident all cleaner residue is gone. This ensures the cabinet surface is truly neutral and ready.
Next, focus on drying. This is perhaps the most overlooked step. Cabinets must be absolutely dry before painting. Any lingering moisture, even tiny amounts, can cause problems. Paint applied to a damp surface will not cure properly. It can bubble, peel, or show blotches. Use clean, dry cloths or paper towels to wipe down every surface immediately after rinsing. Do not air dry cabinets, especially wood. Air drying can leave water spots or mineral deposits. After wiping, allow the cabinets to air dry for several hours. Open windows and use fans to improve air circulation. You can also use a dehumidifier if the air is humid. Feel every surface. If it feels cool to the touch, it might still be damp. Wait until it feels completely dry and at room temperature. This complete drying ensures optimal paint adhesion.
Finally, consider a light sanding. Even after thorough cleaning and drying, sanding helps. This step is crucial for how to clean cabinets before painting. Sanding does two things. It smooths out any minor imperfections or raised wood grain. More importantly, it creates a “tooth” or texture on the surface. This texture allows the primer and paint to grip better. Use a fine-grit sandpaper, typically 180 to 220 grit. Gently scuff all cabinet surfaces. Apply light, even pressure. Do not sand through the existing finish to bare wood unless you intend to completely strip and refinish. After sanding, wipe the cabinets thoroughly with a tack cloth or a damp microfiber cloth. This removes all sanding dust. Dust is just as bad as grease for paint adhesion. Once dusted, you are ready for priming. For more information on preparing wood surfaces, see our guide on how to clean wood after sanding before painting.
Troubleshooting Common Cabinet Cleaning Challenges
Even with the best plan, you might face some stubborn problems. Cleaning cabinets before painting can present unique challenges. Knowing how to handle these issues ensures a successful outcome. Here are some common problems and their solutions.
One frequent issue is very heavy grease build-up. This is especially true for cabinets directly above or next to the stove. A standard degreaser might not be enough. For extremely thick, sticky grease, you might need stronger measures. Try making a paste with baking soda and water. Apply this paste to the greasy spots. Let it sit for 15-30 minutes. The baking soda helps lift and absorb the grease. Then, scrub gently with a soft brush. Follow up with your regular degreaser like TSP. Repeat the process if needed. For extreme cases, a commercial heavy-duty degreaser specifically designed for industrial grease can be used, but test it first. Always wear full protective gear with strong cleaners.
Another challenge is dealing with old, peeling paint or finish. If the existing finish is flaking, cleaning alone is not enough. You must address the loose paint. Use a paint scraper to remove all peeling sections. Then, sand the edges smooth. This creates an even surface. If the finish is peeling due to poor adhesion from a previous job, you might need to strip it entirely. Cleaning will remove surface dirt, but it cannot fix structural issues with the old paint. Ensure the base is sound before applying new paint.
Sometimes, cabinets might have mildew or mold spots. This happens in humid environments. Do not paint over mold. Mold will grow through new paint. For small mold spots, a solution of one part bleach to three parts water can work. Apply it, let it sit for a few minutes, then scrub and rinse. For a bleach-free option, white vinegar is effective for killing mold. Spray undiluted white vinegar onto the mold. Let it sit for an hour, then wipe clean. Ensure the area is completely dry afterward. Address the source of the moisture to prevent mold from returning. If mold is widespread, professional help might be needed.
Dealing with wax or polish build-up is another challenge. Some older cabinets might have layers of furniture polish. This creates a waxy film. Water and degreasers might not cut through it. Mineral spirits can dissolve wax. Apply mineral spirits with a clean cloth. Wipe off the wax. Then, clean with your regular degreaser and rinse. Always test mineral spirits in a hidden area first. They can affect certain finishes. Each of these challenges requires patience and the right approach. Addressing them thoroughly before painting ensures a superior finish and better longevity for your cabinet paint job.
Safety First: Protecting Yourself and Your Home
Working with cleaners and preparing for painting requires attention to safety. You will be using chemicals and creating dust. Taking precautions protects you and your living space. Safety is not a suggestion; it is a requirement.
Personal protection is paramount. Always wear gloves. Chemical-resistant gloves are best. They protect your skin from harsh cleaning solutions. Safety glasses or goggles are also a must. They shield your eyes from splashes and flying debris, especially during sanding. Even small particles can cause eye irritation. If you are using strong cleaners like TSP, consider wearing a respirator. This protects your lungs from fumes. Make sure your clothing covers your arms and legs. An old shirt and pants are ideal. You do not want chemicals or paint dust on your skin.
Ventilation is another key safety aspect. Many cleaners and paints emit fumes. These fumes can be harmful to breathe in. Open windows and doors in your work area. Use fans to direct air away from you and outside. Cross-ventilation is best. If you cannot get good natural airflow, consider using an exhaust fan. This reduces the concentration of fumes in the air. Good ventilation also helps the cabinets dry faster after cleaning. It keeps the air fresh and safe for you to work.
Protecting your home is also important. Lay down drop cloths or old sheets. Cover countertops, floors, and any nearby furniture. This protects surfaces from drips, splashes, and sanding dust. If you remove cabinet doors, put them on a protected work surface. This keeps them clean while you work on them. Use painter’s tape to mask off areas you do not want to clean or paint. This includes walls, ceilings, and appliances. Make sure electrical outlets are covered. Unplug any electrical devices nearby.
Store cleaning chemicals properly. Keep them in their original containers. Store them in a cool, dry place. Keep them out of reach of children and pets. Dispose of waste materials responsibly. Follow local regulations for chemical disposal. Do not pour strong chemicals down the drain. This can harm plumbing and the environment. By following these safety measures, you ensure a safe project for yourself and your home. You also maintain a clean and protected workspace.
FAQ Section
Can I use vinegar to clean cabinets before painting?
Yes, you can use white vinegar for light cleaning. Mix equal parts white vinegar and warm water. This solution cuts through light grease and grime. It also helps neutralize odors. For heavy grease or tough build-up, vinegar alone might not be strong enough. You will likely need a stronger degreaser for best results. Always rinse well after using vinegar.
What is the best degreaser for cabinets before painting?
Tri-sodium phosphate (TSP) is widely considered one of the best degreasers for cabinets before painting. It is highly effective at dissolving grease, grime, and smoke residue. Follow the manufacturer’s instructions for mixing and use. Other effective options include specialized cabinet degreasers or heavy-duty dish soap for lighter grease.
Do I need to sand cabinets after cleaning and before painting?
Yes, light sanding is highly recommended after cleaning and before painting. Use fine-grit sandpaper (180-220 grit). Sanding creates a slightly rough surface, known as a “tooth.” This texture helps the primer and paint adhere much better. It leads to a more durable and professional-looking finish. Always wipe off sanding dust completely afterward.
How long should cabinets dry after cleaning before painting?
Cabinets must be completely dry before painting. This usually takes at least 2-4 hours after the final rinse. If humidity is high or the cabinets feel cool to the touch, allow more drying time, perhaps up to 24 hours. Good ventilation with fans or open windows speeds up the drying process. Do not rush this step.
What happens if I don’t clean cabinets before painting?
If you do not clean cabinets properly before painting, the paint will not adhere well. It will likely bubble, peel, or chip prematurely. Grease, dirt, and grime create a barrier between the cabinet surface and the new paint. This results in a poor-looking finish that will not last. Skipping cleaning wastes your time and money.
Can I paint over old, dirty cabinets?
No, you should never paint over old, dirty cabinets. The dirt and grease will prevent the new paint from bonding correctly. The finish will be uneven, and the paint will fail quickly. Always take the time to clean, degrease, rinse, dry, and lightly sand your cabinets. This ensures proper adhesion and a long-lasting, beautiful paint job.
Conclusion
Cleaning cabinets before painting is the most important step in your entire project. It is the foundation for a durable and beautiful finish. We have covered the critical reasons why this preparation is non-negotiable. We discussed gathering the right tools, from protective gear to powerful degreasers. You now understand the systematic process of degreasing. This includes the important steps of rinsing and thorough drying. We also reviewed how to clean different cabinet materials. You learned about final preparations like light sanding. We also touched on troubleshooting common issues.
Remember, every bit of dirt, grease, or residue can compromise your new paint. Taking the time to properly clean cabinets before painting will save you from future headaches like peeling or chipping. It ensures the paint adheres strongly and looks its best for years. Your hard work in cleaning will truly pay off. A clean surface means a successful result.
Ready to start your cabinet transformation? Take these steps seriously. Your beautifully painted cabinets will be a testament to your careful preparation. Get your supplies ready and begin the essential cleaning process today. Your cabinets will thank you.
- cabinet cleaning
- painting preparation
- kitchen cabinets
- paint adhesion
- degreasing cabinets
- wood cabinets
- cleaning for paint

