· Kitchen Care · 21 min read
How To Clean Burn Marks Off Stove

Restore Your Stove: How To Clean Burn Marks Off Stove
Burn marks on your stove can feel like a permanent fixture. They are unsightly, stubborn, and can make your kitchen look less inviting. You might wonder if you can ever truly get rid of those dark, crusty spots. The good news is, most burn marks are removable with the right approach and a little patience.
In this guide, I will show you exactly how to clean burn marks off stove surfaces. We will cover different stove types, from gas to electric and glass-ceramic cooktops. I will share simple, effective methods using common household items and specialized tools. Get ready to restore your stove’s shine and make it look new again. Let’s get started on tackling those tough stains together.
Takeaway
- Identify your stove type before cleaning. Different materials require specific methods.
- Always ensure the stove is cool and unplugged for safety.
- Start with gentle household solutions like baking soda and vinegar for minor marks.
- Use specialized tools like a razor scraper for glass stovetops carefully.
- Prevention is key; clean spills immediately and use proper cookware.
Burn marks often seem impossible to remove, but with the right techniques, they are often treatable. First, identify your stove type: gas, electric coil, or glass-ceramic. For general burn marks, a paste of baking soda and water often works. Apply it, let it sit, then scrub gently. For more stubborn areas, a specialized stove cleaner or razor scraper might be needed.
Understanding Burn Marks on Different Stove Surfaces
Burn marks appear when food or liquids spill and then burn onto a hot surface. The type of stove you have dictates the best cleaning strategy. Different materials react differently to heat and cleaning agents. Understanding these differences helps you choose the safest and most effective method.
Gas stoves typically have grates and metal burner components. Burn marks on these parts are often carbonized food residue. Electric coil stoves involve exposed heating elements and a drip pan beneath. Glass-ceramic stovetops are smooth, sleek, and prone to burnt-on spills that fuse to the surface. Each surface requires a distinct approach to avoid damage and achieve optimal results.
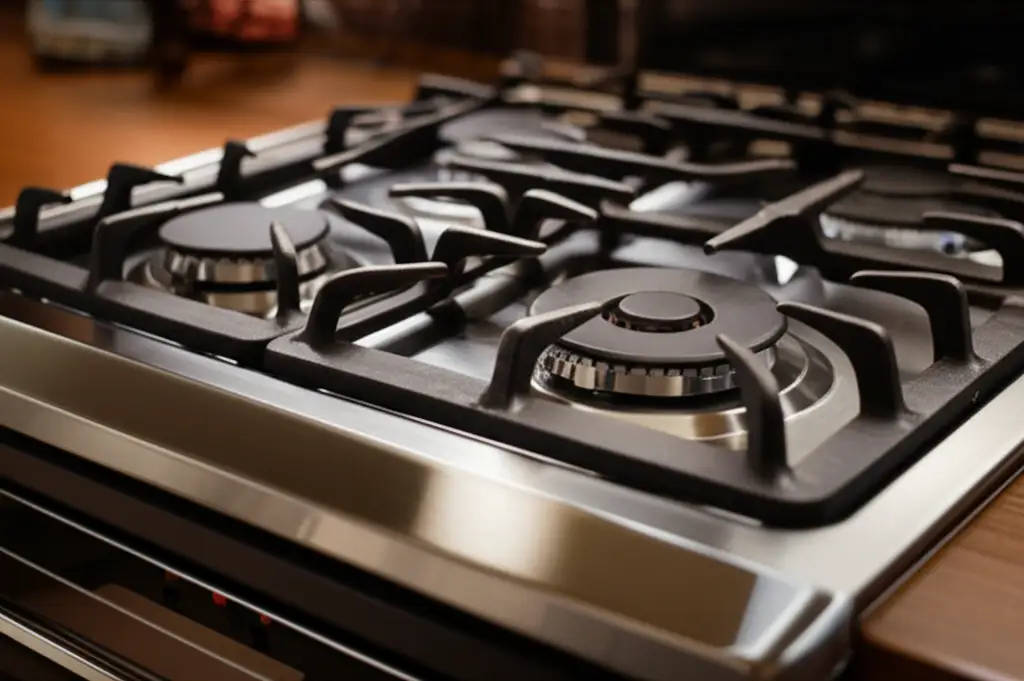
Gas Stove Surfaces
Gas stoves feature cast iron grates, burner caps, and a stainless steel or enamel cooktop. Burn marks on grates are usually charred food. These are often tough but respond well to soaking. The cooktop surface might have baked-on spills around the burners.
For gas stove grates, soaking is a powerful first step. You can use hot, soapy water or a mixture of baking soda and vinegar. Let the grates soak for several hours or overnight. This process softens the burnt residue, making it easier to scrub away. Afterward, use a stiff brush or non-abrasive scrubber.
Electric Coil Stove Surfaces
Electric coil stoves have removable drip pans under the heating elements. Burn marks often appear on these pans. The heating elements themselves do not usually get burn marks. Spills fall onto the drip pans and bake on.
Clean the drip pans by removing them and soaking them in hot, soapy water. For stubborn marks, a paste of baking soda and a scrub brush work well. Some drip pans are dishwasher safe, check your stove’s manual. The cooktop surface below the coils can also accumulate residue.
Glass-Ceramic Stovetop Surfaces
Glass-ceramic stovetops are smooth and sensitive to harsh abrasives. Burn marks on these surfaces can look like dark, charred spots or melted plastic. Food debris bakes directly onto the smooth glass. This requires a gentle yet effective cleaning method.
You must be careful not to scratch the surface. A soft cloth, a non-abrasive pad, or a specialized stovetop scraper is necessary. Chemical cleaners designed for glass stovetops also help loosen the burnt residue. Never use steel wool or harsh scouring pads on glass.
Safety First: Essential Preparations Before Cleaning
Before you begin any cleaning project, safety is paramount. This is especially true when working with appliances like your stove. Taking a few simple precautions prevents accidents and ensures a smooth cleaning process. Never rush this step.
Always make sure your stove is completely cool to the touch. Cleaning a hot surface can cause burns. It can also cause cleaning solutions to evaporate too quickly or bake onto the surface, making stains worse. Disconnect the power source or turn off the gas supply. This prevents accidental activation and electric shock or gas leaks during cleaning.
Power Off and Cool Down
Always start by ensuring your stove is completely off. If it is an electric stove, unplug it from the wall outlet. For gas stoves, ensure all knobs are in the “off” position and consider turning off the gas supply at the valve if you are doing a deep clean or feel more secure. This simple step eliminates any risk of electric shock or gas leaks while you work.
Allow plenty of time for the stove to cool down completely. A hot surface can cause severe burns. It can also make cleaning solutions evaporate too quickly, leaving residue or making the cleaning process less effective. You want the surface to be cool to the touch before applying any cleaners.
Gather Your Tools and Supplies
Having all your cleaning supplies ready beforehand saves time and effort. You won’t need to stop halfway through the process to grab something. This also ensures you have the right tools for the job.
Here is a general list of items you might need:
- Baking soda
- White vinegar
- Dish soap
- Warm water
- Soft cloths or microfiber towels
- Non-abrasive scrub pads or sponges
- Plastic or silicone scraper (for glass stovetops)
- Razor blade scraper (specifically for glass, use with caution)
- Rubber gloves (to protect your hands)
- Commercial stove top cleaner (optional, for tough stains)
Prepare a clean workspace. Clear off any pots, pans, or utensils from the stove. This gives you unobstructed access to the burn marks. Protect your countertops if you plan to use any strong chemicals. A few old towels placed around the stove can catch drips.
Gentle Solutions: How to Clean Minor Burn Marks with Common Household Items
You do not always need harsh chemicals to remove burn marks. Many minor stains respond well to common household products. These methods are gentle on your stove and safer for your home environment. I prefer starting with these natural options. They often do the trick and save you from buying specialized cleaners.
Baking soda and vinegar are a powerful duo for many cleaning tasks. They create a chemical reaction that helps lift grime and burnt-on food. Dish soap is another versatile cleaner that can break down greasy residue. These solutions are effective for daily spills and lighter burn marks.
Baking Soda and Water Paste
Baking soda is a mild abrasive that can gently scrub away burnt residue. It is safe for most stove surfaces. This method works well for recent, less severe burn marks. It forms a paste that can cling to the stain.
- Make a paste: Mix about 1/2 cup of baking soda with a few tablespoons of water. Adjust the water amount until you get a thick, spreadable paste.
- Apply: Spread the paste generously over the burn marks. Make sure the marks are fully covered.
- Wait: Let the paste sit for at least 15-30 minutes. For tougher marks, leave it for several hours or even overnight. The baking soda will work to loosen the burnt debris.
- Scrub: Use a damp, soft cloth or a non-abrasive sponge to gently scrub the paste. The mild abrasive nature of the baking soda helps lift the stain.
- Wipe clean: Wipe away the residue with a clean, damp cloth. Repeat if necessary.
This method works wonders for many surfaces. It is a good starting point for lighter stains. I find it very effective for general cooktop cleaning.
Baking Soda and Vinegar Combination
Adding white vinegar to baking soda creates a fizzing reaction. This effervescence helps to break down stubborn stains. This method is especially good for dried-on spills. You might find it more effective for older marks.
- Apply baking soda: Sprinkle a generous layer of baking soda directly over the burn marks.
- Spray with vinegar: Fill a spray bottle with white vinegar. Spray the vinegar over the baking soda. You will see a fizzing reaction.
- Wait: Let the mixture sit and fizz for 15-30 minutes. The reaction helps lift the burnt food.
- Scrub: Use a non-abrasive sponge or cloth to scrub the area. The bubbling action will have loosened the grime.
- Wipe clean: Rinse with a damp cloth to remove all baking soda and vinegar residue. Ensure no streaks remain.
This technique is excellent for general stove cleaning. You can learn more about how effective this combination is for various cleaning tasks, including your stove, by reading our guide on how to clean with vinegar and baking soda. I often use this method for my glass stovetop. If you are cleaning a glass stovetop specifically, you might find more tailored advice in our article on how to clean glass stove top with vinegar.
Dish Soap and Hot Water Soak
For greasy burn marks or general spills, dish soap is surprisingly effective. Its degreasing properties help break down food residue. This method works well for removable parts like gas stove grates or electric stove drip pans.
- Remove parts: If possible, remove the affected parts, like grates or drip pans.
- Soak: Fill your sink or a large basin with hot water. Add a generous amount of dish soap. Submerge the burnt items in the soapy water.
- Wait: Let them soak for at least an hour, or preferably overnight. The hot water and soap will soften the burnt-on food.
- Scrub: After soaking, use a scrub brush or a non-abrasive pad to remove the softened residue. It should come off much easier.
- Rinse and dry: Rinse the parts thoroughly with clean water and dry them completely before reassembling.
This soaking method is also fantastic for items like gas stove grates. You might even discover that some gas stove grates are safe to clean in the dishwasher after a good soak, simplifying your cleaning routine further.
Tackling Tougher Stains: When to Use Abrasives and Specialized Cleaners
Sometimes, burn marks are too stubborn for basic household remedies. This is when you need to bring in more specialized tools or stronger cleaning agents. Using the right abrasive or cleaner is crucial to avoid damaging your stove’s surface. Always proceed with caution and follow product instructions.
Specialized stove cleaners contain chemicals designed to break down carbonized food. A razor scraper, when used correctly, can physically lift off baked-on residue from specific surfaces. These methods are for marks that have been deeply burned into the surface.
Commercial Stove Top Cleaners
Many commercial cleaners are specifically formulated for stove surfaces. They are designed to dissolve tough, burnt-on food. Make sure you choose a cleaner appropriate for your stove type. A cleaner for glass stovetops may not be suitable for enamel or stainless steel, and vice versa.
- Read instructions: Always read the product label carefully. Instructions can vary significantly between brands.
- Apply: Apply the cleaner as directed, usually a small amount directly onto the burn mark.
- Wait: Allow the cleaner to sit for the recommended time. This gives the chemicals time to work on the stain.
- Scrub: Use a non-abrasive sponge or pad to gently scrub the area. The cleaner should help lift the stain with less effort.
- Wipe clean: Wipe away the cleaner and residue with a damp cloth. Rinse thoroughly to remove all chemical traces.
Always test commercial cleaners on an inconspicuous area first. This checks for any adverse reactions or discoloration. Wear gloves to protect your hands from chemicals.
Using a Razor Scraper (Glass Stovetops Only)
A razor scraper is a powerful tool for glass-ceramic stovetops. It can remove tough, caked-on burn marks that other methods cannot. However, it requires careful handling to prevent scratching the glass. This tool should only be used on glass or ceramic surfaces, never on enamel or stainless steel.
- Angle the scraper: Hold the scraper at a shallow angle, around 30 degrees, against the glass surface. Never hold it perpendicular.
- Scrape gently: Apply gentle, even pressure. Push the scraper under the burnt residue. The goal is to lift it off the glass.
- Work slowly: Do not rush. Work in small sections. You may need to make several passes over the same area.
- Clean as you go: Wipe away loosened debris with a damp cloth periodically. This helps you see your progress and prevents scratching from loose particles.
- Follow with cleaner: After scraping, apply a specialized glass stovetop cleaner to remove any remaining haze or light stains.
Always use a new, sharp razor blade. A dull blade can scratch the surface more easily. Be extremely careful with your fingers, as the blade is very sharp. This method is very effective for getting off truly burnt-on messes.
Specific Strategies for Glass Stovetops: Cleaning Burnt-On Residue
Glass-ceramic stovetops are beautiful but can be challenging to clean when burn marks appear. Their smooth, non-porous surface means food can fuse to the glass. This makes removal tricky without scratching. It is important to use the right tools and techniques.
The key to cleaning burnt residue from glass stovetops is patience and using the correct materials. Abrasive scrubbers or harsh chemicals can permanently damage the surface. Instead, focus on methods that lift the stain without scratching. This often involves a combination of softening and gentle scraping.
Method 1: Baking Soda, Dish Soap, and Hot Towel
This method creates a steamy, alkaline environment to loosen stubborn burn marks. It is a very popular and effective home remedy for glass cooktops. The hot towel helps to steam and soften the burnt residue.
- Clean loose debris: First, wipe away any loose crumbs or food particles from the stovetop.
- Apply soap and soda: Squirt a few drops of dish soap over the burn marks. Then, sprinkle a generous amount of baking soda over the soapy spots.
- Place hot towels: Soak a few old towels or rags in very hot water. Wring them out just enough so they are damp but not dripping wet. Place these hot, damp towels directly over the baking soda and dish soap mixture, covering the burn marks completely.
- Wait: Let the towels sit for at least 30 minutes, or up to several hours for very tough stains. The heat and moisture will soften the burnt residue.
- Scrub: Remove the towels. Use a non-abrasive sponge or scrubber to gently scrub the softened marks. The baking soda will act as a mild abrasive.
- Wipe clean: Wipe away all residue with a clean, damp cloth. Polish with a dry cloth for a streak-free finish.
This method works by rehydrating the burnt food. It is a gentle yet powerful way to remove grime. For issues like burnt water stains, this method is also quite effective. You can find more targeted help on removing burnt water off glass stove top using similar principles.
Method 2: Specialized Glass Stovetop Cleaner and Scraper
For the most stubborn burn marks on glass, a dedicated stovetop cleaner combined with a special scraper is often necessary. These products are formulated to be safe and effective for glass surfaces. They work together to dissolve and lift the carbonized food.
- Apply cleaner: Apply a small amount of the specialized glass stovetop cleaner directly onto the burn mark.
- Spread and wait: Use a clean cloth or paper towel to spread the cleaner evenly over the stain. Let it sit for the time recommended on the product label, usually a few minutes. This allows the cleaner to penetrate and loosen the burnt food.
- Scrape: Hold a specialized razor blade scraper at a shallow angle (about 30 degrees) against the glass. Gently push the scraper under the softened burn mark to lift it off. Work slowly and carefully to avoid scratching the surface.
- Wipe and polish: Wipe away the loosened residue and cleaner with a clean, damp cloth. Then, use a dry microfiber cloth to buff the surface until it shines and no streaks remain.
Always use a clean, sharp razor blade for scraping. Dull blades can drag and scratch the glass. After cleaning, you might want to learn how to keep your black glass stove top without streaks. This prevents new marks and maintains its pristine look.
Cleaning Burn Marks on Gas Stove Grates and Burners
Gas stove components, especially grates and burner caps, endure direct flame and constant spills. This leads to stubborn, carbonized burn marks that are incredibly tough. Removing these requires a different approach than flat surfaces. The key is often prolonged soaking to break down the hardened residue.
These parts are typically made of cast iron, enamel-coated steel, or stainless steel. Each material can withstand more aggressive cleaning than glass but still benefits from appropriate methods. The goal is to loosen the baked-on food without damaging the protective coatings. Let’s explore effective ways to restore these components.
Deep Soaking for Grates and Caps
Soaking is the most effective way to tackle heavy burn marks on gas stove grates and burner caps. This softens the layers of baked-on grime, making them easier to scrub off. You can use several solutions for soaking.
- Remove components: First, ensure your stove is cool. Carefully remove all grates and burner caps.
- Choose a soaking solution:
- Hot, soapy water: Fill a large sink or basin with very hot water and a generous amount of dish soap. Submerge the grates and caps completely.
- Baking soda and vinegar: Place grates in a large basin. Sprinkle generously with baking soda, then pour white vinegar over them. This will cause a fizzing reaction.
- Ammonia (caution!): For extremely stubborn marks, place grates/caps in a heavy-duty sealable plastic bag with 1/4 cup of ammonia. Seal the bag tightly and leave outdoors or in a well-ventilated area overnight. Do not mix ammonia with other cleaners, especially bleach. The fumes are strong, so handle with extreme care.
- Soak time: Let the components soak for several hours, or ideally, overnight. The longer they soak, the more the burnt residue will soften.
- Scrub: After soaking, use a stiff brush (like a dish brush or nylon scrub brush) or a non-abrasive scouring pad to scrub away the softened grime. For intricate areas, an old toothbrush can be helpful.
- Rinse and dry: Rinse all components thoroughly with clean water. Dry them completely before placing them back on the stove. This prevents rust, especially on cast iron grates.
This method works by breaking down the chemical bonds of the burnt food. It makes removal far less strenuous. You might be surprised how much grime comes off with minimal scrubbing after a good soak.
Cleaning Burner Heads and Spark Igniters
The burner heads and spark igniters on a gas stove also accumulate grime. This can affect flame performance and ignition. These parts need careful cleaning to ensure they function properly.
- Remove components: Ensure the stove is off and cool. Remove the burner caps and then the burner heads (often two separate pieces).
- Clean burner heads: For burner heads with clogged ports, use a straightened paper clip or a small needle to clear the holes. Do not use toothpicks, as they can break inside. Soak the burner heads in a solution of warm water and dish soap for 30 minutes. Scrub them with a brush, then rinse thoroughly. Ensure they are completely dry before reassembling.
- Clean spark igniters: The small, white ceramic igniter pins can get greasy. Gently wipe them with a damp cloth or a cotton swab dipped in rubbing alcohol. Be very careful not to bend or damage them. If they are wet, they will not spark, so ensure they are dry before attempting to light the burner.
- Reassemble: Once all components are clean and dry, carefully place them back in their correct positions. Ensure burner caps are seated properly to prevent uneven flames.
Cleaning these parts regularly helps maintain your stove’s efficiency. It also ensures safe operation and a consistent flame.
Preventing Future Burn Marks: Best Practices for Stove Maintenance
The best way to deal with burn marks is to prevent them from happening in the first place. Regular maintenance and mindful cooking habits can significantly reduce the build-up of burnt-on residue. A clean stove not only looks better but also functions more efficiently.
Adopting a few simple routines after each use can save you hours of scrubbing later. This involves immediate action against spills and protective measures during cooking. Prevention is always easier than a deep clean.
Wipe Up Spills Immediately
The simplest and most effective prevention method is cleaning spills as they happen. When food or liquid spills onto a hot surface, it quickly bakes on. Waiting even a few minutes can make a fresh spill a stubborn burn mark.
- Act quickly: As soon as you notice a spill, if it’s safe to do so (and the stove is cool enough not to cause further burning), wipe it up with a damp cloth.
- Cool down first: If the spill is on a very hot burner or has already started to smoke, turn off the burner. Let it cool for a moment before attempting to wipe it.
- Use appropriate tools: For glass stovetops, a soft cloth or paper towel is usually enough for fresh spills. For gas or electric coil stoves, any clean cloth will work.
Immediate cleanup prevents the spill from carbonizing onto the surface. This saves you from the struggle of scrubbing baked-on stains later. Make it a habit after every cooking session.
Regular Light Cleaning
Beyond immediate spill response, a quick wipe-down after each cooking session helps. This removes any small splatters or residue that might not seem significant but can build up over time. This keeps your stove looking good day-to-day.
- Daily wipe: After the stove has cooled, wipe down the entire cooktop surface with a damp cloth and a little dish soap.
- Rinse and dry: Follow with a clean, damp cloth to remove soap residue. Then, dry the surface thoroughly with a microfiber cloth to prevent water spots and streaking.
- Check under grates/coils: Periodically lift gas grates or electric coils to wipe away any hidden crumbs or small spills that might have fallen through.
Consistent light cleaning stops minor residue from becoming major burn marks. This routine takes only a few minutes but makes a huge difference.
Use Proper Cookware and Techniques
The type of cookware you use and how you cook can also influence the occurrence of burn marks. Improper cookware can lead to spills and uneven heating.
- Flat-bottomed pans: Ensure your pots and pans have flat bottoms. This provides even heat distribution, reducing the likelihood of food burning in one spot and creating spills.
- Correct pan size: Use pans that match the size of your burner. A too-small pan on a large burner can allow heat to escape and scorch the surrounding stove surface. A too-large pan can spill over the edges easily.
- Avoid boil-overs: Monitor boiling liquids closely. A pot boiling over is a common cause of severe burn marks. Reduce heat once liquids reach a boil.
- Use lids: Lids help contain splatters and prevent boil-overs. They also improve cooking efficiency.
By following these simple practices, you can dramatically reduce the frequency and severity of burn marks on your stove. Prevention is truly the key to keeping your stove clean and looking its best.
FAQ Section
Can all burn marks be completely removed from a stove?
Most burn marks can be removed or significantly reduced. The success depends on the stove material and the burn’s severity. Fresh or minor marks are easier to clean. Deeply etched or melted marks, especially on glass, might leave a slight shadow or require professional attention.
Is it safe to use abrasive cleaners on all stove types?
No, it is not safe. Abrasive cleaners or scourers can scratch and damage delicate surfaces like glass-ceramic stovetops. Use them only on materials designed to withstand them, like cast iron grates or certain enamel finishes. Always check your stove’s manual for specific cleaning recommendations.
How often should I clean my stove to prevent burn marks?
Ideally, wipe down your stove after every use to remove fresh spills. A light daily cleaning prevents build-up. For a deeper clean targeting potential burn marks, aim for weekly or bi-weekly. This consistent maintenance stops small spills from becoming stubborn, baked-on stains.
What if a burn mark is still there after multiple cleaning attempts?
If a burn mark persists, it might be deeply embedded or have damaged the surface. You can try a stronger commercial cleaner designed for your stove type. For glass stovetops, a razor blade scraper used carefully is often the final solution. If all fails, consider professional help for severe damage.
Are natural cleaners effective for severe burn marks?
Natural cleaners like baking soda and vinegar are effective for many moderate burn marks. They help lift and loosen grime. However, for severe, deeply carbonized, or melted burn marks, you may need a specialized commercial stove cleaner or a razor blade scraper to achieve full removal.
Can I use a metal scouring pad on my glass stovetop?
No, you should never use a metal scouring pad, steel wool, or abrasive scrubbers on a glass stovetop. These materials are too harsh. They will scratch the smooth glass surface, leaving permanent damage. Always use soft cloths, non-abrasive sponges, or specialized glass stovetop pads.
Conclusion
Cleaning burn marks off your stove might seem daunting at first. However, with the right knowledge and tools, it is a manageable task. We have explored various effective methods, from gentle household solutions like baking soda and vinegar to specialized cleaners and scrapers. Remember, the key is to match the cleaning approach to your specific stove type and the severity of the burn mark.
Prioritize safety by ensuring your stove is cool and disconnected from power before you begin. For everyday maintenance, wiping up spills immediately is your best defense against stubborn marks. By consistently applying these tips, you can maintain a clean, sparkling stove that enhances your kitchen. Don’t let those burn marks sit any longer; take action today and restore your stove’s beauty. A clean stove makes cooking more enjoyable and keeps your kitchen looking its best.
- stove cleaning
- burnt stove
- remove burn stains
- cooktop maintenance
- kitchen cleaning tips