· Kitchen Cleaning · 20 min read
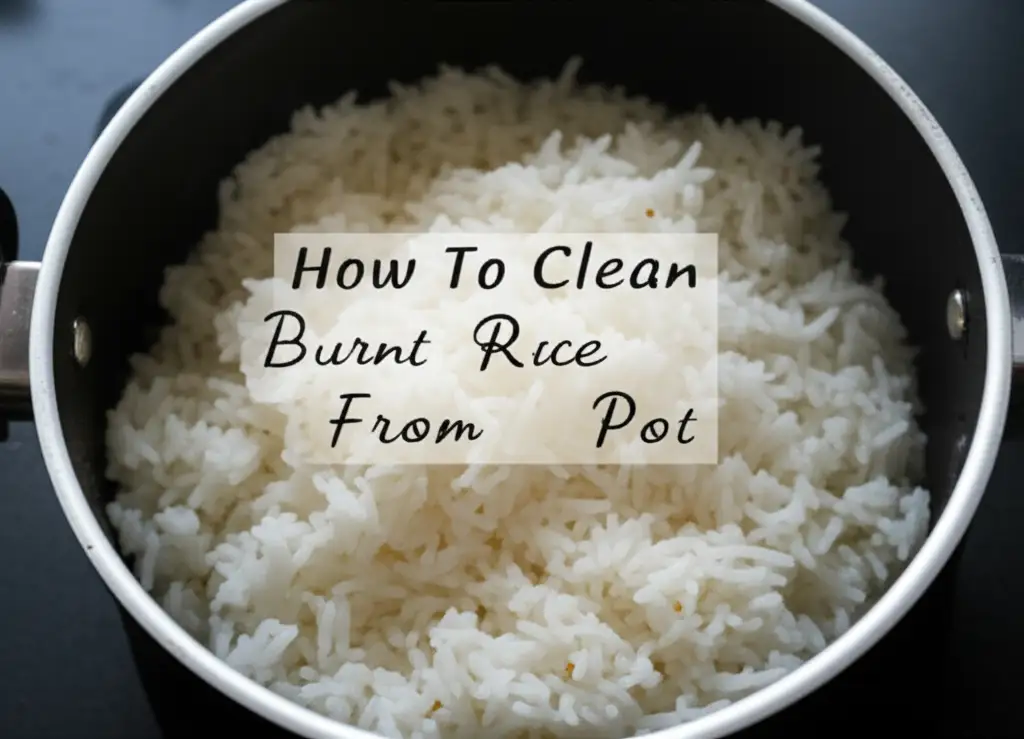
How To Clean Burnt Rice From Pot
Rescue Your Pot: How To Clean Burnt Rice Effectively
We have all been there. You are cooking rice, get distracted for a moment, and suddenly a harsh smell fills your kitchen. You look into the pot and find a layer of stubborn, burnt rice stuck to the bottom. It feels like a disaster, a ruined meal, and a permanently damaged pot. Do not worry. Cleaning burnt rice from a pot is easier than you think.
This guide helps you rescue your cookware. It covers several simple methods to tackle even the most scorched rice. We explore common household items that turn into powerful cleaning agents. You will also learn how to prevent this sticky situation in the future. Let us turn that kitchen mishap into a success story.
Takeaway
- Soak immediately: Always start by soaking the pot with water to loosen residue.
- Use baking soda and vinegar: These household staples create a powerful cleaning reaction.
- Consider natural abrasives: Salt and lemon can help scrub away tough spots.
- Adapt to pot material: Different materials need different care to avoid damage.
- Prevent future burns: Master cooking techniques to avoid burnt rice altogether.
Cleaning burnt rice from a pot involves specific steps. First, remove loose rice. Then, apply a soaking method using water and dish soap, or a mixture of baking soda and vinegar, allowing time for the burnt residue to loosen. Finally, gently scrape and scrub the pot clean.
Why Rice Burns and How to Avoid It
Burnt rice sticks to the bottom of a pot because of a few common issues. Understanding these helps you avoid the problem in the future. High heat without enough liquid is often the main culprit. The rice on the bottom gets direct, intense heat.
Without sufficient water to absorb that heat, the grains quickly dry out and char. My own experiences taught me this lesson many times. A simple adjustment can save your pot and your meal.
Common Causes of Burnt Rice
Several factors contribute to rice burning. Knowing these helps prevent the issue.
- Low Water Content: Rice needs a precise water-to-rice ratio. Too little water means the rice absorbs it quickly. The heat then starts to burn the dry grains.
- High Heat: Cooking rice on high heat makes water evaporate too fast. The bottom layer of rice touches the hot pot directly. This quickly leads to charring.
- Infrequent Stirring: Some rice types, especially sticky rice, benefit from occasional stirring. This prevents grains from settling and sticking. It helps distribute heat evenly.
- Improper Pot: Thin-bottomed pots conduct heat too efficiently. They create hot spots that burn rice quickly. A heavy-bottomed pot distributes heat better.
- Lifting the Lid Too Often: Opening the lid lets steam escape. Steam helps cook the rice evenly and keeps it moist. Losing steam means drier rice at the bottom.
Simple Prevention Tips
Preventing burnt rice is easier than cleaning it. Follow these steps for perfect rice every time.
- Use the Right Ratio: Check your rice package for the correct water-to-rice ratio. Generally, it is 1 part rice to 2 parts water for most white rice. My trick is to add an extra splash of water if I am unsure.
- Cook on Low Heat: Bring water to a boil, then immediately reduce heat to the lowest setting. Cover the pot tightly. This gentle heat cooks rice slowly and evenly.
- Use a Heavy-Bottomed Pot: A thick-bottomed pot distributes heat more evenly. This reduces hot spots that cause burning. Cast iron or stainless steel pots work well. You can learn more about how to clean stainless steel pans burnt if you encounter issues with these.
- Resist the Urge to Stir: Once covered, let the rice cook undisturbed. Stirring releases steam and can break rice grains. Only stir if the recipe specifically calls for it.
- Do Not Rush It: Give rice enough time to absorb water. Let it rest off the heat for 5-10 minutes after cooking. This steams the grains and makes them fluffy.
The Soaking Method: Your First Line of Defense
When you first discover burnt rice in your pot, do not panic. The simplest method is often the most effective for initial damage. Soaking the pot immediately helps loosen the burnt residue. This step is crucial for an easier cleaning process later.
I always tell myself to resist the urge to scrape immediately. That can scratch your pot. A good soak makes a big difference. This method works well for light burns. It also prepares the pot for tougher cleaning if needed.
How to Start Soaking
Start soaking the pot as soon as possible. This prevents the burnt rice from hardening further.
- Remove Loose Rice: First, scoop out any unburnt rice from the pot. You might salvage some of the meal. Do this gently to avoid embedding burnt bits further.
- Add Water and Dish Soap: Fill the pot with hot water. Add a generous squirt of dish soap. Make sure the water covers all the burnt areas.
- Let It Sit: Leave the pot to soak for at least a few hours. For heavily burnt rice, soak it overnight. The warm, soapy water slowly works to soften the stuck-on residue.
- Gentle Scrape: After soaking, try to gently scrape the burnt rice using a wooden spoon or a plastic scraper. Avoid metal utensils, especially on non-stick surfaces. Most of the residue should come off easily.
- Repeat if Necessary: If some parts remain, repeat the soaking process. Sometimes a second soak helps with the most stubborn spots. This method is surprisingly effective for common kitchen spills.
The soaking method is a gentle approach. It minimizes the need for harsh scrubbing. This protects the pot’s surface. It is the first step I take whenever I face a burnt pot situation. This method can save you a lot of effort in the long run.
Baking Soda and Vinegar: A Powerful Duo for Burnt Rice
When simple soaking does not quite do the trick, it is time to bring in the big guns. Baking soda and vinegar form a dynamic duo for cleaning stubborn burnt food. This combination creates a fizzing reaction that effectively lifts burnt rice from the pot’s surface. I have personally relied on this method countless times. It always delivers impressive results.
The science behind it is simple. Baking soda (sodium bicarbonate) is a mild abrasive and a base. Vinegar (acetic acid) is an acid. When mixed, they react to produce carbon dioxide gas. These bubbles help dislodge the burnt particles. This makes them easy to wipe away. This method is safe for most pot materials, including stainless steel and even some non-stick surfaces, if used gently.
Step-by-Step Guide with Baking Soda and Vinegar
This method requires a few simple steps. Follow them carefully for the best outcome.
- Remove Excess: First, scrape out any loose, unburnt rice from the pot.
- Add Water: Pour just enough water into the pot to cover the burnt rice layer.
- Heat Gently: Place the pot on the stove and bring the water to a gentle simmer. Do not boil vigorously. Let it simmer for about 5-10 minutes. This softens the burnt rice.
- Add Baking Soda: Remove the pot from the heat. Carefully pour out most of the water, leaving just a thin layer covering the burnt base. Sprinkle a generous amount of baking soda over the burnt areas. You want a good, visible layer.
- Add Vinegar: Slowly pour white vinegar over the baking soda. You will see a fizzing reaction. This is the carbon dioxide gas working to lift the burnt bits.
- Let It Sit: Let the mixture sit for at least 15-30 minutes, or even a few hours for really tough burns. The longer it sits, the more effective it will be. I often let it sit while I clean the rest of the kitchen.
- Scrub Gently: After soaking, use a wooden spoon, plastic scraper, or a non-scratch scrub pad to gently scrape away the loosened burnt rice. The residue should come off much more easily.
- Rinse and Wash: Rinse the pot thoroughly with warm water. Wash it with dish soap as usual. Repeat the process if some stubborn spots remain.
This method works wonders for various burnt food situations. You can use a similar approach when you need to clean with vinegar and baking soda in other areas of your home. The gentle bubbling action of this duo makes it a go-to solution for many cleaning challenges. It saves your pots and avoids harsh chemicals.
Dish Soap and Water Method: For Stubborn Residue
Sometimes, burnt rice can be extra stubborn. If simple soaking or even the baking soda and vinegar method does not entirely clear the burnt residue, an enhanced dish soap and water technique can help. This method leverages heat to amplify the cleaning power of dish soap. It is especially effective for those burnt layers that seem glued to the pot.
I find this approach useful when the burnt layer is thick and hardened. The heat helps to rehydrate and loosen the carbonized rice. Dish soap then works to break down any greasy or oily components. This combination creates a powerful solution. It allows you to scrape off the remaining grime with less effort.
How to Use the Dish Soap and Water Method
This method is straightforward. It uses common kitchen items.
- Remove Loose Debris: First, scrape out any loose, unburnt rice or easily removable burnt pieces. Use a wooden or plastic utensil to avoid scratching.
- Fill with Water and Soap: Fill the pot with enough water to cover the burnt area. Add a generous amount of liquid dish soap. About 1-2 tablespoons should be sufficient.
- Bring to a Boil: Place the pot on the stove. Bring the water and soap mixture to a boil.
- Simmer: Once boiling, reduce the heat to a low simmer. Let it simmer for 10-20 minutes. The simmering action helps to break down the burnt residue. Steam and heat soften the tough, carbonized layer.
- Cool Down: Turn off the heat. Let the pot cool down completely. As it cools, the burnt residue often loosens further. Do not rush this step.
- Scrape and Scrub: Once cool, carefully pour out the soapy water. Use a wooden spoon, a plastic scraper, or a non-scratch scrubbing sponge to gently scrape the burnt rice off the bottom and sides of the pot. You should find it much easier to remove.
- Rinse and Wash: Rinse the pot thoroughly with warm water. Then, wash it with your usual dish soap and sponge. If any small spots remain, you can repeat the process or use a gentle abrasive like baking soda paste.
This method is a reliable option for various burnt food scenarios. It works particularly well for food that has caramelized or created a sticky, burnt layer. It is a gentler alternative to harsh chemicals. It relies on the power of heat and common detergents.
Salt and Lemon: Natural Abrasives for Burnt Pots
For a more natural and mildly abrasive approach, consider using salt and lemon. This method combines the physical scrubbing power of coarse salt with the acidic properties of lemon juice. It is excellent for tackling burnt rice, especially on stainless steel pots. I often turn to this method when I prefer to avoid chemicals and want a fresh scent in my kitchen.
Coarse salt acts as a gentle yet effective abrasive. It helps to scrape off the burnt residue without scratching the pot’s surface, unlike steel wool. Lemon juice, on the other hand, contains citric acid. This acid helps to break down the burnt organic matter. The combination works synergistically to lift and remove stubborn scorch marks. This method is particularly useful for burnt stainless steel pots, as these materials can withstand mild abrasion.
How to Use Salt and Lemon
This natural cleaning method is simple and effective.
- Remove Loose Debris: First, remove any loose, unburnt rice or large pieces of burnt residue.
- Add Water (Optional): For very stubborn burns, you can add a thin layer of water to the bottom of the pot. Bring it to a simmer for 5-10 minutes. This helps to loosen the burnt layer slightly. Then, pour out the water, leaving the pot moist.
- Sprinkle Salt: Sprinkle a generous amount of coarse salt (like kosher salt or sea salt) onto the burnt areas. You need enough salt to form a visible layer.
- Add Lemon Juice: Squeeze fresh lemon juice directly over the salt. Alternatively, you can cut a lemon in half and use it as a scrubbing tool. The acid in the lemon juice will react with the burnt residue.
- Scrub with Lemon Half: Use the cut half of the lemon as a scrubbing tool. Rub the lemon over the salt and burnt areas in circular motions. The salt acts as an abrasive, and the lemon juice helps dissolve the burnt matter. For extra tough spots, you can use a non-scratch scrub pad.
- Let It Sit (Optional): For severe burns, let the salt and lemon mixture sit in the pot for 15-30 minutes. This allows the acid more time to work.
- Rinse and Wash: Rinse the pot thoroughly with warm water. Most of the burnt residue should wash away. Wash the pot with dish soap as usual. Repeat if necessary.
This method is gentle on most pot surfaces. It leaves a fresh, clean scent. It is a fantastic option for cleaning burnt stainless steel pots. You might also find similar natural cleaning principles effective when you need to clean burnt stainless steel pots from other types of food.
Cream of Tartar: An Acidic Helper
Cream of tartar is another fantastic, lesser-known household item for cleaning burnt pots. It is an acidic powder often used in baking. Its acidic nature makes it effective at breaking down tough, burnt-on food residues, including rice. I have found it particularly useful for giving stainless steel pots a renewed shine after a burn.
This fine white powder is technically potassium bitartrate, a byproduct of winemaking. When combined with water and heat, its mild acidity goes to work on the carbonized layers. It is a gentler alternative to some harsher chemicals. It is also excellent for removing discoloration from stainless steel, making your pots look good as new.
How to Use Cream of Tartar
Using cream of tartar for burnt rice is simple.
- Remove Loose Bits: First, scrape out any easily removable burnt rice from the pot.
- Create a Paste: Mix a few tablespoons of cream of tartar with a small amount of water to form a thick paste. The paste should be spreadable but not too watery.
- Apply the Paste: Spread this paste generously over the burnt areas inside the pot. Make sure all scorched parts are covered.
- Add Water and Heat: Pour enough water into the pot to cover the paste and the burnt areas. Bring the water to a gentle simmer on the stove.
- Simmer: Let it simmer for about 10-15 minutes. The heat activates the cream of tartar. It helps to lift the burnt residue.
- Cool and Scrape: Remove the pot from the heat. Let it cool down completely. Once cool, use a wooden spoon or plastic scraper to gently scrape away the loosened burnt rice.
- Rinse and Wash: Rinse the pot thoroughly. Wash it with dish soap and a sponge. Your pot should be significantly cleaner. Repeat the process for very stubborn spots.
Cream of tartar is a versatile cleaner for many kitchen items. It works well not just for burnt food but also for polishing and removing stains from stainless steel and aluminum. It is a gentle yet powerful option to restore your pots.
Specific Pot Materials and Care: What Not to Do
The type of pot material matters when cleaning burnt rice. Different materials react differently to various cleaning agents and scrubbing techniques. Using the wrong method can damage your pot permanently. I learned this the hard way with a beloved non-stick pan. Knowing your pot’s material helps you choose the safest and most effective cleaning approach.
Understanding what not to do is as important as knowing what to do. Harsh abrasives or strong chemicals can ruin coatings or etch surfaces. Always prioritize gentle methods first. Then, gradually increase intensity if needed, always considering the material. This careful approach preserves your cookware for a long time.
Stainless Steel Pots
Stainless steel is durable and resistant. It can handle most cleaning methods.
- Do Use: Baking soda and vinegar, dish soap and water (boiled), salt and lemon, cream of tartar. These methods are generally safe and effective. You can also use a non-scratch scourer or brush for tough spots.
- Do Not Use: Steel wool or harsh abrasive pads can scratch the surface. This makes it dull and potentially prone to sticking in the future. Avoid extremely strong chemical cleaners unless specifically designed for stainless steel. When cleaning burnt oil from stainless steel pan, similar methods apply.
Non-Stick Pots
Non-stick coatings are delicate. They require gentle care to prevent damage.
- Do Use: Soaking with warm, soapy water is best. The baking soda and vinegar method can be used, but avoid excessive scrubbing. Use only soft sponges, silicone, or wooden utensils.
- Do Not Use: Absolutely no metal scrapers, steel wool, abrasive pads, or harsh chemical cleaners. These will scratch and ruin the non-stick coating, making the pot unusable. High heat can also damage the coating over time, causing it to flake. This is similar to how you would clean a burnt non-stick baking sheet.
Aluminum Pots
Aluminum can be susceptible to discoloration. It reacts with certain substances.
- Do Use: Soaking with dish soap and water. Baking soda and water paste. Gentle scrubbing with a non-scratch pad. Cream of tartar can help remove discoloration.
- Do Not Use: Vinegar or other strong acidic cleaners can cause pitting or discoloration, especially on unanodized aluminum. Avoid harsh abrasives that can scratch the softer surface.
Cast Iron Pots
Cast iron needs specific care to maintain its seasoning.
- Do Use: Hot water and a stiff brush or scraper. A paste of coarse salt and a little water for gentle abrasion. Re-season the pot after deep cleaning to restore its non-stick properties.
- Do Not Use: Harsh dish soap, as it can strip the seasoning. Avoid abrasive pads or steel wool that can damage the seasoning. Do not let cast iron air dry; dry it immediately after washing to prevent rust, then apply a thin layer of oil.
Knowing your pot’s material ensures you apply the correct cleaning method. This prevents further damage and keeps your cookware in good condition.
Tools and Safety Tips for Cleaning Burnt Pots
Cleaning burnt rice effectively also depends on using the right tools and following safety precautions. The wrong tool can scratch your pot. Overlooking safety can lead to skin irritation or other issues. I always make sure I have the necessary equipment ready before tackling a burnt pot.
Safety in the kitchen is paramount. Cleaning chemicals, even natural ones, can be irritating. Always protect your hands and ensure good ventilation. This combination of proper tools and safety measures makes the cleaning process smoother and safer for you and your cookware.
Essential Tools for Cleaning Burnt Pots
Having the right tools makes a big difference.
- Wooden Spoon or Plastic Scraper: These are your best friends for gently dislodging burnt rice without scratching the pot’s surface. They are essential for non-stick cookware.
- Non-Scratch Scrub Pad or Sponge: Look for sponges specifically labeled as “non-scratch” or “safe for non-stick.” These provide abrasive power without causing damage.
- Old Toothbrush or Detail Brush: For getting into tight corners or around rivets, a small brush can be very useful.
- Rubber Gloves: Protect your hands from hot water, dish soap, and cleaning solutions. This prevents skin irritation.
- Measuring Cups/Spoons: For precise application of ingredients like baking soda, vinegar, or cream of tartar.
- Towels: For drying the pot thoroughly after cleaning, especially for cast iron to prevent rust.
Safety Tips for Cleaning Burnt Pots
Prioritize your safety during the cleaning process.
- Ventilation: When using vinegar or other strong-smelling agents, ensure your kitchen is well-ventilated. Open windows or turn on the range hood.
- Gloves: Always wear rubber gloves. This protects your hands from hot water, dish soap, and any cleaning agents. It also keeps your hands clean.
- Test on an Inconspicuous Area: If you are unsure about a cleaning method or agent, test it on a small, hidden part of your pot first. This helps prevent accidental damage.
- Avoid Harsh Chemicals: For most burnt food, common household items like baking soda, vinegar, and salt are sufficient. Avoid industrial-strength cleaners unless absolutely necessary and clearly specified for cookware.
- Do Not Over-Scrub: Aggressive scrubbing can damage pot surfaces. Let the soaking or chemical reaction do most of the work. Use gentle, circular motions.
- Cool Down Pots: Always let hot pots cool down completely before starting the cleaning process. Rapid temperature changes can warp some materials, and hot water can scald.
- Dispose of Residue Properly: Collect the burnt residue and dispose of it in the trash, not down the drain. Large amounts of food residue can clog pipes. You can also refer to tips for how to clean burnt sugar from a pan, which often involves similar tools and safety measures.
By using the right tools and staying safe, you can effectively clean your burnt pots. This ensures your cookware lasts longer.
Frequently Asked Questions (FAQ)
Can I use steel wool on burnt rice?
You should avoid steel wool for most pots. It can scratch and damage surfaces, especially non-stick, aluminum, and even stainless steel over time. For stainless steel, gentle alternatives like baking soda paste or specialized non-scratch scourers are safer. Always choose a cleaning tool appropriate for your pot’s material to prevent irreversible damage.
How long should I soak a burnt rice pot?
Soaking time varies based on the severity of the burn. For light burns, a few hours may suffice. For heavily burnt rice, an overnight soak (8-12 hours) is often necessary. The goal is to allow the water or cleaning solution to fully penetrate and loosen the stuck-on residue, making it easier to scrape off without force.
Does baking soda damage pots?
No, baking soda is generally safe for most pot materials, including stainless steel, cast iron, and non-stick when used correctly. It is a mild abrasive and a gentle chemical cleaner. Avoid vigorous scrubbing on non-stick surfaces, even with baking soda, as excessive force can still cause wear. Always rinse thoroughly after use.
What if the rice is really badly burnt?
For very badly burnt rice, you may need to combine methods. Start with a long soak (overnight). Then, use the baking soda and vinegar boiling method. Repeat these steps if necessary. Patience is key. Avoid harsh scraping that can damage the pot. Consider letting it soak for a full 24 hours if the burn is extreme.
Is it safe to eat rice from a pot that had burnt rice?
It is generally safe to eat the unburnt rice from the pot, provided it did not come into direct contact with the burnt, carbonized layer. However, if the entire pot has a strong burnt smell or taste permeating the unburnt rice, it might affect the flavor negatively. Separate the edible rice carefully from the burnt bottom.
Can burnt rice ruin a pot permanently?
No, burnt rice rarely ruins a pot permanently, unless you use aggressive cleaning methods that cause physical damage. While it can create stubborn stains, most pots can be fully restored with the right cleaning techniques. Non-stick pots are more susceptible to permanent damage if the coating is scratched or overheated.
Conclusion
Finding burnt rice stuck to your pot can feel like a frustrating kitchen disaster. Yet, you do not need to discard your cookware. Cleaning burnt rice from a pot is achievable with simple household items and a bit of patience. We have explored several effective methods, from initial soaking to using baking soda, vinegar, salt, lemon, and even cream of tartar. Each approach offers a way to tackle that stubborn, charred residue.
Remember to choose the right method for your pot’s material. Stainless steel pots can withstand more rigorous cleaning. Non-stick surfaces demand a gentler touch. Always prioritize safety by using proper tools and ensuring good ventilation. By following these steps, you can restore your pots to their former glory. This saves money and extends the life of your cookware. Next time you encounter a burnt rice mishap, you will know exactly how to clean burnt rice from your pot. Give these methods a try, and share your own successful cleaning stories with us!
- burnt pot
- rice cleaning
- kitchen hacks
- pot cleaning
- burnt food
- household tips
- cleaning tips