· Camera Care · 15 min read
How To Clean Camera Mirror
Safely Clean Your Camera Mirror: A Comprehensive Guide
A clean camera is happy camera. Dust and debris on your camera’s mirror can affect your photography experience. You might see specks in your viewfinder. These specks can distract you while composing shots. Learning how to clean a camera mirror correctly is a skill every photographer should master. This guide explains simple steps to help you clean your camera mirror without causing damage. We will cover necessary tools, step-by-step instructions, and important precautions. Keeping your gear clean helps maintain its performance. It also helps preserve image quality.
Takeaway
Cleaning your camera mirror requires care and the right tools.
- Always use a dedicated camera air blower first.
- Never touch the mirror surface directly with your fingers.
- Use specialized cleaning tools made for cameras if needed.
- Distinguish between mirror dust and sensor dust.
- Seek professional help for stubborn spots or if unsure.
To clean a camera mirror, first use an air blower to remove loose dust. If dust remains, use a soft, lint-free camera brush or a specialized sensor cleaning swab, applied with extreme caution. Avoid touching the mirror with your fingers or using harsh cleaning solutions to prevent damage.
Understanding Your Camera’s Mirror and Its Importance
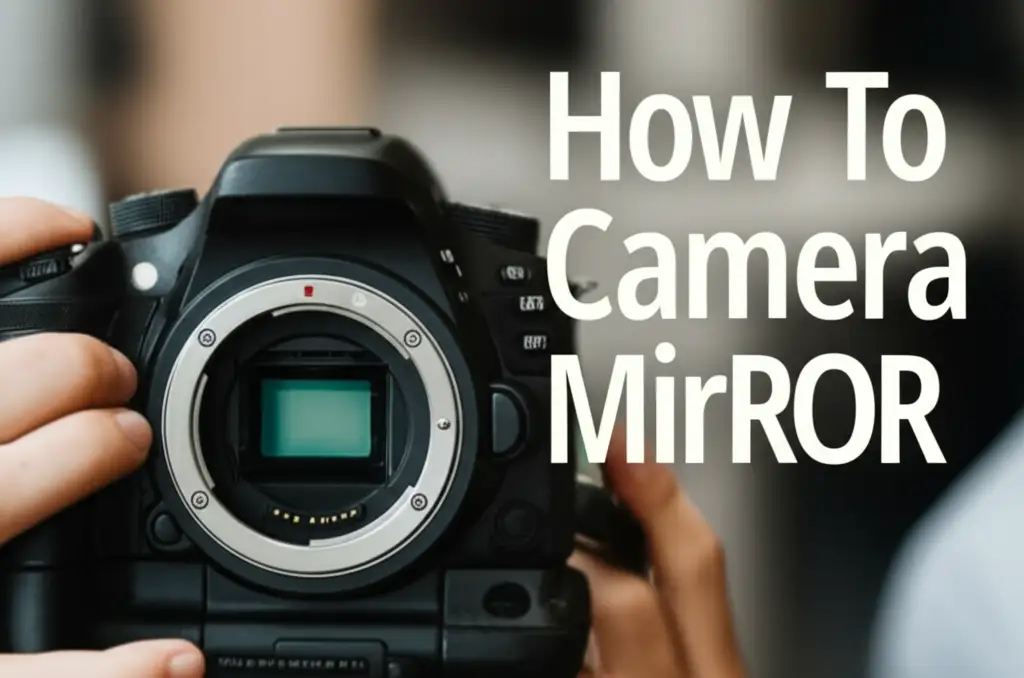
Your camera’s mirror is a vital part of a Digital Single-Lens Reflex (DSLR) camera. It sits in front of the image sensor. This mirror reflects light up to your viewfinder. When you look through the viewfinder, you see the scene through your lens. This reflection helps you frame and focus your shot. When you press the shutter button, the mirror flips up. This allows light to reach the sensor. The sensor then records the image.
The mirror surface is very delicate. It is a first-surface mirror. This means the reflective coating is on the front. It is not behind glass like a regular bathroom mirror. This design offers a brighter and clearer image in the viewfinder. However, it also makes the surface very fragile. Dust or smudges on the mirror can make your viewfinder look dirty. They can obstruct your view. It is important to know that mirror dust does not usually show up in your final photos. This is because the mirror moves out of the light path during exposure. However, dust on the sensor will appear in your images. Understanding this difference is key to proper camera maintenance. You can also learn about cleaning other camera parts, like your iPhone camera for better photo quality.
The mirror gathers dust over time. This happens when you change lenses. It also occurs when you shoot in dusty environments. Keeping the mirror clean helps maintain a clear viewfinder. This lets you compose your shots without distraction. Regular inspection is a good habit. You can then address minor dust issues before they get worse. Ignoring dust can lead to more embedded particles. These are harder to remove safely. Proper care ensures your camera performs at its best.
Essential Tools for Effective Camera Mirror Cleaning
Before you start cleaning, gather the right tools. Using improper tools can cause permanent damage to your camera. Do not use household cleaning cloths or sprays. These items often leave fibers or chemical residues. We only want tools designed for delicate camera components. Investing in a good camera cleaning kit is wise. These kits include items specifically for optical surfaces.
Here is a list of essential tools:
- Rocket Blower: This is your primary tool. A rocket blower is a bulb-shaped device with a nozzle. It provides a strong burst of air. This air removes loose dust particles. It does not touch the mirror. This makes it the safest first step. Always use a clean blower.
- Sensor Swabs (or Mirror Swabs): These are small, lint-free paddles. They are often individually sealed. They come in sizes specific to your camera’s sensor. While designed for sensors, some photographers use them with extreme care for the mirror. They are used for stubborn spots.
- Lens Cleaning Pen: Some pens have a soft brush on one end. They also have a carbon cleaning tip on the other. The brush can gently remove dust. Use the brush only. Do not use the carbon tip on the mirror. The carbon tip is for lens elements only.
- Microfiber Cloth (Lens Grade): These cloths are very soft and lint-free. They are suitable for cleaning camera bodies or external lens parts. Avoid using them directly on the mirror. The mirror is too delicate for wiping.
- Specialized Cleaning Solution: Use only solutions made for camera sensors or optical elements. Do not use household glass cleaners. Solutions like isopropyl alcohol are not safe for mirrors. They can strip the delicate coating.
Remember, the goal is to remove dust without touching the mirror surface. Most mirror cleaning involves only air. Wiping is a last resort and requires extreme caution. You can also explore how to clean a Ring camera lens for similar delicate cleaning tips. Ensuring you have the correct supplies is the first step to a successful cleaning process. These tools help keep your camera optics clear and clean.
Step-by-Step Guide: Safely Cleaning Your DSLR Mirror
Cleaning your camera mirror requires patience and precision. Do not rush the process. Find a clean, dust-free environment. A well-lit room helps you see dust particles. Charge your camera battery fully before you start. This ensures the mirror lock-up function works without interruption. Follow these steps carefully to clean your camera mirror.
Preparation and Initial Inspection
- Find a Clean Space: Work on a flat, stable surface. Avoid windy areas or places with active dust. A room with minimal airflow is best.
- Charge Battery: Make sure your camera battery is full. This is crucial for mirror lock-up. An empty battery can cause the mirror to drop unexpectedly.
- Remove Lens: Take off your camera lens carefully. Point the camera body down. This helps prevent more dust from entering.
- Inspect the Mirror: Look into the camera’s mirror chamber. Use a small LED flashlight to illuminate the mirror surface. Look for dust, lint, or smudges.
Dust Removal with an Air Blower
- Activate Mirror Lock-Up (If Available): Most DSLRs have a mirror lock-up mode. This raises the mirror and keeps it open. Check your camera manual for specific instructions. This mode usually found in the custom functions or setup menu. This gives you better access to the mirror.
- Position Camera: Hold the camera body face down. This helps dust fall out naturally.
- Use Rocket Blower: Hold your rocket blower close to the mirror. Do not touch the mirror with the blower tip. Give several short, firm puffs of air. Aim the air at different angles. This helps dislodge dust. Do not blow air directly from your mouth. Your breath contains moisture droplets. These droplets can leave marks. Repeat this step a few times. Re-inspect the mirror after each attempt. Most mirror dust will come off with just the blower. This method is safe and effective. It prevents physical contact with the delicate mirror surface.
Addressing Stubborn Spots (with extreme caution)
If dust remains after using the blower, you have a stubborn spot. Proceed with extreme caution. Wiping the mirror should be a last resort. Do not use any regular cleaning solutions. You should not use any product containing alcohol. Never apply liquid directly to the mirror.
- Soft Camera Brush: If you have a clean, dedicated camera brush, you may try this. Gently touch only the dust particle with the very tip of the brush. Do not sweep the brush across the mirror. This can scratch the surface. This method is riskier than air blowing. It can also transfer oils or dust if the brush is not perfectly clean.
- Specialized Mirror/Sensor Swab: If a smudge or sticky particle is present, use a specialized, individually wrapped sensor swab. These are designed for wet cleaning of sensors. Use them dry for mirrors. Gently dab the swab on the speck. Do not wipe or apply pressure. This is very risky. It is often better to leave small, stubborn marks on the mirror. These do not affect image quality. For more general mirror cleaning, you can find methods on how to clean a mirror without Windex, though those methods are for household mirrors and not suitable for camera mirrors.
Reassembly and Final Check
- Close Mirror/Reattach Lens: Once satisfied, turn off your camera to let the mirror return to its normal position. Reattach your lens immediately. This prevents new dust from entering.
- Check Viewfinder: Look through the viewfinder again. See if the dust is gone. If dust remains, re-evaluate if it is mirror dust or sensor dust.
Remember, the mirror is highly sensitive. Less is more when cleaning it. Most dust on the mirror can be removed with just an air blower. Avoid aggressive actions. These can cause costly damage.
Recognizing Mirror Dust Versus Sensor Dust
Understanding the difference between dust on your camera’s mirror and dust on its sensor is crucial. Each type of dust requires a different cleaning approach. Misidentifying the dust can lead to unnecessary cleaning efforts or even damage. Your camera mirror lives inside a DSLR body. The sensor is directly behind it.
Dust on the Mirror
- Where you see it: Dust on the mirror is visible when you look through your camera’s viewfinder. It appears as specks or fibers. These specks might be sharp or slightly blurry. They are fixed in position relative to your view.
- Effect on photos: Mirror dust does not appear in your actual photographs. This is because the mirror flips up and out of the light path when you take a picture. The mirror’s job is for composing the shot only.
- Cleaning approach: For mirror dust, use an air blower as the primary tool. Very rarely, a soft, dedicated camera brush may be used with extreme care.
Dust on the Sensor
- Where you see it: Dust on the sensor appears in your actual photographs. It shows up as dark, blurry, or sharp spots on your images. These spots are most noticeable in photos with a clear, bright sky or a plain background. They become more prominent at narrower apertures (higher f-numbers, like f/16 or f/22).
- Effect on photos: Sensor dust directly affects your image quality. It appears as imperfections on your digital files.
- Cleaning approach: Sensor cleaning is a more delicate and direct process. It often involves specialized sensor cleaning swabs and solutions. Many photographers prefer professional sensor cleaning. Attempting to clean the sensor requires specific knowledge and tools. It carries higher risks of damage if done incorrectly.
How to Test for Sensor Dust
To check for sensor dust:
- Set Camera: Attach a lens and set your camera to Aperture Priority mode (Av or A).
- Choose Aperture: Set your aperture to a narrow value, such as f/16 or f/22.
- Focus: Point your camera at a plain, well-lit surface. A clear sky or a white wall works well. Make sure the lens is out of focus. This ensures any marks are dust, not focusing issues.
- Take Photo: Take a picture.
- Examine Photo: View the image on your computer screen at 100% zoom. Look for dark spots. If you see spots, this indicates sensor dust. If your viewfinder has dust but your photos are clean, the dust is on your mirror. This distinction helps you apply the correct cleaning method. It helps you avoid unnecessary or incorrect cleaning attempts.
When to Seek Professional Camera Mirror Cleaning
Sometimes, dust and smudges on your camera mirror are too stubborn for DIY methods. Or, you might feel unsure about cleaning it yourself. In these situations, seeking professional help is the best option. Professionals have specialized tools and expertise. They can clean your camera safely. This protects your valuable equipment.
Here are scenarios when professional cleaning is advisable:
- Persistent Smudges: If a persistent smudge or oily mark remains after using an air blower and gentle brushing, a professional can address it. They might use specific solutions and techniques to remove such marks without harming the mirror’s coating.
- Fear of Damage: If you are worried about scratching the mirror or damaging the camera’s internal components, trust a professional. It is better to pay for a cleaning service than to risk expensive repairs.
- Deep-Seated Dust: Sometimes, dust can become deeply embedded or static-charged. A professional service has advanced tools to remove these particles effectively.
- Combo Cleaning: Many camera service centers offer combined mirror and sensor cleaning. If you have both issues, a single visit can address all internal dust problems.
- No Improvement After DIY: If you have tried the safe DIY steps and still see dust in your viewfinder, a professional assessment is helpful. They can identify the exact location of the dust. They can also offer a lasting solution.
Professional cleaning services vary in cost. Expect to pay anywhere from $50 to $100 or more. This cost depends on your camera model and the extent of cleaning needed. It is a small price to pay for peace of mind. It also ensures your camera remains in top condition. Regular professional check-ups can also prolong the life of your camera. They maintain optimal performance. They are a good investment for serious photographers.
Preventing Dust Accumulation on Your Camera Mirror
Prevention is always better than cure when it comes to dust on your camera mirror. Taking proactive steps can significantly reduce the frequency of needing to clean it. A little vigilance goes a long way. These habits protect your camera’s delicate internal components. They keep your viewfinder clear for longer.
Here are effective strategies to prevent dust accumulation:
- Change Lenses in a Clean Environment: This is one of the most important tips. When changing lenses, do so indoors in a clean area. Avoid dusty, windy, or humid places. Point the camera body opening downwards. This uses gravity to help prevent dust from settling inside.
- Minimize Lens Changes: If possible, avoid frequent lens changes. Use zoom lenses if you can. These reduce the need to expose the camera’s interior.
- Keep Camera Caps On: Always put your body cap on when no lens is attached. Keep your rear lens cap on the lens. This prevents dust from entering the camera body and the lens itself.
- Use a Camera Bag: Store your camera in a sealed camera bag when not in use. A good camera bag provides protection from physical impact. It also helps keep dust out. Choose a bag that fits your gear snugly.
- Avoid Blowing with Your Mouth: Never blow into your camera with your mouth. Your breath contains moisture droplets and saliva. These can leave marks or encourage mold growth. Always use a dedicated rocket blower.
- Regular External Cleaning: Clean the outside of your camera regularly. Wipe down the body and lens barrel with a soft cloth. This stops dust from migrating inside. A clean exterior means less chance of internal dust.
- Handle with Care: Always handle your camera with care. Avoid vigorous shaking or sudden movements. These actions can dislodge dust from other parts inside the camera. This dust can then settle on the mirror.
Adopting these preventative habits will save you time and potential frustration. A well-maintained camera system delivers reliable performance. It also helps produce crisp, clean images. Protecting your gear from dust is a simple but vital part of camera ownership.
FAQ Section
Can I use alcohol to clean my camera mirror?
No, you should never use alcohol or alcohol-based cleaners on your camera mirror. The mirror surface has a delicate coating. Alcohol can strip this coating, causing permanent damage. Stick to specialized optical cleaning solutions or, ideally, just an air blower.
How often should I clean my camera mirror?
Clean your camera mirror only when you see visible dust or specks in your viewfinder. Over-cleaning can increase the risk of damage. Most dust can be removed with a rocket blower. This is a very safe method.
Is it okay to touch the camera mirror?
No, you should never touch the camera mirror with your fingers or any non-specialized tool. The mirror surface is extremely fragile. Fingerprints leave oil and can easily scratch the delicate coating. Always use a rocket blower as your first line of defense.
What happens if I scratch my camera mirror?
If you scratch your camera mirror, the scratch will likely be visible in your viewfinder. However, mirror scratches typically do not affect your final image quality. This is because the mirror flips up during exposure. While not affecting photos, a scratch can be distracting in the viewfinder. Repairing a scratched mirror usually requires professional service.
Does a dirty mirror affect image quality?
No, a dirty camera mirror does not affect your final image quality. The mirror’s function is to direct light to the viewfinder for composition. When you take a picture, the mirror moves out of the light path. Only dust or debris on the actual sensor affects the quality of your photographs.
Is cleaning a mirrorless camera sensor the same as a DSLR mirror?
No, a mirrorless camera does not have a mirror. Therefore, there is no mirror to clean. Mirrorless cameras have an exposed sensor directly behind the lens mount. Dust on a mirrorless camera affects the sensor directly. Cleaning a mirrorless sensor requires specific sensor cleaning techniques and tools, which are different from cleaning a DSLR mirror.
Conclusion
A clear viewfinder is important for good photography. Learning how to clean your camera mirror safely ensures your view remains unobstructed. We have explored the delicate nature of your DSLR mirror. We have identified the right tools for the job. We also walked through the gentle steps for dust removal. Remember, patience and proper tools are your best friends.
Distinguishing between mirror dust and sensor dust is crucial. This helps you apply the correct cleaning method. Most mirror dust comes off with a simple air blower. Avoid touching the mirror directly. If you find persistent spots or feel unsure, professional cleaning is always an option. It protects your valuable camera. By following these guidelines and adopting preventative habits, you can keep your camera mirror clean. This extends the life of your gear. It also keeps your images crisp and clear. Take care of your camera, and it will take care of your photos. Keep shooting great images!
- camera cleaning
- DSLR maintenance
- mirror cleaning
- photography tips

