· Kitchen Cleaning · 15 min read
How To Clean Canning Jars
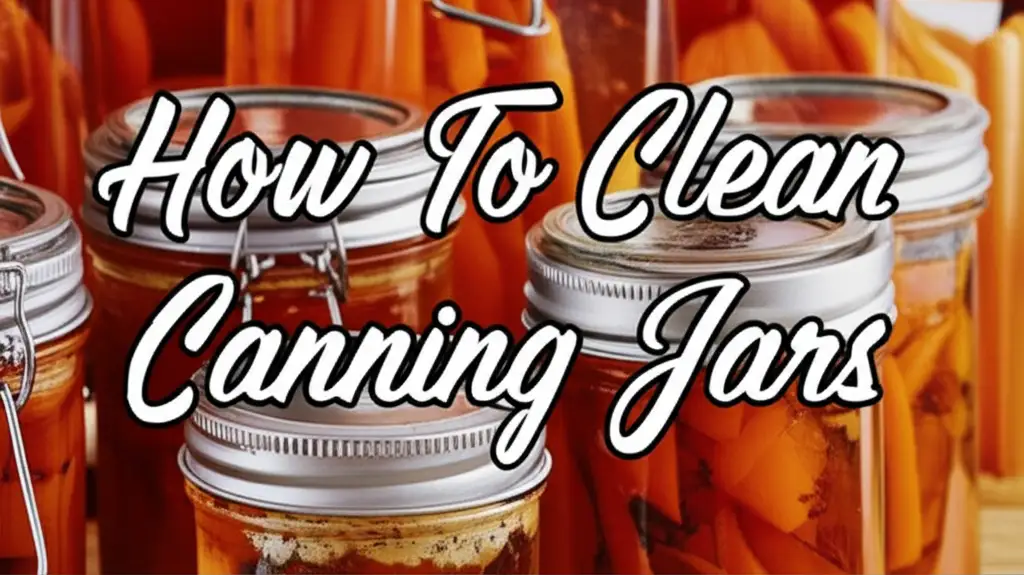
How to Clean Canning Jars: A Complete Guide
Maintaining a clean home is important. Cleaning canning jars is a vital step in food preservation. Dirty jars can ruin your efforts and even make food unsafe. I understand the importance of proper jar hygiene for successful canning. This guide provides clear steps to clean canning jars effectively. We will cover basic cleaning, deep cleaning methods, and techniques for handling mold. You will also learn about preparing jars for future use and proper storage. Let’s make sure your canning projects are always a success.
Takeaway
- Thoroughly wash jars with hot, soapy water.
- Use vinegar or baking soda for tough stains and cloudy film.
- Address mold immediately with a bleach solution for safety.
- Sanitize or sterilize jars based on canning recipe requirements.
- Store clean jars properly to prevent re-contamination.
How do I clean canning jars?
You can clean canning jars by washing them with hot, soapy water and a bottle brush. For tough stains or cloudy residue, use vinegar or baking soda paste. If mold is present, disinfect with a diluted bleach solution. Rinse all jars thoroughly.
The Foundation: Basic Cleaning of New and Used Canning Jars
Cleaning canning jars starts with simple steps. This first phase prepares your jars for any deeper cleaning or future use. Proper initial cleaning saves you time later. It also ensures a safe starting point for all canning projects. I always begin my cleaning process this way.
Initial Rinse and Dish Soap Method
Start by rinsing jars with warm water. This removes any loose debris or dust. Then, fill a sink or basin with hot water and dish soap. Hot water helps to dissolve grease and food residues. Use a bottle brush to scrub the inside of each jar. Pay attention to the bottom and sides. A good brush reaches all areas. Wash the outside of the jars as well. Wash the jar lids and bands separately. Rinse all parts thoroughly under hot running water. This removes all soap residue.
Removing Labels and Adhesive Residue
Removing labels can be tricky. Soak jars in hot, soapy water for 15-30 minutes. This softens most labels. Then, peel them off. Use a scraper if needed. For stubborn adhesive, I recommend a few methods. Rubbing alcohol or nail polish remover can dissolve sticky residue. Apply a small amount to a cloth. Rub the sticky area until it comes off. You can also make a paste with baking soda and a little oil. Apply it to the residue. Let it sit for a few minutes. Then, scrub with a sponge. Always wash the jar again with soap and water after removing adhesive. This ensures no chemical residue remains.
Tackling Tough Stains: Deep Cleaning Methods for Discolored Jars
Sometimes, jars develop tough stains. Mineral deposits can leave a cloudy film. Old food residues might stick stubbornly. These stains need more than just soap and water. Deep cleaning methods restore clarity and cleanliness to your jars. I have found these techniques to be very effective.
Vinegar Soaks for Mineral Deposits and Haze
Vinegar is excellent for hard water stains and cloudiness. These deposits are often mineral buildup. Vinegar’s acidity dissolves them. Fill your jars with white vinegar. You can dilute it with some water if the stains are light. Let the jars soak overnight. For very cloudy jars, I sometimes add a tablespoon of rice to the vinegar. The rice acts as an abrasive when you shake the jar. Shake the jar vigorously. The rice rubs against the inside surfaces. This helps loosen the mineral deposits. After soaking, empty the jars. Scrub them with a bottle brush. Rinse thoroughly with hot water. Your jars will look much clearer. Using vinegar is a safe and natural way to clean. You can even clean glass with vinegar in other areas of your home. It works wonders on many surfaces.
Baking Soda Paste for Persistent Grime
Baking soda is a gentle abrasive and odor absorber. It works well on tough food stains or baked-on residues. Mix baking soda with a small amount of water to form a thick paste. Apply this paste directly to the stained areas inside the jar. Let the paste sit for 15-30 minutes. This allows it to penetrate the grime. Then, use a stiff brush or a non-scratch scrub pad to scrub the stains. The gentle abrasive action of baking soda helps lift the grime without scratching the glass. For especially stubborn spots, you can leave the paste on longer. Rinse the jar completely with warm water. This removes all baking soda residue and loosened stains. Baking soda is a versatile cleaner, similar to how it can tackle various household messes. It is effective on many tough cleaning jobs, like those you might find at the bottom of a pan.
Eliminating Odors and Residues: Specialized Cleaning for Canning Jars
Canning jars can sometimes hold onto smells. Strong-smelling foods or fermented items leave odors. Old food residues might also stick to the glass. These smells must go before you reuse the jars. Nobody wants apple butter that smells like pickles. Specialized cleaning helps ensure a fresh start for every batch.
Addressing Lingering Food Smells
Lingering food smells can be annoying. Even after washing, some odors stay. Odors from garlic, onions, or strong spices can cling to glass. To remove these smells, try a baking soda soak. Fill the jar with warm water. Add a few tablespoons of baking soda. Stir well to dissolve. Let the jar sit overnight with this solution. Baking soda is a natural deodorizer. It absorbs and neutralizes odors. Another option is to use crumpled newspaper. Stuff dry newspaper into the jar. Leave it for a few days. The newspaper absorbs the smells. After soaking or using newspaper, wash the jar again with hot, soapy water. Rinse well. This should leave your jar smelling fresh and clean.
Using Oxygen Bleach for Extreme Cases
For very tough stains or deeply embedded odors, oxygen bleach can be effective. This is different from chlorine bleach. Oxygen bleach is gentler on materials and typically safer for septic systems. It works by releasing oxygen when mixed with water. This oxygen helps break down organic stains and odors. Fill the jar with hot water. Add a scoop of oxygen bleach powder according to package directions. Let the solution sit in the jar for several hours or overnight. You will see bubbles as it works. The oxygen will lift stains and eliminate strong smells. After soaking, empty the jar. Scrub it thoroughly with a bottle brush. Rinse it multiple times with hot water to remove all traces of the oxygen bleach solution. Always wear gloves when handling cleaning agents. This method is good for jars that have held strong ferments or greasy residues that won’t budge.
Handling Mold and Mildew: Safe Cleaning of Contaminated Canning Jars
Finding mold in a canning jar is not ideal. It means the contents were not properly preserved. Mold indicates a need for careful cleaning. You must ensure the jar is completely sterilized before reuse. Safety is the top priority when dealing with mold. Always take precautions to protect yourself.
Initial Mold Removal Steps
Before deep cleaning, remove visible mold. Do this in a well-ventilated area, preferably outdoors. Wear gloves and a mask. This protects your skin and prevents breathing in mold spores. Empty the jar’s contents directly into the trash. Do not try to salvage anything. Rinse the jar thoroughly with hot water. This removes loose mold particles. Immediately wash your hands with soap and water. Clean the immediate area where you handled the moldy jar. This prevents mold spores from spreading to other surfaces in your kitchen. Even a small amount of mold can be concerning, just like finding mold in a shower requires immediate attention.
Bleach Solution for Sterilization
Bleach is very effective at killing mold and bacteria. Use a dilute bleach solution for moldy jars. Mix 1 part bleach with 10 parts water. For example, 1/4 cup bleach in 2.5 cups of water. Or, for a larger batch, 1 cup bleach in 1 gallon of water. Submerge the moldy jars completely in this solution. Let them soak for at least 30 minutes. This contact time is crucial for killing all spores. After soaking, carefully remove the jars. Scrub them thoroughly with a bottle brush, still wearing gloves. Pay close attention to the rim and threads. These areas can hide spores. Rinse the jars multiple times with hot water. Ensure no bleach smell remains. Let them air dry completely. Bleach is a strong disinfectant. It works similarly to how it might clean mold off walls or other hard surfaces.
Natural Alternatives: Vinegar and Baking Soda for Mold
For those who prefer not to use bleach, vinegar and baking soda offer alternatives. White vinegar is a natural antifungal and antibacterial agent. Fill the jar with undiluted white vinegar. Let it soak for several hours or overnight. The vinegar will kill most mold spores. After soaking, scrub the jar vigorously with a brush. Rinse well. For stubborn mold, you can also make a paste with baking soda and a small amount of water. Apply this paste to the moldy areas. Let it sit for 30 minutes. Then, scrub with a brush. The abrasive action helps remove the mold physically. Always follow up with a thorough rinse. While these methods are effective for surface mold, for significant contamination, bleach provides the highest level of disinfection. You can use vinegar to clean mold with vinegar in many other household situations too.
Preparing Jars for Canning: Sterilization vs. Sanitization
After cleaning, jars must be prepared for actual canning. This step is crucial for food safety. The method you choose depends on the specific canning recipe. It’s important to understand the difference between sanitization and sterilization. Many people use these terms interchangeably, but they have distinct meanings in canning.
When Sterilization is Necessary
Sterilization means destroying all living microorganisms. This includes bacteria, yeasts, molds, and their spores. You need to sterilize jars for recipes with a processing time of less than 10 minutes. This often applies to high-acid foods like jams, jellies, and pickled vegetables. To sterilize jars, submerge them in boiling water for at least 10 minutes. Ensure the water covers the jars by at least an inch. You can also sterilize jars in an oven. Place clean, dry jars in a cold oven. Heat the oven to 225°F (107°C). Hold at this temperature for 20 minutes. Jars must be hot when filled to prevent breakage. This sudden temperature change can cause thermal shock. Always use hot jars for hot foods.
Hot Water Bath and Dishwasher Sanitization
Most canning recipes today use a hot water bath or pressure canning method. These processes involve heating the jars and their contents to high temperatures. If your recipe calls for 10 minutes or more of processing time, jars only need to be sanitized, not fully sterilized. Sanitization means reducing the number of microorganisms to a safe level. A hot dishwasher cycle can sanitize jars. Make sure your dishwasher reaches a very hot temperature. Place clean jars in the dishwasher and run a regular or sanitize cycle. Remove them while they are still hot. Alternatively, you can use a hot water bath. Fill your canner with water and heat jars to 180°F (82°C). Keep them hot until you are ready to fill them. Hot jars help prevent thermal shock when you add hot food. They also create a better vacuum seal.
Proper Storage: Keeping Canning Jars Clean and Ready
Cleaning your canning jars is only half the battle. Storing them correctly ensures they stay clean and ready for your next canning project. Improper storage can lead to dust, dirt, or even re-contamination. This negates all your hard work. I pay close attention to how I put my jars away.
Air Drying and Storage Practices
After cleaning and rinsing, allow jars to air dry completely. Inverting them on a clean dish rack helps water drain away. Make sure they are bone dry inside. Any residual moisture can lead to musty smells or even mold growth later. Once dry, store jars in a clean, dry place. A pantry shelf or a cupboard works well. Avoid areas with high humidity, like basements, if possible. Humidity can encourage mold or rust on lids and bands. Store jars upright. This prevents dust accumulation inside. Do not store jars with lids and bands tightened on them. This can create an airtight seal that traps moisture. It also puts stress on the sealing compound. I store my jars with their lids loosely placed on top or separately in a clean container.
Avoiding Dust and Contaminants
Dust and environmental contaminants are common enemies of clean jars. While jars are on shelves, they can collect dust. To prevent this, consider covering your jar shelves. A clean cloth or plastic sheeting works well. You can also store jars in sealed containers or boxes. This keeps them pristine. If you store jars in an area that might have pests, like a garage or shed, using sealed containers is essential. Check your jars before each use. A quick visual inspection helps. If you see any dust or debris inside, give them a quick rinse. Then dry them completely again. Keeping jars clean during storage means less work when it’s time to can. It gives you peace of mind that your jars are always ready.
Essential Tools and Supplies for Effective Jar Cleaning
Having the right tools makes jar cleaning much easier. Some items are essential for getting into all the nooks and crannies. Others help tackle specific cleaning challenges. Investing in good cleaning supplies saves time and effort. I rely on a few key items to keep my jars sparkling clean.
Must-Have Brushes and Scrapers
A good bottle brush is your best friend for cleaning jars. Look for one with a long handle and sturdy bristles. The bristles should be able to reach the bottom corners of jars. Some brushes have a flexible head. This helps clean the curved shoulders of jars. A smaller, stiffer brush is also useful for cleaning jar threads. These threads can trap food particles. For removing stubborn labels or dried-on food, a plastic scraper or an old credit card works well. Avoid metal scrapers on glass, as they can scratch the surface. A non-scratch scrubbing pad is also helpful for general cleaning and applying pastes. These simple tools ensure every part of your jar gets clean.
Choosing the Right Cleaning Agents
For general cleaning, standard dish soap is perfectly adequate. Choose a soap that effectively cuts through grease. For hard water stains and mineral deposits, white vinegar is indispensable. It’s acidic nature breaks down mineral buildup. Baking soda is another versatile agent. It’s a mild abrasive. It also neutralizes odors. This makes it ideal for scrubbing away sticky residues or eliminating lingering smells. When dealing with mold, diluted chlorine bleach is the most effective disinfectant. Always use it in a well-ventilated area. Wear gloves to protect your hands. Alternatively, oxygen bleach can be used for tough stains and odors. It is less harsh than chlorine bleach. Always read the labels on any cleaning product. Ensure it is safe for the material you are cleaning. These agents, used correctly, will help you tackle any jar cleaning challenge.
FAQ Section
Can I wash canning jars in the dishwasher?
Yes, you can wash canning jars in the dishwasher. A normal cycle with hot water and detergent will clean them. If your dishwasher has a “sanitize” cycle, that setting is even better. It prepares jars for canning processes over 10 minutes. Ensure jars are not touching each other to prevent breakage.
How do I remove cloudy film from canning jars?
Remove cloudy film from canning jars using white vinegar. Fill the jars with undiluted vinegar. Let them soak overnight. The vinegar’s acidity dissolves mineral deposits that cause cloudiness. You can also add some rice to the vinegar and shake the jar for an abrasive action. Then, scrub and rinse thoroughly.
Is it safe to reuse canning jars with rust on the rims?
No, it is not safe to reuse canning jars with rust on the rims. Rust can prevent a proper seal during canning. A compromised seal allows air to enter the jar. This can cause spoilage and make your food unsafe. Discard any jars with rusted rims.
How do I remove old labels and glue from jars?
To remove old labels and glue, soak jars in hot, soapy water for 15-30 minutes. Peel off the labels. For stubborn glue, rub with alcohol, nail polish remover, or a paste of baking soda and oil. Let the paste sit, then scrub. Wash the jar afterward.
Do I need to sterilize jars every time I can?
You only need to sterilize jars if your canning recipe has a processing time of less than 10 minutes. For recipes with 10 minutes or more processing time in a boiling water bath or pressure canner, jars only need to be hot and clean. The canning process itself will sterilize them.
What if my jars still smell after cleaning?
If jars still smell after cleaning, try a baking soda soak. Fill the jar with water and a few tablespoons of baking soda. Let it sit overnight. Alternatively, stuff dry crumpled newspaper into the jar and leave it for a few days. The newspaper absorbs odors. Wash the jar again afterward.
Conclusion
Cleaning canning jars is a critical step for safe and successful food preservation. From basic washing to tackling tough mold, each method plays an important role. We have explored simple dish soap cleaning for everyday grime. We also discussed using vinegar and baking soda for stubborn stains and odors. We covered essential safety steps for handling mold. Remember, preparing your jars correctly ensures your canned goods remain fresh and safe to eat.
Taking the time to clean canning jars properly protects your food. It also extends the life of your jars. Always ensure your jars are spotless and free of any residues or contaminants. This ensures a proper seal and prevents spoilage. Your efforts in cleaning will result in delicious, safely preserved food. Now you are ready to tackle your next canning project with confidence. Happy canning!
- canning jars
- jar cleaning
- food preservation
- sterilization