· Car Maintenance · 20 min read
How To Clean Car Cd Player

Restore Your Sound: How To Clean Car CD Player
Do you remember enjoying your favorite music CDs on the open road? If your car CD player is skipping, making strange noises, or refusing to play, a dirty lens is likely the cause. Dust, grime, and debris build up over time. This build-up affects the laser’s ability to read the disc. Learning how to clean a car CD player can bring your music back to life. It also extends the lifespan of your car’s audio system. This guide will walk you through safe and effective methods to clean your car CD player. We cover everything from simple external cleaning to delicate internal maintenance. We help you enjoy crisp, clear audio once more.
Takeaway
- Identify Symptoms: Skipping, errors, and no-play indicate a dirty CD player.
- Start External: Clean the player’s faceplate and surrounding area first.
- Use Cleaning Discs: This is the safest first step for internal lens cleaning.
- Consider Compressed Air: Use short bursts for dust, but be careful with moisture.
- Avoid Liquids Inside: Do not spray cleaning solutions directly into the CD slot.
- Prevent Future Buildup: Keep car interior clean and avoid dusty environments.
To clean a car CD player, use a specialized CD cleaning disc for the laser lens. For external surfaces, use a soft, damp cloth and mild cleaner. Use compressed air carefully to remove loose dust from the disc slot. Avoid harsh chemicals or inserting objects into the player.
Why Your Car CD Player Needs Cleaning: Understanding The Issues
Your car CD player works by reading tiny pits and lands on a compact disc with a laser. When dust, dirt, or other contaminants settle on the laser lens, it cannot read the disc correctly. This leads to common playback problems. The car environment is often dusty. Dust enters the CD player through the disc slot. Smoke, pet hair, and food particles also contribute to this build-up. A dirty lens is the primary reason CDs skip or do not play at all.
You might notice several signs that your car CD player needs cleaning. CDs may skip frequently, even on smooth roads. The player might show “Disc Error” messages. Sometimes, the player will try to read the disc but then stop without playing music. You might hear unusual noises from the player as it struggles. These are all signals that the internal components, especially the laser lens, are dirty. Ignoring these signs can cause more severe damage. Regular cleaning prevents these problems. It ensures your car CD player plays music reliably. Cleaning also helps maintain good audio quality.
A dirty CD player affects your listening experience. It also shortens the life of the unit. The laser might overwork to try and read through the grime. This causes premature wear on the laser assembly. Your CD player’s performance degrades slowly. You might not notice it until the problems become very obvious. Taking simple cleaning steps can prevent this decline. It keeps your car CD player working well for many years. Think of it as routine maintenance for your car’s entertainment system. Just like you clean other parts of your car, your CD player also needs attention.
Gathering Your Cleaning Arsenal: Essential Tools For The Job
Before you start cleaning your car CD player, gather the right tools. Using the correct items prevents damage to the delicate internal components. Do not use harsh chemicals or abrasive materials. These can scratch the lens or damage the player’s plastic parts. Having everything ready before you begin makes the cleaning process smooth and efficient.
Here is a list of essential cleaning supplies:
- CD Cleaning Disc: This is the most important tool for internal cleaning. These discs have tiny brushes or pads on their surface. They gently wipe the laser lens as they spin inside the player. Look for one designed for car CD players.
- Can of Compressed Air: This helps remove loose dust from the CD slot and exterior vents. Make sure to buy “electronics safe” compressed air. These usually contain a bitterant to prevent huffing. Hold the can upright to prevent propellant from spraying out.
- Microfiber Cloths: Use these for external cleaning. Microfiber is soft and lint-free. It does not scratch delicate surfaces. Keep a few clean ones handy.
- Cotton Swabs or Foam Swabs: These are useful for reaching small crevices on the player’s faceplate. Use them sparingly and with care.
- Rubbing Alcohol (Isopropyl Alcohol 70% or higher): Use a small amount on a microfiber cloth for stubborn grime on the exterior. Do not use it inside the CD player. Alcohol evaporates quickly. It leaves no residue.
- Water (Distilled Preferred): For dampening microfiber cloths for light external cleaning. Distilled water prevents mineral deposits.
- Small Vacuum Cleaner (with brush attachment): A handheld car vacuum or a regular vacuum with a small attachment can clean surrounding areas. This removes dust that might otherwise enter the CD player.
Avoid using paper towels, facial tissues, or other fibrous materials. They can leave lint or scratch surfaces. Do not use glass cleaner or general household cleaners. These often contain ammonia or other chemicals harmful to electronics. With the right tools, you can safely and effectively clean your car CD player. Proper preparation makes the cleaning process easier and more effective.
External Cleaning: The First Step For Your Car CD Player
Before you tackle the internal parts of your car CD player, start with the exterior. The player’s faceplate and surrounding dashboard areas collect dust, grime, and fingerprints. Cleaning these outer surfaces prevents debris from entering the CD slot. It also improves the overall appearance of your car’s interior. This step is simple but important. It sets the stage for more delicate internal cleaning.
Here is how to clean the exterior of your car CD player:
- Power Off the Unit: Always turn off your car and the CD player before cleaning. This prevents accidental activation or electrical issues. Safety is important when working with car electronics.
- Dust the Surface: Use a soft-bristled brush or a can of compressed air to gently remove loose dust. Spray compressed air in short bursts. Hold the can upright. Aim at the CD slot and any buttons or crevices. This dislodges surface dust. You can also use a small car vacuum with a brush attachment to pick up dust from around the player.
- Wipe the Faceplate: Dampen a clean microfiber cloth with a small amount of distilled water. Wring it out well so it is barely damp. Gently wipe the entire faceplate, buttons, and surrounding trim. For stubborn smudges or fingerprints, you can use a very small amount of rubbing alcohol on the cloth. Be careful not to let any liquid drip into the CD slot or buttons. The microfiber cloth will pick up dirt without scratching.
- Clean Crevices: For tight spots around buttons or dials, use a cotton swab lightly dampened with water or rubbing alcohol. Gently clean these areas. Do not push too hard or force the swab into small openings. This can cause damage. The goal is to remove visible dirt and grime.
- Dry Thoroughly: After wiping, use a separate, dry microfiber cloth to dry all surfaces. This prevents water spots and ensures no moisture remains. Make sure the player is completely dry before turning it back on.
Cleaning the external parts of your car CD player is a quick task. It makes a big difference in how clean your car interior looks. This first step also reduces the amount of dirt that could enter the CD player during use. Keeping the exterior clean makes the entire unit more pleasant to use. It prepares the unit for the next step: internal cleaning. You might use general cleaning techniques here similar to how you would clean other parts of your car’s interior. For example, if you clean your car’s dashboard regularly, this step fits right into that routine.
Internal Cleaning Methods: The Delicate Core of Your CD Player
The internal cleaning of your car CD player requires a more delicate approach. The laser lens is the most sensitive part. It needs gentle cleaning to avoid damage. There are a few methods for internal cleaning. Start with the least invasive method first. Move to more direct methods only if necessary and with extreme caution. Always remember that directly accessing the lens often requires disassembling the unit. This can void warranties or cause permanent damage if done incorrectly.
Using a CD Cleaning Disc
This is the safest and most recommended method for most car owners. A CD cleaning disc works like a regular CD. It has small, soft brushes or pads on its surface. When you insert the disc, it spins inside the player. The brushes gently wipe the laser lens. This removes dust and light grime.
Here are the steps to use a CD cleaning disc:
- Purchase a Quality Disc: Buy a CD cleaning disc specifically designed for CD players. Some cleaning kits include a special cleaning solution. You apply this solution to the disc’s brushes before inserting it. Follow the product’s instructions.
- Insert the Disc: Place the cleaning disc into your car CD player just like you would a regular music CD.
- Run the Cleaning Cycle: The player will typically run a short cleaning cycle. It might play a voice prompt or a short track indicating the cleaning process. This usually lasts for about 30 seconds to a minute.
- Remove and Test: Once the cycle is complete, remove the cleaning disc. Try playing a regular music CD. Check if the skipping or reading errors have stopped.
A CD cleaning disc is effective for general dust and light contamination. It does not require any disassembly. This makes it a low-risk option. It is a good first attempt to fix playback issues.
Using Compressed Air (With Warnings)
Compressed air can blow loose dust out of the CD slot. This can help if dust particles are blocking the disc’s path. However, use compressed air with extreme caution. Directing it improperly can force dust deeper into the unit. It can also cause moisture from the propellant to condense on sensitive components.
Follow these precautions when using compressed air:
- Hold Can Upright: Always hold the compressed air can upright. This prevents liquid propellant from spraying out. If liquid sprays onto the lens, it can leave a residue or cause damage.
- Short Bursts: Use only short, controlled bursts of air. Do not spray continuously. Continuous spraying can chill internal components or force dust further inside.
- Aim Carefully: Direct the nozzle into the CD slot. Angle it slightly to blow dust outward. Do not insert the nozzle deep into the player.
- Avoid Delicate Areas: Do not spray directly onto the laser lens if you can see it. Focus on the opening and surrounding areas.
- Test: After using compressed air, try playing a CD to see if the problem is resolved.
Compressed air is best for external dust near the opening. It is less effective for dust directly on the laser lens itself. It should be used before a cleaning disc, or as a supplementary step.
Manual Lens Cleaning (Advanced and Risky)
Manually cleaning the laser lens is the most direct method. This method usually requires disassembling the car stereo unit. This is highly risky for car owners without electronics repair experience. You can easily damage fragile components. If done incorrectly, you can permanently damage the CD player. We do not recommend this method for most users. If you are not comfortable disassembling car electronics, skip this step. Consider professional help instead.
If you choose to attempt manual cleaning, proceed with extreme caution:
- Disassembly: You must remove the car stereo unit from the dashboard. This often involves specific tools and knowledge of your car’s dashboard layout. Then, carefully disassemble the CD player’s casing to access the internal mechanism. Consult your car’s service manual or an online guide for your specific model.
- Locate the Lens: Once disassembled, identify the small, optical lens. It usually sits on a movable tray mechanism. It looks like a tiny, clear eye.
- Gentle Cleaning: Use a specialized lens cleaning pen or a new, clean cotton swab. Dampen the swab with a tiny amount of pure isopropyl alcohol (90% or higher). Gently wipe the lens in a straight motion. Do not rub in circles. Apply very little pressure. The goal is to lift dust, not push it around.
- Allow to Dry: Let the alcohol evaporate completely. It evaporates quickly.
- Reassemble and Test: Carefully reassemble the CD player and reinstall it in your car. Test with a music CD.
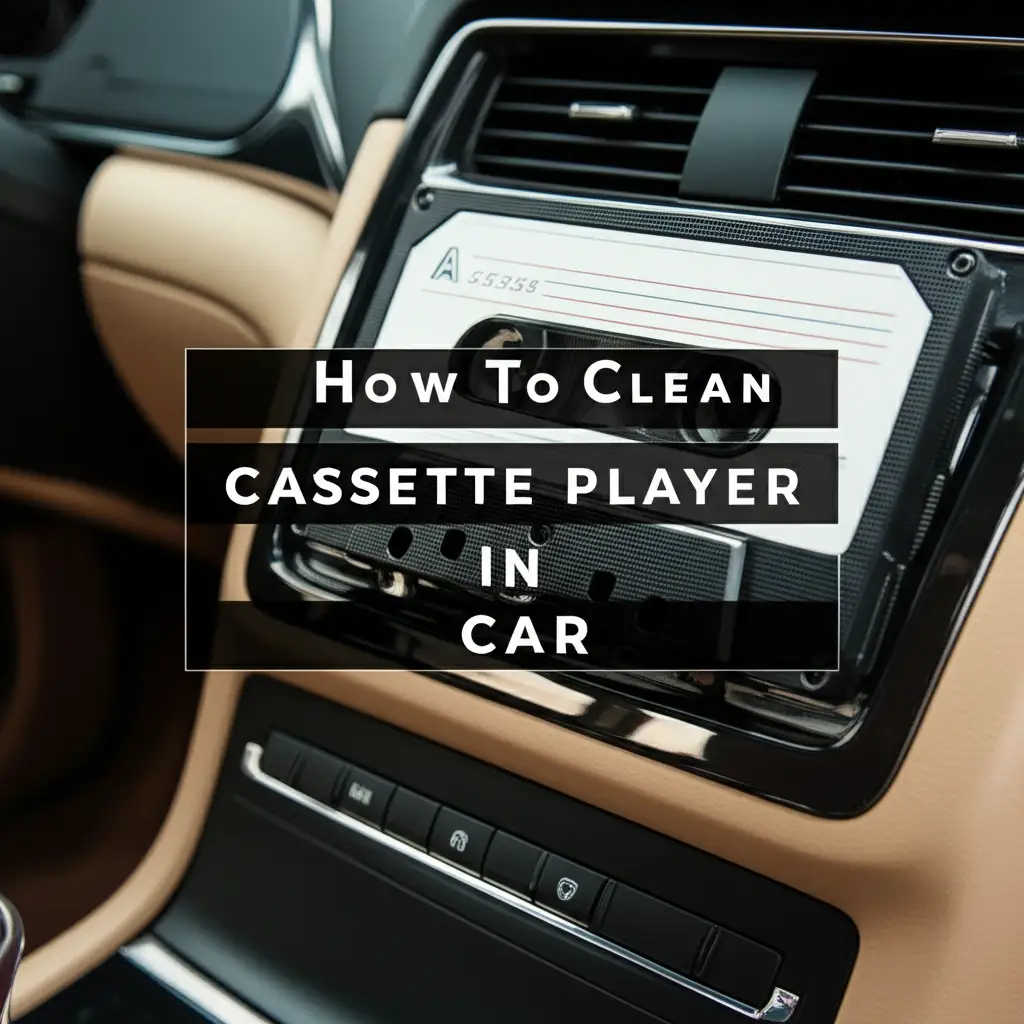
Manual lens cleaning is a last resort for DIY cleaning. It carries significant risk of damage. It is usually better to rely on a cleaning disc or professional service. If you are cleaning other car parts, like a car cassette player, you might encounter similar disassembly challenges. Cleaning a car cassette player also involves delicate internal components and requires care.
Troubleshooting Common CD Player Issues After Cleaning
You have cleaned your car CD player. Yet, it still has problems. Do not worry. Some issues might need more than a simple cleaning. It is important to know what steps to take next. This helps determine if the problem is minor or requires professional attention. Sometimes, cleaning helps. Other times, the issue is mechanical or electrical.
Here are common issues and troubleshooting tips after cleaning:
- CDs Still Skipping or Not Playing:
- Check the CD itself: Sometimes the CD is the problem. Inspect the disc for deep scratches, cracks, or smudges. Try a different CD, preferably one you know works well. A dirty or damaged CD will still cause problems even with a clean player.
- Repeat Cleaning: The laser lens might still have some stubborn residue. Try running the CD cleaning disc a few more times. Sometimes, one pass is not enough to clear all debris.
- Check Environmental Factors: Extreme heat or cold can affect electronics. If your car was left in extreme temperatures, let the interior normalize. Then try the player again. Condensation can also cause temporary issues.
- Player Makes Unusual Noises:
- This often points to a mechanical issue. The motor that spins the CD might be failing. The tray mechanism might be stuck. Cleaning generally does not fix mechanical noises.
- Listen Closely: Try to pinpoint where the sound comes from. Is it a grinding sound? A clicking sound? This helps diagnose the problem.
- “Disc Error” or “No Disc” Message:
- This could mean the player cannot detect the disc at all. It could still be a dirty laser lens. Or, it could be a fault with the disc detection sensor.
- Firmware Reset: Some car stereos allow a soft reset. Check your car stereo manual for instructions on resetting the unit. This can sometimes clear minor glitches.
- CD Gets Stuck Inside:
- This is a mechanical problem. Do not force the CD out. Forcing it can damage the tray mechanism or the CD itself.
- Eject Button: Try pressing the eject button multiple times.
- Power Cycle: Turn off the car, remove the key, and restart it. Sometimes a power cycle can reset the mechanism.
- Manual Ejection (Risky): Some players have a small pinhole for manual ejection. Use a paperclip to gently press it. Consult your manual first. This is a very delicate operation.
- Intermittent Problems:
- If the player works sometimes and not others, it could be a loose connection. It could also be an aging component.
- Check Wiring: This requires accessing the back of the stereo. If you are comfortable, ensure all wiring harnesses are secure. This step is usually for professionals.
Always troubleshoot the simplest potential causes first. Rule out dirty CDs or environmental factors. Then move to cleaning steps. If issues persist after thorough cleaning, the problem might be mechanical or electrical. At that point, consider professional help.
Preventative Measures for a Long-Lasting Car CD Player
Prevention is always better than cure. Taking a few simple steps can significantly extend the life of your car CD player. These actions reduce the amount of dust and grime that gets into the unit. They help maintain optimal playback quality. Incorporating these habits into your car care routine can save you time and money on future cleanings or repairs.
Here are effective preventative measures:
- Keep Your Car Interior Clean: A dusty car interior leads to a dusty CD player. Regularly vacuum your car’s seats, floor mats, and dashboard. Wipe down surfaces with a microfiber cloth. Less dust in the air means less dust settling on and inside your CD player. You can find general cleaning guides for car interiors that apply to these efforts. For example, some general tips for cleaning parts of your home, like cleaning with vinegar and baking soda, highlight the benefits of regular tidiness. Applying similar principles to your car helps keep it tidy.
- Use CD Storage Cases: Do not leave CDs lying exposed in the car. CDs collect dust and scratches. Always store your CDs in proper cases or binders when not in use. This keeps them clean and prevents damage. When you insert a clean CD into the player, less dust transfers to the lens.
- Handle CDs Carefully: Always hold CDs by their edges. Avoid touching the shiny data side. Fingerprints contain oils and dust. These transfer directly to the CD player’s lens. If a CD has smudges, clean it with a soft cloth designed for optical media before inserting it.
- Avoid Smoking in the Car: Smoke leaves a sticky residue on all surfaces. This includes the internal components of your CD player. This residue attracts and holds dust. It can be very difficult to remove once it builds up inside the unit.
- Limit Food and Drink Spills: Spills near the dashboard or console can introduce sticky substances. These can drip into the CD player. Sugar from drinks attracts dust and can gum up internal mechanisms. Be careful with what you eat and drink in your car.
- Use Your Car’s Air Filtration: If your car has a cabin air filter, ensure it is clean and replaced regularly. A clean cabin filter helps reduce airborne dust circulating within your car’s interior. This indirectly benefits your CD player by reducing the overall dust load.
- Avoid Extreme Temperatures: Leaving your car in direct sunlight for long periods can cause internal temperatures to rise significantly. While modern electronics are built to withstand some heat, extreme and prolonged exposure can affect performance and longevity. Condensation from rapid temperature changes can also cause issues.
- Perform Routine External Wipes: Give your CD player’s faceplate and surrounding area a quick wipe with a microfiber cloth every few weeks. This prevents dust from accumulating near the CD slot. This simple habit keeps the entry point clean.
By following these preventative measures, you minimize the need for deep cleaning. You also extend the life of your car CD player. A well-maintained player provides consistent and clear audio.
When to Seek Professional Help for Your Car CD Player
Sometimes, despite your best cleaning efforts, your car CD player might still not work correctly. This is when you should consider professional help. Car audio technicians have specialized tools and knowledge. They can diagnose and repair problems that are beyond simple cleaning. Knowing when to call a professional can save you time and prevent further damage to your unit.
Here are signs that it is time to seek professional assistance:
- Persistent Skipping or Error Messages After Cleaning: You have used a cleaning disc multiple times. You have tried compressed air. The unit still skips or displays error messages. This often indicates a deeper issue. The laser lens might be faulty. The mechanism might be misaligned.
- CDs Not Loading or Ejecting: If your CD player struggles to load or eject discs, it is likely a mechanical problem. Gears might be stripped. Motors might be failing. Cleaning will not fix these issues. Forcing a stuck CD can cause more damage. A professional can safely extract the disc and repair the mechanism.
- Unusual Grinding, Clicking, or Whirring Noises: These sounds point to internal mechanical wear or damage. The spindle motor might be worn out. The tray loading system could be jammed. These problems require disassembly and part replacement.
- No Power or Intermittent Power: If the CD player does not turn on, or loses power randomly, it is an electrical issue. This could be a blown fuse. It could also be a wiring problem. Or, it could be a fault with the player’s internal power supply. This requires electrical diagnostic skills.
- Buttons Not Responding or Display Issues: If buttons do not work, or the display is blank or garbled, the control board might have a fault. These are complex electronic repairs. They require specific testing equipment.
- You Are Uncomfortable With Disassembly: If the problem requires opening the unit, and you lack experience with car electronics, it is best to stop. Disassembling car stereo components incorrectly can lead to severe damage. It can also cause problems with your car’s electrical system.
- Value of the Unit: Consider the value of your car stereo. If it is an expensive, integrated unit, professional repair might be cost-effective. If it is an old, inexpensive aftermarket unit, replacing it might be a better option than repair costs.
A professional car audio technician can accurately diagnose the problem. They have the right tools to take the unit apart safely. They can identify worn-out parts. They can source replacements. They can also perform complex soldering if needed. Many professionals offer a diagnostic fee. This fee helps you understand the problem and the cost of repair. This allows you to make an informed decision. Remember that a professional repair ensures the job is done correctly. It helps restore your car CD player to full function.
FAQs About Cleaning Car CD Players
Q1: How often should I clean my car CD player?
A1: You should clean your car CD player whenever you notice playback issues, such as skipping or error messages. For preventative maintenance, consider using a CD cleaning disc every 6 to 12 months. If you drive in very dusty conditions, or if you smoke in your car, you might need to clean it more frequently. Regular cleaning keeps the player working well.
Q2: Can I use a regular cleaning cloth or household cleaner to clean the CD player’s interior?
A2: No, you should not use regular cleaning cloths or household cleaners for the CD player’s interior. Regular cloths can leave lint. Household cleaners contain chemicals that can damage the delicate laser lens or other components. Always use a specialized CD cleaning disc for internal cleaning. For the exterior, use a soft microfiber cloth and specific electronic cleaners or plain water.
Q3: What should I do if my CD cleaning disc gets stuck?
A3: If your CD cleaning disc gets stuck, do not force it out. First, try pressing the eject button multiple times. Turn off the car and restart it to see if a power cycle helps. Some car stereos have a small pinhole for manual ejection. Consult your car’s manual to find this. If these steps do not work, seek professional help to avoid damage.
Q4: Will cleaning my CD player fix all skipping issues?
A4: Cleaning your CD player often fixes skipping issues caused by a dirty laser lens. However, it will not fix all problems. Skipping can also happen due to a scratched CD. It can also be from a mechanical problem within the player. If cleaning does not help, inspect your CDs. If problems persist, the player might have a mechanical or electronic fault.
Q5: Is it safe to use rubbing alcohol inside the CD player?
A5: You can use a small amount of high-percentage isopropyl alcohol (90% or higher) on a cotton swab for manual lens cleaning, but this is a very advanced and risky step. Do not spray alcohol directly into the CD player. Never use it on plastic parts that could be damaged. For general internal cleaning, a CD cleaning disc is much safer. Avoid getting any liquids inside the player.
Q6: Can dust from my car’s air vents affect the CD player?
A6: Yes, dust from your car’s air vents can definitely affect the CD player. The car’s ventilation system circulates air throughout the cabin. This air carries dust, dirt, and other particles. These particles can enter the CD player’s slot and settle on the laser lens and internal mechanisms. Regularly cleaning your car’s interior and ensuring a clean cabin air filter helps reduce this.
- car audio
- CD player cleaning
- skip CD
- car electronics
- audio quality