· Audio Care · 16 min read
How To Clean Cassette Tape
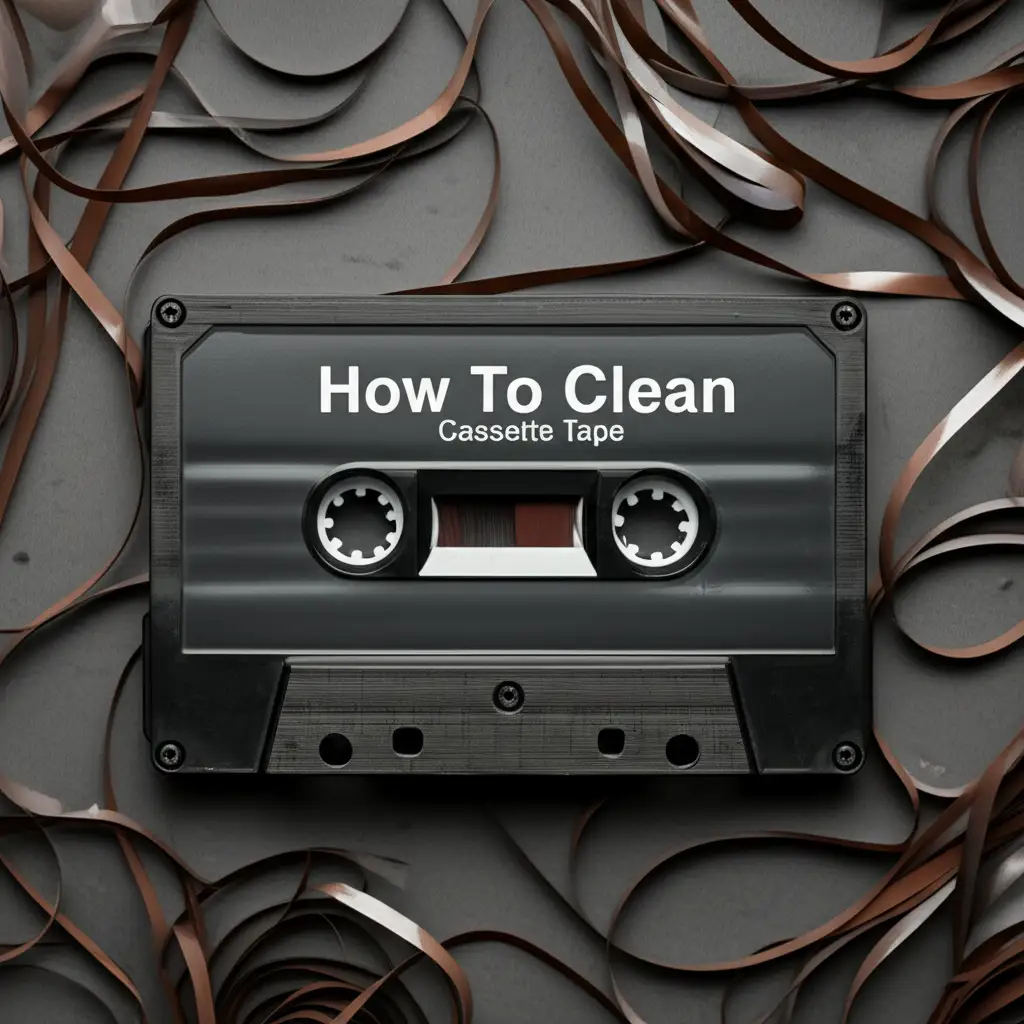
Revitalize Your Audio: How To Clean Cassette Tape
Do you have a collection of old cassette tapes gathering dust? Perhaps you are encountering audio issues during playback, like muffled sound or dropouts. These problems often stem from dirt, dust, or even mold accumulating on the tape and its shell. Learning how to clean cassette tape properly can revive your cherished recordings and ensure their longevity.
I understand the sentimental value these analog treasures hold. Cleaning cassette tapes not only improves playback quality but also prevents further damage to your tapes and your cassette player. This comprehensive guide will walk you through the necessary steps, tools, and precautions to safely clean your cassette tapes, addressing common issues like dirt, dust, and even stubborn mold. Get ready to rediscover your favorite albums and memories with crystal-clear sound!
Takeaway:
- Gather specific tools: isopropyl alcohol, cotton swabs, lint-free cloth, screwdriver, non-abrasive cleaner.
- Always handle tapes carefully to prevent damage to the magnetic ribbon.
- Clean the cassette shell exterior and interior first.
- Carefully clean the magnetic tape with isopropyl alcohol, avoiding excessive moisture.
- Address mold and sticky tape issues using specialized techniques.
- Store cleaned tapes correctly to maintain their condition.
To clean cassette tape, gently wipe the cassette shell with a damp cloth and mild cleaner. For the magnetic tape itself, carefully clean visible dust or debris with a lint-free swab dipped in 90%+ isopropyl alcohol, winding the tape manually to access all areas.
Why Cleaning Your Cassette Tapes Matters
Cassette tapes, while durable, are not immune to the passage of time and environmental factors. Dust, dirt, fingerprints, and even mold can accumulate on the tape surface and inside the cassette shell. These contaminants directly impact the sound quality. They can cause muffled audio, volume fluctuations, and annoying dropouts during playback.
Beyond sound quality, dirty tapes pose a risk to your valuable cassette player. Debris from a dirty tape can transfer to the player’s delicate tape heads, capstan, and pinch roller. This can lead to wear and tear on these components, requiring more frequent cleaning of your cassette player or even costly repairs. Regular cleaning of your tapes prevents this kind of damage. It extends the life of both your tapes and your playback equipment. Think of it as preventative maintenance for your entire audio setup. Maintaining your audio equipment is important, just like ensuring your car’s cassette player stays clean for optimal performance. You can learn more about how to keep your cassette player in car spotless.
Moreover, cleaning helps preserve the physical integrity of the magnetic tape. Contaminants can degrade the binder that holds the magnetic particles to the tape base, leading to “sticky shed syndrome” or complete tape decay. Mold, in particular, can be very destructive, literally eating away at the tape material. By cleaning your tapes, you are not just improving sound; you are actively preserving a piece of audio history. This step ensures your memories last for generations.
Essential Tools and Materials for Cassette Cleaning
Before you begin the cleaning process, gathering the correct tools and materials is important. Using the right items ensures a safe and effective cleaning without causing damage to your delicate cassette tapes. Avoid harsh chemicals or abrasive materials at all costs. These can strip the magnetic coating or warp the plastic shell. I always make sure I have everything laid out before I start.
Here is a list of the essential supplies you will need:
- Isopropyl Alcohol (90% or higher): This is the gold standard for cleaning magnetic tape and cassette player components. It evaporates quickly and leaves no residue. Lower percentages contain more water, which can be harmful to delicate tape.
- Lint-Free Cotton Swabs: These are crucial for applying alcohol precisely and gently. Standard cotton swabs can leave fibers behind, which you want to avoid. Look for photographic-grade or medical-grade swabs.
- Lint-Free Microfiber Cloth: Perfect for wiping down the cassette shell exterior. It traps dust and grime without scratching surfaces.
- Small Phillips Head Screwdriver: Many cassette tapes are held together with screws, allowing you to open the shell for thorough cleaning of the interior and the tape itself.
- Canned Air or Blower Brush: Useful for dislodging loose dust and debris from inside the shell without touching surfaces.
- Distilled Water (optional): For mild cleaning of the cassette shell, especially if you want to avoid alcohol on certain plastics.
- Mild, Non-Abrasive Cleaner (optional): For general exterior shell cleaning, like a diluted dish soap solution. Ensure it leaves no residue.
- Gloves (optional but recommended): To prevent transferring oils and dirt from your hands to the tape.
Having these items ready will make the cleaning process smooth and efficient. Remember, precision and gentleness are key when working with these fragile items. Always ensure you are working in a clean, dust-free environment.
Preparing Your Cassette Tape for Cleaning
Proper preparation is essential before you begin cleaning your cassette tape. This step ensures you do not inadvertently introduce more contaminants or cause damage during the cleaning process. Taking a few moments to prepare can make a big difference in the outcome. I find a clean workspace helps me focus on the delicate task.
First, find a clean, well-lit work surface. Lay down a clean, lint-free cloth or paper towels to protect your workspace and the cassette. This also helps catch any small screws or parts if you plan to open the cassette. Ensure the area is free from dust, pet hair, and food particles. These items can easily stick to the tape.
Next, gently inspect the cassette tape. Look for visible signs of dirt, dust, or mold on the outside of the shell. Check the tape window for any grime or debris clinging to the magnetic tape itself. Also, note if the tape looks loose on the reels, or if there are any visible creases or damage to the tape. This initial inspection helps you determine the extent of cleaning needed. It also helps you identify any potential issues that require extra care.
If the cassette shell is screwed together, you might consider opening it for a more thorough internal cleaning. Use your small Phillips head screwdriver to carefully remove the screws. Gently pry open the shell halves, being careful not to touch the magnetic tape inside. Some cassettes are glued or sonically welded shut. These types cannot be opened without destroying the shell. In such cases, you will need to clean as much as possible through the tape windows and openings. Carefully wind the tape back and forth using a pencil or pen to expose different sections.
Step-by-Step Guide to Cleaning the Cassette Shell
Cleaning the cassette shell is often the easiest part of the process. However, it is an important first step. A dirty shell can re-contaminate a clean tape or transfer grime to your player. This method focuses on the exterior and interior of the shell.
Cleaning the Exterior of the Cassette Shell
Start by wiping down the outside of the cassette shell. Use a lint-free microfiber cloth, slightly dampened with distilled water or a very mild, diluted all-purpose cleaner. Gently wipe away dust, smudges, and fingerprints. Avoid getting any liquid near the tape openings or the tape itself. If there are stubborn spots or old label residue, a tiny bit of isopropyl alcohol on a cotton swab can help. Make sure the shell is completely dry before proceeding. For sticky residue, you might find tips on how to clean tape residue off glass helpful for similar principles.
Cleaning the Interior of the Cassette Shell (If Opened)
If you have opened the cassette shell, you can now clean the inside. Use canned air or a blower brush to dislodge any loose dust or debris from the shell halves. Do not blow directly with your mouth, as this can introduce moisture. Next, take a fresh lint-free cotton swab lightly dampened with isopropyl alcohol. Carefully wipe down all internal surfaces of the shell, including the guide posts, rollers, and pressure pad assembly. These parts often accumulate grime that can affect tape movement and playback. Ensure all components are clean and free of lint. Let them air dry completely before reassembling. This meticulous cleaning prevents future issues.
Safe Methods for Cleaning the Magnetic Tape Itself
Cleaning the actual magnetic tape requires extreme care. This is the most delicate part of the entire cassette. Improper handling can permanently damage your audio. I approach this step with great patience and precision. Remember, the goal is to remove contaminants, not to scrub them into the tape.
Manual Tape Cleaning
This method is for tapes with visible dirt, dust, or light mold on the exposed tape. It is a slow and gentle process.
- Prepare your tools: Get fresh lint-free cotton swabs and a small dish with 90%+ isopropyl alcohol.
- Access the tape: If the cassette is open, you have direct access. If not, you will clean through the windows. Use a pencil or pen to gently turn the tape reels, exposing small sections of tape at a time.
- Dampen a swab: Dip a cotton swab into the isopropyl alcohol. Gently squeeze out any excess liquid against the side of the dish. The swab should be damp, not dripping.
- Clean the tape: Lightly touch the damp swab to the exposed section of the magnetic tape. Apply very little pressure. Gently move the swab in the direction of the tape’s travel. This means moving it along the length of the tape, not across its width. The goal is to lift dirt, not push it in.
- Rotate and repeat: As the swab picks up dirt, discard it and use a fresh one. Continue to gently wind the tape forward, cleaning small sections at a time. This process can be time-consuming, but patience pays off.
- Allow to dry: Ensure each cleaned section is completely dry before winding it onto the reel. Isopropyl alcohol evaporates quickly, but rushing can lead to problems.
Cleaning the Tape Heads (Indirectly)
While this article focuses on cleaning the tape, it’s worth noting that a dirty tape deck can re-contaminate your newly cleaned tape. For optimal sound, ensure your player’s tape heads and pinch roller are also clean. Cleaning your tape heads with isopropyl alcohol and a clean swab is similar to cleaning the tape itself, but on the player’s components. Remember, a clean player ensures your clean tape stays clean.
Avoid harsh scrubbing or excessive pressure. The magnetic coating is fragile. This cleaning method is for surface contaminants. If the tape shows severe physical damage, creasing, or binder degradation, professional restoration may be needed.
Addressing Specific Issues: Mold and Sticky Tapes
Sometimes, cassette tapes suffer from more than just dust. Mold growth and sticky shed syndrome are common problems that require specific, careful approaches. These issues can significantly degrade audio quality and even damage your player.
Dealing with Mold on Cassette Tapes
Mold often appears as white, fuzzy, or dark spots on the tape or inside the cassette shell. It thrives in humid environments. If you see mold, isolate the affected tape immediately to prevent it from spreading to other cassettes. Cleaning mold requires extra care to avoid spreading spores. Many cleaning principles for mold apply across different surfaces, such as how to clean mold in shower or mold off plastic.
- Open the shell: For moldy tapes, opening the shell is almost always necessary to effectively reach all affected areas.
- Isolate and ventilate: Work in a well-ventilated area, preferably outdoors or near an open window. Wear gloves and a mask to avoid inhaling mold spores.
- Initial mold removal: Use canned air or a soft brush to gently remove loose mold from the shell and tape. Do this away from other tapes and your home to prevent spreading spores.
- Alcohol cleaning: Dip a lint-free cotton swab in 90%+ isopropyl alcohol. Gently wipe the moldy sections of the tape. The alcohol helps kill the mold and lift it from the tape surface. Use a fresh swab frequently as it picks up mold.
- Wind and repeat: Slowly wind the tape from one reel to the other, cleaning sections as they are exposed. Be incredibly patient. This process can take a long time for heavily molded tapes.
- Clean the shell: Thoroughly clean both halves of the cassette shell with isopropyl alcohol, ensuring all traces of mold are gone.
- Dry completely: Allow the tape and shell to air dry completely in a dust-free environment before reassembling. Do not play a moldy tape until it is completely clean and dry, as it can contaminate your player.
Managing Sticky Shed Syndrome
Sticky shed syndrome (SSS) occurs when the binder holding the magnetic particles to the tape base deteriorates, becoming sticky or gooey. This can cause the tape to shed oxide onto your player’s heads and wrap around guide posts. SSS is more common in older tapes, particularly those made with certain binder formulations.
- Symptoms: Squealing sounds during playback, tape sticking to the heads, or visible brown residue on player components.
- Temporary fix (Baking): For severe SSS, a temporary solution known as “baking” the tape can sometimes re-bind the coating. This is a delicate process and should only be done as a last resort, as it can permanently damage the tape if done incorrectly. It involves exposing the tape to low heat in a controlled environment. I recommend researching this method extensively if you consider it, or seeking professional help.
- Playback after baking: If you bake a tape, immediately transfer its contents to a digital format. The effect is temporary, and the tape may become sticky again.
- Professional help: For valuable or severely affected tapes, professional audio restoration services are often the best choice. They have specialized equipment and experience to deal with these complex issues.
Always remember that these methods are for restoration, not a guarantee. Some tapes may be too far gone for effective cleaning or repair.
Post-Cleaning Care and Storage Tips
After you have meticulously cleaned your cassette tapes, the next crucial step is ensuring they remain in pristine condition. Proper post-cleaning care and storage prevent future contamination and degradation, preserving your audio memories for years to come. I always make sure I store my tapes correctly to avoid having to clean them again soon.
Reassembling and Testing
Once the tape and shell are completely dry, carefully reassemble the cassette. Ensure the tape is properly spooled onto the reels and that the pressure pad and rollers are in their correct positions. Gently screw the shell halves back together. Do not overtighten the screws.
Before storing, give the tape a quick test play in a clean cassette player. Listen for improved sound quality and ensure the tape plays smoothly without sticking or wobbling. If you hear issues, double-check your cleaning and reassembly. Remember to keep your cassette player in car clean too, as a dirty player can quickly re-contaminate a fresh tape.
Optimal Storage Conditions
Environmental factors are the biggest enemies of cassette tapes. Follow these guidelines for long-term preservation:
- Temperature Stability: Store tapes in a cool, stable environment. Avoid extreme temperature fluctuations, which can cause the tape binder to break down or the plastic shell to warp. An ideal range is generally 60-70°F (15-21°C).
- Humidity Control: Low humidity is crucial. High humidity encourages mold growth and can damage the magnetic coating. Aim for relative humidity between 40-50%. Desiccants like silica gel packets can help in very humid environments, but avoid direct contact with the tapes. Mold, in particular, can be a persistent issue; applying methods similar to how to clean mold with vinegar could be an option for external cases, though not recommended for the tape itself.
- Dust and Light Protection: Store tapes in their original cases or in dedicated cassette storage boxes. This protects them from dust, dirt, and damaging UV light, which can degrade plastic and magnetic media.
- Vertical Storage: Store cassettes vertically, like books on a shelf. This prevents stress on the tape reels and hubs, which can occur if stored horizontally for long periods.
- Away from Magnetic Fields: Keep tapes away from strong magnetic fields. Speakers, televisions, and even some appliances can erase or corrupt the magnetic data on your tapes. Store them on a wooden or non-magnetic metal shelf, away from electronic devices.
- Rewind Tapes: Always store tapes fully rewound or fully forwarded. Storing them partially wound can create uneven tension and lead to damage over time.
By following these post-cleaning and storage tips, you significantly extend the life of your cassette tape collection. You also ensure your hard work in cleaning them truly pays off.
FAQ Section
How often should I clean my cassette tapes?
The frequency depends on usage and storage. If tapes are played often or stored in dusty/humid conditions, inspect them regularly. Clean them when you notice visible dirt, mold, or experience playback issues like muffled sound or dropouts. For critical tapes, a gentle cleaning every few years or before digitizing is a good practice.
Can I use rubbing alcohol to clean cassette tapes?
Yes, you can use rubbing alcohol, but it is important to choose the right type. Always use isopropyl alcohol with a concentration of 90% or higher. Lower concentrations contain more water, which can potentially damage the delicate magnetic tape. Avoid using denatured alcohol or household cleaners, as they can leave residues or harm the tape.
What causes mold on cassette tapes?
Mold on cassette tapes is primarily caused by high humidity and poor ventilation during storage. Spores are naturally present in the air. When they land on tapes in a damp, stagnant environment, they find an ideal breeding ground. Storing tapes in basements, attics, or garages without climate control significantly increases the risk of mold growth.
Is it safe to open a cassette tape to clean it?
Opening a cassette tape is generally safe if it is designed with screws. Many older tapes have screws, allowing careful disassembly. Some newer or cheaper tapes are sonically welded or glued shut, making them impossible to open without destruction. Always check for screws first. If no screws are present, clean as much as possible through the tape windows.
Will cleaning my cassette tape improve the sound quality?
Yes, cleaning your cassette tape can significantly improve sound quality. Dirt, dust, and mold on the magnetic tape interfere with the playback head’s ability to read the audio signal accurately. Removing these contaminants reduces muffled sound, static, and dropouts, leading to clearer and more vibrant audio playback. It is a vital step for audio restoration.
Can I clean a tape that has been completely submerged in water?
Cleaning a tape that has been completely submerged in water is extremely difficult and often not successful. Water can permanently damage the binder and magnetic particles. While some attempt to dry and clean them, success is rare. Professional restoration is the only hope for valuable submerged tapes, and even then, results are not guaranteed.
Conclusion
Embarking on the journey of how to clean cassette tape is a rewarding endeavor. You are not just cleaning an object; you are preserving a piece of personal or historical audio. We have covered everything from gathering the right tools to executing delicate cleaning steps for both the cassette shell and the magnetic tape itself. We also addressed challenging issues like mold and sticky shed syndrome.
Remember, patience and precision are your best allies in this process. By following these guidelines, you can significantly improve the playback quality of your tapes and extend their lifespan. Maintaining a clean cassette player is also vital to prevent re-contamination. Now, take action! Gather your supplies, choose a quiet space, and begin the restoration process. Revive those cherished sound memories and enjoy them for years to come. Your old tapes are waiting to sound fantastic again.
- Cassette maintenance
- audio preservation
- vintage audio
- magnetic tape care
- mold on tapes
- sticky shed syndrome
- tape deck cleaning