· Tile Care · 19 min read
How To Clean Cement Tile

How To Clean Cement Tile: Essential Guide for Lasting Beauty
Cement tiles add special charm to any home. Their unique patterns and colors make spaces look beautiful. However, these tiles need special care to keep them looking good. Unlike ceramic or porcelain, cement tiles are porous. This means they can absorb liquids and stains easily. Cleaning them the right way helps them last for many years. This guide will show you how to clean cement tile, how to handle stains, and how to protect them from damage. I will share simple steps for daily care and deep cleaning. You will learn how to keep your cement tile floors looking new and vibrant.
Takeaway:
- Clean spills quickly to prevent stains.
- Use mild, pH-neutral cleaners always.
- Avoid acidic or harsh chemical products.
- Seal your cement tiles after installation and re-seal them often.
- Sweep or vacuum daily, mop weekly with a damp mop.
- Test any cleaning method in a small, hidden spot first.
To clean cement tile, use a soft mop with a pH-neutral cleaner mixed in warm water. Avoid harsh chemicals or acidic solutions that can damage the tile’s surface. Always wipe up spills right away and consider sealing the tiles to protect them from future stains.
Understanding Cement Tile: Its Unique Nature
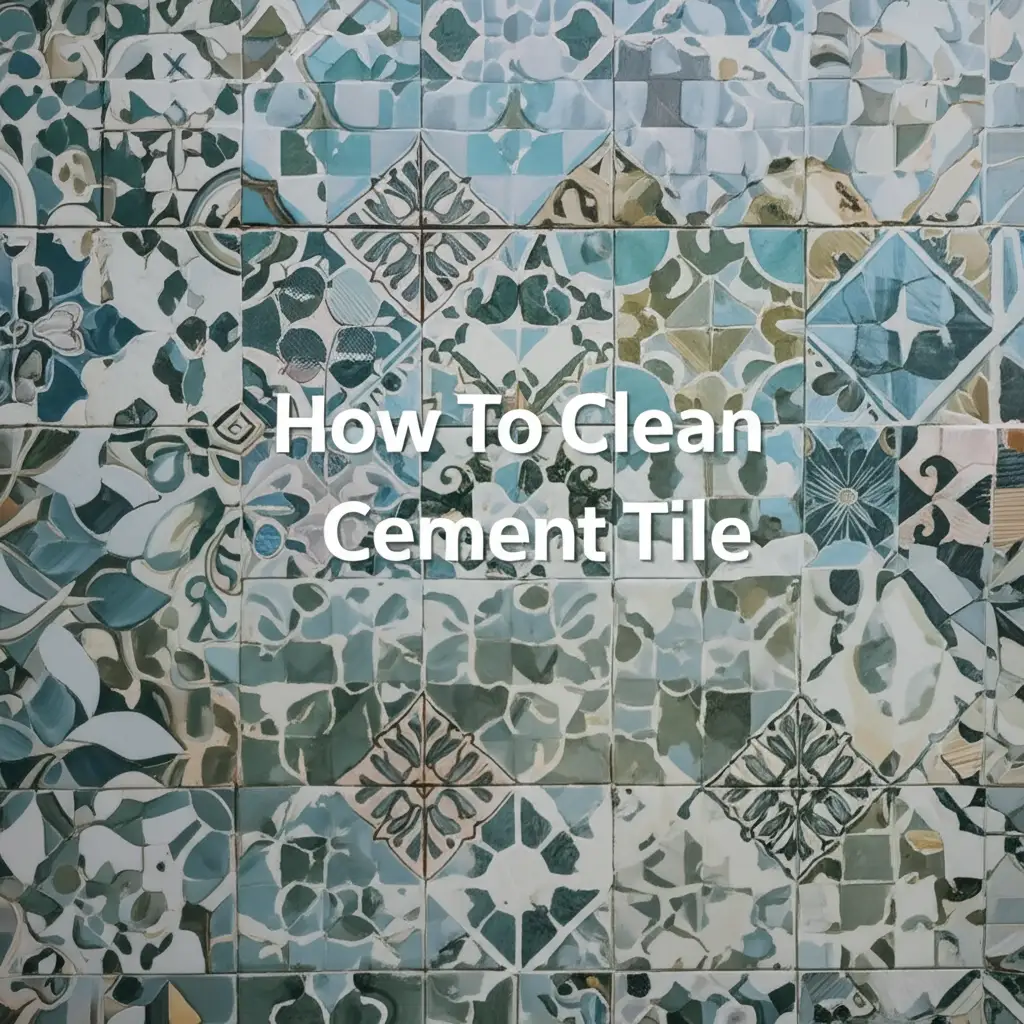
Cement tiles are different from other types of tile. They are handmade from cement, sand, and color pigments. This process gives them a unique look. It also makes them porous. A porous surface means the tile has tiny holes. These holes can soak up liquids. This is why cement tiles can stain easily if not cared for properly.
Their open nature means they need special attention. You cannot clean them the same way you clean ceramic or porcelain. Harsh chemicals can strip away their color or even erode the surface. This would ruin their natural beauty. Understanding this key difference helps you choose the right cleaning products and methods. Proper care helps preserve their beautiful finish for many years.
What Makes Cement Tiles Porous?
The way cement tiles are made creates their porous surface. They are not fired in a kiln like ceramic tiles. Instead, they are pressed and then cured. This curing process allows the cement mixture to harden. However, it leaves tiny pathways within the tile material. These pathways are what liquids can travel through.
Because of this, cement tiles need sealing. Sealing adds a protective layer on top of the tile. This layer fills the tiny holes. It stops liquids from soaking into the tile body. This step is important for stain prevention. Without a good seal, spills can become permanent marks very quickly.
Why Care is Different for Cement Tile
Caring for cement tile is different because of its absorbency. Strong cleaners designed for non-porous tiles can harm cement. Acidic cleaners, for example, will etch the surface. This means they will eat away at the tile, making it dull and rough. Bleach can also strip color. My goal is always to keep things simple and safe for the tile.
I recommend using mild, pH-neutral cleaners. These cleaners do not contain harsh acids or alkalis. They clean the surface without damaging the tile material or its colors. This gentle approach ensures the tiles stay beautiful and bright. It keeps their unique patterns intact for your enjoyment.
Essential Tools and Gentle Cleaners for Cement Tile
Choosing the right tools and cleaners is vital for cement tile. Using the wrong items can damage the tile. It can also strip away its color. I always pick products that are gentle yet effective. These items help keep your tiles looking their best without causing harm.
A good cleaning routine starts with the right supplies. You will need a few basic things for daily cleaning. For deeper cleaning or stain removal, you might need a few more items. Always make sure your cleaning solutions are pH-neutral. This is the safest choice for cement tiles.
Recommended Cleaning Tools
You do not need many special tools to clean cement tile. Start with simple items you might already have. These tools help you clean effectively without scratching the surface. Soft materials are always better for these tiles.
Here are the tools I use:
- Soft-bristle broom or vacuum cleaner: For daily dust and loose dirt. A vacuum should have a soft brush attachment.
- Microfiber mop or soft cloth mop: These mops are gentle on the tile. They also absorb water well.
- Two buckets: One for clean cleaning solution, one for rinse water. This keeps your cleaning water fresh.
- Soft scrub brush (optional): For stubborn spots, but use with caution and gentle pressure.
- Clean towels or old rags: For drying the tiles after mopping.
Make sure your mop heads are clean before each use. Dirty mops can spread dirt or even scratch the tile. I prefer microfiber because it picks up dirt well.
Safe Cleaning Solutions
The type of cleaner you use is the most important part. Cement tiles react badly to harsh chemicals. These chemicals can cause etching, fading, or other damage. Always check the label of any cleaner before you use it. Look for words like “pH-neutral” or “safe for natural stone.”
Here are my preferred cleaning solutions:
- Warm water: Often, warm water alone is enough for light cleaning.
- pH-neutral tile cleaner: Many brands make cleaners specifically for natural stone or cement tile. I always pick these.
- Mild dish soap (very diluted): For simple cleaning, a tiny drop of mild dish soap in a bucket of warm water works. Make sure it is truly mild.
- Hydrogen peroxide (diluted): For specific stains, used with caution.
- Poultice materials (e.g., baking soda, flour): For drawing out deep stains.
Avoid these products completely:
- Vinegar, lemon juice, or other acidic cleaners: These will etch the tile surface.
- Bleach or ammonia-based cleaners: These can strip color and damage the seal.
- Abrasive powders or scrubbing pads: These will scratch the tile.
- Oil-based cleaners: These can darken the tile or leave a residue.
When you buy a cleaner, check if it says “safe for cement tile” or “pH neutral.” This simple step saves your tiles from harm. If you are unsure, always test a small, hidden spot first.
Daily Care and Routine Cleaning for Cement Tile Floors
Regular cleaning keeps your cement tiles beautiful. It also helps prevent dirt from building up. This means you will need deep clean less often. A consistent routine is the best way to care for these special floors. I find that quick, daily steps make a big difference.
Think of it like brushing your teeth daily. Small actions add up to big results. This daily care is especially important if your cement tiles are in high-traffic areas. Areas like entryways or kitchens gather more dirt. Your routine helps keep the surface free from abrasive grit.
Sweeping or Vacuuming Daily
The first step in daily care is removing loose dirt. Dust, sand, and grit can act like sandpaper underfoot. These small particles can scratch the tile surface. Sweeping or vacuuming every day or every other day is important.
Here is how I do it:
- Sweep: Use a soft-bristle broom. Sweep the entire tiled area. Pay attention to corners and edges.
- Vacuum: If you use a vacuum, make sure it has a soft floor attachment. Do not use a beater bar, as this can scratch the tile. Go over the floor gently.
This step removes surface debris. It prepares the floor for any damp cleaning. This simple action helps preserve the tile’s finish. It also makes your home feel cleaner.
Weekly Damp Mopping
Even with daily sweeping, your tiles will need damp cleaning. This removes surface grime that sweeping misses. Damp mopping is different from wet mopping. You want to use minimal water. Too much water can soak into the unsealed grout or even the tile itself.
Here are the steps for weekly mopping:
- Prepare the solution: Mix a small amount of pH-neutral cleaner with warm water in one bucket. Follow the product’s directions for dilution.
- Mop the floor: Dip your microfiber mop into the cleaning solution. Wring out the mop very well. It should be damp, not dripping wet. Mop the floor in sections.
- Rinse the mop: Dip the mop into a second bucket of clean, plain water. Wring it out well again.
- Rinse the floor: Go over the mopped section with the clean, damp mop to remove any cleaner residue.
- Dry the floor (optional but recommended): Use a clean, dry towel to wipe down the tiles. This helps prevent water spots or streaks.
I always recommend rinsing the floor. Leaving cleaner residue can make the tiles look dull. It can also attract more dirt. Drying the floor helps ensure no moisture sits on the tile. For more general advice on cleaning all kinds of tile, you can check out this guide on how to clean tile floors. This process helps keep your cement tiles looking fresh and clean.
Deep Cleaning Cement Tile: When and How
Sometimes, daily cleaning is not enough. Over time, dirt can build up, or the tiles might lose their shine. This is when deep cleaning becomes necessary. Deep cleaning helps bring back the tile’s original look. It removes embedded dirt and refreshes the surface. I typically deep clean my cement tiles once or twice a year.
The frequency depends on how much traffic the area gets. High-traffic areas might need more frequent deep cleaning. Low-traffic areas might need it less often. Remember, always use gentle methods even for deep cleaning. Aggressive cleaning can harm the tile.
Preparing for Deep Cleaning
Before you deep clean, make sure you have all your supplies ready. This makes the process smoother. You will need your pH-neutral cleaner, two buckets, a soft mop, and soft brushes if needed. Make sure the area is clear of furniture and rugs.
Here are the preparation steps:
- Clear the area: Move furniture, rugs, and anything else off the tile.
- Thoroughly sweep or vacuum: Remove all loose dirt and debris. This step is even more important for deep cleaning.
- Inspect the tiles: Look for any specific stains or problem areas. This helps you focus your efforts.
Being prepared saves time and effort. It ensures you can focus on the cleaning itself.
The Deep Cleaning Process
Deep cleaning cement tiles uses a slightly stronger approach than daily mopping. You still use a pH-neutral cleaner. However, you might let the cleaner sit on the surface a little longer. You might also use a soft brush for scrubbing.
Follow these steps for deep cleaning:
- Mix stronger solution: Mix your pH-neutral cleaner with warm water. Use the maximum recommended dilution ratio for tough cleaning.
- Apply solution in sections: Pour the cleaning solution onto a small section of the floor. Let it sit for 5-10 minutes. Do not let it dry on the tile.
- Gently scrub: Use a soft-bristle brush or a soft mop to gently scrub the tile. Work in circular motions. Focus on dirty areas or grout lines. For tips on cleaning the grout itself, you can look into how to clean tile grout on floors.
- Remove dirty water: Use a wet/dry vacuum to suck up the dirty water. Or, use a clean mop to soak it up.
- Rinse thoroughly: Fill your second bucket with clean, plain water. Mop the area with the clean water several times. This removes all cleaner residue. Change the rinse water often.
- Dry completely: Use clean towels or a dry mop to dry the tiles. Ensure no water is left standing on the surface.
This process removes deeper grime. It helps restore the tile’s original appearance. It is crucial to rinse well. Any cleaner left on the tile can attract more dirt or leave a dull film.
Removing Common Stains from Cement Tile
Stains can happen, even with the best care. Because cement tile is porous, spills can soak in quickly. Acting fast is key to preventing permanent marks. Different types of stains need different cleaning approaches. I always try the gentlest method first. If that does not work, I move to a slightly stronger but still safe option.
Always test any stain removal method in a hidden spot first. This helps ensure it does not damage or discolor your tile. Remember that patience is important. Some stains need repeated treatments to fade or disappear. For general advice on removing floor stains, you can also refer to how to clean cement floor stains.
Oil and Grease Stains
Oil and grease stains are common in kitchens. They can soak into porous cement tile very easily. The key to removing them is to draw the oil out. A poultice works best for this. A poultice is a paste that pulls the stain from the tile.
Here is how to remove oil/grease stains:
- Blot excess: Use a clean cloth to blot up any fresh oil or grease. Do not rub, as this can spread the stain.
- Make a poultice: Mix absorbent material (like baking soda, talcum powder, or fuller’s earth) with a small amount of liquid. Use water or rubbing alcohol. Make a thick paste, like peanut butter.
- Apply the poultice: Spread the paste generously over the stain. It should be about 1/4 to 1/2 inch thick.
- Cover and wait: Cover the poultice with plastic wrap. Tape the edges down to keep it moist. Let it sit for 12-24 hours. The poultice needs to dry completely.
- Remove and clean: Once dry, scrape off the poultice with a plastic scraper. Brush away the residue. Clean the area with warm water and a pH-neutral cleaner.
- Repeat if needed: For stubborn stains, you might need to repeat the process.
The absorbent material in the poultice pulls the oil from the tile as it dries. This method is effective and safe for cement tile.
Mold and Mildew Stains
Mold and mildew grow in damp, humid areas. They appear as dark spots on tiles and grout. They are usually on the surface but can stain if left too long. Proper ventilation helps prevent them.
Here is how to remove mold/mildew:
- Prepare solution: Mix one part hydrogen peroxide (3%) with two parts water. Put it in a spray bottle.
- Spray the area: Spray the moldy spots. Let the solution sit for 10-15 minutes.
- Gently scrub: Use a soft brush to gently scrub the mold away.
- Rinse thoroughly: Rinse the area with clean water. Dry it with a clean cloth.
- For tough mold: If mold is deep in the grout, you might need a specific grout cleaner designed for mold. Always check that it is safe for cement tile.
Proper ventilation is your best defense against mold. Ensure bathrooms and kitchens are well-aired. If your cement tile is in a shower, you might find general tips for cleaning shower tile helpful, although specific methods for cement tile must be followed.
Rust Stains
Rust stains often come from metal objects left on the tile. They leave a reddish-brown mark. Rust needs a specific type of cleaner. You must use a rust remover made for natural stone or concrete. Do not use acidic rust removers.
Here is how to remove rust stains:
- Buy a stone-safe rust remover: Look for products specifically labeled “rust remover for natural stone” or “non-acidic rust remover.”
- Apply according to directions: Follow the product instructions very carefully. Usually, you apply a small amount directly to the stain.
- Let it work: Allow the product to sit for the recommended time.
- Rinse well: Rinse the area with plenty of clean water. Remove all residue.
- Repeat if needed: Some rust stains need a second application.
Always wear gloves and eye protection when using chemical rust removers. Use them in a well-ventilated area.
Other Common Stains (Paint, Mortar, Caulk)
Sometimes, after a project, you might find other residues on your tiles.
- Paint: If you have paint on your tiles, scrape off dried paint carefully with a plastic scraper. Do not use metal. For dried paint residue, you can try applying a small amount of mineral spirits or a paint stripper designed for concrete or masonry. Test it first. For more details, see how to clean paint off tile.
- Mortar or Thinset: For mortar or thinset haze, a specific acid-free cement remover is needed. Do not use standard muriatic acid. Look for “grout haze cleaner” or “cement film remover” that states “acid-free” or “safe for natural stone.” Gently scrub with a soft brush. For guidance on removing mortar off tile or even thinset off tile, check out those articles.
- Caulk: Fresh caulk can be wiped away with a damp cloth. Dried caulk needs gentle scraping with a plastic tool. Sometimes, a caulk remover can help, but test it first. Here’s a helpful guide on how to clean caulk off tile.
Remember, prevention is the best approach. Wipe spills quickly. Protect your tiles during home projects. This helps avoid many of these stain issues.
Sealing and Protecting Your Cement Tile
Sealing is the most important step for protecting cement tiles. It creates a barrier on the tile surface. This barrier stops liquids from soaking in. It makes the tiles much more resistant to stains. If your tiles are new, they must be sealed after installation. If they are older, they need re-sealing often.
Think of sealant like a raincoat for your tiles. It keeps water and other liquids from penetrating the material. Without a proper seal, even clean water can leave a dark mark. This is especially true if the water has minerals. A good seal also makes daily cleaning easier.
Why Sealing is Critical for Cement Tile
Cement tiles are like sponges without a seal. They absorb anything that spills on them. This makes them very prone to staining. Coffee, wine, oil, or even plain water can leave lasting marks. The color pigments in cement tile can also fade if exposed to harsh conditions or constant moisture without protection.
A high-quality sealant fills the tiny pores in the tile. It creates an invisible shield. This shield pushes liquids to the surface, giving you time to wipe them up. Sealing preserves the tile’s vibrant colors and patterns. It also extends the life of your floor. I always tell people sealing is not an option; it is a necessity for cement tile.
Types of Sealers and Application
There are different types of sealers for cement tile. The most common type is a penetrating sealer. This sealer soaks into the tile and cures within the pores. It does not leave a surface film. It allows the tile to breathe. There are also enhancing sealers. These deepen the tile’s color while sealing it.
Here is a general guide to applying sealer:
- Clean the tile: The tiles must be completely clean and dry before sealing. Any dirt or moisture will be trapped under the seal.
- Choose your sealer: Buy a penetrating sealer specifically made for cement tile or natural stone.
- Test in a small area: Always test the sealer in an unseen spot first. Make sure you like the look.
- Apply evenly: Use a paint roller, brush, or lambswool applicator. Apply a thin, even coat of sealer. Do not let it puddle.
- Wipe off excess: After the recommended dwell time (check product instructions), wipe off any excess sealer from the surface. Do not let it dry on the surface.
- Apply second coat: Most sealers require two or three coats. Wait the recommended time between coats.
- Cure time: Allow the sealer to cure fully before walking on or cleaning the tiles. This can take 24-72 hours.
I always recommend reading the sealer product instructions carefully. Each brand might have slightly different steps or cure times. Proper application ensures the best protection.
Re-sealing Frequency
Sealant does not last forever. It wears down over time, especially in high-traffic areas. The frequency of re-sealing depends on several factors:
- Traffic: High-traffic areas (kitchens, entryways) need re-sealing more often.
- Cleaning habits: Frequent or aggressive cleaning can wear down the seal faster.
- Type of sealer: Some sealers last longer than others.
- Environment: Outdoor tiles might need re-sealing more often due to weather exposure.
As a general rule, I recommend re-sealing indoor cement tiles every 2-3 years. For high-traffic areas or outdoor installations, you might need to re-seal every 1-2 years. You can test the seal by dropping a few drops of water on the tile. If the water beads up, the seal is good. If it soaks in, it is time to re-seal. Regular re-sealing is the best way to maintain the beauty and protection of your cement tiles.
Preventative Measures and Long-Term Cement Tile Maintenance
Beyond cleaning and sealing, smart habits can greatly extend the life of your cement tiles. Prevention is always easier than fixing a problem. By taking a few extra steps, you can keep your tiles looking great with less effort. These measures help avoid common issues like scratches, fading, and stubborn stains.
Think about how you use your tiled spaces. High-traffic areas and places where spills happen often need more attention. Simple changes to your daily routine can offer a lot of protection. My goal is to help you enjoy your beautiful cement tiles for decades.
Using Mats and Rugs
Placing mats and rugs in key areas protects your cement tiles. They act as barriers against dirt, moisture, and wear. This is especially important at entryways. Mats catch dirt from shoes before it spreads onto the tiles.
Consider placing mats in these spots:
- Entryways: An outdoor mat helps remove large debris. An indoor mat catches finer dirt and moisture.
- Kitchens: Mats near sinks and stoves protect against food and water spills. They also offer comfort when standing.
- Bathrooms: A rug outside the shower or tub absorbs splashes and prevents slips.
Choose rugs with a non-slip backing. This prevents them from moving around. Shake out or vacuum these mats regularly to remove trapped dirt. This simple step reduces the amount of dirt on your tiles. It lessens the wear and tear from foot traffic.
Quick Spill Cleanup
Speed is crucial when something spills on cement tile. Because these tiles are porous, liquids can soak in very fast. The longer a spill sits, the higher the chance it will leave a permanent stain. I always advise immediate action.
Here is my method for quick spill cleanup:
- Blot, do not wipe: Use a clean, absorbent cloth or paper towel. Gently blot the spill from the outside in. This prevents spreading the liquid.
- Clean the area: After blotting, wipe the spot with a damp cloth and a small amount of pH-neutral cleaner.
- Rinse and dry: Rinse the area with clean water. Dry it completely with a clean towel.
This quick response minimizes the time the liquid has to penetrate the tile. It greatly reduces the risk of staining. Make sure you always have clean cloths handy in areas with cement tile.
Protecting from Furniture and Scratches
Heavy furniture can scratch or chip cement tiles. Sliding chairs or tables can also leave marks. Taking steps to protect your tiles from these damages is easy.
Here are ways to prevent scratches:
- Furniture pads: Attach felt pads to the legs of all furniture that sits on your cement tile. Check these pads regularly. Replace them if they wear out.
- Lift, do not drag: When moving furniture, always lift
- cement tile cleaning
- tile maintenance
- natural tile cleaners
- stain removal
- tile sealing


