· Home Maintenance · 20 min read
How To Clean Chimney From Bottom Up
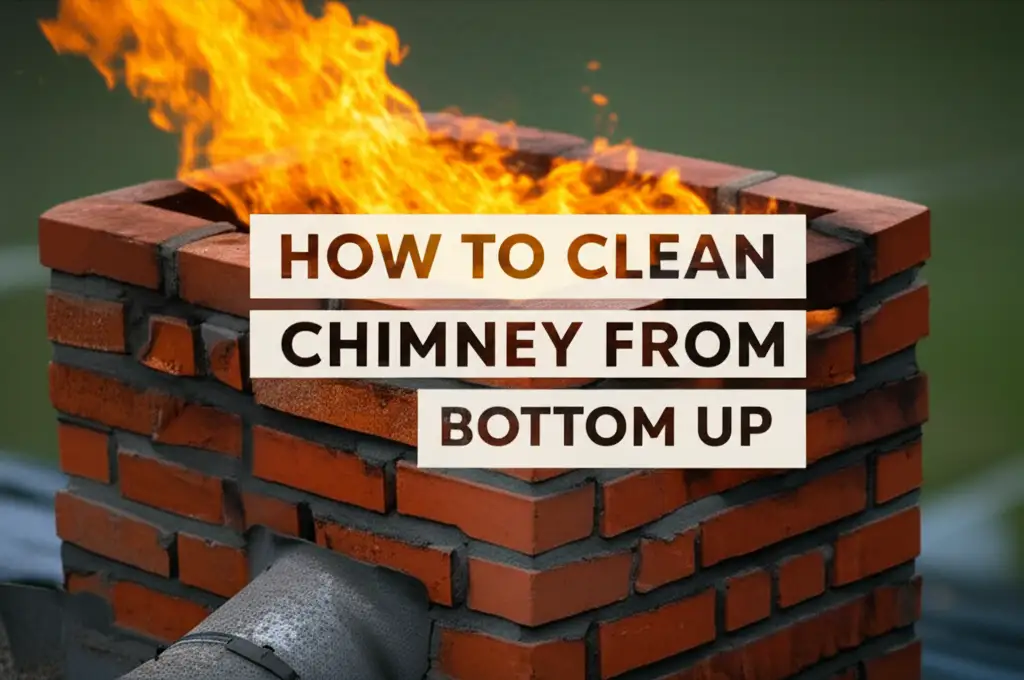
Clean Your Chimney from Bottom Up
Do you enjoy cozy fires in your fireplace? A dirty chimney can pose a fire risk. Creosote buildup is dangerous. Cleaning your chimney regularly is important for safety. Many people think chimney cleaning is a professional-only job. You can learn how to clean chimney from bottom up yourself. This method is effective and safer for many homeowners. It allows you to work from inside your home.
Cleaning your chimney prevents chimney fires. It also ensures proper ventilation. A clean chimney means a more efficient fireplace. This guide will walk you through the entire process. We will cover tools, preparation, and cleaning steps. You will learn how to handle the mess. You will also know when to call a professional. This article helps you keep your home safe and warm.
Takeaway
- Prioritize Safety: Always use proper protective gear. This includes gloves, goggles, and a respirator.
- Gather Tools: Collect specialized chimney brushes, rods, and a heavy-duty vacuum.
- Prepare Your Space: Cover furniture and seal the fireplace opening. This contains the mess.
- Brush Systematically: Clean the flue in sections using a bottom-up motion.
- Clean Up Thoroughly: Remove all dislodged soot and creosote safely.
To clean your chimney from the bottom up, gather specific tools like a chimney brush and flexible rods. Protect your home by sealing the fireplace opening with plastic sheeting. Then, insert the brush from the firebox. Push it upwards in sections to scrape off creosote. Regularly withdraw and empty the brush. Finish by vacuuming all fallen debris.
Understanding Bottom-Up Chimney Cleaning: Benefits and Safety
Cleaning your chimney is crucial for home safety. Over time, wood fires create a substance called creosote. Creosote is highly flammable. A thick layer of creosote can ignite. This causes a chimney fire. Such fires can damage your home. They also pose a serious danger to people inside. Regular cleaning removes this risk.
The bottom-up method for chimney cleaning offers several benefits. You work from inside your home. This means you do not need to climb onto your roof. Working on a roof can be dangerous. It presents risks of falls. The bottom-up approach makes the job more accessible for many homeowners. You can manage the debris more easily. Soot falls directly into the firebox or onto your prepared drop cloths. This helps contain the mess. This method is practical for DIY cleaning. It gives you control over the process. You can see the creosote as it falls.
Safety remains the top priority. Even when cleaning from the bottom, hazards exist. You will encounter soot and creosote dust. These particles can irritate your lungs. Always wear a respirator or a high-quality dust mask. Eye protection, like safety goggles, is also important. Soot can get into your eyes. Heavy-duty gloves protect your hands. Wear old clothes. They will get dirty. Never clean a chimney that has been recently used. Ensure the firebox is completely cold. Wait at least 24 hours after the last fire. This prevents burns and reduces smoke. Being prepared keeps you safe.
Knowing when to clean your chimney is also important. If you use your fireplace often, clean it more frequently. A good rule is to clean your chimney after every cord of wood burned. Inspect your chimney regularly. Look for creosote buildup. If you see a layer of creosote thicker than 1/8 inch, it is time to clean. Proper safety gear and planning make the job manageable.
Gathering Your Tools: Essential Equipment for a DIY Chimney Clean
Starting any cleaning project requires the right tools. Cleaning a chimney from the bottom up is no exception. Having all your equipment ready saves time. It also ensures you can complete the job effectively. Specialized tools make chimney cleaning easier and safer. Do not try to clean a chimney without them. Using the wrong tools can damage your chimney. It can also make the job harder.
The most important tool is a chimney brush. Chimney brushes come in different sizes and materials. You need a brush that matches your chimney flue’s size and shape. Measure your flue’s width and length before buying a brush. Brushes are typically round, square, or rectangular. They are made of wire or polypropylene bristles. Wire brushes are good for stubborn creosote. Polypropylene brushes are better for metal flues. They prevent scratches. Choose a brush that fits snugly against the flue walls. This ensures maximum scraping power. A loose brush will not clean well.
Next, you will need flexible chimney rods. These rods screw together. They allow you to extend your reach up the flue. Buy enough rods to reach the top of your chimney from the firebox. Most rods are about 3 to 4 feet long. They are designed to bend slightly. This helps them navigate the flue. Make sure the rods you buy are compatible with your chimney brush. Most brands use a universal screw-on fitting. Rods are key to the bottom-up method. They push the brush upwards.
You will also need a strong vacuum cleaner. A shop-vac or industrial vacuum works best. Regular household vacuums can get clogged. Fine soot particles can also damage their motors. Use a vacuum with a HEPA filter. This traps fine dust particles. These particles can affect air quality. You will use the vacuum to clean up all the dislodged creosote and soot. Drop cloths or old sheets are essential. They protect your floors and furniture. Use a heavy plastic sheet to seal the fireplace opening. This stops dust from entering your room. A strong flashlight helps you inspect the flue. You can see your progress and identify stubborn areas. A sturdy ladder or step stool might be needed if your fireplace opening is high. Have a metal bucket or sturdy trash bag for disposing of creosote. Consider a creosote remover log. These can help loosen buildup before manual cleaning. They are not a substitute for brushing.
Here is a list of essential tools:
- Chimney brush (sized for your flue)
- Flexible chimney rods
- Heavy-duty shop-vac with HEPA filter
- Drop cloths or old sheets
- Large plastic sheet and painter’s tape
- Respirator or high-quality dust mask
- Safety goggles
- Heavy-duty work gloves
- Strong flashlight
- Metal bucket or sturdy trash bags
- Old clothes
Having these items ready ensures a smoother cleaning process. You are now prepared for the next step.
Preparing Your Home: Protecting Your Space During Chimney Work
Chimney cleaning can be a very messy job. Soot and creosote are fine, black, and can stain almost anything. Preparing your home properly is vital. This step prevents a huge cleanup after the actual scrubbing. It protects your floors, furniture, and air quality. Do not skip this preparation phase. A little effort now saves you hours of cleaning later.
Start by clearing the area around your fireplace. Move all furniture, rugs, and decorative items. Get them at least 10 feet away from the fireplace opening. If you cannot move an item, cover it completely. Use old sheets or plastic tarps. Remember that soot particles can travel. They are very light. Covering everything thoroughly is important. Remove any valuable items from the room entirely. This includes electronics, delicate fabrics, and artwork. Close off the room if possible. Close interior doors to other parts of your house. This helps prevent soot from spreading.
Next, focus on sealing the fireplace opening. This is the most crucial step for containing the mess. Take a large plastic sheet. Heavy-gauge painter’s plastic works well. Use strong painter’s tape to secure the plastic sheet over the entire firebox opening. Tape all edges tightly. Ensure no gaps remain. You want an airtight seal. You will cut a small slit or hole in this plastic later. This hole allows you to insert the chimney rods and brush. Make the slit only as big as needed for the rods. This minimizes the escape of soot. You can also buy specialized fireplace tarps or sealing kits. These often have a built-in access hole with a drawstring.
Lay down drop cloths. Place them generously on the floor in front of the fireplace. Extend them several feet out. Soot will fall from the chimney. It will also come off the rods and brush as you work. Double-layering the drop cloths can offer extra protection. Old newspapers or cardboard can also be placed under the drop cloths for added absorption. If you have carpet, consider a heavier-duty plastic sheet first. Then, place your drop cloths over that. This gives maximum protection.
Close your fireplace damper before you start. This prevents any large debris from falling directly into your living space. It also helps contain some of the dust. However, you will need to open it partially when you start brushing. You need access to the flue. You will be working through the damper opening. Before beginning the actual cleaning, ensure the firebox is empty. Remove any logs, ash, or grates. Place them in a metal container outside. A thorough preparation makes the actual cleaning much less stressful. It keeps your home clean. You can then focus on the chimney itself.
Step-by-Step Guide: Cleaning Your Chimney Flue from the Fireplace
Now that your home is protected and tools are ready, it is time to clean. This section details the process of cleaning your chimney flue. Follow these steps carefully for effective creosote removal. Remember to wear all your safety gear. This includes your respirator, goggles, and gloves. Take your time. Do not rush the process.
- Inspect the Chimney (Briefly): Before starting, use a flashlight. Shine it up into the flue from the firebox. Look for any major blockages. Check for animal nests or large debris. Note the amount and type of creosote buildup. This helps you know what to expect. If you see very heavy, glazed creosote, consider calling a professional first.
- Open the Damper and Create Access: Gently open your fireplace damper. It needs to be open to allow the brush into the flue. If you sealed the fireplace with plastic, carefully cut a small slit. This slit should be just large enough for your chimney brush and rods to pass through. Tape the edges of the slit. This keeps the plastic from tearing further. This ensures that most of the soot stays inside your sealed area.
- Attach the Brush to the First Rod: Screw your chimney brush securely onto the end of your first flexible rod. Make sure it is tight. A loose brush can get stuck in the flue. This would create a bigger problem.
- Insert and Push Upwards: Carefully insert the brush and rod through the slit in your plastic cover. Push it up into the chimney flue. Use a steady, back-and-forth, scrubbing motion. Push the brush upwards. This scrapes the creosote off the chimney walls.
- Add More Rods: As the brush moves higher, you will need to add more rods. Pull the brush down slightly. Screw the next rod onto the first one. Push the brush up again. Continue this process. Work in sections. Scrape each section thoroughly. Focus on about 2-3 feet at a time before adding another rod. This ensures full coverage.
- Reach the Top: Continue adding rods and scrubbing. You will feel less resistance when the brush reaches the top of the flue. It means you have cleaned the entire length.
- Work Your Way Down: Once you reach the top, begin to pull the brush downwards slowly. Remove one rod at a time. Continue the scrubbing motion as you pull the brush down. This helps dislodge any remaining creosote. It also sweeps down the debris you just loosened. Ensure every part of the flue gets cleaned. This includes corners and crevices.
- Clear the Smoke Chamber: After cleaning the main flue, focus on the smoke chamber. This is the area above the damper. It funnels smoke from the firebox into the flue. Use your brush to clean the walls of the smoke chamber. This area can accumulate significant creosote. Scrape thoroughly. You may need to use a smaller hand brush for harder-to-reach spots. You can use a mixture of vinegar and baking soda to loosen stubborn deposits in the firebox area after the main brushing.
This systematic approach ensures a thorough clean. It removes dangerous creosote. Once you have brought the brush all the way down and removed it, the bulk of the cleaning is done. The next step is dealing with the mess.
Handling Creosote and Soot: Tips for Effective Debris Removal
After the scrubbing, your fireplace and hearth will be covered in soot and creosote. This is normal. It is a sign you did a good job. However, these materials are messy. They need careful handling. Effective debris removal is crucial. It ensures your home remains clean. It also prevents respiratory issues from fine particles. Do not rush this step.
First, let the dust settle. Do not immediately remove the plastic covering. Wait about 15-30 minutes. This allows the fine soot particles to settle down. If you open the cover too soon, a cloud of dust will fill your room. This makes cleanup harder. It also poses a health risk. Patience here pays off.
Once the dust has settled, it is time for vacuuming. Use your heavy-duty shop-vac. Make sure it has a HEPA filter. This filter traps the tiny soot particles. Carefully remove the plastic sheeting from your fireplace opening. Try to fold it inwards. This traps any clinging soot. Place the dirty plastic directly into a sturdy trash bag. Immediately seal the bag. Now, vacuum the entire firebox area. Get into all corners and crevices. Vacuum the hearth. Also, vacuum the drop cloths thoroughly before removing them. A good vacuum job minimizes airborne particles. For general cleaning around the fireplace, you can use a solution of baking soda. Learn more about cleaning various surfaces with baking soda.
Creosote comes in different forms. Powdery creosote is the easiest to remove. It is like fine ash. Flaky creosote is harder. It comes off in larger chunks. Glazed creosote is the most challenging. It is a hard, shiny, tar-like substance. This type is very difficult to remove with a brush alone. If you encounter large amounts of glazed creosote, you might need professional help. No amount of brushing will remove it completely. It needs specialized tools or chemicals.
After vacuuming, you will likely have some residue. For stubborn black residue on your firebox walls, a stiff brush and a cleaning solution can help. A paste made of baking soda and water can work for light stains. Apply it, let it sit, then scrub and wipe. For more persistent dark marks, you can consider specialty fireplace cleaners. Be careful with these products. They often contain harsh chemicals. Always follow the manufacturer’s instructions. Ensure good ventilation. Avoid mixing chemicals. Remember, cleaning tough, black buildup can be similar to tackling other challenging dark stains, like when you clean black mold off wood, requiring specific tools and methods.
Finally, dispose of the vacuumed debris. Empty your shop-vac canister carefully. Place the contents into sturdy trash bags. Double-bag them. Seal the bags tightly. Take them outside to your garbage bin immediately. Do not leave them inside your home. Soot has a strong smell. It can linger. Cleaning up effectively prevents this smell. It also keeps your home healthy.
Post-Cleaning Steps: Final Cleanup and Important Checks
The heavy work is done. But a clean chimney job is not complete without thorough final steps. These steps ensure your home is truly clean. They also confirm your chimney is ready for use. Proper post-cleaning actions prevent lingering mess. They also help identify any issues you might have missed.
First, do a final vacuuming of the entire room. Even with careful preparation, some fine soot particles can escape. Use a regular household vacuum with a good filter. Vacuum carpets, hard floors, and any upholstered furniture. Dust surfaces with a damp cloth. Soot is very fine. It can settle on surfaces that you thought were clean. Wipe down walls and window sills near the fireplace. You can use a mild all-purpose cleaner. For glass surfaces on fireplace doors, a vinegar solution works well. This detailed cleaning removes any last traces of dust. It restores your room to its normal state.
Next, it is time for a post-cleaning inspection. Use your flashlight. Look up into the flue again from the firebox. Check for any remaining creosote patches. Ensure the flue walls look clean. Look for any cracks or damage to the flue liner. Pay attention to the damper and smoke chamber. Make sure they are clear of debris. Open and close the damper to ensure it moves freely. This inspection confirms your cleaning was effective. It also helps spot potential hazards.
Inspect the outside of your chimney as well. Look for any obvious damage. Check the chimney cap. Make sure it is secure and free of blockages. A good chimney cap prevents animals and rain from entering. This quick exterior check adds another layer of safety. It also helps you spot problems early.
Regular maintenance extends the life of your chimney. It also keeps it safe. After cleaning, think about how often you use your fireplace. This helps determine your cleaning schedule. For frequent users, clean more often. Consider burning seasoned wood. Seasoned wood burns hotter and cleaner. It produces less creosote. Avoid burning trash or green wood. These create more creosote. Store firewood in a dry, covered area. This prevents moisture buildup. Moist wood leads to more creosote.
You can also use a chimney inspection camera. These small cameras attach to rods. You can send them up the flue. They provide a clear view of the interior. This helps you spot issues you might miss with a flashlight. It is a small investment for peace of mind. Keeping a log of your cleaning dates is also a good practice. This helps you stay on schedule. A clean chimney is a safe chimney.
Knowing When to Call a Pro: When DIY Cleaning Is Not Enough
While cleaning your chimney from the bottom up is achievable for many, there are times when a professional chimney sweep is necessary. Knowing these situations is crucial. It ensures your safety. It also protects your home from potential hazards. A professional sweep has specialized training. They also have tools for various chimney issues. They can spot problems that a homeowner might miss.
One major reason to call a professional is for glazed creosote. As mentioned, this type of creosote is hard and shiny. It sticks firmly to the chimney walls. It is highly flammable. Standard chimney brushes struggle to remove it. Professionals use special power tools. They also use chemical treatments designed for glazed creosote. If your inspection reveals thick, glazed creosote, do not attempt to remove it yourself. It is a job for experts. Trying to force it can damage your flue liner.
Another key reason is advanced chimney issues. During your inspection, you might find cracks in the flue liner. You might see crumbling mortar. These are serious structural problems. They can allow heat and sparks to escape. This creates a fire risk. A professional chimney sweep performs a thorough inspection. They can identify these issues. They can also recommend repairs. Some issues, like a damaged crown or flashing, require specialized repair work. This is beyond basic cleaning.
If you suspect an animal nest or major blockage, call a professional. Animals like birds, squirrels, or raccoons can build large, dense nests. These blockages prevent smoke from escaping. This can lead to carbon monoxide buildup in your home. They can also be fire hazards. Removing these nests can be difficult and messy. Professionals have the tools to do it safely. They can also install chimney caps. These prevent future animal entry.
Also, consider professional help if you have a complex chimney system. Some chimneys have multiple flues. Others have unusual bends or angles. These can be difficult to navigate with standard homeowner tools. A professional sweep has various brushes and techniques. They can handle complex designs. If you have any doubt about your ability to clean your chimney thoroughly, call a pro.
Finally, regular professional inspections are vital. The Chimney Safety Institute of America (CSIA) recommends annual inspections. This is true even if you clean your chimney yourself. A professional inspection checks more than just creosote. They check the entire chimney system. This includes the fireplace structure, damper, smoke chamber, and cap. They look for hidden damage. They ensure everything works safely. You might clean the flue, but a professional provides a comprehensive safety check. This peace of mind is invaluable.
Frequently Asked Questions
How often should I clean my chimney using the bottom-up method?
You should clean your chimney at least once a year. If you burn wood frequently, especially unseasoned wood, clean it more often. A good rule is to clean after every cord of wood consumed. Always inspect your flue for creosote buildup. If it is 1/8 inch thick or more, it is time to clean. Regular cleaning prevents fires.
What are the main advantages of cleaning from the bottom up?
Cleaning from the bottom up offers several advantages. You work from inside your home. This avoids climbing onto a potentially dangerous roof. It also helps contain the mess. Soot and creosote fall directly into the fireplace. This makes cleanup more manageable. It is a practical method for many homeowners.
Can I use a regular vacuum cleaner for chimney soot?
No, do not use a regular household vacuum cleaner for chimney soot. Fine soot particles can damage the motor. They can also clog the filter quickly. A regular vacuum does not trap fine particles well. This releases them back into your air. Always use a heavy-duty shop-vac with a HEPA filter. This protects your vacuum and your air quality.
What should I do if I find glazed creosote in my chimney?
If you find glazed creosote, you should call a professional chimney sweep. Glazed creosote is a very hard, tar-like substance. It is highly flammable and very difficult to remove with standard brushes. Professionals have specialized tools and chemicals. They can safely remove it. Trying to remove it yourself can damage your flue.
How long does it take to clean a chimney from the bottom up?
The time it takes varies. It depends on the amount of creosote and your experience. For a first-timer, expect 2-4 hours. This includes setup, actual cleaning, and thorough cleanup. With practice, it might take less time. Always allow ample time for preparation and proper disposal of debris.
Is it safe to clean my chimney myself?
Yes, it can be safe to clean your chimney yourself if you follow proper safety guidelines. Wear a respirator, safety goggles, and heavy-duty gloves. Ensure the fireplace is completely cold. Prepare your home by covering furniture and sealing the firebox. If you see significant damage or heavy glazed creosote, call a professional. Your safety is paramount.
Conclusion
Cleaning your chimney from the bottom up is a practical task. It helps maintain your home’s safety and warmth. We have covered every step, from gathering tools to thorough cleanup. You now understand the benefits of this method. You also know the crucial safety measures. Regular chimney cleaning prevents dangerous creosote buildup. It also ensures your fireplace operates efficiently.
Remember the importance of proper preparation. Protect your home from the inevitable mess. Use the right tools for the job. Do not forget your safety gear. A systematic approach ensures a thorough clean. Always inspect your chimney after cleaning. This confirms its readiness for use. It also helps spot any missed areas.
While DIY cleaning is empowering, know your limits. Glazed creosote or structural damage requires a professional touch. Annual professional inspections offer peace of mind. They catch issues you might overlook. Taking care of your chimney means taking care of your home. A clean chimney is a happy and safe chimney. Keep your fires burning brightly and safely. Regular maintenance ensures enjoyment for years to come.
- chimney cleaning
- creosote removal
- fireplace maintenance