· Home Maintenance · 17 min read
How To Clean Condensate Pump
Clean Your Condensate Pump: A Complete Guide
Have you noticed strange noises coming from your air conditioner or furnace? Does your HVAC system sometimes stop working unexpectedly? A clogged condensate pump could be the problem. This small device plays a big role in removing water from your heating and cooling systems. When it gets dirty, it causes big issues. Learning how to clean a condensate pump can save you from costly repairs and keep your home comfortable. I will show you how to do it step-by-step.
Cleaning your condensate pump regularly keeps your HVAC system efficient. It prevents water damage to your home. This guide will walk you through everything you need to know. We will cover why cleaning is important, what tools you need, and the simple steps to get the job done. You will also learn how to maintain your pump after cleaning for lasting performance. Let us ensure your condensate pump works properly.
Takeaway:
- Regular cleaning prevents HVAC system failures and water damage.
- Disconnect power and drain the pump before cleaning.
- Use vinegar or bleach solution to remove mold and slime.
- Rinse all parts thoroughly before reassembly.
- Perform periodic checks to keep your pump running smoothly.
A condensate pump removes water (condensate) that collects in HVAC systems like air conditioners, furnaces, and dehumidifiers. You clean it by disconnecting power, emptying the reservoir, and scrubbing away slime and debris with a mild cleaner. This prevents clogs, overflows, and system shutdowns, ensuring proper water drainage.
Why Your Condensate Pump Needs Regular Cleaning
Your condensate pump handles a constant flow of water. This water contains dust, dirt, and microscopic organisms. Over time, these particles combine to form a slimy buildup. This sludge often looks like black or green goo. This buildup collects inside the pump’s reservoir and on its components. It can block the inlet and outlet ports. It also restricts the float switch movement.
A dirty condensate pump cannot do its job well. The float switch tells the pump when to turn on. Slime can stop the float from rising. This means the pump does not activate when the water level gets too high. Water then overflows from the reservoir. This overflow can cause water damage to your floor, ceiling, or nearby walls. It can also trip a safety switch on your HVAC unit. This shuts down your entire system.
Regular cleaning prevents these problems. It ensures the pump operates freely. It also extends the life of your HVAC unit. You avoid costly service calls and unexpected breakdowns. A clean pump means a healthy home. It also means consistent comfort for you and your family. I always make time for this important task.
Common Issues Caused by a Dirty Pump
Several problems signal a dirty condensate pump. Pay attention to these signs. Early detection helps you avoid larger issues. I have seen these problems many times.
- Water Leaks: You might find puddles near your furnace or air handler. This is a clear sign the pump cannot move water out. The reservoir overflows. This causes damage to surrounding areas.
- HVAC System Shutdowns: Many HVAC units have a safety switch connected to the condensate pan. If water backs up, this switch turns off the unit. This prevents damage. You might notice your AC or furnace just stops working.
- Unusual Noises: A pump struggling with sludge makes strange noises. You might hear humming, gurgling, or rattling. These sounds indicate blockages or motor strain.
- Foul Odors: Mold and mildew grow in the standing water and slime. This produces a musty or sour smell. This odor often spreads throughout your home.
Addressing these issues quickly saves you money. It also keeps your home healthy. Cleaning your condensate pump is a simple solution to these common problems. Remember that a clean pump works better.
Gathering Your Tools: What You Need to Clean a Condensate Pump
Before you start, gather all necessary tools and materials. Having everything ready saves time. It makes the cleaning process smooth. You likely have most of these items already in your home. I always prepare my workspace first.
Essential Tools and Supplies
You do not need many specialized tools. Most items are common household supplies. Get these ready before you begin.
- Bucket or Wet/Dry Vacuum: You need this to collect water. A bucket works for manual draining. A wet/dry vacuum makes draining easier.
- Gloves: Protect your hands from grime and cleaning solutions. Disposable gloves are a good choice.
- Safety Goggles: Protect your eyes from splashes. This is very important when using cleaning agents.
- Screwdriver (Phillips or Flathead): You might need this to open the pump casing. Some pumps have screws.
- Old Towels or Rags: Use these to wipe up spills. They also help dry parts.
- Small Brush or Bottle Brush: Use this to scrub inside the reservoir. It reaches tight spots. An old toothbrush also works well.
- Measuring Cups: For precise measurements of cleaning solutions.
- Water: For rinsing.
- Distilled White Vinegar or Bleach: These are the primary cleaning agents.
- White Vinegar: This is my preferred choice. It is a natural disinfectant. It breaks down mold and slime. It is safer for pump components. For general cleaning, vinegar is excellent for removing mold. You can learn more about how to clean mold with vinegar here.
- Bleach: Use a small amount of bleach solution for tough mold. Mix one part bleach with 10 parts water. Bleach is very effective against mold in a shower, for instance. However, use it carefully.
I prefer using white vinegar whenever possible. It is effective and less harsh on plastics and seals. If you have severe mold buildup, a diluted bleach solution works best. Just be sure to rinse thoroughly afterwards.
Step-by-Step Guide: Safely Disconnecting Your Condensate Pump
Safety comes first when working with electrical appliances. Disconnecting the power is the most important step. Do not skip this. I always double-check my power sources.
Disconnecting Power and Draining the Pump
Follow these steps carefully to ensure your safety. This prevents electric shock. It also prevents damage to your pump.
Turn Off Power to Your HVAC System:
- Locate the circuit breaker for your furnace or air conditioner. This is usually in your main electrical panel.
- Flip the breaker to the “OFF” position.
- If you cannot find the specific breaker, turn off the main power to your home.
- Also, unplug the condensate pump itself if it has a separate power cord. Many pumps plug into a standard outlet or a dedicated electrical box near the HVAC unit.
- Confirm the power is off. You can use a non-contact voltage tester if you have one.
Locate the Condensate Pump:
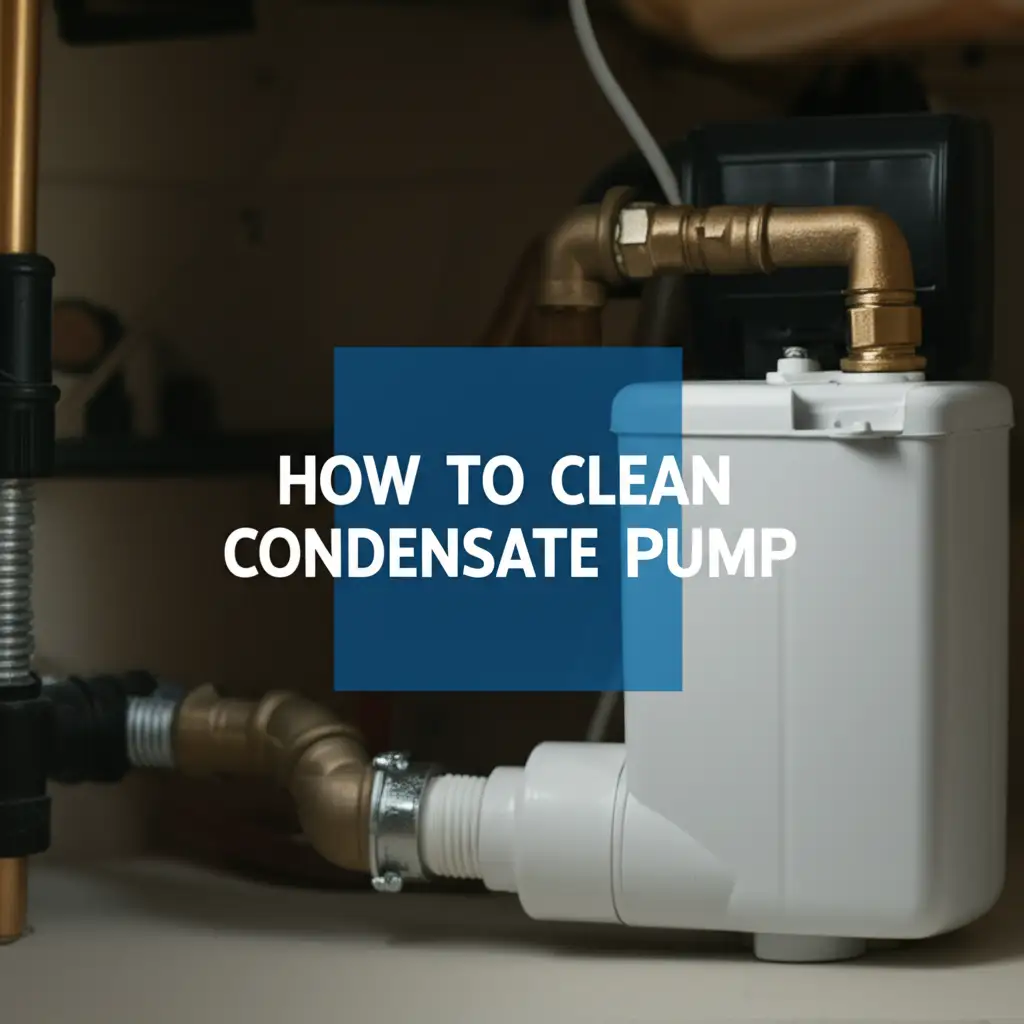
- The condensate pump typically sits near your indoor AC unit, furnace, or air handler. It is usually a small box, often made of plastic. It has hoses connected to it.
- You might find it in your basement, utility closet, or attic.
Disconnect Hoses and Tubing:
- There will be an inlet hose. This hose brings water from the HVAC unit’s drain pan to the pump. Carefully disconnect this hose.
- There is also an outlet hose (discharge line). This hose carries water away from the pump to a drain. Disconnect this hose too.
- Be ready for some water to spill. Have your towels or bucket nearby.
- Some pumps have a vent tube. Disconnect this if present.
Drain the Pump Reservoir:
- Carefully lift the pump. Carry it to your bucket or utility sink.
- Pour out any remaining water from the reservoir.
- You will likely see some sludge or slime at the bottom. This is normal.
Once these steps are complete, your pump is ready for cleaning. You have made it safe to work on. I always feel better once the power is off.
Thorough Cleaning Process: How to Remove Slime and Debris
Now for the main event: cleaning the pump itself. This part requires some elbow grease. But it is very satisfying to see the grime disappear.
Dismantling and Cleaning Components
Follow these steps to deep clean your condensate pump. Pay attention to each part.
Open the Pump Housing:
- Most condensate pumps have a lid or cover. This cover can be removed.
- Look for clips, latches, or screws. Use your screwdriver if needed.
- Carefully lift off the lid. This exposes the inside of the reservoir. You will also see the float switch and possibly the pump motor.
Remove the Float Switch:
- The float switch is a crucial part. It often looks like a small, hollow plastic cylinder or ball. It sits on a rod or lever.
- Gently lift it out. Be careful not to bend any wires or components.
- This switch gets covered in slime. This prevents it from moving freely.
Clean the Reservoir:
- Scrub the inside of the reservoir. Use your small brush and warm water.
- Remove all visible slime, mold, and sediment.
- For stubborn buildup, mix your cleaning solution.
- Vinegar Solution: Mix equal parts distilled white vinegar and warm water. Pour this into the reservoir. Let it sit for 15-30 minutes. The acid in the vinegar breaks down the slime. Vinegar is a gentle yet effective cleaning agent. It is a good choice for various cleaning tasks, including cleaning glass with vinegar.
- Bleach Solution (for tough mold): Mix 1 part bleach with 10 parts water. Use this solution for severe mold. Pour a small amount into the reservoir. Let it sit for a few minutes.
- After soaking, scrub again. Rinse the reservoir thoroughly with clean water. Make sure no cleaning solution remains.
Clean the Float Switch:
- Clean the float switch and its rod or lever. Use your brush and warm water.
- Remove all slime. Ensure the float slides smoothly up and down. This is critical for the pump to turn on.
- Soak the float switch in your chosen cleaning solution if it has heavy buildup.
- Rinse it well.
Clean the Inlet and Outlet Ports:
- The ports are where the hoses connect. Slime often clogs these openings.
- Use your small brush or even a pipe cleaner. Clear any blockages.
- Ensure water can flow freely through them. This is similar to clearing a furnace condensate drain line. Blockages here prevent proper drainage.
Clean the Check Valve (if present):
- Some pumps have a check valve on the outlet port. This valve stops water from flowing back into the pump.
- Inspect it for debris. Clear any blockages.
- Make sure its small flap or ball moves freely.
Clean the Impeller (if accessible):
- The impeller is the part that moves the water. It is inside the pump motor housing.
- Sometimes you can access it by unscrewing a few more parts.
- If you can reach it, clean any hair or debris wrapped around it. This is similar to cleaning a dishwasher pump or a pool pump impeller. If the pump impeller is clogged, it cannot move water.
Make sure every component is free of slime and debris. A thorough cleaning now saves you trouble later. I take my time during this phase.
Reassembly and Testing: Getting Your Pump Back in Action
After cleaning, you need to put everything back together. Then, test the pump to ensure it works correctly. This is the last step before your HVAC system can resume normal operation.
Putting It All Back Together
Follow these steps for proper reassembly. Accuracy here prevents leaks and malfunctions.
Reinstall the Float Switch:
- Carefully place the clean float switch back into its position.
- Ensure it slides freely on its rod or lever. It must move up and down without sticking.
- This is important for the pump’s automatic operation.
Close the Pump Housing:
- Place the lid or cover back onto the pump reservoir.
- Secure it using the clips, latches, or screws. Make sure it is sealed tightly. A loose cover could lead to leaks or inefficient operation.
Reconnect Hoses and Tubing:
- Reconnect the inlet hose from your HVAC unit to the pump’s inlet port. Ensure it is secure.
- Reconnect the outlet (discharge) hose from the pump to its drain location. Make sure this connection is also tight.
- If your pump had a vent tube, reconnect it.
Return the Pump to Its Location:
- Place the reassembled pump back in its original position.
- Ensure it sits on a level surface. This helps with proper water collection and pumping.
Testing the Pump
Testing is crucial. It confirms your cleaning efforts were successful. It also ensures the pump operates safely.
Restore Power to the Pump:
- Plug the condensate pump back into its electrical outlet.
- Turn the circuit breaker for your HVAC system back to the “ON” position.
Manual Test (Optional but Recommended):
- Locate the float switch. Many pumps have a manual test button. Pressing this button lifts the float, activating the pump.
- If no button exists, you can manually lift the float switch inside the reservoir with a non-conductive object. Do this carefully.
- The pump should turn on. You should hear the motor running. Water should pump out through the discharge line. If you do not have water in the reservoir, you can pour a small amount of clean water into it to simulate overflow.
Operational Test:
- Turn on your HVAC system. Set your air conditioner to a low temperature. This makes it run and produce condensate quickly.
- Watch the condensate pump. It should start collecting water.
- Once the water level rises enough, the float switch should activate the pump.
- The pump should run, emptying the reservoir. Then it should shut off when the water level drops.
- Check for any leaks around the connections you made.
If the pump activates, drains the water, and stops, you have successfully cleaned it! If it does not, you might need to recheck your connections or ensure the float switch moves freely. Sometimes, a pump is simply beyond cleaning and needs replacement. But often, cleaning solves the problem.
Preventative Maintenance: Keeping Your Condensate Pump Clean Longer
Regular cleaning is key. But you can do more to keep your condensate pump cleaner for longer. Preventative measures reduce the frequency of deep cleaning. They also extend the pump’s life.
Tips for Extended Pump Life
I always recommend these practices. They make a big difference.
Regular Visual Inspection:
- Check your condensate pump monthly. Look for standing water in the reservoir when the pump should be off.
- Look for signs of mold or slime buildup. Inspect the hoses for kinks or blockages.
- Early detection of issues saves you from major problems. This is a quick check that pays off.
Add Vinegar or Bleach Periodically:
- Every 3-6 months, add a small amount of cleaning solution to the pump.
- Pour 1/4 cup of distilled white vinegar into the condensate pan of your HVAC unit. The water carries it down to the pump. This helps prevent algae growth.
- Alternatively, you can add 1 tablespoon of bleach (mixed with 1 cup of water) directly into the pump’s reservoir. Be cautious with bleach.
- This routine flush helps dissolve minor buildup before it becomes a problem.
- Vinegar is also good for cleaning other parts of your HVAC system, like heat pump coils. Keeping the whole system clean improves efficiency.
Keep the Area Around the Pump Clean:
- Dust and debris in the surrounding area can enter the condensate pan and then the pump.
- Regularly vacuum or clean the area around your furnace or air conditioner.
- Ensure the pump’s inlet is not obstructed by insulation or debris.
Check for Proper Drainage Slope:
- Ensure the drain line from your HVAC unit to the condensate pump has a slight downward slope. This allows water to flow easily into the pump.
- A flat or upward-sloping line can cause water to sit, encouraging growth.
Consider a Condensate Pan Tablet:
- You can buy special tablets designed to prevent algae and slime in condensate pans.
- Place one tablet in your HVAC unit’s condensate pan every few months.
- These tablets slowly dissolve. They release chemicals that inhibit biological growth. This keeps the pan and pump cleaner.
These simple steps make a big difference. They minimize the need for frequent deep cleaning. Your condensate pump will work efficiently for years.
Troubleshooting Common Condensate Pump Issues After Cleaning
Even after a thorough cleaning, sometimes issues persist. Do not worry. Many common problems have simple solutions. I have helped many people troubleshoot these.
Addressing Persistent Problems
If your pump is still acting up, consider these possibilities.
Pump Runs Constantly:
- Issue: The pump never turns off.
- Cause: This often means the float switch is stuck in the “up” position. Or, the check valve is faulty. It could also mean a blockage in the discharge line.
- Solution: Disconnect power. Re-check the float switch. Make sure it moves freely. Inspect the discharge line for clogs. Clear any debris. Check the check valve for proper operation. The check valve allows water to only flow in one direction.
Pump Does Not Turn On:
- Issue: Water fills the reservoir, but the pump does not activate.
- Cause: The float switch might be stuck in the “down” position. Or, there is no power to the pump. The motor itself might be faulty.
- Solution: First, verify power at the outlet. Check the circuit breaker. Then, inspect the float switch. Ensure it moves freely. If the float moves but the pump still does not start, the motor might be burned out. This usually means you need a new pump.
Pump Makes Noise But No Water Pumps:
- Issue: You hear the motor, but water is not moving.
- Cause: The impeller is likely clogged or damaged. Or, there is a severe airlock in the discharge line.
- Solution: Disconnect power. Open the pump. Inspect the impeller for debris. Clear any hair or gunk wrapped around it. If it seems damaged, the pump might need replacing. For airlocks, disconnect the discharge line and try to clear it manually. Sometimes, pouring water slowly into the reservoir helps clear an airlock.
Water Leaks from Connections:
- Issue: Water drips from where hoses connect.
- Cause: Hoses are not tight enough. Or, the rubber seals are old and cracked.
- Solution: Tighten all hose clamps. If leaks persist, replace the rubber washers or the hoses themselves. Ensure you use the correct size hoses and clamps for a secure fit.
Frequent Clogging of Discharge Line:
- Issue: The small discharge line gets clogged repeatedly.
- Cause: This indicates persistent algae or slime growth. Or, the line is too long. It might have too many bends.
- Solution: Increase the frequency of adding vinegar or bleach to the condensate pan. Consider replacing the narrow discharge tubing with slightly wider, smoother tubing if possible. Reduce the length of the tubing and avoid sharp bends.
Most condensate pump issues stem from clogs or electrical interruptions. Systematic troubleshooting helps pinpoint the problem. If you have tried all these steps and the pump still fails, it might be time for a replacement. A new pump is not expensive. It prevents future headaches.
FAQ Section
How often should I clean my condensate pump?
You should clean your condensate pump at least once a year. If your HVAC system runs frequently, especially in humid climates, or if you notice slime buildup, clean it every 3-6 months. Regular cleaning prevents clogs and extends the pump’s life. This also keeps your system running well.
Can I use bleach to clean my condensate pump?
Yes, you can use bleach, but with caution. Mix one part household bleach with 10 parts water. This diluted solution effectively kills mold and mildew. However, too much bleach or undiluted bleach can harm plastic or rubber pump components over time. Always rinse thoroughly after using bleach.
What happens if I don’t clean my condensate pump?
If you do not clean your condensate pump, it will eventually clog with slime and debris. This causes the pump to fail. Water will then back up in your HVAC system’s drain pan. This leads to water overflowing, causing damage to your home. It can also trigger a safety switch, shutting down your entire heating or cooling unit.
Is a condensate pump really necessary?
A condensate pump is necessary if your HVAC system’s drain pan is below the level of your main drain line. Gravity cannot move the water uphill. The pump pushes the water out. Without it, condensate would accumulate and cause extensive water damage. It is a vital component for proper drainage in many homes.
How do I know if my condensate pump is broken or just clogged?
A clogged pump might run constantly without moving water, or it might not turn on at all due to a stuck float. A broken pump, however, often shows no signs of life even with power, or it might leak from its casing. If cleaning does not resolve the issue, and you have confirmed power, the pump is likely broken and needs replacement.
Conclusion
Cleaning your condensate pump is a straightforward but essential task. It keeps your HVAC system running smoothly. It also protects your home from water damage. We covered why this small pump matters, what tools you need, and the step-by-step process for a thorough clean. You now understand how to safely disconnect, dismantle, and scrub away that stubborn slime.
Remember the power of preventative maintenance. A little attention now saves you big headaches later. Regularly inspecting your pump and adding a vinegar solution can significantly reduce future clogs. Do not let a dirty condensate pump disrupt your home comfort. Take action today. Give your condensate pump the clean it deserves. Your HVAC system will thank you for it.
- condensate pump cleaning
- HVAC maintenance
- drain pump cleaning
- AC cleaning
- furnace maintenance
- prevent clogs

