· Automotive Maintenance · 10 min read
How To Clean Cylinder Head

Revitalize Your Engine: How to Clean a Cylinder Head
Have you ever wondered what keeps your engine running smoothly? The cylinder head plays a vital role. It sits on top of the engine block, sealing the combustion chambers. Over time, carbon and oil deposits build up. This buildup harms engine performance. Knowing how to clean cylinder head parts makes a difference.
Cleaning the cylinder head improves engine efficiency and power. It also extends the life of your vehicle. A clean head ensures proper valve sealing and airflow. This article will show you the exact steps. We cover the tools you need and common mistakes to avoid. Get ready to give your engine the care it needs.
Takeaway
Cleaning your cylinder head helps your engine run better. Here are the main points:
- Gather the right tools and safety gear first.
- Choose between cleaning with the head removed or partially in place.
- Use proper chemicals and mechanical methods for different deposits.
- Clean gasket surfaces completely for a good seal.
- Perform a final check before putting parts back together.
Clear, Concise Answer
To clean a cylinder head, remove it from the engine for a thorough job. Scrape large deposits, then use specialized chemical cleaners to dissolve carbon and oil. Scrub all surfaces, including valve ports and combustion chambers. Clean the gasket surface well. Rinse and dry thoroughly before reassembly.
Understanding Cylinder Head Contamination
Your car’s engine generates power through combustion. Inside the cylinder head, fuel and air mix and burn. This process leaves behind residues. These residues are often carbon deposits and oil sludge. They collect on valves, ports, and combustion chambers.
Carbon buildup comes from incomplete fuel burning. Oil sludge forms when engine oil breaks down. These contaminants stick to surfaces inside the head. Over time, they create a thick layer. This layer reduces engine airflow and valve sealing. Your engine loses power and uses more fuel. Cleaning removes these harmful layers. This restores engine function and prevents future problems.
Essential Tools and Supplies for Cylinder Head Cleaning
Preparing the right tools makes the cleaning job easier and safer. You need specific items for effective cleaning. Having everything ready saves time during the process. I always lay out all my tools before I start.
First, safety gear is a must. You will need safety glasses to protect your eyes. Chemical-resistant gloves shield your hands. A respirator helps prevent breathing in harmful fumes or dust. Proper ventilation is also key when using strong chemicals.
For cleaning, gather a few types of tools. You will need plastic scrapers and wire brushes for removing large deposits. Nylon brushes are good for scrubbing without scratching. Specialized carbon removers and degreasers break down grime. Brake cleaner or carburetor cleaner works well for final degreasing. Always check the cleaner’s label to ensure it is safe for aluminum if your head is aluminum. I also use a vacuum or shop vac to clear loose debris.
Step-by-Step Guide to Cleaning a Disassembled Cylinder Head
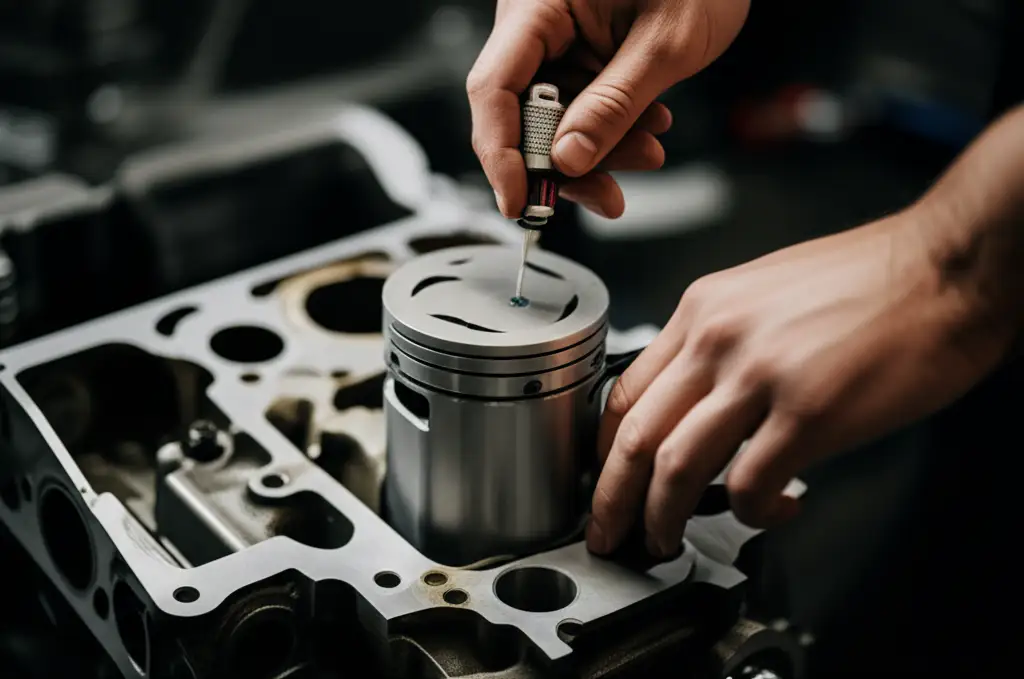
Cleaning a cylinder head that is off the engine allows for the most thorough work. This method helps you reach all areas. I start by removing all valves, springs, and other components. Label everything clearly to make reassembly simple.
Begin with rough cleaning. Use a plastic scraper to remove thick carbon deposits from combustion chambers and ports. Be gentle to avoid scratching the metal. Next, apply a specialized carbon remover or degreaser. Let the chemical soak for the recommended time. This softens stubborn grime.
After soaking, use various brushes to scrub the surfaces. Wire brushes work on stubborn carbon. Nylon brushes are better for less aggressive cleaning. Pay close attention to intake and exhaust ports. These areas often have heavy buildup. Clean the valve guides and valve seats. Ensure all passages are clear of debris. Sometimes, you may want to clean the cylinder head without removing valves. This is a different process that targets carbon on valve stems while they are still in place. You can learn more about how to clean cylinder head without removing valves.
Once surfaces appear clean, rinse the head thoroughly with water. Make sure no cleaning chemicals remain. Use compressed air to dry the head completely. Check all ports and passages for any leftover debris. A bright light helps here. Your goal is to see bare metal everywhere.
Cleaning the Cylinder Head Without Full Disassembly
Sometimes you cannot remove the entire cylinder head. You can still clean parts of it while it remains on the engine. This method focuses on areas like the intake ports and valves. It is less comprehensive but still helpful for engine performance. I find this approach useful for regular maintenance.
You need specialized tools and chemicals for this. You can use intake valve cleaners that spray into the throttle body. These products clean carbon deposits from intake valves. Some systems use walnut blasting. This method shoots fine walnut shells at the valves under high pressure. The shells break up carbon without damaging metal parts. This is a very effective way to clean intake valves.
Another approach involves using a cleaning solution that soaks in the combustion chambers. You turn the engine by hand to expose different valves. Then you fill the combustion chamber with cleaner. Let it sit for a few hours or overnight. This method helps soften carbon on piston tops and exhaust valves. After soaking, you remove the liquid and restart the engine. The remaining cleaner burns off. This type of cleaning helps improve valve seal and combustion efficiency without extensive engine work.
Cleaning the Gasket Surface and Mating Areas
A clean gasket surface is extremely important. If this surface is not clean, the new head gasket will not seal properly. This leads to leaks or engine damage. I always dedicate extra time to this step. It prevents headaches later on.
First, remove all traces of the old gasket material. Use a plastic scraper or a dedicated gasket removal tool. Be very careful not to scratch or gouge the aluminum head surface. Aluminum is softer than steel. If you have an aluminum head, you need to be especially gentle when cleaning the aluminum head gasket surface. A smooth, clean surface ensures a perfect seal.
After scraping, use a fine abrasive pad or a mild solvent to clean any remaining residue. Wipe the surface with brake cleaner or acetone. This removes any oil or grease. The surface must be perfectly dry and free of debris. Then, use a straight edge and feeler gauge to check for warpage. A warped head will not seal correctly, even with a clean surface. If it is warped, it needs machining. This step ensures that all surfaces are flat and ready for the new gasket.
Final Inspection and Preparation for Reassembly
After cleaning, the cylinder head needs a thorough inspection. This step ensures no damage exists and all parts are ready. I check everything one last time. This prevents problems during engine reassembly.
First, visually inspect the entire cylinder head. Look for any cracks, especially around valve seats and spark plug holes. A strong light helps here. Small cracks can grow under engine heat and pressure. Check for excessive wear on valve guides. If valve stems have too much side-to-side play, the guides may need replacement.
Next, ensure all oil passages and coolant passages are clear. Use compressed air to blow through them. Make sure no cleaning residue or debris remains. Apply a light coat of engine oil to valve stems and valve guides before reinstallation. This helps with initial lubrication. Place new valve stem seals on the valves. Make sure they seat correctly.
Keep all parts organized. When you reassemble the cylinder head, use new gaskets and bolts. Follow the torque specifications in your vehicle’s service manual. This ensures a proper seal and prevents damage. A properly cleaned and inspected cylinder head will give your engine a fresh start.
Common Mistakes to Avoid When Cleaning Cylinder Heads
Cleaning a cylinder head can be straightforward, but mistakes happen. Avoiding these errors saves time and prevents damage. I learned many of these lessons the hard way.
First, do not use harsh abrasive tools on aluminum heads. Steel wire brushes or aggressive sandpaper can scratch the soft aluminum. This damages gasket surfaces or valve seats. Use plastic scrapers or brass brushes instead. These are much safer for aluminum.
Second, do not use oven cleaner or other household chemicals. These products often contain strong lye or acids. They can corrode engine metals, especially aluminum. Always use chemicals designed for engine parts. These are formulated to clean without causing damage.
Third, never skip safety gear. Fumes from cleaners are harmful to your lungs. Dirt and metal particles can fly into your eyes. Always wear safety glasses, gloves, and a respirator. Work in a well-ventilated area.
Fourth, do not leave cleaning residue behind. Any leftover chemicals or debris can cause problems. They might corrode parts or block oil passages. Rinse thoroughly and dry the head completely. Check all passages with compressed air. A clean head means no lingering grime.
Finally, do not skip checking for warpage. A cylinder head that is not flat will cause a head gasket leak. This wastes your time and money. Always check the gasket surface flatness with a straight edge. If it is warped, have it machined before reassembly. These precautions ensure a successful cleaning and a healthy engine.
FAQ Section
How often should I clean my cylinder head?
The frequency of cleaning depends on engine type and usage. For most vehicles, a cylinder head cleaning is part of a major engine overhaul. It is not typically a routine maintenance item. If your engine shows signs of carbon buildup, like reduced power or misfires, cleaning may be needed. This might happen after 100,000 miles or more.
Can I use oven cleaner to clean my cylinder head?
No, do not use oven cleaner to clean your cylinder head. Oven cleaners contain harsh chemicals like lye (sodium hydroxide). These chemicals are highly corrosive to aluminum and other engine metals. They can damage the cylinder head permanently. Always use automotive-specific degreasers or carbon removers.
What is media blasting for cylinder head cleaning?
Media blasting involves shooting abrasive media, like walnut shells or glass beads, at the cylinder head surfaces. This process effectively removes carbon deposits and rust. Walnut blasting is common for intake valves. It is effective and gentler on parts than sandblasting. This method usually requires specialized equipment and professional service.
What causes carbon buildup in a cylinder head?
Carbon buildup results from incomplete combustion of fuel and oil. Direct injection engines are especially prone to carbon on intake valves. This is because fuel does not wash over the valves. Short trips, excessive idling, and low-quality fuel can also worsen carbon accumulation. Dirty PCV systems can also contribute to oil deposits.
Is professional cylinder head cleaning better than DIY?
Professional cleaning offers advantages. Shops have specialized equipment like hot tanks, ultrasonic cleaners, or media blasters. They also have experience dealing with different materials and damage. DIY cleaning is possible for many, but a professional job ensures all small passages are clear. They also check for cracks and warpage using precise tools.
Conclusion
Cleaning your cylinder head gives your engine a new lease on life. It improves performance and extends vehicle longevity. We covered everything from understanding carbon buildup to the final inspection. Remember to gather your tools and safety gear. Use the right cleaning methods for the job.
Whether you remove the head or clean it in place, patience and attention to detail matter. A clean cylinder head ensures optimal combustion and airflow. This leads to a more efficient and powerful engine. Give your engine the clean it deserves. Your car will thank you for it. Start cleaning your cylinder head today for better drives tomorrow.
- engine cleaning
- cylinder head maintenance
- carbon removal
- DIY car repair
- engine performance