· Nail Care & Beauty Tools · 20 min read
How To Clean Dip Powder Brush
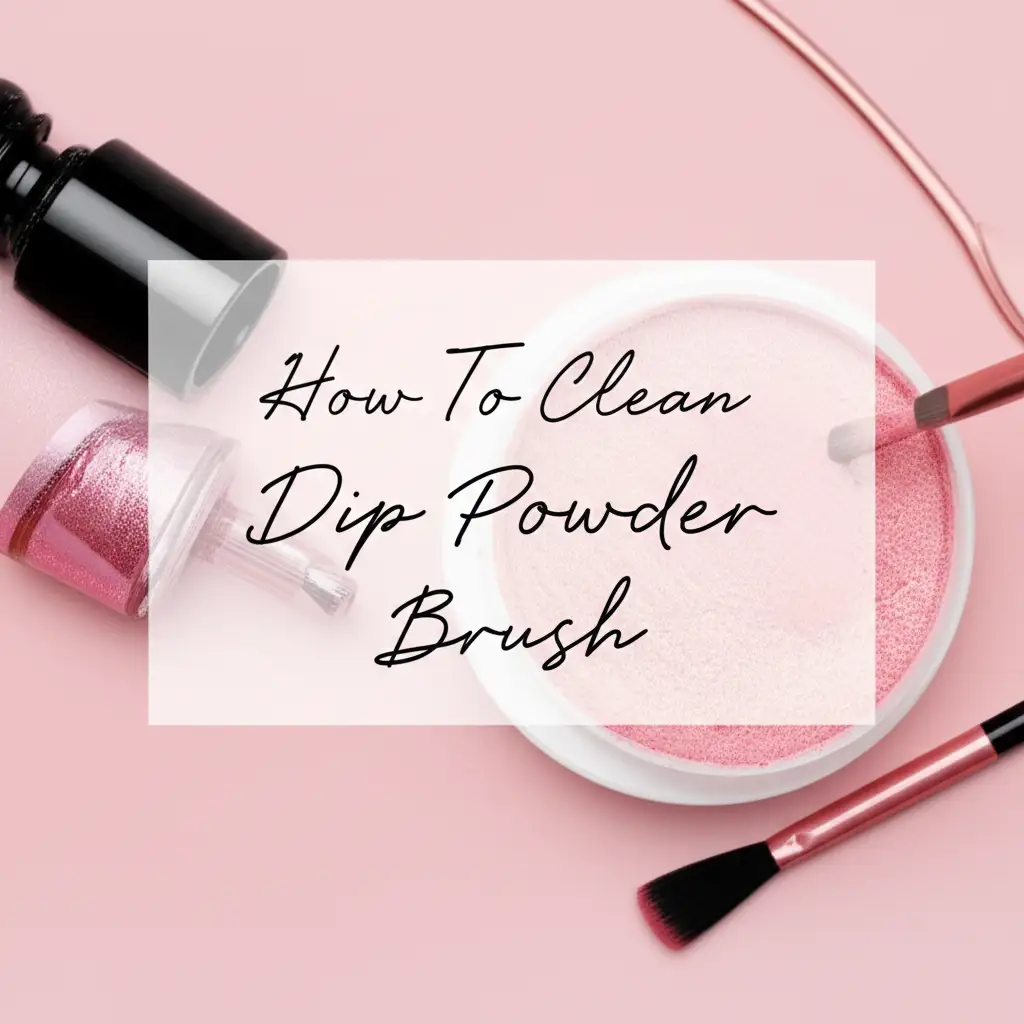
How To Clean Dip Powder Brush: Restore Your Nail Tools
Have you ever picked up your favorite dip powder brush, only to find it stiff and unusable? It is a common problem. Dip powder residue can quickly build up on brush bristles. This residue makes the brush hard. A hardened brush cannot apply powder smoothly. It impacts your nail application quality.
Keeping your dip powder brushes clean is important for beautiful nails. Clean brushes ensure even, flawless powder application. They also extend the life of your valuable tools. Neglecting brush care leads to frustrating nail sessions. It also means you buy new brushes more often. I know this frustration well.
This article shares how to clean dip powder brush tools effectively. We will explore why brushes get stiff. We will list essential cleaning supplies. We will cover step-by-step methods for cleaning. This includes using brush saver products. We also discuss using acetone. Learn how to deep clean and restore old brushes. Discover tips for preventing future buildup. This guide helps you keep your dip powder brushes soft and ready for use.
Takeaway
- Regularly clean dip powder brushes to prevent hardening.
- Use specific brush saver liquids or 100% pure acetone.
- Gently swish brushes; avoid harsh scrubbing or pulling.
- Condition brushes after cleaning to keep bristles soft.
- Store brushes properly to maintain their shape and cleanliness.
Clear, Concise Answer
To clean a dip powder brush, dip the hardened brush into a dappen dish filled with brush saver solution or 100% pure acetone. Swirl the brush gently for a few minutes to dissolve product buildup. Remove the brush, wipe it on a lint-free cloth, and reshape the bristles. Repeat as needed until the brush becomes soft and pliable.
Understanding Dip Powder Brush Challenges
Dip powder application involves several liquids and fine powders. These products work together to create strong nail enhancements. Over time, residues from these liquids and powders build up on your brushes. This buildup is the main reason brushes become stiff. It makes them difficult to use.
The ‘activator’ liquid plays a big role in brush hardening. Activator is a fast-drying chemical. It hardens the dip powder layers. If activator gets on your brush and mixes with powder particles, it can quickly cure on the bristles. This creates a hard, plastic-like shell. This shell coats the brush hairs. It makes them stiff and clumpy. You cannot apply product smoothly with a stiff brush.
Regular cleaning prevents this problem. A clean brush allows for precise application. It helps you avoid streaks and lumps. It also extends the life of your brush. A well-maintained brush lasts longer. This saves you money. Neglecting to clean your brushes properly is a common mistake. It leads to frustration and wasted product. I have learned this the hard way myself.
Common Problems with Dip Powder Brushes
Dip powder brushes face specific issues. These issues are unique to the dip system. First, brushes often become sticky. This happens when the base coat or top coat dries on the bristles. These sticky brushes pick up too much powder. They also spread product unevenly. This creates a messy application.
Second, brushes frequently become completely hardened. This is usually due to the activator liquid. Activator solidifies dip powder. If any activator touches your brush, especially the base coat brush, it can cure residual powder on the bristles. The brush becomes a solid block. It is then useless for future applications. This hardening often surprises new users.
Lastly, some brushes shed bristles. This is a sign of poor quality or improper care. Harsh cleaning methods can damage brush hairs. Using incorrect solvents might weaken the glue that holds bristles. A shedding brush leaves hairs on the nail. This ruins the smooth finish. Proper care helps prevent these issues. It keeps your brushes performing their best.
Essential Cleaning Supplies for Dip Brushes
Before you start cleaning your dip powder brushes, gather the right materials. Having everything ready makes the process smooth. You will need specific products to break down dip powder residues. Regular soap and water are not enough. Dip powder is a polymer. It needs strong solvents.
The most important supply is a dip brush saver liquid. Many nail brands sell their own version. This liquid is designed to dissolve hardened dip powder and activator. It softens the bristles without damage. A good brush saver is gentle on the brush hairs. It also works effectively. Always check the ingredients for compatibility.
Another crucial item is 100% pure acetone. This is a powerful solvent. It effectively dissolves cured dip powder. Be careful when using acetone. It can dry out brush handles or damage plastics. Always use pure acetone. Nail polish removers often contain added oils. These oils can leave a residue on your brushes. This residue attracts more powder.
You will also need lint-free wipes or paper towels. These are for wiping excess product. Lint-free materials prevent tiny fibers from sticking to your clean brush. A small glass dappen dish is also essential. This dish holds the cleaning solution. Its small size minimizes the amount of liquid needed. It also prevents spills. Make sure your dish is glass. Acetone can melt plastic.
Choosing the Right Brush Cleaner
Choosing the right cleaner depends on your situation. For regular maintenance, a dedicated dip brush saver is usually best. These products are formulated specifically for dip powder systems. They are often less harsh than pure acetone. Brush savers work well for preventing buildup. They keep your brushes soft with consistent use. Many brands offer their own brush saver. It often matches their dip system liquids. This ensures compatibility.
Pure 100% acetone is powerful for deep cleaning. It is excellent for brushes that are already stiff or completely hardened. Acetone quickly dissolves cured powder and activator. However, acetone can be strong. It might strip natural oils from brush bristles. This can make them brittle over time. It can also damage the brush handle if it is not acetone-resistant. I use acetone for my most stubborn brushes.
Some people consider using rubbing alcohol. Rubbing alcohol is not effective for cleaning dip powder brushes. It does not dissolve the hardened product. It might even spread it around. Stick to brush saver or pure acetone. These options are proven to work. Always choose the cleaner that fits the brush’s condition.
Step-by-Step Method: Using Dip Brush Saver
Using a dedicated brush saver is the gentlest way to clean your dip powder brushes. This method helps maintain the brush’s integrity. It is ideal for regular cleaning. It also works well for brushes that are just starting to stiffen. Follow these steps for best results.
First, pour a small amount of dip brush saver into a glass dappen dish. You only need enough liquid to cover the bristles. Do not overfill the dish. A little goes a long way. Make sure your workspace is clear. Have your lint-free wipes ready.
Next, gently place the affected brush into the brush saver liquid. Submerge the bristles completely. Let the brush soak for a few minutes. This allows the solution to penetrate the hardened product. Some brushes might need more time. Stiffer brushes may need 5-10 minutes. Do not force the bristles apart.
After soaking, gently swirl the brush in the liquid. You can also press the bristles lightly against the bottom of the dish. This helps dislodge the softened residue. You will see cloudy liquid forming. This means the product is dissolving. Keep swirling until the brush feels soft again.
Finally, remove the brush from the dish. Wipe the bristles thoroughly on a lint-free wipe or paper towel. Press and reshape the brush hairs. Ensure no residue remains. Let the brush air dry completely before storing it. Store the brush upright or flat. This helps it keep its shape. Proper care keeps your brushes working well. This method is effective for maintaining brush quality. If you want to know more about removing stubborn marks from your tools, check out our guide on how to clean stain off a brush.
Pros and Cons of Brush Saver
Using a brush saver has several advantages. The main pro is that it is formulated specifically for dip powder products. This means it is highly effective at dissolving activator and powder residue. Brush savers are also generally milder than pure acetone. They are less likely to damage brush bristles over time. They help preserve the natural oils in the brush hairs. This keeps your brushes soft and pliable. Many brush savers also contain conditioners. These conditioners protect and nourish the bristles. They can extend the life of your brushes significantly.
However, there are also some cons. Brush savers can be more expensive than pure acetone. You might need to buy a specific brand. They may not be as readily available in every store. For extremely hardened brushes, a brush saver might require multiple soaks. It might not work as quickly as acetone. It depends on the severity of the buildup. Some very stubborn, rock-hard brushes might need a stronger solution first. Overall, brush saver is excellent for regular maintenance. It is a good choice for keeping brushes in top condition.
Alternative Method: Cleaning with Acetone
When your dip powder brush is very stiff, or completely hardened, pure 100% acetone is a powerful solution. Acetone is a strong solvent. It can quickly dissolve cured dip powder and activator. This method is often a last resort for badly damaged brushes. It works very fast.
Start by pouring a small amount of 100% pure acetone into a glass dappen dish. As with brush saver, only use enough to submerge the bristles. Always work in a well-ventilated area. Acetone fumes can be strong. Protect your work surface. Acetone can damage many surfaces.
Carefully place the hardened brush into the acetone. Submerge only the bristles. Avoid soaking the ferrule or handle in acetone for too long. Acetone can weaken the glue in the ferrule. It can also damage plastic handles. Swirl the brush gently in the liquid. You will see the hardened product begin to dissolve quickly. The liquid will turn milky or cloudy.
Continue to swirl until the brush bristles feel soft and pliable. This might take only a minute or two for very stiff brushes. For rock-hard brushes, it may take longer. You might need to replace the dirty acetone with fresh acetone if the solution becomes too saturated. Once soft, remove the brush. Gently wipe the bristles on a lint-free cloth or paper towel. Reshape the brush hairs. Let the brush air dry completely. This method is highly effective for severe buildup. If you are looking for less harsh alternatives to other cleaning agents for tough stains, you might find useful tips in our article on how to clean stain off brush without mineral spirits.
Acetone vs. Non-Acetone Cleaners
Choosing between acetone and non-acetone cleaners depends on your brush’s condition. 100% pure acetone is a strong, fast-acting solvent. It is excellent for deep cleaning. It effectively dissolves even completely hardened dip powder residue. Acetone works quickly. This makes it ideal for emergency situations. However, acetone can be harsh on brush bristles over time. It may dry them out. It can also damage plastic handles and weaken brush ferrules if soaked improperly. I use acetone for my most stubborn brushes.
Non-acetone cleaners, like specific brush savers, are milder. They are formulated to be gentler on brush bristles. Many contain conditioning agents. These cleaners are perfect for regular maintenance. They help prevent buildup without stripping the brush hairs. They are also less likely to damage brush handles. However, non-acetone cleaners might not be strong enough for severely hardened brushes. They may require longer soaking times. Some tough residues might not dissolve completely.
For me, a balanced approach works best. Use a non-acetone brush saver for daily or regular cleaning. This keeps brushes in good shape. Reserve 100% acetone for occasional deep cleaning. Use it for brushes that have become very stiff. Always use caution with acetone. It is a powerful tool. Knowing when to use each helps keep your brushes in top condition.
Deep Cleaning and Restoration for Stiff Brushes
Sometimes, a brush gets so stiff it feels beyond repair. Do not give up yet. Deep cleaning techniques can often restore even the most hardened brushes. This process requires patience. But it saves you money on new brushes. I have brought many brushes back to life this way.
Start with pure 100% acetone for rock-hard brushes. Pour a generous amount into a glass dappen dish. Submerge the hardened bristles fully. Let the brush soak for a longer period. This could be 10-15 minutes, or even longer for extremely stiff brushes. The acetone needs time to fully penetrate and break down the cured product. Do not force the bristles.
After soaking, gently press the bristles against the bottom of the dish. You can use your fingers to gently work the bristles. Be very careful. Avoid pulling or tugging. The goal is to loosen the hardened product. You will see chunks or flakes of product dissolving. If the acetone becomes too cloudy, discard it. Replace with fresh acetone. Repeat the soaking and gentle agitation.
Once the brush feels pliable, remove it from the acetone. Wipe the bristles thoroughly with a lint-free cloth. Reshape the brush head. Then, consider a conditioning step. You can dip the brush quickly into a cuticle oil or a small amount of hair conditioner diluted with water. This helps restore moisture to the bristles. Wipe off excess conditioner. Let the brush air dry completely. Your brush should now be soft and ready for use. If you have experienced similar sticky or hardened substances on other tools, our article on how to clean polyurethane off brush offers valuable insights into tackling stubborn residues.
Tips for Restoring Brush Shape
After deep cleaning, your brush might look a little disheveled. Restoring its original shape is important. This ensures precise application for future manicures. A well-shaped brush performs better. It also looks more professional.
First, after wiping excess cleaner, gently press the bristles together. Form them into their original flat or pointed shape. For flat brushes, press the sides to create a sharp edge. For pointed brushes, gently pull the bristles to a fine point. You can use your fingers for this. Be very gentle. The bristles are soft when wet.
Second, consider using a brush guard or a plastic sleeve. Many new brushes come with these. If you have one, slide it over the reshaped bristles. This holds the brush in its desired form as it dries. If you do not have a brush guard, you can try wrapping the bristles with a thin piece of paper or plastic wrap. Secure it with a rubber band. This prevents splaying.
Finally, allow the brush to air dry completely. Always lay it flat or hang it with the bristles pointing downwards. Never dry a brush upright in a container. Water or cleaning solution can seep into the ferrule. This can weaken the glue. It causes bristles to shed. Drying it properly helps maintain its shape. It also prevents glue damage. A little extra care in this step makes a big difference.
Preventative Measures: Keeping Your Brushes Clean
Preventing brush hardening is easier than fixing it. A few simple habits can keep your dip powder brushes soft and functional. Consistent care saves time and money. I have adopted these habits. They make a big difference.
First, wipe your brush frequently during application. After applying a layer of base coat or top coat, quickly wipe the brush on a lint-free paper towel. Do this before redipping the brush into the liquid. This removes excess product. It prevents buildup before it hardens. It also removes any stray powder particles. This is especially important for the activator brush. The activator makes things hard fast.
Second, clean your brushes immediately after each dip manicure. Do not wait for the product to harden. A quick clean with brush saver or acetone right after use is highly effective. If you use your brushes daily, clean them daily. If you do nails less often, clean them after each session. Regular, light cleaning prevents heavy buildup. It stops the problem before it starts. This simple step protects your tools.
Third, store your brushes properly. After cleaning and drying, store them in a way that protects the bristles. Keep them in a clean, dust-free environment. Use brush caps if they came with your brushes. You can also store them in a brush roll or a clean drawer. Proper storage prevents dust from accumulating on the bristles. It also keeps them from getting bent. This helps maintain their shape. For general advice on keeping tools free from common issues, you might find our insights on how to clean buildup on hair brush helpful.
Proper Brush Storage
Proper storage is as important as proper cleaning. It keeps your dip powder brushes ready for your next manicure. Incorrect storage can bend bristles. It can also lead to contamination. A well-stored brush performs better.
Always ensure your brushes are completely dry before storing them. Even a tiny bit of moisture can encourage mold growth. It can also weaken the brush’s ferrule. Once dry, store your brushes in a way that protects their shape. The best way is to store them flat or upright with bristles facing up. Many brush sets come with clear plastic sleeves or caps. Use these caps. They protect the bristles from dust and bending.
Consider a dedicated brush holder or a clean, closed container. A brush roll is an excellent option for travel. It keeps brushes separate and protected. Avoid storing brushes in direct sunlight or extreme temperatures. Heat can weaken brush glue. It can also damage the bristles over time. Always keep them in a cool, dry place.
Finally, store your nail liquids separately from your brushes. Spills can happen. Liquid spills can damage your clean brushes. Keeping them apart prevents accidental contamination. Proper storage means your brushes stay clean. It means they stay in perfect shape. This extends their useful life. For more general beauty tool maintenance, our guide on how to clean beauty blender powder puff shares additional insights on hygiene and care.
Troubleshooting Common Dip Brush Problems
Even with the best care, sometimes dip powder brushes encounter problems. It is helpful to know how to diagnose these issues. Some problems mean you need to clean differently. Other problems indicate it is time for a new brush. I have faced many of these situations.
One common issue is continued stiffness after cleaning. This happens if the product buildup is very severe. Or, it happens if the cleaning solution is too weak. If your brush is still stiff, try a longer soak. Use a stronger solution, like 100% pure acetone. Repeat the cleaning process. Gentle agitation helps break up stubborn residue. Do not rush this step.
Another problem is bristles shedding. This often indicates the glue in the ferrule is compromised. Harsh solvents, like prolonged acetone exposure, can weaken this glue. Old brushes might also shed naturally. If your brush sheds excessively, it might be time to replace it. A shedding brush leaves unwanted hairs on your nails. This ruins your manicure. It is frustrating.
Sometimes, the brush handle might get damaged. Acetone can melt plastic handles. This happens if you submerge the entire brush. To avoid this, only dip the bristles into the cleaning solution. If your handle is damaged, you might need to replace the brush. Prevention is key here. Be careful when cleaning.
Lastly, brushes can become warped. This means they lose their original flat or pointed shape. Improper drying or storage causes this. If a brush warps, you can try reshaping it while wet. Use a brush guard during drying. If the warp is severe, it might affect your application. Then, replacement is the best option. Knowing these common issues helps you react quickly. It keeps your nail tools in good order.
When Cleaning is Not Enough
There comes a point when cleaning alone cannot save a dip powder brush. Recognizing this moment is important. Holding onto a damaged brush can ruin your manicures. It can also make the process more frustrating. I have learned to let go of truly irreparable brushes.
One clear sign is persistent brittleness or splaying. Even after thorough cleaning and conditioning, if the brush bristles remain stiff, dry, or fan out unnaturally, they might be permanently damaged. Over-exposure to harsh chemicals can destroy the integrity of the synthetic bristles. They lose their ability to hold a shape. They cannot apply product smoothly.
Another sign is excessive shedding that continues after multiple cleanings. If you find multiple bristles on your nails with every stroke, the brush is likely beyond repair. This indicates the glue holding the bristles in the ferrule has failed. Trying to continue using such a brush creates more problems than it solves. It is not worth the frustration.
Finally, severe physical damage like a broken ferrule or a melted handle. If the brush structure is compromised, it is impossible to use effectively. Such damage makes the brush unstable. It cannot hold its shape. In these cases, it is time to invest in a new brush. A good quality, new brush will provide a much better application experience. Do not compromise your results with a faulty tool.
FAQ Section
Can I use rubbing alcohol to clean dip powder brushes?
No, rubbing alcohol is not effective for cleaning dip powder brushes. It does not dissolve the hardened dip powder or activator. It might spread the residue. Stick to dedicated brush saver liquids or 100% pure acetone for proper cleaning. These solutions are formulated to break down the specific chemicals in dip powder products.
How often should I clean my dip powder brushes?
You should clean your dip powder brushes immediately after each dip manicure application. For regular maintenance, a quick wipe during application also helps prevent buildup. Consistent, immediate cleaning prevents the product from hardening on the bristles. This extends the life and performance of your brushes.
What causes dip powder brushes to harden?
Dip powder brushes harden primarily due to activator liquid. Activator quickly cures dip powder. If activator touches the brush, especially the base coat brush, it can solidify any residual powder or liquid on the bristles. This creates a hard, plastic-like coating on the brush hairs, making them stiff.
Can I use nail polish remover that is not 100% acetone?
It is not recommended to use nail polish remover that is not 100% acetone. Many removers contain oils, fragrances, or other additives. These additives can leave a greasy residue on your brushes. This residue can attract more powder or interfere with future applications. Always use pure 100% acetone for best results.
When should I throw away a dip powder brush?
You should throw away a dip powder brush if it remains stiff and brittle after multiple deep cleanings. Also discard it if it sheds excessively or if the ferrule or handle is severely damaged. Persistent issues like these indicate the brush is beyond repair. It will negatively affect your manicure results.
Is brush saver reusable?
No, brush saver liquid is generally not reusable for cleaning. Once you use brush saver to clean a brush, the liquid becomes saturated with dissolved dip powder residue. This dirty solution will not effectively clean future brushes. It can even deposit residue back onto your brush. Always use fresh brush saver for each cleaning session.
Conclusion
Cleaning your dip powder brushes does not have to be a chore. It is a vital part of maintaining your nail tools. Regular care keeps your brushes soft. It ensures flawless dip powder applications every time. We explored why brushes get stiff and how to combat it. From understanding the challenges to gathering essential supplies, you now have the knowledge.
We covered detailed steps for using brush saver. This is ideal for routine maintenance. We also discussed the powerful properties of 100% pure acetone. This works wonders for deeply hardened brushes. Remember to follow the proper techniques for deep cleaning and restoring even the most stubborn tools. Prevention is key. Wiping your brush during use and proper storage extend its life.
Taking care of your brushes makes your dip powder journey smoother. It saves you money on replacements. It also gives you professional-looking results. Do not let a stiff brush ruin your manicure. Commit to regular brush care. You will enjoy beautiful, long-lasting nails. Start cleaning your dip powder brush tools today for a better nail experience.
- dip powder brush
- nail brush cleaning
- brush maintenance
- nail art tools
- stiff brush
- brush saver