· Beauty Tools Cleaning · 22 min read
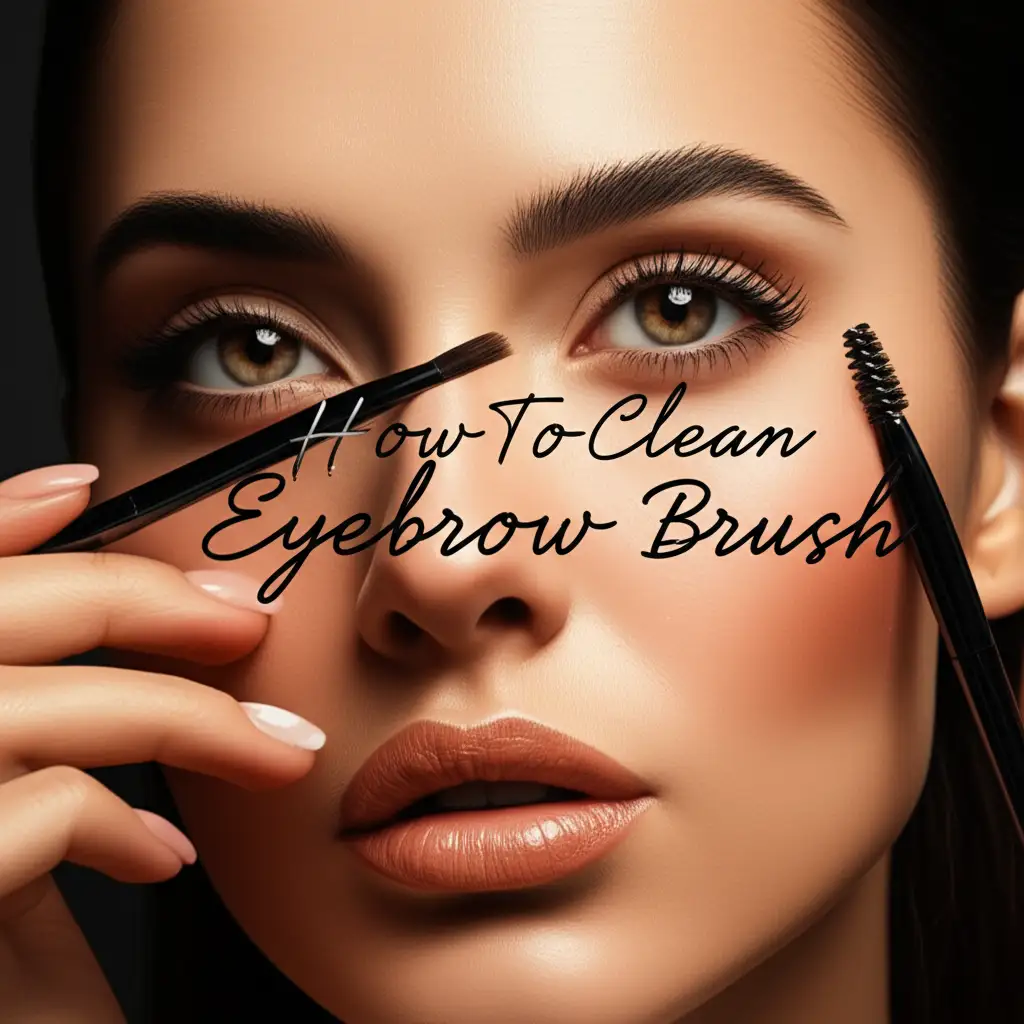
How To Clean Eyebrow Brush
Unlock Flawless Brows: How to Clean Your Eyebrow Brush
Having a perfectly sculpted eyebrow can transform your face. Your eyebrow brush is an essential tool for achieving this look. However, a dirty brush can hinder your makeup application and even harm your skin. Learning how to clean your eyebrow brush properly is a simple yet crucial step in your beauty routine.
Many people overlook this small but mighty tool when cleaning their makeup brushes. Dirt, oils, and old product build up quickly on eyebrow brushes. This can make your brows look muddy instead of defined. A clean brush ensures smooth application and keeps bacteria away from your delicate eye area. This article will guide you through the process. We will cover the tools you need, step-by-step cleaning methods, and crucial drying techniques. You will also learn about maintaining your brushes and troubleshooting common problems.
Takeaway:
- Clean your eyebrow brush regularly to prevent bacteria buildup.
- Use gentle cleansers and proper drying methods for brush longevity.
- A clean brush ensures better makeup application and prevents skin issues.
- Develop a consistent cleaning routine for optimal hygiene and performance.
How to Clean Your Eyebrow Brush: A Quick Answer
To clean your eyebrow brush, gently wet the bristles under lukewarm water. Apply a small amount of mild soap or brush cleaner. Swirl the brush on a cleaning mat or your palm to create lather, removing product buildup. Rinse thoroughly until the water runs clear. Reshape the bristles and lay the brush flat or hang it downwards to air dry completely before reuse.
Why Cleaning Your Eyebrow Brush is Essential for Health and Beauty
Keeping your eyebrow brush clean goes beyond just looking good. It is a vital part of maintaining your skin health and ensuring your makeup performs its best. I know many people skip this step, but it truly makes a difference. A dirty brush can become a breeding ground for bacteria and mold.
Old makeup, skin oils, and dead skin cells accumulate on the bristles. When you use a dirty brush, you reintroduce these impurities to your skin. This can lead to various skin problems. You might experience breakouts, irritation, or even eye infections. Think of your eyebrow area; it is close to your eyes, which are very sensitive.
Prevent Bacteria Buildup
Your eyebrow brush touches your skin, brows, and makeup products daily. Each use transfers skin oils, dust, and microscopic debris onto the bristles. Over time, this creates a fertile environment for bacteria to multiply. Using a brush with bacteria can lead to clogged pores around your eyebrows.
It also increases the risk of eye infections like styes or conjunctivitis. Regular cleaning removes these harmful microorganisms. This helps protect your delicate skin and eyes from potential harm. I always prioritize this step to keep my skin clear.
Ensure Flawless Application
A dirty eyebrow brush cannot apply makeup smoothly or evenly. The bristles become stiff and clumpy with dried product. This makes it hard to pick up new product and blend it seamlessly. You might find your brow gel or powder applies unevenly.
Your brows could look patchy or muddy. Cleaning the brush restores its softness and flexibility. This allows for precise application and a more natural, polished finish. A clean brush glides effortlessly, helping you create perfectly defined brows. Just like keeping other beauty tools clean, such as a face brush, a clean eyebrow brush delivers superior results.
Extend Brush Lifespan
Makeup brushes are an investment, and proper care helps them last longer. Product buildup can damage the bristles over time. It can cause them to fray, splay, or even fall out. Harsh chemicals from old makeup can also degrade the brush adhesive.
Regular, gentle cleaning preserves the integrity of the bristles and the brush handle. It keeps the bristles soft and shaped correctly. This means your favorite eyebrow brush will perform well for years to come. You save money by not needing to replace brushes as often.
Gathering Your Supplies: What You Need to Clean Eyebrow Brushes
Before you start cleaning, gather all the necessary items. Having everything ready makes the process smoother and more efficient. You likely already have most of these items around your home. I always make sure to have my cleaning essentials prepared.
Choosing the right supplies is crucial for effective cleaning. It also helps prevent damage to your delicate brushes. You do not need many specialized tools for eyebrow brushes. Simple, gentle items work best.
Gentle Cleansing Solutions
The type of cleanser you use is very important. You want something effective at removing makeup but gentle on bristles. Avoid harsh chemicals that can strip natural oils or damage synthetic fibers. I usually reach for mild options.
Here are some good choices:
- Baby shampoo: This is a popular choice because it is very mild. It effectively breaks down makeup without harming the bristles. It is also usually very affordable.
- Gentle liquid soap: A mild hand soap or dish soap (like Dawn) can work in a pinch. Just ensure it is free from strong perfumes or dyes. Always use a small amount.
- Dedicated brush cleanser: Many beauty brands offer specialized brush cleaning solutions. These are formulated to clean brushes without causing damage. They often come in liquid or spray forms.
- Olive oil (optional for stubborn makeup): For very stubborn, dried-on makeup, especially waterproof products, a tiny bit of olive oil can help dissolve it first. Follow with soap.
Essential Cleaning Tools
Beyond the cleanser, a few other items will make cleaning easier and more effective. These tools help you work the cleanser into the bristles and rinse thoroughly. They also help maintain the brush’s shape.
Consider these tools:
- Lukewarm water: Never use hot water, as it can melt the glue that holds the bristles. Lukewarm water is ideal for effective cleaning without damage.
- A clean towel or paper towels: You will need these to gently blot excess water from your brush after rinsing. They help absorb moisture.
- A brush cleaning mat or textured glove (optional): These silicone mats have various textures designed to gently agitate bristles. They help loosen and remove makeup buildup more efficiently. You can also use the palm of your hand as a surface.
- A bowl or cup (optional): Useful for holding water or a cleaning solution if you prefer to dip your brushes. I often use a small bowl for mixing.
Step-by-Step Guide: How to Clean Your Eyebrow Brush Effectively
Cleaning your eyebrow brush is a straightforward process once you know the steps. There are two main approaches: a quick daily clean and a deeper weekly clean. Both are important for maintaining hygiene and performance. I follow both routines consistently.
The key is to be gentle with your brushes. Rough handling can damage the bristles or loosen the ferrule (the metal part holding the bristles). Always ensure the brush dries completely before its next use. This prevents mold and mildew.
Quick Daily Clean
A quick clean after each use, or at least every few days, helps prevent product buildup. This is especially good if you use cream or gel products. It keeps your brush fresh for your next application. I usually do this right after I finish my makeup.
Follow these simple steps for a quick clean:
- Dampen a paper towel: Spray a little brush cleaning solution onto a paper towel. You can also use a small amount of rubbing alcohol.
- Gently swipe the brush: Lightly drag your eyebrow brush back and forth across the damp paper towel. Do this until no more makeup residue comes off.
- Reshape and air dry: Reshape the bristles with your fingers. Let the brush air dry completely before storing it. This usually takes just a few minutes.
This quick method removes surface makeup. It is not a substitute for a deep clean. However, it helps maintain brush hygiene between deeper washes.
Deep Weekly Clean
A deep clean is necessary to remove all accumulated product, oils, and bacteria. I recommend doing this at least once a week, or more often if you use your brush daily. This process is more thorough and ensures your brush is truly sanitized. Remember to be gentle throughout the entire process.
Here are the detailed steps for a deep clean:
- Wet the bristles: Hold your eyebrow brush bristles facing downwards under lukewarm running water. Avoid letting water go into the ferrule, where the bristles meet the handle. Water in the ferrule can loosen the glue over time.
- Apply cleanser: Squeeze a small amount of your chosen cleanser (baby shampoo or brush cleaner) onto your palm or a brush cleaning mat.
- Lather and swirl: Gently swirl the wet bristles into the cleanser on your palm or mat. Use circular motions. You will see makeup pigments coming off. Continue until the lather looks clean. For stubborn buildup, like you might find on other tools, similar techniques apply to how to clean buildup on a hair brush.
- Rinse thoroughly: Keep the bristles pointing downwards under lukewarm running water. Squeeze the bristles gently to help rinse out the soap. Continue rinsing until no suds or makeup residue comes out. The water should run clear.
- Remove excess water: Gently squeeze the bristles with your fingers to remove excess water. Do not twist or pull the bristles.
- Blot dry: Press the brush gently onto a clean towel or several layers of paper towels. This helps absorb more moisture.
- Reshape bristles: Carefully reshape the bristles to their original form. A damp brush is easier to reshape.
- Air dry completely: Lay the brush flat on a clean towel. You can also hang it bristles-down off the edge of a counter. Ensure air can circulate around the bristles. Let it dry completely, which can take several hours or overnight. Do not store it until it is fully dry.
Choosing the Right Cleanser for Your Eyebrow Brush
Selecting the correct cleanser is a key part of effective brush cleaning. The goal is to dissolve makeup and oils without damaging the brush. Different cleansers offer various benefits. I have tried many types over the years.
Your choice often depends on the type of makeup you use and your personal preference. Always check the ingredients for anything that might be too harsh. Gentle is always better for delicate brush bristles.
Mild Soaps and Shampoos
Mild soaps and shampoos are excellent, affordable options for cleaning makeup brushes. They are readily available and generally safe for most brush types. These products are designed to be gentle on skin and hair, making them suitable for brush bristles.
- Baby Shampoo: This is a top recommendation for a reason. It is formulated to be tear-free and very gentle. It effectively breaks down oil-based makeup and cream products. I find it works wonders without stripping the bristles.
- Gentle Liquid Hand Soap: Look for soaps that are moisturizing and free of harsh detergents. Avoid antibacterial soaps with strong chemicals, as these can dry out bristles. A small drop is usually enough to create a good lather.
- Dish Soap (with caution): A tiny amount of a gentle dish soap, like original Dawn, can be effective for very oily or heavily soiled brushes. It is designed to cut through grease. However, use it sparingly and rinse very thoroughly. Regular use of strong dish soap might be too harsh for some delicate natural bristles.
Dedicated Brush Cleansers
Many beauty brands offer specialized brush cleansing solutions. These products are formulated specifically for makeup brushes. They are often designed to clean effectively while conditioning the bristles. They can be a convenient option.
- Liquid Brush Cleansers: These are poured onto a cleaning mat or directly onto the brush. They often contain gentle surfactants and sometimes conditioning agents. They are effective for deep cleaning and can often be very quick.
- Spray Brush Cleansers (Instant Cleaners): These are great for quick, daily spot cleaning. You spray them onto the brush or a paper towel and wipe. They evaporate quickly and do not require rinsing. They are not a substitute for a deep clean but are perfect for in-between washes. They often contain alcohol to sanitize.
- Solid Brush Cleansers: These are usually soap-like bars that you swirl your wet brush onto. They create a rich lather and are often mess-free. They are good for deep cleaning and can be very long-lasting. Many contain conditioning ingredients.
Natural Home Remedies
For those who prefer natural options, a few household items can serve as gentle brush cleansers. These are often inexpensive and readily available. Always patch-test these first on a small part of your brush if you are unsure.
- Olive Oil + Dish Soap: For very stubborn, oil-based products, start by dipping your brush into a small amount of olive oil. Swirl it around to break up the makeup. Then, follow with a gentle dish soap or baby shampoo wash. The oil helps dissolve the makeup, making it easier to clean.
- White Vinegar (diluted, for sanitizing): White vinegar has natural antibacterial properties. You can mix a small amount (1 part vinegar to 2 parts water) for a final rinse. Dip the brush briefly, then rinse thoroughly with plain water. Be mindful of the strong smell, which usually dissipates as the brush dries. I use this sometimes for an extra sanitizing boost.
- Rubbing Alcohol (for sanitizing/spot cleaning): Alcohol is a strong disinfectant. It is best used for quick spot cleaning or sanitizing, not regular deep cleaning. It can be drying to bristles if used too often. Dip the bristles briefly or spray onto a paper towel and wipe. Let it evaporate completely.
Drying Your Eyebrow Brush: A Crucial Step for Longevity
Proper drying is just as important as the washing process. Incorrect drying can ruin your brush, encouraging mold growth or damaging the bristles and glue. I have seen brushes ruined by improper drying. This step ensures your brush lasts longer and remains hygienic.
Patience is key here. Do not rush the drying process. Air drying is always the best method. Avoid heat at all costs, as it can be detrimental to your brush’s structure.
Air Drying Techniques
Air drying allows your brush to dry naturally and thoroughly. It helps maintain the integrity of the bristles and the adhesive. There are a couple of effective ways to air dry your eyebrow brush.
- Lay Flat: After gently squeezing and blotting excess water, reshape the bristles. Lay the brush flat on a clean, dry towel. Ensure the bristles are not touching anything. This position prevents water from seeping into the ferrule. It also helps the brush keep its original shape. Turn the brush over after a few hours to ensure even drying.
- Hang Bristles Down: Some brush drying racks or stands allow you to hang brushes with the bristles facing downwards. This is an excellent method as gravity pulls any residual water away from the ferrule. It also allows for optimal air circulation around the bristles. If you do not have a dedicated rack, you can improvise by hanging them off the edge of a counter or table. Just make sure they are secure.
Allow plenty of time for your brush to dry completely. Small eyebrow brushes might dry in a few hours. Larger, denser brushes can take overnight or even longer. Never use a damp brush.
Avoiding Common Drying Mistakes
Knowing what not to do is as important as knowing what to do. These mistakes can cause irreversible damage to your beloved eyebrow brush. I have learned these lessons over time.
- Do Not Stand Brushes Upright: This is a common mistake. If you stand a wet brush upright, water can drip down into the ferrule. Over time, this will degrade the glue that holds the bristles together. It can lead to shedding bristles and even mold growth inside the ferrule.
- Avoid Direct Heat: Never use a hairdryer, direct sunlight, or a radiator to dry your brushes. High heat can melt the glue in the ferrule. It can also singe, warp, or damage both synthetic and natural bristles. This makes the brush unusable. The bristles might become stiff, brittle, or lose their shape permanently.
- Do Not Store Damp: Storing a brush before it is completely dry creates a perfect environment for bacteria and mold. It can also lead to unpleasant smells. Always ensure your brush is bone dry before putting it back in your makeup bag or holder.
By following these proper drying techniques, you will extend the life of your eyebrow brush significantly. This ensures it stays hygienic and performs flawlessly for every application.
Maintaining Your Eyebrow Brushes Between Washes
Cleaning your eyebrow brush weekly or bi-weekly is essential. However, daily maintenance between deep washes is also crucial. This helps keep your brush cleaner for longer. It also ensures consistent performance. I always do a quick clean after each use.
These small habits can make a big difference in the overall hygiene and longevity of your brushes. They help reduce the frequency of deep cleaning. This also means you are always using a relatively clean brush.
Spot Cleaning for Quick Touch-ups
Spot cleaning is perfect for daily upkeep. It removes superficial makeup and oils that accumulate with each use. This method is fast and requires no drying time. It helps prevent product buildup from hardening on the bristles.
Here is how you can spot clean your eyebrow brush:
- Use a dedicated spray cleanser: Many brands offer quick-drying brush cleaning sprays. You can also use a mixture of rubbing alcohol and water (70% alcohol, 30% water).
- Spray onto a paper towel: Spray a small amount of the cleanser onto a clean paper towel. Do not spray directly onto the brush bristles, as this can lead to oversaturation.
- Wipe the brush: Gently swipe or swirl your eyebrow brush across the damp part of the paper towel. Continue until no more makeup residue transfers onto the towel.
- Reshape and use: The alcohol or quick-drying formula will evaporate almost instantly. Reshape the bristles with your fingers. Your brush is now ready for its next use.
This method is perfect for removing fresh makeup. It helps keep your brush performing well. For different beauty tools, such as a dip powder brush, similar spot cleaning principles apply to maintain daily hygiene.
Proper Storage for Protection
How you store your eyebrow brush impacts its cleanliness and shape. Improper storage can lead to bent bristles, contamination, or even damage. Protecting your brush between uses is simple but important.
Consider these storage tips:
- Upright in a brush holder: Store your eyebrow brush upright in a cup or brush holder. Ensure the bristles are facing upwards. This prevents them from getting bent or crushed. It also allows air circulation.
- In a makeup bag with brush slots: If you travel or prefer to keep brushes in a bag, use one with individual brush slots. This prevents brushes from rolling around and getting dirty. It also protects the bristles from other makeup products.
- Keep away from dust and moisture: Store your brushes in a clean, dry area. Avoid leaving them exposed in dusty environments. High humidity can also promote mildew growth. Consider a closed container or drawer if your space is particularly dusty.
- Separate from other makeup: Do not let your clean brush touch other dirty makeup items. This can transfer bacteria and product. Keep your clean brushes distinct from used makeup applicators.
By combining regular spot cleaning with proper storage, you extend the time between deep cleans. You also ensure your eyebrow brush stays hygienic and in excellent condition. This helps you achieve perfect brows every time.
Troubleshooting Common Eyebrow Brush Cleaning Issues
Sometimes, cleaning your eyebrow brush might present a few challenges. You might encounter stubborn stains, bristles that lose their shape, or persistent odors. Do not worry; most of these issues have simple solutions. I have dealt with all of these at some point.
Knowing how to troubleshoot these problems can save your favorite brush. It means you do not have to throw it away prematurely. These tips will help you restore your brush to its best condition.
Dealing with Stubborn Product Buildup
Eyebrow products, especially gels, pomades, or waterproof formulas, can be notoriously difficult to remove. They often cling to the bristles, leaving a sticky residue. This buildup can make the brush stiff and unusable.
Here is how to tackle stubborn buildup:
- Pre-treat with oil: Before washing, apply a tiny amount of olive oil or coconut oil to the dry bristles. Gently work the oil into the bristles with your fingers. The oil helps dissolve oil-based makeup.
- Use a stronger cleanser (with caution): For very tough stains, a stronger dish soap (like Dawn) can be effective. Use only a tiny drop and dilute it slightly with water. Alternatively, some dedicated brush cleansers are designed for heavy-duty cleaning. For general stain removal, principles are similar to how to clean a stain off a brush.
- Soak briefly: For extremely stubborn cases, you can soak the bristle tips in a mixture of cleanser and lukewarm water for 5-10 minutes. Do not let the water touch the ferrule. After soaking, proceed with your regular swirling and rinsing method.
- Use a cleaning mat: The textured surface of a brush cleaning mat is excellent for dislodging dried product. The ridges and bumps help work the cleanser deep into the bristles.
Remember to rinse thoroughly after using any stronger cleaning agent. Ensure no residue remains.
Restoring Bristle Shape
Sometimes, after washing or improper storage, your brush bristles might splay out or lose their original shape. This can make precise application difficult. Luckily, restoring their shape is often possible.
- Reshape while damp: The best time to reshape bristles is when the brush is still damp after washing. Gently squeeze the bristles together with your fingers. Mold them back into their original flat or pointed shape.
- Use a brush guard: Brush guards are mesh covers that gently hug the bristles. You can slide them onto a clean, damp brush. They help keep the bristles compacted and shaped as the brush dries. They are inexpensive and very effective.
- Elastic band method: If you do not have a brush guard, you can use a small elastic band. Wrap it gently around the bristles while they are drying. This keeps them together and helps them retain their form. Remove the band once the brush is completely dry.
Be patient and gentle. Repeatedly reshaping while drying can help train the bristles back into their correct form.
Addressing Odors
If your eyebrow brush smells musty or unpleasant, it often indicates mold or bacteria growth. This happens if the brush was stored damp or not cleaned thoroughly. A smelly brush needs immediate attention.
- Deep clean thoroughly: Perform a very thorough deep clean. Pay extra attention to swirling the bristles deeply into the cleanser. Ensure all product residue is removed.
- Sanitize with rubbing alcohol or vinegar: After washing, you can dip the bristles briefly into a solution of 70% rubbing alcohol. Or, use a diluted white vinegar solution (1 part vinegar to 2 parts water). Rinse very thoroughly with plain water afterward to remove the alcohol or vinegar smell.
- Ensure complete drying: The most critical step is to ensure the brush dries completely. Mold thrives in damp environments. Air dry the brush in a well-ventilated area. Do not store it until it is bone dry. If the odor persists after multiple thorough cleans and proper drying, it might be time to replace the brush. Sometimes, deep-seated mold cannot be fully removed.
By addressing these common issues, you can keep your eyebrow brush in top working condition. This ensures it stays hygienic and always performs at its best.
FAQ Section
How often should I clean my eyebrow brush?
You should ideally spot clean your eyebrow brush after every use, especially if you use cream or gel products. This prevents product buildup. A deep clean with soap and water is recommended at least once a week. If you use it daily or share it, clean it more frequently. Consistent cleaning keeps it hygienic and performing well.
Can I use dish soap to clean my eyebrow brush?
Yes, you can use a mild dish soap, like original Dawn, to clean your eyebrow brush. Dish soap is very effective at cutting through oily makeup. However, use it sparingly as it can be stronger than baby shampoo. Rinse your brush very thoroughly afterwards to ensure no soap residue remains. This prevents bristles from drying out or becoming stiff.
What if my eyebrow brush bristles are stiff after cleaning?
If your eyebrow brush bristles feel stiff after cleaning, it is often due to soap residue or improper drying. Re-rinse the brush thoroughly under lukewarm water until all suds are gone. You can also try adding a tiny drop of hair conditioner during the rinse. Ensure the brush air dries completely, laid flat or hanging downwards. Avoid using heat.
How long does an eyebrow brush take to dry?
The drying time for an eyebrow brush depends on its density and the humidity of your environment. Small, sparse eyebrow brushes can dry in a few hours. Denser brushes might take 6 to 12 hours, or even overnight. Always ensure the brush is completely dry to the touch before storing or using it again. Patience prevents mold.
Can dirty brushes cause breakouts?
Yes, dirty makeup brushes can absolutely cause breakouts and other skin issues. Old makeup, skin oils, dead skin cells, and bacteria accumulate on dirty bristles. When you use these brushes, you transfer these impurities back onto your skin. This can clog pores, leading to acne, irritation, or even infections like styes, especially around the eye area.
Conclusion
Cleaning your eyebrow brush is more than just a chore; it is an essential part of your beauty and hygiene routine. A clean eyebrow brush ensures precise application for perfectly sculpted brows every time. More importantly, it safeguards your skin from potential breakouts and infections caused by bacteria buildup. Neglecting to clean this small but vital tool can hinder your makeup results and compromise your skin health.
I encourage you to adopt a regular cleaning schedule. Spot clean your eyebrow brush daily and perform a deep clean weekly. Use gentle cleansers and proper drying techniques to maintain your brush’s integrity and extend its lifespan. By investing a few minutes each week into this simple task, you will notice a significant improvement in your makeup application. You will also enjoy healthier, clearer skin. Make cleaning your eyebrow brush a priority; your brows and skin will thank you for it!
- eyebrow brush cleaning
- makeup brush care
- brush hygiene
- beauty tools
- clean makeup brushes
- makeup hygiene
- brush maintenance