· Cleaning Tips · 20 min read
How To Clean Dry Paint Brushes
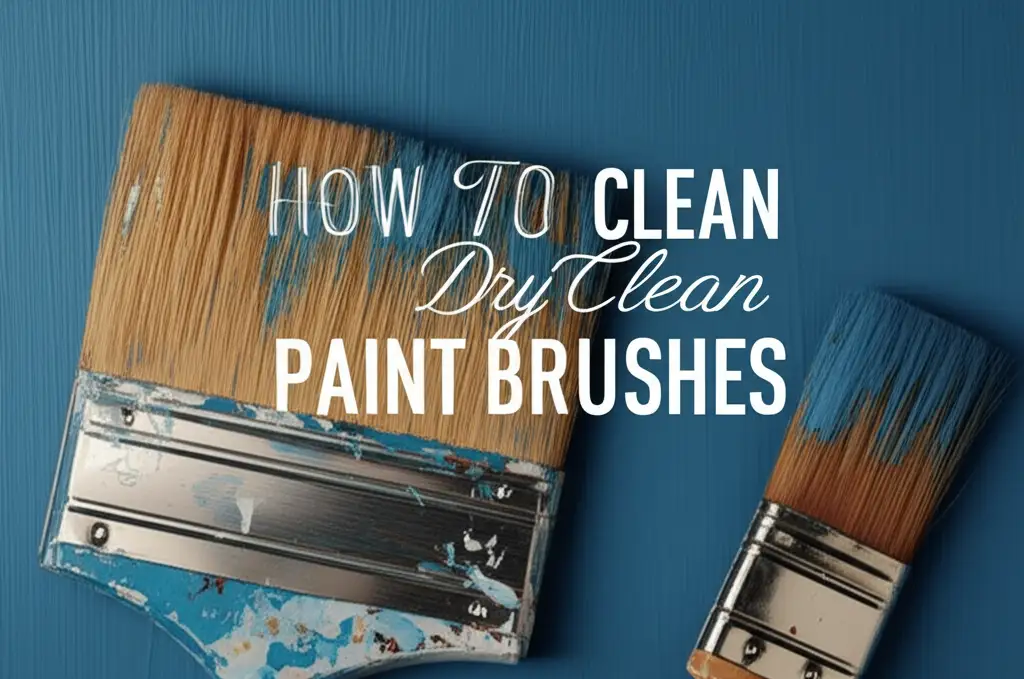
Cleaning Dry Paint Brushes: Restore Your Tools
You just finished a painting project. You put your brushes aside, intending to clean them later. Days pass, and now your paint brushes are stiff with dried paint. Do not throw them away. Cleaning dry paint brushes is possible, and it saves you money. Many people believe a hardened brush is useless. This is not true. With the right steps and products, you can bring those brushes back to life. I will show you how to do it.
This guide explores effective methods to clean dry paint brushes. We will cover different types of paint and the specific solutions each requires. You will learn about common household items and specialized cleaners. We also discuss essential care tips to prevent brushes from drying out again. By the end, you will have the knowledge to restore your valuable painting tools. You can make them ready for your next creative endeavor.
Takeaway
- Soak Thoroughly: Submerge dried brushes in appropriate cleaning solutions for several hours or overnight.
- Match Cleaner to Paint Type: Use water-based solutions for latex/acrylic and solvent-based for oil/enamel paints.
- Agitate and Comb: Gently work the bristles to loosen paint, using a brush comb for stubborn areas.
- Rinse Completely: Ensure all paint and cleaner residue is removed from the bristles.
- Reshape and Dry: Form the brush head back to its original shape and hang it to dry.
How do you clean a dry paint brush?
You clean a dry paint brush by first soaking it in a suitable solvent or water, depending on the paint type. For water-based paints, use warm soapy water or fabric softener. For oil-based paints, mineral spirits or lacquer thinner work best. Then, gently work the bristles to remove softened paint. Finally, rinse, reshape, and let the brush air dry.
Understanding Dry Paint Brushes and Paint Types
When paint dries on a brush, it forms a hard coating. This coating binds the bristles together. It makes the brush unusable for smooth application. The type of paint dictates the cleaning method. Different paints have different chemical compositions. This means they need different solvents for effective removal. Using the wrong cleaner can damage the brush or be ineffective.
Knowing your paint type saves time and effort. Most paints fall into two main categories: water-based and oil-based. Latex and acrylic paints are water-based. They are common for walls and crafts. Enamel, oil, and alkyd paints are oil-based. They are used for durable finishes. Each type requires a specific approach for cleaning once dry. We will explore these methods in detail.
Water-Based Paints (Latex, Acrylic)
Water-based paints are common. They are easy to clean when wet. When dry, they become more challenging. The good news is you often do not need harsh chemicals. Warm water and soap are a good starting point. Sometimes, dried latex or acrylic paint needs more help. Fabric softener can work wonders on these brushes. It helps loosen the dried paint film.
Soaking is key for water-based paints. Submerge the bristles in the solution. Let them sit for several hours or overnight. This softens the paint. Then, you can gently work it out. Avoid harsh scrubbing at first. Let the soaking do most of the work. You want to protect the bristles.
Oil-Based Paints (Enamel, Oil, Alkyd)
Oil-based paints are durable. They need stronger solvents for cleaning. Water does not work on these paints. Mineral spirits are a common choice. Lacquer thinner or acetone are stronger options. Always use these solvents in a well-ventilated area. Wear protective gloves. They can irritate skin and lungs.
The process for oil-based paints is similar. Soak the bristles in the appropriate solvent. The paint will soften over time. You might need to change the solvent if it becomes very cloudy. Patience is important with these paints. Do not rush the soaking process. After soaking, gently clean the bristles.
Essential Tools and Materials for Brush Restoration
Before you start, gather your supplies. Having everything ready makes the cleaning process smoother. You do not want to stop in the middle to find a missing item. The tools vary slightly based on paint type. Some items are universal for any brush cleaning task. These items are often found around the house or at a hardware store.
Prepare your workspace before you begin. Lay down newspaper or a drop cloth. This protects your surfaces from spills. Work in an area with good ventilation. This is especially true when using strong solvents. Proper preparation ensures safety and efficiency. It also prevents more mess.
Common Household Items
You might already have many necessary items. These work well for water-based paints. They can also help with the initial stages of oil-based paint removal.
- Warm Water: Essential for water-based paints. It helps soften the dried paint.
- Dish Soap: A degreasing dish soap helps break down paint residues. It works well with water.
- Fabric Softener: Surprisingly effective for stubborn dried latex or acrylic paint. It helps to loosen the paint from the bristles.
- Vinegar: White vinegar can also help dissolve dried paint. Use it in a warm solution.
- Containers: You need several containers. Use them for soaking and rinsing. Old plastic food containers work well.
- Old Rags or Paper Towels: For wiping off excess paint and cleaner.
Specialized Cleaning Solutions
For tough jobs, or oil-based paints, special cleaners are necessary. These solutions are designed to break down specific paint types.
- Mineral Spirits: The standard for cleaning oil-based paints. It is effective and relatively safe. You can find more details about using mineral spirits for paint brushes. How to Clean Paint Brushes with Mineral Spirits
- Lacquer Thinner/Acetone: Stronger solvents for very stubborn oil paints or lacquers. Use with extreme caution.
- Paint Brush Cleaner/Restorer: Commercial products designed specifically for dried paint. They often contain a mix of solvents and conditioning agents. These can be very effective.
- Wire Brush/Brush Comb: A dedicated brush comb helps separate bristles. It removes dried paint particles.
Step-by-Step Guide: Cleaning Dry Water-Based Paint Brushes
Cleaning brushes with dried water-based paint, like latex or acrylic, is often simpler. These paints usually succumb to water and soap, or a little fabric softener. Patience is still your best friend here. Do not try to force the paint off. This can damage the bristles. Instead, let the cleaning solution do the work.
Remember to protect your hands. Even mild cleaners can dry out your skin. Gloves are always a good idea. Work methodically through each step. This increases your chances of fully restoring the brush. You can save many brushes this way.
Method 1: Warm Soapy Water Soak
This is the gentlest method. It works well for paint that has not been dry for too long.
- Prepare the Solution: Fill a container with warm water. Add a generous amount of dish soap. Mix until it creates suds. The water should be warm, not hot. Hot water can sometimes set certain paints.
- Submerge the Brush: Place the dry paint brush into the soapy water. Make sure the bristles are fully submerged. Avoid soaking the ferrule (the metal band). Soaking the ferrule can loosen the glue holding the bristles.
- Soak Overnight (or Longer): Let the brush soak for several hours. For very dry paint, an overnight soak is best. Some brushes may need up to 24 hours. Check periodically to see if the paint is softening.
- Work the Paint Out: Once the paint softens, gently work the bristles. Use your fingers to massage the paint out. A brush comb can help separate the bristles. Push the comb through from the ferrule outwards.
- Rinse Thoroughly: Rinse the brush under clean running water. Keep rinsing until all soap and paint residue are gone. The water should run clear.
- Reshape and Dry: Shake off excess water. Reshape the bristles with your fingers. Hang the brush to dry with the bristles pointing down. This prevents water from sitting in the ferrule.
Method 2: Fabric Softener Trick
Fabric softener contains agents that can break down the bonds of dried latex and acrylic paint.
- Mix the Solution: Mix equal parts fabric softener and warm water in a container. Stir it well.
- Soak the Brush: Submerge the brush bristles into the solution. Again, avoid soaking the ferrule.
- Extended Soak: Let the brush soak for at least 4-6 hours. For very hard brushes, soak it overnight. The fabric softener will penetrate the dried paint.
- Agitate and Remove Paint: After soaking, gently work the bristles. Use your fingers or a brush comb. You will see the dried paint beginning to flake off.
- Rinse and Clean: Rinse the brush under warm running water. Add a little dish soap to help remove any fabric softener residue. Lather and rinse until clean.
- Final Reshaping: Squeeze out excess water. Reshape the bristles. Lay the brush flat or hang it to dry completely.
Step-by-Step Guide: Cleaning Dry Oil-Based Paint Brushes
Oil-based paints are tougher. They need stronger solvents. Always prioritize safety when working with these materials. Ensure good ventilation. Wear gloves and eye protection. Never dispose of solvents down the drain. Follow local regulations for hazardous waste.
This process involves more robust chemicals. Be patient, as these paints are designed to be durable. Rinsing thoroughly is crucial to remove all solvent residues. Residual solvent can damage new paint jobs.
Method 1: Mineral Spirits Soak
Mineral spirits are the go-to cleaner for most oil-based paints. They dissolve the paint without being overly harsh on the bristles.
- Prepare the Area: Work in a well-ventilated area. Open windows or work outdoors. Lay down protective sheeting.
- Pour Mineral Spirits: Pour a small amount of mineral spirits into a shallow container. Just enough to cover the bristles.
- Soak the Brush: Submerge the bristles of the dry brush in the mineral spirits. Do not let the spirits touch the ferrule if possible.
- Agitate and Soak: Gently swish the brush in the spirits. You will see the paint color bleed into the liquid. Let it soak for several hours. For very hard paint, an overnight soak might be needed. You may need to change the mineral spirits if they become heavily saturated with paint.
- Work Out the Paint: Use a brush comb or old rag to work the softened paint out of the bristles. Work from the ferrule to the tips.
- Rinse with Clean Solvent: Pour fresh mineral spirits into another container. Swish the brush in the clean spirits to rinse out remaining paint. Repeat until the spirits remain clear.
- Final Cleanse (Optional but Recommended): For a truly clean brush, wash it with warm water and dish soap after the mineral spirits rinse. This removes any oily residue. Rinse thoroughly with water.
- Reshape and Dry: Squeeze out excess water. Reshape the bristles. Hang the brush to dry, bristles down. For comprehensive advice on cleaning brushes with mineral spirits, read more here: How to Clean Paint Brushes with Mineral Spirits
Method 2: Stronger Solvents (Lacquer Thinner/Acetone)
For extremely hardened oil paint or lacquers, stronger solvents may be necessary. Use these with extreme caution.
- Extreme Ventilation and Protection: Ensure maximum ventilation. Wear heavy-duty chemical-resistant gloves and eye protection.
- Small Amount of Solvent: Pour a very small amount of lacquer thinner or acetone into a metal or glass container. These solvents can melt plastic.
- Brief Soak: Dip the very tip of the brush bristles into the solvent. Do not soak for long. These solvents are harsh. They can damage brush glue or bristles if exposed for too long.
- Work Rapidly: Immediately begin working the paint out with a brush comb or old rag. The paint will soften quickly.
- Rinse Immediately: As soon as the paint loosens, remove the brush from the strong solvent. Swish it in fresh mineral spirits. Then, wash thoroughly with soap and water. The quick transition prevents damage.
- Reshape and Dry: Squeeze dry. Reshape the bristles. Allow the brush to air dry completely.
Advanced Techniques and Troubleshooting for Tough Cases
Sometimes, dried paint is incredibly stubborn. Standard methods might not fully clean the brush. In these cases, you can try advanced techniques. These methods combine different approaches or use specialized products. Do not give up on a valuable brush too quickly. Even seemingly hopeless brushes can often be salvaged.
Remember that repeated harsh treatments can shorten a brush’s life. Try the gentlest effective method first. Only move to stronger options if needed. Your goal is to restore the brush without destroying its form or function.
Using Commercial Brush Restorers
Many brands offer specific products for restoring dried paint brushes. These formulas often contain a blend of solvents and conditioning agents. They are designed to be highly effective.
- Follow Directions: Each product has specific instructions. Read them carefully. Some are ready to use. Others may require mixing with water.
- Soak Time: Commercial restorers often require extended soaking times. This can range from several hours to a few days.
- Agitation and Rinsing: After soaking, work the paint out. Rinse the brush thoroughly. Many restorers suggest a final wash with soap and water.
- Conditioning: Some restorers include conditioners. They help keep bristles soft and pliable after cleaning.
Gentle Heat Application (Very Cautiously)
For very thick, dried paint, a small amount of heat can sometimes help. This is a risky method. It can damage the brush if not done carefully. I recommend trying all other methods first.
- Avoid Direct Flame: Never hold a brush over an open flame. This will melt synthetic bristles and burn natural ones.
- Warm Water Bath: Heat water in a pot. Do not boil it. Dip the brush bristles into the very warm, but not boiling, water. This can sometimes soften paint enough to begin working it out.
- Heat Gun (Extreme Caution): If you use a heat gun, keep it far from the brush. Apply heat indirectly and briefly. The goal is to warm the paint, not melt the bristles. This is only for the most desperate cases and experienced users.
Combining Methods
For truly intractable dried paint, a combination of methods may be needed.
- Initial Soak (Solvent): Start with an appropriate solvent soak (mineral spirits for oil, fabric softener for latex).
- Scraping/Combing: After the initial soak, try to scrape off softened paint. Use a stiff brush comb or an old utility knife blade. Be gentle around the ferrule.
- Second Soak (Stronger Solution): If paint remains, try a shorter soak in a stronger solution. For oil, this might be lacquer thinner. For latex, try a commercial brush cleaner designed for dried latex.
- Repeat and Refine: Repeat the soak, agitation, and rinse process until the brush is clean.
Proper Care and Maintenance to Prevent Dry Brushes
Preventing dried paint is far easier than cleaning it. Good habits extend the life of your brushes. This saves you money and time. A well-maintained brush performs better. It gives smoother results. Think of your brushes as valuable tools. Treat them with respect.
After every painting session, clean your brushes immediately. Do not let paint dry on them. This is the single most important rule. Different paints require different cleaning routines when wet. For a general guide on cleaning wet brushes and rollers, you can refer to: How to Clean Paint Brushes and Rollers
Immediate Cleaning After Use
Always clean your brushes as soon as you finish painting.
- Water-Based Paints: Rinse under running water. Use dish soap to work out all paint. Rinse until the water runs clear.
- Oil-Based Paints: Clean with mineral spirits or a suitable solvent. Swish the brush in the solvent until paint is gone. Then wash with soap and water.
- Never Let Paint Dry: This is the golden rule. Even a short delay can make cleaning much harder.
Proper Drying Techniques
How you dry a brush matters. Incorrect drying can lead to misshapen bristles or mold.
- Reshape Bristles: After cleaning, gently squeeze out excess water. Reshape the bristles to their original form. A paper towel can help absorb moisture and maintain shape.
- Hang or Lay Flat: Hang brushes bristles-down. Use a clip or clothesline. This allows water to drip away. It prevents water from pooling in the ferrule. If you cannot hang them, lay them flat. Do not stand them bristles-up in a container. This can bend the bristles and trap water.
- Air Dry Completely: Ensure brushes are completely dry before storing. Storing damp brushes can lead to mold or mildew.
Storing Brushes Correctly
Proper storage protects brushes from damage and dust.
- Brush Sleeves/Wraps: Many brushes come with a cardboard or plastic sleeve. Keep these. They protect the bristles and help maintain their shape.
- Flat or Hanging: Store brushes flat in a drawer or toolbox. Or hang them on a pegboard. Keep them away from extreme temperatures or direct sunlight.
- Avoid Crushing: Do not store brushes where the bristles get bent or crushed. This can permanently deform them.
Common Mistakes to Avoid When Cleaning Dry Paint Brushes
Cleaning dry paint brushes can be successful. However, some common mistakes can damage your tools. Knowing what to avoid is as important as knowing what to do. These pitfalls can make your efforts useless. They can even destroy a brush beyond repair. Your goal is restoration, not destruction.
Paying attention to these warnings helps preserve the integrity of your brushes. It ensures they stay in good condition for many projects to come.
Using the Wrong Solvent for Paint Type
This is perhaps the biggest mistake.
- Water for Oil-Based: Water does nothing for oil-based paint. It will not dissolve the paint. It wastes time and does not clean the brush.
- Harsh Solvents for Water-Based: Strong solvents like lacquer thinner can melt synthetic bristles. They can also dissolve the glue in the ferrule of any brush type. Use appropriate, gentler solutions for water-based paints.
Aggressive Scrubbing or Pulling
It is tempting to scrub hard to remove stubborn paint. Resist this urge.
- Damaged Bristles: Harsh scrubbing can bend, break, or fray bristles. This ruins the brush’s ability to apply paint smoothly.
- Loose Ferrule: Pulling hard can loosen the metal ferrule. This causes bristles to fall out.
- Patience is Key: Let the soaking solution do the work. Gently massage and comb the paint out.
Soaking the Ferrule
The ferrule is the metal band holding the bristles. It often contains glue.
- Loosening Glue: Prolonged soaking of the ferrule can dissolve the glue. This leads to bristles falling out.
- Rust: Metal ferrules can rust if soaked and not dried properly. Rust can stain new paint.
- Keep Liquid Low: Always aim to submerge only the bristles. Keep the liquid level below the ferrule.
Improper Drying or Storage
After cleaning, the drying and storage steps are critical.
- Drying Bristles Up: Standing a wet brush bristles-up can trap water in the ferrule. This leads to glue degradation and rust.
- Storing Wet: Storing a brush that is not completely dry encourages mold and mildew growth. This can ruin the brush and spread spores.
- Crushing Bristles: Storing brushes where bristles are bent or crushed causes permanent deformation. The brush will never paint straight again.
When to Salvage and When to Replace a Dry Paint Brush
Not all dry paint brushes can be saved. Sometimes, the damage is too severe. Or, the cost of cleaning materials outweighs the brush’s value. Knowing when to try to salvage and when to replace is important. It helps you make practical decisions. Do not spend hours on a cheap, ruined brush. Invest time in a quality brush.
Evaluate the condition of your brush before you start. This saves you frustration.
Factors to Consider for Salvage
- Brush Quality: High-quality brushes are worth the effort. They have better bristles and construction. A cheap brush might not be worth the trouble.
- Severity of Dried Paint: A thin layer of dried paint is easier to remove. A brush completely solid with paint might be a lost cause.
- Type of Bristles: Natural bristles (hog hair) are more resilient to some solvents. Synthetic bristles (nylon, polyester) can melt or deform with strong chemicals.
- Cost of Replacement: Compare the cost of a new brush to the time and materials needed to clean the old one. For very expensive specialty brushes, almost any effort is worthwhile.
Signs a Brush May Not Be Salvageable
- Permanently Deformed Bristles: If bristles are bent, crimped, or frayed beyond repair, the brush will not paint smoothly. Even if clean, it will not perform well.
- Melted Synthetic Bristles: If strong solvents have melted or fused synthetic bristles together, they cannot be separated.
- Loose or Rusted Ferrule: A loose ferrule means bristles will fall out. Rust on the ferrule can stain paint.
- Extremely Old, Hardened Paint: Paint that has been dry for years, especially certain types, may be impossible to remove fully without destroying the brush.
Making the Replacement Decision
If a brush shows severe signs of damage, consider replacing it. Sometimes, cutting your losses is the smart choice.
- Time vs. Value: How much time will you spend trying to clean it? Is that time worth saving a brush that might still perform poorly?
- New Project Needs: If you are starting a new project, you want reliable tools. A compromised brush can lead to poor results.
- Invest in Quality: When replacing, consider investing in a good quality brush. Proper cleaning and care will then make it last for years. This reduces the need for frequent replacements.
Frequently Asked Questions
Can I clean a paint brush that has been dry for a long time?
Yes, you can often clean a paint brush even if it has been dry for a long time. The success depends on the paint type and brush quality. Longer drying times usually need extended soaking in the appropriate solvent. Patience is key. Sometimes, multiple cleaning attempts are necessary for very old, hardened paint.
What is the best household product to clean dry paint brushes?
For water-based paints, fabric softener or a strong solution of warm water and dish soap are very effective household products. Fabric softener is particularly good at breaking down dried latex or acrylic paint. For oil-based paints, you will generally need mineral spirits, which are not a common household item but are widely available.
How do you soften hardened paint brushes?
You soften hardened paint brushes by soaking them in a suitable liquid. For water-based paints, soak in warm, soapy water or a fabric softener solution. For oil-based paints, use mineral spirits or a specialized paint thinner. The liquid penetrates the dried paint, making it pliable and easier to remove from the bristles.
Can vinegar clean dry paint brushes?
Yes, white vinegar can help clean dry paint brushes, especially those with water-based paint. Warm the vinegar slightly for better effectiveness. Soak the bristles in the warm vinegar for several hours or overnight. Then, gently work the paint out. Rinse the brush thoroughly with water and soap afterward.
What if my paint brush bristles are melted or fused together?
If your paint brush bristles are melted or completely fused, especially synthetic ones, it is usually beyond repair. This often happens from using an incorrect or overly harsh solvent, or direct heat. Unfortunately, melted plastic bristles cannot be restored to their original form. It is best to replace such a brush.
How do I dispose of used solvents after cleaning brushes?
Never pour used solvents down the drain or onto the ground. This pollutes water and soil. Collect all used solvents in a clearly labeled, sealed container. Take them to a local hazardous waste collection facility. Check with your local waste management department for specific guidelines and drop-off locations.
Conclusion
Bringing your dry paint brushes back to life is a rewarding task. It extends the life of your tools and saves you money. We have explored effective methods for cleaning dry paint brushes, whether they are stiff with water-based latex or hardened with oil-based enamel. The key is understanding your paint type and choosing the right cleaning agent. Patience and gentle handling are always important.
Remember to immediately clean your brushes after every use. This prevents them from drying out in the first place. Proper drying and storage also play a vital role in maintaining your brushes. By following these steps, you will enjoy well-maintained brushes ready for any project. Do not let those dried brushes sit idle. Grab your supplies and restore them today!
- paint brush cleaning
- restoring brushes
- dried paint removal