· Home Cleaning · 19 min read
How To Clean Dust Off Fan

Breathe Easy: How to Clean Dust Off Your Fan for a Fresher Home
Do you ever wonder why your fan seems to push around warm air instead of cool, refreshing breezes? The answer often sits right on its blades: dust. Over time, fans collect a surprising amount of dust, pet dander, and allergens. This build-up reduces airflow, lowers efficiency, and even circulates dirty air throughout your home. Knowing how to clean dust off fan blades and components is simple. I want to help you restore your fan’s performance and ensure your indoor air stays clean. This guide covers everything from essential tools to step-by-step instructions for various fan types, making your cleaning task straightforward and effective.
Takeaway:
- Regularly cleaning your fan prevents dust buildup, improves air quality, and extends appliance life.
- Always disconnect power before cleaning any fan for safety.
- Use a combination of dry and damp cleaning methods depending on the dust level and fan type.
- Different fan types (desk, tower, ceiling, exhaust) require specific cleaning approaches.
- Preventative measures, like regular dusting, keep your fan working efficiently longer.
How to clean dust off a fan? To effectively clean dust off a fan, first unplug it. Use a vacuum with a brush attachment or compressed air to remove loose dust. For stubborn grime, wipe down blades and guards with a damp cloth and mild cleaner. Always dry components completely before reassembling and plugging in the fan.
Why Your Fan Needs a Deep Clean: Beyond Just Aesthetics
Many people overlook fan cleaning until dust bunnies visibly cling to the blades. However, fan cleaning goes far beyond improving your appliance’s look. A dusty fan works harder to move air. This extra effort can increase energy consumption, leading to higher electricity bills. I often tell my friends that a clean fan is an efficient fan.
Dust accumulation on fan blades creates friction. This makes the motor strain, potentially shortening the fan’s lifespan. Overheating can also occur if air circulation through the motor housing is blocked by thick dust. Regular cleaning prevents these issues, ensuring your fan serves you for many years. Think of it as a small investment in your home comfort and budget.
Perhaps most important are the health benefits. Fans circulate air in your room. If the fan is dirty, it actively spreads dust, allergens, pet dander, and even mold spores. This can worsen allergies, trigger asthma, and contribute to general indoor air pollution. People with respiratory sensitivities feel the impact more strongly. Cleaning your fan helps maintain healthier indoor air quality, reducing the airborne irritants you breathe every day. My own allergies improve when I keep all my fans spotless.
Dust buildup also makes noise. A fan designed to operate quietly can become noisy if dust unbalances its blades or clogs its motor. You might hear rattling, humming, or grinding sounds from a dirty fan. Cleaning can often resolve these noise issues, bringing back the peaceful hum you expect. A well-maintained fan performs at its best.
Lastly, consistent fan cleaning helps prevent serious issues. Excessive dust can become a fire hazard, especially if it accumulates near electrical components. While rare, it is a risk worth addressing. Keeping your fans clean is a simple safety measure. It ensures your appliances function safely and effectively in your home.
Gathering Your Arsenal: Essential Tools for Dust Removal
Before you dive into cleaning, gather all the necessary tools. Having everything ready streamlines the process and ensures you do not have to stop midway. The right tools make the job easier and more effective. I always lay out my supplies before starting any cleaning project. This preparation saves time and effort.
Here are the essential items you will need:
- Microfiber Cloths: These cloths are excellent for trapping dust without spreading it. They are soft, absorbent, and reusable, making them perfect for wiping down fan blades and surfaces. I use several so I always have a clean one available.
- Vacuum Cleaner with Brush Attachment: A vacuum cleaner is your best friend for removing large amounts of loose dust. The brush attachment helps dislodge dust from grilles and blades without scratching surfaces. This is especially useful for getting into tight spots.
- Compressed Air Can: For hard-to-reach crevices and electronic components, compressed air works wonders. It blasts away dust from motor housings and intricate parts. Make sure to use short bursts to avoid condensation buildup.
- Screwdriver (Philips or Flathead): Many fans require disassembly to properly clean the blades and internal parts. A screwdriver lets you remove protective grilles and access the fan’s interior. Check your fan model for specific tool requirements.
- Mild Dish Soap or All-Purpose Cleaner: For caked-on grime or sticky residue, a gentle cleaning solution is necessary. Mix a few drops of dish soap with water, or use an eco-friendly all-purpose cleaner. Avoid harsh chemicals that could damage plastic or metal.
- Small Brush (e.g., Paintbrush, Old Toothbrush): These are great for scrubbing stubborn dust from tight corners, vents, or small grilles that a cloth cannot reach. An old toothbrush works surprisingly well for detailed cleaning.
- Bucket or Bowl: You will need this for mixing your cleaning solution. It also holds dirty cloths as you work. I prefer a small bucket for easy access.
- Paper Towels: Useful for drying components or for quick clean-ups. They are especially handy for soaking up excess moisture.
- Safety Glasses and Gloves: While not always mandatory, wearing safety glasses protects your eyes from flying dust. Gloves keep your hands clean and prevent skin irritation from dust or cleaning solutions. I always recommend putting safety first.
Having these tools ensures you can tackle any level of dust. From light surface dust to heavy, caked-on grime, you will be prepared. Preparing your tools makes the cleaning process smooth and efficient.
Safety First: Crucial Precautions Before You Start Cleaning Fans
Cleaning a fan is generally safe, but neglecting basic precautions can lead to accidents. Before you even think about touching your fan, prioritize safety. Electrical appliances require respect, and fans are no exception. I always tell people that the most important step is always the first one: unplugging the device.
Unplug the Fan: This is the most crucial step. Always disconnect the fan from its power source before cleaning. Whether it’s a desk fan, a tower fan, or a ceiling fan, cut the power. For wall-mounted or ceiling fans, you might need to turn off the power at the circuit breaker. This eliminates any risk of electric shock or the fan accidentally turning on while your hands are inside. I never skip this step; it ensures peace of mind.
Allow for Cooling: If your fan has been running for a long time, its motor or other parts might be warm. Give it some time to cool down before you start handling it. Hot components can cause minor burns. Patience here prevents discomfort.
Work in a Well-Ventilated Area: Dust can fly everywhere during cleaning. Work outdoors if possible, or in a room with open windows. This prevents you from inhaling too much dust and helps dissipate any cleaning solution fumes. Good ventilation makes the task more pleasant and healthier.
Wear Protective Gear: As mentioned earlier, safety glasses protect your eyes from dust particles. Gloves keep your hands clean and shield them from potential irritants in dust or cleaning agents. A dust mask is highly recommended, especially if you have allergies or are dealing with a very dusty fan. I wear a mask even for light cleaning.
Avoid Water Near Electrical Components: Never spray water directly onto the motor or electrical wiring. Water and electricity do not mix. If you use a damp cloth, wring it out thoroughly so it is only slightly moist. Ensure all components are completely dry before reassembling the fan and plugging it back in. This step prevents electrical shorts and damage.
Handle Blades with Care: Fan blades, especially plastic or metal ones, can be sharp or delicate. Handle them gently to avoid cuts or bending. If you remove blades for cleaning, note their orientation so you can reinstall them correctly. Bent blades can cause imbalance and noise.
Secure Ladders for Ceiling Fans: If you are cleaning a ceiling fan, use a sturdy ladder. Ensure it is placed on a stable, level surface. Have someone spot you if possible. Do not overreach or stand on unstable furniture. You can also explore options like how to clean a ceiling fan without a ladder for some situations. Safety while working at heights is paramount.
By following these simple safety precautions, you can clean your fan effectively and safely. Your well-being is always the top priority.
Step-by-Step Fan Cleaning Guide: From Desk to Tower Fans
Cleaning different types of fans requires slightly different approaches. However, the core principle remains the same: remove dust, wipe down surfaces, and dry thoroughly. I will walk you through the specifics for common household fans.
Desk and Pedestal Fans
These are probably the most common types of fans. They are relatively easy to clean because you can usually disassemble them.
- Unplug and Disassemble: First, make sure the fan is unplugged. Use a screwdriver to remove the front grille. Some models have clips or latches instead. Once the front grille is off, you might need to remove a retaining nut or cap to slide the fan blade assembly off the motor shaft. Carefully set aside all screws and parts.
- Clean the Grilles: Take both the front and rear grilles. Use a vacuum cleaner with a brush attachment to remove loose dust. For stubborn grime, wash them in a sink with warm, soapy water. Use a small brush to scrub between the bars. Rinse thoroughly and let them air dry completely.
- Clean the Blades: Use your vacuum’s brush attachment to remove loose dust from the fan blades. If the blades are very dirty or greasy, wipe them with a damp microfiber cloth moistened with mild soap and water. For delicate plastic blades, be gentle to avoid bending or scratching. Ensure the blades are completely dry before reassembly.
- Wipe the Motor Housing and Base: Use a dry or slightly damp microfiber cloth to wipe down the fan’s motor housing and base. Pay attention to vents and crevices where dust might accumulate. Do not use excessive water near the motor.
- Reassemble: Once all parts are dry, carefully reassemble the fan. Make sure the blades are securely reattached and spin freely. Replace the front grille and tighten any screws or re-fasten clips. Double-check all connections.
- Test: Plug the fan back in and turn it on. Listen for any unusual noises and ensure it operates smoothly.
Tower Fans
Tower fans are trickier because you cannot easily access the internal rotating drum. They typically have fixed grilles. Many people ask me how to clean their specific model, like a Honeywell QuietSet Tower Fan or a Holmes Tower Fan. The methods are largely similar.
- Unplug the Fan: Always disconnect power first.
- Vacuum the Exterior: Use a vacuum cleaner with a brush or crevice attachment. Go over the entire exterior, focusing on the intake and output grilles. These are where most dust collects.
- Use Compressed Air: This is your best tool for tower fans. Blast compressed air into the grilles from multiple angles. This forces dust out from the internal components. You might see a cloud of dust emerge, so do this outdoors or in a well-ventilated area.
- Wipe Down the Casing: Use a damp microfiber cloth to wipe down the exterior casing. Pay attention to buttons and control panels. A dry cloth can follow to buff for shine.
- Clean the Base: Wipe the base thoroughly. Dust often settles there.
- Consider Partial Disassembly (If Possible): Some tower fans have removable rear panels or filters. Consult your fan’s manual. If you can access internal components, use compressed air and a dry cloth to clean them. Always follow manufacturer instructions carefully.
- Test: Plug in the fan and check its operation.
Tackling Elevated Fans: How to Clean Ceiling and Exhaust Fans
Cleaning fans that are high up, like ceiling fans and exhaust fans, presents unique challenges due to their location. Safety is even more critical here. I always prepare thoroughly when dealing with elevated cleaning.
Ceiling Fans
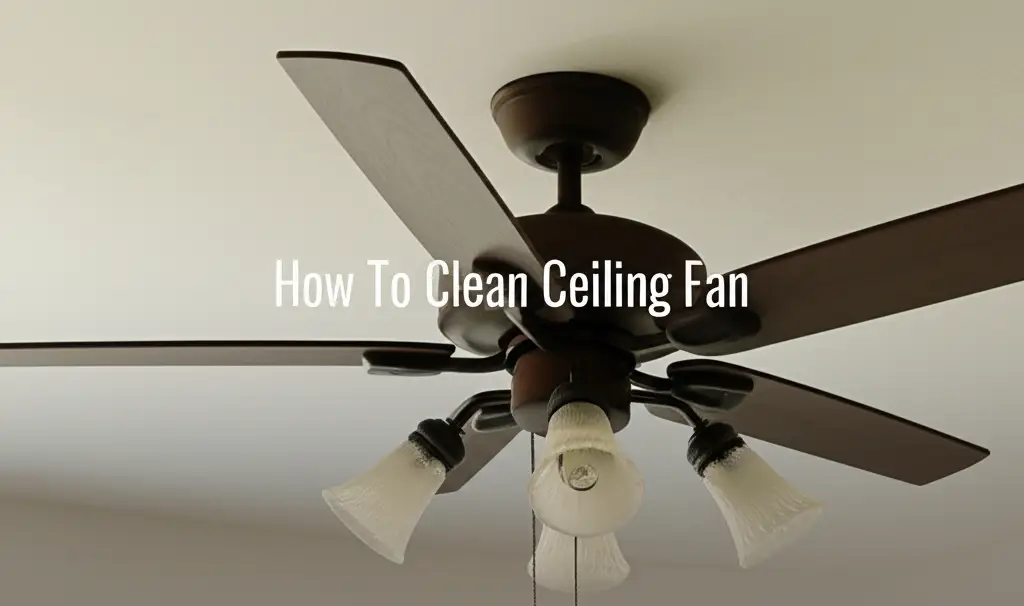
Ceiling fans collect a surprising amount of dust, which then gets flung around the room when the fan operates. Cleaning them regularly improves air quality significantly. For insights into cleaning high-up fans, you might find specific tips on how to clean a high ceiling fan useful.
- Safety First: Turn Off Power at the Breaker: This is paramount. Do not just use the wall switch. Go to your electrical panel and flip the breaker that controls the fan. This ensures no electricity reaches the fan. Confirm by trying to turn on the fan from the wall switch.
- Prepare the Area: Lay down a drop cloth, old bedsheet, or newspaper directly beneath the fan. This catches any falling dust and debris. This step makes cleanup much easier.
- Use a Sturdy Ladder: Ensure your ladder is stable and on a level surface. Have someone spot you if possible, especially if you are working alone. Never overreach; reposition the ladder as needed.
- Clean Fan Blades:
- The Pillowcase Method: This is my favorite and highly effective. Slide an old pillowcase over one fan blade at a time. As you pull the pillowcase back, all the dust from the blade will fall into the pillowcase. This prevents dust from spreading into your room. Repeat for all blades.
- Damp Cloth Method: For caked-on grime, lightly dampen a microfiber cloth with water or a mild cleaning solution. Wipe each blade carefully. You may need to apply a bit of pressure. Make sure the cloth is only damp, not dripping wet.
- Clean the Motor Housing and Light Fixture: Use a dry microfiber cloth to wipe down the fan’s motor housing and light fixture (if applicable). For glass light covers, you can remove them and wash them with soapy water, then dry thoroughly before replacing. Avoid spraying any liquids directly onto the electrical components.
- Wipe Down Pull Chains and Remotes: Do not forget to wipe these down. They also collect dust and fingerprints.
- Re-energize and Test: Once everything is clean and dry, remove your drop cloth. Go back to your circuit breaker and turn the power back on. Test the fan to ensure it operates correctly. If you need tips on how to clean a ceiling without a ladder, some specialized tools exist.
Bathroom and Kitchen Exhaust Fans
These fans pull moisture, odors, and sometimes grease out of the air. They can get particularly dirty. For bathroom fans, you can often clean them without removing the entire unit. Kitchen exhaust fans often deal with grease buildup.
- Turn Off Power: Again, turn off the power at the circuit breaker for safety.
- Remove the Cover/Grille: Most exhaust fan covers simply pull down or have spring clips that you can pinch to release. Some might have a central screw. Carefully remove the cover and take it to a sink.
- Clean the Cover: Wash the cover with warm, soapy water. Use a brush to scrub away dust, lint, and especially grease (for kitchen fans). Rinse thoroughly and let it air dry completely.
- Vacuum Inside the Housing: While the cover is off, use your vacuum cleaner’s hose attachment to reach inside the fan housing. Vacuum up as much loose dust and lint as possible from the fan blades and interior surfaces. This also helps with issues like black dust around air vents.
- Use Compressed Air (Optional): For stubborn dust or hard-to-reach areas, a burst of compressed air can dislodge remaining debris.
- Wipe Blades and Housing (If Accessible): If you can safely reach the fan blades or the inside of the housing with a damp cloth (wrung out very well), gently wipe them. Avoid getting water into the motor.
- Reassemble: Once the cover is completely dry, reattach it to the fan housing. Ensure it clicks or screws securely into place.
- Restore Power and Test: Turn the power back on at the circuit breaker and test the fan.
Deep Cleaning Strategies for Stubborn Dust and Grime
Sometimes, a quick wipe-down is not enough. Fans in high-traffic areas, kitchens, or homes with pets can accumulate stubborn grime. This needs a more intensive approach. I often encounter fans that have not been cleaned in years, requiring extra effort.
Dealing with Caked-On Dust: If dust has compacted and hardened on fan blades, a dry brush or vacuum may not be enough.
- Pre-Soak (for Removable Parts): If grilles or plastic blades can be removed, consider soaking them. Fill a basin with warm water and a generous squirt of dish soap. Submerge the parts for 15-30 minutes. This softens the dust and makes it easier to scrub off.
- Scrub with a Brush: After soaking, use a stiff brush or an old toothbrush. Scrub away the softened dust. The bristles can get into crevices better than a cloth. I find this method highly effective for intricate grilles.
- Baking Soda Paste: For extremely stubborn spots, mix baking soda with a little water to form a paste. Apply it to the affected area, let it sit for a few minutes, then scrub gently. Baking soda is a mild abrasive that helps lift grime without scratching.
Handling Grease Build-Up (Especially Kitchen Fans): Kitchen fans face a unique challenge: grease. Cooking fumes mix with dust, creating a sticky, hard-to-remove layer.
- Degreasing Solution: For kitchen exhaust fan grease, a stronger degreaser is needed. You can use a commercial kitchen degreaser or a homemade solution. Mix equal parts white vinegar and warm water, adding a few drops of dish soap. Vinegar helps cut through grease.
- Hot Water Immersion: For removable metal filters or grilles, immerse them in very hot, soapy water (with degreaser added). Let them soak for at least an hour, or even overnight for severe cases.
- Scrubbing and Rinsing: Use a sturdy brush to scrub the greasy parts. For metal filters, a wire brush might be necessary. Rinse thoroughly with hot water until all traces of grease and cleaner are gone.
- Steaming (for Non-Removable Parts): If you cannot remove the parts, use a handheld steam cleaner. The hot steam helps liquefy the grease. Follow up immediately with a damp microfiber cloth to wipe away the loosened residue. Steam is a powerful, chemical-free way to clean.
Cleaning Fan Motors and Electronic Components: Always remember to avoid liquids here.
- Compressed Air is Key: For the motor and electrical components, compressed air remains the safest and most effective tool. Use short, controlled bursts to blow dust out of vents and around wiring. Hold the can upright to prevent propellant discharge.
- Soft Brush Dusting: A very soft, dry paintbrush or an electronics dusting brush can gently sweep away dust from sensitive areas. Be gentle to avoid damaging small wires or connections.
- Never Lubricate (Unless Specified): Most modern fan motors are sealed and do not require lubrication. Adding oil can attract more dust and actually harm the motor. Only lubricate if your fan’s manual specifically states to do so.
Deep cleaning takes more time but yields much better results. Your fan will run more smoothly, quietly, and efficiently. It’s an investment in your home’s air quality and your appliance’s longevity.
Keeping Fans Dust-Free: Maintenance Tips and Habits
Cleaning your fan is great, but regular maintenance can significantly reduce the need for deep cleaning. Building good habits keeps your fans cleaner for longer. I believe prevention is always better than cure, especially when it comes to dust.
Establish a Regular Cleaning Schedule: The best way to prevent severe dust buildup is to clean your fans routinely.
- Weekly/Bi-weekly (Light Dusting): For desk and pedestal fans, a quick wipe down with a microfiber cloth once or twice a week can prevent dust from settling. This takes only a minute or two.
- Monthly (Vacuuming/Compressed Air): For all fan types, a monthly vacuuming with a brush attachment or a blast of compressed air can remove surface dust before it becomes caked on.
- Quarterly/Bi-annually (Deep Clean): Depending on how dusty your environment is (e.g., presence of pets, open windows, construction nearby), plan a more thorough deep clean every three to six months. This involves disassembly for desk fans or comprehensive cleaning for ceiling/tower fans.
Use Dust-Repelling Sprays (with Caution): Some anti-static or dust-repelling sprays can be applied to fan blades after cleaning and drying. These create a surface that dust is less likely to cling to. Always check product labels to ensure they are safe for plastics and metals and avoid spraying near electrical components. I use them sparingly on plastic blades.
Improve Overall Home Dust Management: A cleaner home means cleaner fans.
- Regular Vacuuming and Dusting: Vacuum floors and dust surfaces regularly. This reduces the amount of airborne dust that can settle on your fans. Remember to clean areas where dust collects, like cleaning construction dust from floors if you’ve recently had renovations.
- Change HVAC Filters: If you have a central heating and air conditioning system, regularly changing your HVAC filters (every 1-3 months) greatly reduces airborne dust in your home. This benefits all your appliances, including fans.
- Air Purifiers: Using an air purifier in rooms where fans operate can significantly reduce airborne particles. Less dust in the air means less dust on your fans.
- Pet Grooming: If you have pets, regular grooming can minimize pet dander floating in the air. This directly translates to less dander accumulating on your fans.
Strategic Fan Placement:
- Avoid Dusty Areas: If possible, do not place fans directly next to heavily trafficked areas or open windows where dust enters easily.
- Elevate Desk Fans: Placing desk fans on a table or shelf rather than directly on the floor can reduce the amount of floor dust they pick up.
By incorporating these simple maintenance tips into your cleaning routine, you can keep your fans operating at peak performance and ensure a cleaner, healthier living environment. A little consistent effort goes a long way.
Troubleshooting Common Fan Cleaning Challenges
Even with the best intentions, you might run into a few snags while cleaning your fan. Don’t worry; most challenges have simple solutions. I have encountered many of these myself over the years.
Challenge 1: Fan Grilles Won’t Come Off Some modern fans, especially tower fans, have non-removable grilles. This can make thorough cleaning difficult.
- Solution: Your main tools here are a vacuum cleaner with a crevice or brush attachment and compressed air. Use the vacuum to suction as much dust as possible from the outside. Then, blast compressed air into the grilles from various angles to dislodge dust from the internal components. Do this outdoors or over a dust sheet. A long, flexible brush (like a dryer vent brush or a specialized fan cleaning brush) can also help reach deeper inside.
Challenge 2: Stubborn, Greasy Grime on Kitchen Fans Kitchen exhaust fans can accumulate a sticky mix of dust and cooking grease, which is very hard to remove.
- Solution: For removable parts, an extended soak in very hot, soapy water with a strong degreaser (like a specialized kitchen degreaser or even heavy-duty dish soap) is often necessary. Let them soak for hours or overnight. For non-removable parts, a steam cleaner works wonders to loosen the grease. Follow immediately with a robust degreasing spray and vigorous scrubbing with a stiff brush or old toothbrush. Repeat if necessary.
- fan maintenance
- dust removal
- air quality
- appliance cleaning


