· Dyson Maintenance · 20 min read
How To Clean Dyson Animal Vacuum
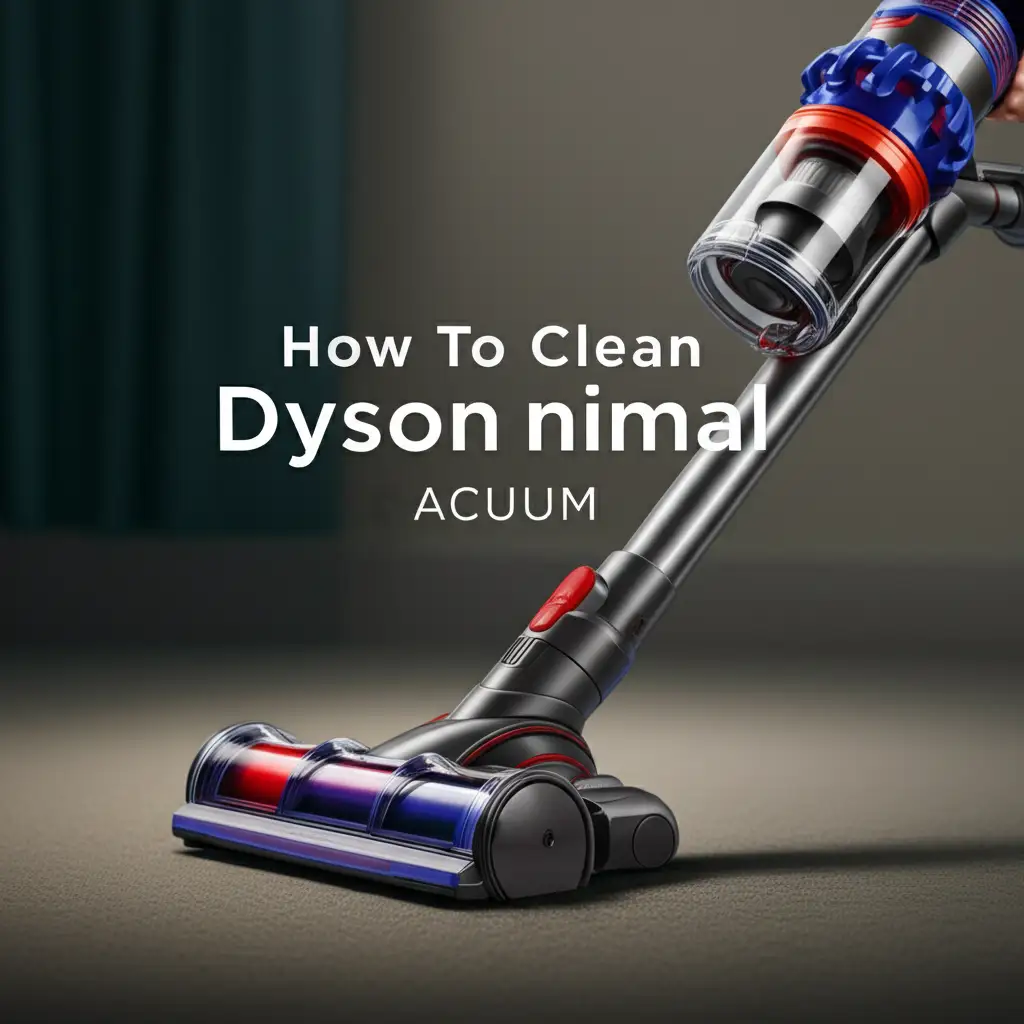
Clean Your Dyson Animal Vacuum: A Comprehensive Guide
Pets bring so much joy into our lives. They offer companionship, comfort, and often a lot of laughs. Yet, with all that love comes pet hair, dander, and general debris that can quickly accumulate in your home. This is precisely why many of us rely on powerful tools like the Dyson Animal vacuum cleaner. It stands as a trusted ally in the battle against pet-related messes, designed specifically to tackle the challenges that come with furry family members.
But even the most powerful cleaning machines need regular care. Over time, your Dyson Animal vacuum can lose suction, emit odors, or simply not perform as well as it once did. Dirt, dust, and pet hair can clog its vital components, making it less effective. The good news is, restoring its peak performance is straightforward with proper cleaning. This guide shows you exactly how to clean Dyson Animal vacuum models comprehensively. We will explore everything from emptying the dust bin to revitalizing filters and untangling brush bars. Follow these simple steps to ensure your Dyson Animal vacuum remains a powerful force against pet messes, keeping your home fresh and clean for years to come.
Takeaway: Restore Your Dyson Animal’s Power
- Regularly empty the dust bin and clean the cyclone shroud.
- Wash and thoroughly dry all washable filters every 3-6 months.
- Remove tangled hair and debris from the brush bar and head assembly.
- Check hoses and attachments for blockages and clean them regularly.
- Wipe down the exterior and perform final checks to maintain optimal performance.
To clean your Dyson Animal vacuum, you must first empty the dust bin and clean the cyclone. Then, remove and wash the pre-motor and post-motor filters, allowing them to dry completely for at least 24 hours. Next, clear any tangled hair or debris from the brush bar and inspect the hose and attachments for blockages. Regular maintenance ensures strong suction and extends the life of your vacuum.
Why Regular Cleaning Matters for Your Dyson Animal Vacuum
Keeping your Dyson Animal vacuum clean goes beyond simple aesthetics. It directly impacts the machine’s performance, lifespan, and your home’s air quality. Over time, dust, dirt, pet hair, and allergens build up inside the vacuum’s system. This accumulation can significantly hinder its powerful suction capabilities. Imagine trying to breathe through a blocked nose; your vacuum experiences a similar struggle when its internal components are clogged.
A dirty vacuum works harder to achieve less. This increased strain on the motor can lead to overheating and premature wear, shortening the life of your valuable appliance. Furthermore, a neglected vacuum can become a source of unpleasant odors, especially if it’s picking up pet accidents or damp debris. The trapped particles can harbor bacteria and mold, recirculating stale air back into your living space. This counteracts your efforts to clean and freshen your home.
Regular cleaning prevents these issues. It ensures your Dyson Animal maintains its optimal suction power, picking up every stray pet hair and speck of dust with ease. A clean filter captures more allergens, improving the air you and your family breathe. This practice also extends the vacuum’s life, protecting your investment. You maintain a hygienic environment, free from recirculated dirt and odors.
Essential Tools for Cleaning Your Dyson Animal Vacuum
Before you begin the cleaning process, gathering the right tools makes the job much easier and safer. You do not need any specialized or expensive equipment for this task. Most items are likely already in your home. Having everything ready beforehand saves time and prevents interruptions during the cleaning process.
First, always remember to unplug your Dyson Animal vacuum from the power outlet before you start any cleaning or maintenance. This is a critical safety step that prevents accidental activation and potential injury. Safety is paramount when working with electrical appliances. Make sure the vacuum is completely disconnected from power.
Here is a list of the simple tools you will need:
- Microfiber cloths: These are excellent for wiping down surfaces. They capture dust and grime effectively without scratching. You might want to have two: one dry for dusting and one damp for wiping.
- Mild dish soap: A small amount mixed with water creates a gentle cleaning solution. This is perfect for washing filters and exterior surfaces. Avoid harsh chemicals as they can damage your vacuum’s components.
- Warm water: Used for washing filters and rinsing components. Ensure the water is clean.
- Scissors or a seam ripper: These are indispensable for cutting away tangled hair from the brush bar. Pet hair can be incredibly stubborn, and sharp scissors make quick work of it. A seam ripper offers a safe way to get under strands without scratching the roller.
- A coin or flathead screwdriver: Some Dyson models require a coin or a flathead screwdriver to unlock certain components, such as the brush bar cover. Check your vacuum’s manual for specific instructions regarding component removal.
- Soft brush or old toothbrush: This is useful for dislodging stubborn dust and debris from crevices and intricate parts, like the cyclone assembly.
- Protective gloves: Optional, but recommended if you are sensitive to dust or prefer not to handle dirty components directly.
Having these items within reach will ensure a smooth and efficient cleaning session. You are now prepared to give your Dyson Animal vacuum the thorough cleaning it deserves, ensuring it continues to perform at its best.
Step-by-Step Guide: Emptying the Dust Bin and Cyclone
The dust bin and cyclone assembly are the first line of defense against dirt and pet hair in your Dyson Animal vacuum. They collect the vast majority of debris. Regular emptying and cleaning of these components are crucial for maintaining strong suction and preventing odors. Neglecting this step means your vacuum cannot effectively draw in dirt, regardless of how clean other parts might be.
Emptying the Dust Bin
My Dyson Animal vacuum’s dust bin fills up quickly, especially with a shedding pet. I find emptying it after every few uses, or when the “Max” line is reached, is best.
- Remove the Bin: First, locate the red release button, usually on top of the clear dust bin. Press this button firmly to release the bin from the main body of the vacuum. The bin should detach easily.
- Position Over a Trash Can: Carry the dust bin over a trash can. Position it directly over the opening to contain the dust.
- Open the Bottom Flap: Locate the second red lever or button, typically on the underside of the dust bin. Press this button. The bottom flap of the bin will swing open, allowing the collected dirt and debris to fall out. You might need to gently shake the bin to ensure all contents are released.
Cleaning the Cyclone Shroud
After emptying, the cyclone shroud often retains a fine layer of dust and pet dander. This build-up can restrict airflow over time.
- Separate the Cyclone: With the dust bin empty, locate the release mechanism that separates the clear bin from the silver or colored cyclone assembly. On many Dyson Animal models, this involves a small clip or twist mechanism. Carefully separate these two parts.
- Wipe Down: Use a damp microfiber cloth to wipe the inside and outside of the clear dust bin. Pay attention to any sticky residues or fine dust layers. For the cyclone shroud itself, a damp cloth is also effective. You can use a soft brush or an old toothbrush to gently dislodge stubborn dust from the conical sections of the cyclone. I find this especially helpful around the perforations.
- Rinse (If Applicable): Some Dyson dust bins are entirely washable. Check your model’s manual. If washable, you can rinse the clear bin under cool water. Avoid getting water into the cyclone assembly itself unless your specific model states it’s safe. Water can damage internal electrical components or sensitive parts of the cyclone mechanism.
- Dry Completely: This step is crucial. Ensure both the clear bin and the cyclone shroud are completely dry before reassembling. Air dry them for at least 24 hours. Placing them in direct sunlight or a well-ventilated area can speed up the process. Reassembling wet components can lead to mold growth and damage to your vacuum.
By regularly emptying and cleaning the dust bin and cyclone, you ensure optimal airflow and suction power. This prevents blockages and keeps your Dyson Animal vacuum ready to tackle any mess. Proper care of these components sets the foundation for your vacuum’s overall performance. You can find more specific guidance on cleaning filters for Dyson Ball models, which share similar cyclone mechanisms, by visiting our guide on how to clean filters on Dyson Ball.
Revitalizing Your Dyson Animal Vacuum Filters
Filters are the lungs of your Dyson Animal vacuum. They capture microscopic dust particles, allergens, and pet dander, preventing them from being recirculated back into your home’s air. Over time, these filters become clogged with the very particles they are designed to trap. A clogged filter severely restricts airflow, leading to a noticeable drop in suction power. This makes your vacuum less effective at cleaning and can put a strain on its motor.
Dyson Animal vacuums typically have two types of filters: a pre-motor filter and a post-motor (HEPA) filter. Both require regular attention, though their cleaning frequency and methods may differ.
- Pre-Motor Filter: This filter is usually washable and located near the dust bin. It protects the motor from larger dust particles.
- Post-Motor (HEPA) Filter: Found at the base or side of the vacuum, this filter captures the finest particles and allergens. Some Dyson HEPA filters are washable, while others are sealed and require replacement. Always check your specific model’s manual for confirmation.
Washing Washable Filters
Most Dyson Animal pre-motor filters are washable. Some post-motor filters are also washable. I usually wash mine every three to six months, depending on how often I use the vacuum and how much pet hair I’m cleaning.
- Remove Filters: Locate and carefully remove both the pre-motor and, if applicable, the washable post-motor filters. They usually twist or pull out easily.
- Rinse with Cold Water: Hold the filter under cold running water. Continue rinsing until the water runs clear. Gently squeeze the pleated sections of the filter to help dislodge trapped dirt. Avoid using any detergents or soaps unless explicitly stated in your Dyson manual, as chemicals can damage the filter material. I just let the water run through until it looks clean.
- Shake and Squeeze: After rinsing, shake off excess water. Then, gently squeeze the filter to remove as much moisture as possible. Do not twist or wring the filter forcefully, as this can damage its internal structure.
- Air Dry Completely: This is the most crucial step. Place the clean filters in a warm, dry area with good airflow. Leave them to air dry for a minimum of 24 hours. In some humid environments, they might need up to 48 hours. I often place them near a fan or in a sunny spot. It is absolutely essential that the filters are completely dry before you put them back into your vacuum. Reinstalling a damp filter can lead to mold growth, damage to the motor, and a musty smell. I once put a filter back too soon, and my vacuum smelled terrible!
Replacing Non-Washable Filters
If your Dyson Animal vacuum has a non-washable HEPA filter, you cannot clean it. These filters are sealed units designed for replacement at specific intervals, typically once a year. Check your vacuum’s manual for replacement recommendations. Regular replacement ensures your vacuum continues to capture fine allergens effectively.
By giving your filters the attention they need, you will notice a significant improvement in your Dyson Animal vacuum’s suction power. This also ensures the air in your home remains cleaner. For owners of the Dyson Ball Animal 3, which is a popular Dyson Animal model, you can find more detailed cleaning instructions specific to that model, including filter care, here: how to clean Dyson Ball Animal 3. Maintaining these filters is a key part of overall Dyson vacuum longevity and performance.
Maintaining the Brush Bar and Head Assembly
The brush bar, sometimes called the roller brush or cleaner head, is arguably the most hard-working component of your Dyson Animal vacuum. It is specifically designed to agitate carpets and lift pet hair, dirt, and debris into the vacuum’s suction path. Because of its constant contact with surfaces, and especially with furry friends around, the brush bar is highly susceptible to tangles and blockages. Hair, threads, and even small pieces of debris can wrap tightly around it. This accumulation prevents the bristles from rotating freely and effectively.
When the brush bar becomes clogged, its ability to pick up dirt diminishes drastically. You will notice your vacuum pushing debris around instead of suctioning it up, especially pet hair. This also puts extra strain on the motor, leading to reduced efficiency and potentially overheating. Regularly cleaning the brush bar is essential for restoring your vacuum’s deep-cleaning capabilities.
Clearing the Brush Bar
This is a task I tackle often, especially during pet shedding seasons. It’s satisfying to see all the hair come off.
- Access the Brush Bar: First, ensure your vacuum is unplugged. Then, lay the cleaner head flat on the floor. On many Dyson Animal models, you can access the brush bar by unlocking a retaining clip or a coin-operated screw on the side of the cleaner head. Refer to your model’s manual for precise instructions on how to remove the brush bar or its cover. Some models have a transparent cover that can be removed for easy access.
- Remove Tangles: Use your scissors or seam ripper to carefully cut through any tangled hair, threads, or fibers wrapped around the brush bar. Work your way around the entire bar, being careful not to cut the bristles or scratch the plastic. After cutting, you can usually pull the loosened hair away by hand. I find the seam ripper is excellent for sliding under tough tangles without damaging anything.
- Inspect for Debris: Check the ends of the brush bar for any debris caught in the bearings or small wheels. Clear these out. Also, look inside the cleaner head where the brush bar sits. Sometimes, larger debris like paper clips or small toys can get lodged here, creating an obstruction.
- Clean the Bristles: Use your fingers or a stiff brush to remove any remaining dust and debris from the bristles themselves. Ensure they are free to move and stand upright. The bristles should look relatively clean and untangled.
- Wipe Down the Head: Use a damp microfiber cloth to wipe the inside of the cleaner head assembly, removing any accumulated dust or grime. Clean the clear plastic window, if your model has one, to ensure you can see the brush bar spinning freely.
Reassembling the Head Assembly
Once the brush bar and cleaner head are clean, carefully reassemble the components. Ensure the brush bar clicks securely back into place. If you removed a cover, make sure it is properly fastened. Test the brush bar by spinning it manually to confirm it rotates freely.
Maintaining a clean brush bar ensures your Dyson Animal vacuum remains effective at tackling pet hair and deep-cleaning your floors. This simple but vital step will significantly improve your vacuum’s performance and longevity. Dyson Ball Animal 3 models, for example, have very similar brush bar cleaning procedures, and you can find specific guidance on their maintenance, which applies broadly to other Animal models, in our article: how to clean Dyson Ball Animal 3.
Cleaning Hoses, Wands, and Attachments
While the dust bin, filters, and brush bar handle the bulk of the cleaning, the hoses, wands, and attachments of your Dyson Animal vacuum also play crucial roles. They allow you to reach tight spaces, clean upholstery, and tackle specific messes. However, these components are equally susceptible to blockages from larger debris, pet hair clogs, or general dirt accumulation. A clogged hose or attachment can severely reduce suction power, making it frustrating to clean anything beyond floor surfaces.
Think of the hose as a crucial pathway. If it’s blocked, airflow stops, and your vacuum cannot pull dirt from the nozzle to the bin. Attachments also collect dirt and dust, especially around their openings and internal channels. Regular inspection and cleaning of these parts ensure your Dyson Animal maintains its versatility and powerful suction across all cleaning tasks.
Clearing Hoses and Wands
I have found surprising things lodged in my Dyson hose, from socks to toy parts. It is always worth checking if suction drops.
- Disconnect Components: First, always unplug your vacuum. Then, disconnect the hose from both the main vacuum body and the cleaner head or wand. This usually involves pressing release clips or buttons. Do the same for the wand, separating it from the hose and any attached tools.
- Inspect for Blockages: Hold each section of the hose and wand up to a light source. Look through them to identify any visible obstructions. You might see pet hair clogs, pieces of paper, or even small toys. For hoses, gently flex them to see if you can dislodge anything.
- Clear Blockages: If you find a blockage, use a broom handle or a long, blunt object to carefully push the obstruction through the hose or wand. Be gentle to avoid puncturing or damaging the hose. Never use sharp objects, as they could tear the internal lining. For stubborn hair clogs, sometimes a strong blast of air from a compressed air can might help, but ensure you are working in a well-ventilated area.
- Rinse (If Applicable): If your hose or wand is particularly dirty and made of a material that can withstand water (check your manual!), you can rinse them with cool water. Avoid getting water into any electrical connections. If you do rinse them, ensure they are completely dry, which can take a long time, before reattaching them to the vacuum. Air dry thoroughly, preferably for 24-48 hours.
Cleaning Attachments
Dyson Animal vacuums come with various attachments designed for specific tasks, such as crevice tools, upholstery tools, and pet hair tools. These tools accumulate dust and hair.
- Wipe Down: For most attachments, a damp microfiber cloth is sufficient. Wipe the exterior and interior surfaces, paying attention to the narrow openings and brush sections.
- Remove Tangles (for Mini Motorized Head): If you have a mini motorized tool (often included with Animal models for pet hair on upholstery), it has a small brush bar. This brush bar can get tangled with pet hair just like the main one. Use scissors or a seam ripper to carefully cut and remove any hair wrapped around it. Some mini motorized tools allow for removal of the brush bar for easier cleaning.
- Wash (If Safe): Some plastic attachments can be washed with warm water and a mild dish soap solution. After washing, rinse them thoroughly and let them air dry completely before reattaching them. I always make sure these smaller tools are bone dry before putting them back in my kit.
By keeping your hoses, wands, and attachments clean and clear, you ensure your Dyson Animal vacuum maintains its versatility and suction power across all types of surfaces and messes. This regular attention extends the life of these crucial accessories and keeps your vacuum operating at peak efficiency.
Exterior Wipe-Down and Final Checks
Once you have meticulously cleaned the internal components of your Dyson Animal vacuum, including the dust bin, filters, brush bar, hoses, and attachments, the final steps involve an exterior wipe-down and crucial reassembly checks. This stage ensures the vacuum looks as good as new and that all components are correctly fitted, preventing future performance issues. A clean exterior not only improves the vacuum’s appearance but also prevents dirt from transferring back onto your hands or floors during use.
The exterior of your Dyson Animal vacuum can accumulate dust, grime, and even pet dander over time. A quick wipe-down makes a significant difference in its overall cleanliness.
Exterior Wipe-Down
- Gather Supplies: You will need a clean, damp microfiber cloth and possibly a mild all-purpose cleaner diluted in water, or just plain water. Avoid abrasive cleaners or harsh chemicals, as these can damage the plastic or cause discoloration.
- Wipe Surfaces: Gently wipe down the entire exterior surface of the vacuum. Pay attention to the handle, wheels, and any crevices where dust might settle. For stubborn marks, a slightly damp cloth with a tiny drop of mild dish soap can be effective. Ensure you do not get water into any electrical openings or vents. I always give the wheels a good scrub; they pick up so much grime.
- Dry Thoroughly: After wiping with a damp cloth, use a dry microfiber cloth to wipe down the vacuum and remove any moisture. This prevents water spots and ensures no dampness remains on electrical parts.
Reassembly and Final Checks
Reassembling your Dyson Animal vacuum correctly is as important as the cleaning process itself. An improperly assembled vacuum can lead to reduced suction, strange noises, or even damage.
- Reinstall Filters: Carefully slide or twist your completely dry filters back into their designated compartments. Ensure they click securely into place. I cannot stress enough how important it is for them to be dry. If they are even slightly damp, mold can grow, and the vacuum’s motor can be damaged.
- Reattach Dust Bin and Cyclone: Slide the cleaned cyclone assembly back into the clear dust bin. Then, attach the entire dust bin and cyclone unit back onto the main body of the vacuum. Listen for the reassuring click that indicates it is securely fastened.
- Reattach Brush Bar and Head: Carefully reinsert the clean brush bar into the cleaner head. Ensure any retaining clips or screws are fastened tightly. Then, reattach the cleaner head to the vacuum’s main body or wand, making sure it locks into position.
- Check Seals and Connections: Visually inspect all seals around the dust bin, filters, and hose connections. Ensure there are no gaps or tears. Intact seals are crucial for maintaining optimal suction. Loose connections allow air to escape, reducing efficiency.
- Functionality Test: Once everything is reassembled, plug your Dyson Animal vacuum back in. Turn it on briefly to confirm everything sounds normal and the brush bar spins freely. Test the suction with your hand over the end of the hose or cleaner head. It should feel strong and consistent.
By following these final steps, you not only ensure your Dyson Animal vacuum is sparkling clean on the outside but also fully operational and ready to tackle its next cleaning challenge with renewed vigor. This comprehensive approach to cleaning guarantees lasting performance and a healthier home environment. For similar deep cleaning insights on other Dyson models, particularly those with Ball technology, our article on how to clean Dyson Ball Animal 3 offers complementary advice that is highly relevant to this process.
Frequently Asked Questions About Cleaning Your Dyson Animal Vacuum
Cleaning your Dyson Animal vacuum might raise a few questions. Here are answers to some common queries I hear and have had myself. These tips will help you keep your vacuum in top shape.
Q1: How often should I clean my Dyson Animal vacuum?
I recommend emptying the dust bin after every use, especially if you have pets. Wash the washable filters every three to six months. Check the brush bar for tangled hair monthly. If you notice reduced suction or an odor, perform a more thorough cleaning immediately. Regular, quick maintenance prevents bigger problems later.
Q2: Can I use soap or detergents to wash my Dyson Animal filter?
No, do not use soap or detergents on your Dyson Animal filters unless the manual explicitly states it. Dyson filters are designed to capture microscopic particles. Soap residue can clog the filter material, making it less effective and potentially damaging it. Stick to cold water for washable filters. This keeps the filter material pure.
Q3: What if my Dyson Animal vacuum still has low suction after cleaning?
If suction remains low after a thorough cleaning, check for hidden blockages. Inspect the hose, wand, and all attachments for any lodged debris. Ensure filters are completely dry before reinstallation, as damp filters can restrict airflow. If issues persist, it might indicate a motor problem or a need for professional service.
Q4: How do I remove
- Dyson Animal
- Vacuum Cleaning
- Pet Hair
- Filter Cleaning
- Brush Bar
- Vacuum Maintenance
- Home Care