· Vacuum Maintenance · 14 min read
How To Clean Dyson Brush Head
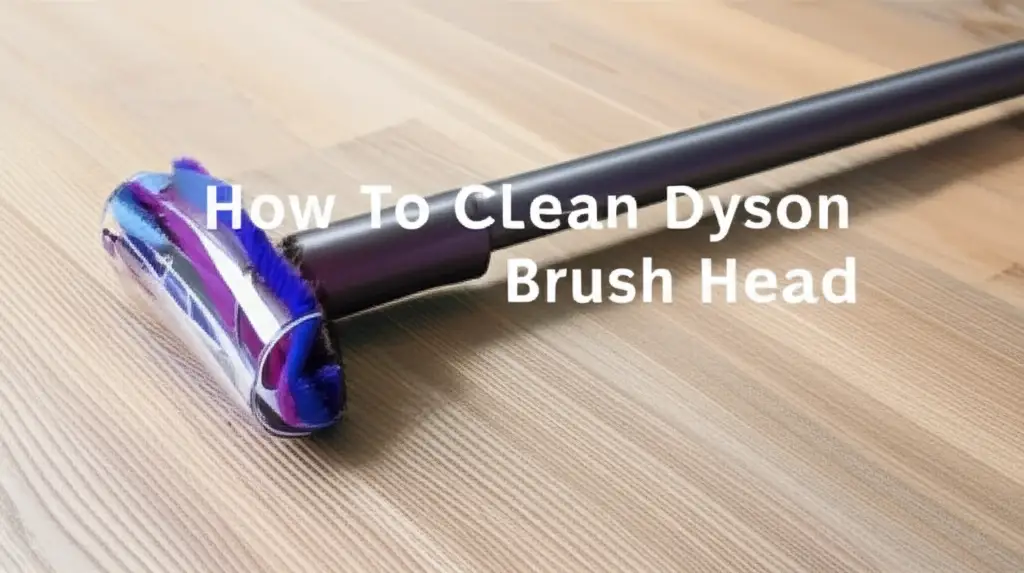
Effortlessly Clean Your Dyson Brush Head
Your Dyson vacuum cleaner is a powerful tool. It picks up dirt, dust, and pet hair efficiently. However, over time, the brush head collects debris. This buildup reduces your vacuum’s cleaning ability. A dirty brush head can also strain the motor. Learning how to clean Dyson brush head ensures peak performance. This simple task maintains your vacuum’s suction power. It also extends the life of your valuable machine. I will guide you through each step. You will easily restore your Dyson brush head to its best condition.
Takeaway
- Regularly clean your Dyson brush head to maintain vacuum performance.
- Gather simple tools like scissors, a coin, and a microfiber cloth.
- Always disconnect the vacuum from power before cleaning the brush head.
- Remove tangled hair and debris by hand and with scissors.
- Wash removable brush bars with water, if your model allows.
- Ensure all parts are completely dry before reassembly.
To clean a Dyson brush head, first disconnect the vacuum from power. Use a coin to unlock the end cap and remove the brush bar. Cut and remove tangled hair and debris. Wipe down the housing and wash the brush bar if your model is washable. Air dry all parts completely before putting them back.
Why Cleaning Your Dyson Brush Head Matters
Your Dyson vacuum is an investment. It works hard to keep your home spotless. The brush head, also known as the brush bar, does most of the heavy lifting. It agitates carpets and sweeps hard floors. Over time, hair, pet fur, strings, and general debris wrap around it. This buildup reduces its effectiveness. A dirty brush head cannot spin freely. This means it cannot pick up dirt properly.
I have seen vacuums lose significant suction just because of a clogged brush head. The motor works harder to spin a hindered brush. This can lead to overheating. It can even cause the motor to burn out eventually. Cleaning the brush head is a simple preventative measure. It helps your Dyson vacuum run smoothly. It also keeps your floors truly clean. You will notice a big difference in performance after a thorough cleaning. It feels good to maintain your tools properly.
A clean brush head also prevents unpleasant odors. Trapped dirt and hair can harbor bacteria. This creates a musty smell during vacuuming. This is not something anyone wants in their home. Regular cleaning solves this problem. It helps maintain a fresh and clean environment. Think of it as essential maintenance. Just like you might clean your vacuum’s filters, the brush head needs attention too. If you are cleaning other parts of your vacuum, like the Dyson vacuum filter or even a Dyson cordless filter, add the brush head to your routine. It completes the cleaning cycle.
Tools You Need for a Sparkling Clean Brush Head
Getting ready for the task makes it much easier. You do not need many specialized tools. Most items are already in your home. Having everything prepared helps you work efficiently. It also prevents interruptions during the cleaning process. I always gather my supplies beforehand. This ensures a smooth cleaning experience.
Here is what you will need:
- Coin or Flathead Screwdriver: Many Dyson brush heads have a coin-slot fastener. This is for easy removal. A small flathead screwdriver can also work.
- Scissors or Seam Ripper: These are crucial for cutting tangled hair. A small pair of sharp scissors works best. A seam ripper can also be very effective for getting under tight tangles.
- Microfiber Cloth: A soft cloth is good for wiping down parts. It picks up fine dust and grime.
- Running Water (Optional): Some Dyson brush bars are washable. Check your model’s manual first. If yours is washable, you will need a sink with running water.
- Soft Brush or Toothbrush: This is helpful for scrubbing stubborn grime. It gets into tight spaces.
- Safety Gloves (Optional): If you are sensitive to dust or dirt, gloves are a good idea. They keep your hands clean.
Before you start, make sure your Dyson vacuum is unplugged. Safety comes first with any appliance. Disconnecting the power prevents accidental startups. It protects you from harm. This simple step is vital for your safety. It also protects your vacuum from damage. Always make sure the vacuum is completely off. Do not just turn it off; unplug it from the wall outlet.
Step-by-Step Guide to Removing Your Dyson Brush Bar
Removing the brush bar is usually straightforward. However, the exact method can vary slightly. This depends on your specific Dyson model. Most Dyson uprights, canisters, and stick vacuums have a similar design. They allow easy access to the brush head. Always check your Dyson’s user manual if you are unsure. I find the manual very helpful for model-specific instructions.
First, lay your Dyson vacuum down. Place it on a clean, flat surface. This gives you easy access to the cleaner head. Locate the brush bar housing. It is the part that touches your floor. You will usually see a coin slot or a clip on one side. This is what holds the brush bar in place.
For many Dyson models, you will use a coin. Insert the coin into the designated slot. Turn it a quarter turn counter-clockwise. This will unlock the end cap. Some models might have a quick-release button or a latch. Press or slide it to release the brush bar. Carefully pull the brush bar out from its housing. It should slide out easily once unlocked. Take note of how it sits in the housing. This will help you put it back correctly later. Sometimes the brush bar has two separate pieces. Make sure you remove both if that is the case for your model. If you own a specific Dyson like the Dyson V11 or a Dyson Animal vacuum, the removal process will be similar. Dyson designs their parts to be user-friendly for maintenance.
Once removed, you will likely see the amount of hair and debris. It can be quite surprising how much accumulates. This visual confirms why cleaning is necessary. Now you are ready for the next steps. These will get your brush head spotless.
Untangling and Debris Removal: The First Essential Step
With the brush bar removed, you can begin the main cleaning. This step focuses on removing visible tangles and debris. This is often the most time-consuming part. However, it is also the most satisfying. You will quickly see the brush bar transform. I usually start this process over a trash can. This helps contain the mess.
Start by hand-pulling any loose hair or large debris. Many strands will come off easily. For tightly wound hair, use your scissors or seam ripper. Carefully slide the blade under the tangled hair. Cut along the length of the brush bar. Be very careful not to cut the bristles themselves. Cut the hair into smaller sections. This makes it easier to pull off. Work your way around the entire brush bar. Make sure to get into the grooves. Hair often wraps around the ends. It also gets into the bearing areas.
You might find more than just hair. Lint, threads, and even small pieces of paper can get stuck. Use your fingers to pull these away. A small, stiff brush, like an old toothbrush, can help. It can dislodge stubborn bits of dust and lint. Pay attention to the very ends of the brush bar. Small debris can collect here. This can impede the brush bar’s rotation. Ensure all visible tangles are gone. The brush bar should spin freely in your hands. This step is critical for restoring proper function. It allows the bristles to do their job. This initial cleanup prevents the need for deep washing. It often brings the brush head back to life.
Washing and Drying Your Dyson Brush Head Components
After removing all tangles, you might need to wash the brush bar. This depends on your Dyson model. Some Dyson brush bars are designed to be washable. Others are not. Check your user manual to be sure. Washing a non-washable part can damage it. Always verify this information first. If your brush bar is washable, this step will make it truly sparkling.
If your Dyson brush bar is washable, use cool or lukewarm water. Do not use hot water. Hot water can deform the bristles or plastic parts. You can use a mild soap if the brush head is very grimy. Apply a small amount of soap. Use your fingers or a soft brush to gently scrub the bristles. Rinse the brush bar thoroughly under running water. Ensure all soap residue is gone. Soap left behind can attract more dirt later. Rinse until the water runs clear.
The most important part of this step is drying. The brush bar must be completely dry before reassembly. Any moisture can damage your Dyson vacuum’s motor. It can also lead to mold or mildew growth inside the vacuum. After washing, shake off excess water. Then, stand the brush bar upright. Place it in a well-ventilated area. I usually let mine air dry for at least 24 to 48 hours. This ensures it is bone dry. You can also use a fan to speed up the drying process. Do not use heat, such as a hairdryer, as this can warp plastic parts. Make sure the bristles feel completely dry to the touch. They should not feel damp or cold. This thorough drying is critical. It protects your vacuum from moisture damage.
Reassembling and Testing Your Clean Brush Head
Once your Dyson brush bar is completely dry, it is time to put everything back together. Reassembly is usually the reverse of removal. This step should be quick and easy. However, proper alignment is key. A correctly reassembled brush head will ensure optimal vacuum performance. It also prevents future issues.
First, check the brush bar housing inside your Dyson. Make sure it is free of any lingering dust or debris. You can use a dry microfiber cloth to wipe it clean. Now, carefully slide the dry brush bar back into its slot. Ensure it clicks into place. Make sure the ends are properly aligned. Some Dyson brush heads have a specific orientation. There might be a key or a notch that matches the housing. Follow the way you removed it. Push it firmly until it seats correctly.
Once the brush bar is in place, secure it. If your model uses a coin slot, insert the coin. Turn it a quarter turn clockwise to lock the end cap. If it has a latch or button, ensure it clicks shut. Give the brush bar a gentle spin by hand. It should rotate freely without any resistance. This confirms it is properly installed.
Finally, reattach the cleaner head to your Dyson vacuum. Plug your vacuum back into the power outlet. Turn it on for a quick test run. Listen for any unusual noises. Check if the brush bar spins normally. You should immediately notice improved suction. The vacuum will glide more smoothly across your floors. The difference can be quite significant. A clean brush head feels more efficient. It picks up dirt with greater ease. This final test ensures your hard work paid off.
Maintenance Tips to Keep Your Brush Head Cleaner Longer
Regular maintenance extends the life of your Dyson. It also ensures consistent cleaning power. A few simple habits can keep your brush head cleaner for longer. These tips reduce the frequency of deep cleaning. They also prevent severe buildup. I always tell people that prevention is easier than cure. Applying these tips will save you time and effort in the long run.
- Regular Visual Checks: Briefly inspect your brush head after every few uses. Look for visible hair tangles. Catching them early makes removal quick and easy. A quick snip with scissors prevents bigger problems.
- Prompt Debris Removal: If you see large pieces of debris, like string or fabric, remove them immediately. Do not wait for them to become deeply embedded. This takes seconds but saves minutes later.
- Vary Cleaning Directions: When vacuuming, try to vary the direction you push the vacuum. This helps distribute wear on the bristles. It also reduces the chances of hair wrapping in just one spot.
- Be Mindful of What You Vacuum: Avoid vacuuming large items. Loose shoelaces, small toys, or thick paper can quickly jam the brush head. This can even damage the motor.
- Clean Filters Regularly: A clogged filter makes your vacuum work harder. This can indirectly affect the brush head. If your vacuum struggles, the brush head might also be under more strain. Make sure you also clean your Dyson air filter and other vacuum filters. A clean filter allows for better airflow.
- Consider Pet Grooming: If you have pets, regular grooming can reduce shedding. Less pet hair on your floors means less pet hair in your vacuum’s brush head.
- Use the Right Attachments: For specific tasks, like vacuuming pet beds, use specialized attachments. This keeps the main brush head cleaner. It also ensures you are using the right tool for the job.
Following these tips helps maintain your Dyson’s performance. It extends the time between major brush head cleanings. Your Dyson will continue to be a powerful cleaning companion.
FAQ Section
How often should I clean my Dyson brush head? Clean your Dyson brush head every 1 to 3 months. If you have pets or long hair, you might need to clean it more often, perhaps every month. Regular checks are important. Look for visible hair or debris buildup. This helps you decide the best cleaning schedule for your home.
Can I wash all Dyson brush heads with water? No, not all Dyson brush heads are washable. It depends on your specific model. Always check your Dyson user manual before washing any part with water. Washing a non-washable brush head can cause damage to the vacuum. Air dry washable parts completely.
What happens if I do not clean my Dyson brush head? Not cleaning your Dyson brush head reduces suction power. It forces the motor to work harder. This can lead to overheating and potential motor damage. The brush head will also accumulate odors from trapped dirt and hair. Regular cleaning ensures optimal performance and a longer vacuum lifespan.
How do I remove tightly tangled hair from the brush bar? Use a pair of sharp scissors or a seam ripper. Carefully slide the blade under the tangled hair. Cut the hair along the length of the brush bar into smaller sections. This makes it easier to pull the hair away by hand. Be gentle to avoid damaging the bristles.
Can I use harsh chemicals to clean my Dyson brush head? No, do not use harsh chemicals, detergents, or abrasive cleaners. These can damage the plastic parts and bristles of your Dyson brush head. Use only cool or lukewarm water, and a very mild soap if necessary, for washable components. Rinse thoroughly and dry completely.
My Dyson brush head is not spinning after cleaning. What should I do? First, check if the brush head is fully dry. Any moisture can prevent it from working. Ensure it is correctly reassembled and locked into place. Check for any small, hidden debris still blocking movement. Sometimes, the belt or motor might need service if the problem persists.
Conclusion
Cleaning your Dyson brush head is a straightforward task. It makes a big difference in your vacuum’s performance. A clean brush head means better suction. It also extends the life of your valuable Dyson machine. This simple maintenance prevents common issues. It ensures your vacuum works as effectively as the day you bought it. I hope these steps give you the confidence to tackle this job.
Remember to always unplug your Dyson first. Use the right tools. Be patient with untangling hair. Most importantly, ensure all components are completely dry before reassembly. Making this a regular part of your cleaning routine will pay off. Your floors will be cleaner. Your Dyson will run smoothly. Take the first step today. Give your Dyson the care it deserves. You will see a cleaner home and a happier vacuum.
- Dyson cleaning
- vacuum maintenance
- brush head cleaning
- Dyson parts
- home cleaning tips