· Vacuum Maintenance · 20 min read
How To Clean Dyson Handheld Vacuum

Clean Your Dyson Handheld Vacuum: A Full Guide
Having a Dyson handheld vacuum makes quick cleanups easy. This small, powerful tool tackles spills and messes quickly. But over time, dirt and dust build up inside it. This buildup can make your vacuum lose suction power.
You can prevent this by cleaning your Dyson handheld vacuum regularly. Proper cleaning maintains strong suction. It also helps your Dyson last longer. This guide will show you how to clean your Dyson handheld vacuum step-by-step. We cover everything from emptying the bin to washing filters.
Takeaway
Keeping your Dyson handheld vacuum clean is simple. Follow these key steps for optimal performance:
- Empty the dust bin after each use.
- Wash the filter every month with cold water.
- Remove hair and debris from the brush bar.
- Check and clear any blockages in the airway.
- Allow all parts to dry completely before reassembly.
How do you clean a Dyson handheld vacuum?
You clean a Dyson handheld vacuum by regularly emptying the dust bin, washing the filter, and removing debris from the brush bar. Check for blockages in the main body and attachments. Always ensure all components are fully dry before reassembly to prevent damage and maintain strong suction.
Prepare Your Dyson Handheld Vacuum for Cleaning
Before you begin cleaning your Dyson handheld vacuum, gather your tools. Safety is important when cleaning any electrical device. Always make sure your Dyson vacuum is turned off. Disconnect it from the charger too. This stops accidental power ups during the cleaning process.
You will need a few simple items for this cleaning task. A soft brush, like an old toothbrush, works well for detailed areas. You also need a pair of scissors to cut tangled hair. A lint-free cloth helps dry parts. Having a trash bin nearby is also useful for debris disposal. Getting everything ready first makes the cleaning process smooth. This preparation step protects both you and your Dyson.
Gather Your Tools:
- Soft brush (e.g., old toothbrush)
- Scissors
- Lint-free cloth
- Trash bin
- Mild dish soap (optional, for heavily soiled parts)
Safety First Steps:
- Turn off the Dyson handheld vacuum.
- Unplug the vacuum from its charger.
- Allow the vacuum to cool down if it has been recently used.
- Work in a well-lit area to see all dirt and debris.
Following these preparation steps sets you up for a successful cleaning session. It ensures you clean your Dyson safely and effectively. Proper preparation helps maintain the machine’s efficiency.
Emptying the Dust Bin and Cyclone Separator
Emptying the dust bin is the most frequent cleaning task for your Dyson handheld vacuum. It should be done after every use. A full bin reduces suction power significantly. Regular emptying also prevents debris from compacting inside. This protects the internal components of your vacuum.
Dyson handheld vacuums have a clear dust bin. You can easily see when it is full. Most models have a simple release button. This button usually sits near the top of the bin. Press it to release the bottom flap. The dirt and dust will fall out into your trash can. Always hold the vacuum over a bin when opening the flap. This keeps your home clean during the process.
Cleaning the Dust Bin
Just emptying the bin is not always enough. Dust and fine particles can cling to the inside. You might notice a film or residue. For a deeper clean, remove the dust bin completely. Many Dyson models allow the bin to detach from the main body. Check your specific model’s manual for exact instructions. Once detached, you can wipe the inside. Use a damp cloth for this. Do not use harsh chemicals.
The cyclone separator sits inside the dust bin. This is the part with many small cones. These cones spin the air to separate dirt. Hair and debris can get stuck in these cones. Use a soft brush, like an old toothbrush, to dislodge any stuck dirt. You can also tap the bin gently against your hand. This helps loose particles fall out. Make sure no large clumps of hair remain. You can find more tips on keeping your Dyson clean, including larger models, by reading about how to clean your Dyson Animal vacuum.
- Steps to Empty and Clean the Dust Bin:
- Locate the dust bin release button.
- Hold the vacuum over a trash bin.
- Press the release button to open the bin flap.
- Shake the bin gently to ensure all contents fall out.
- Detach the dust bin from the main vacuum body (if your model allows).
- Wipe the inside of the bin with a damp cloth to remove fine dust.
- Use a soft brush to clean the cyclone separator cones.
- Ensure the bin is completely dry before reattaching it.
Regularly cleaning the dust bin maintains strong airflow. This helps your Dyson handheld vacuum perform at its best. It also extends the life of your vacuum.
Cleaning and Maintaining Dyson Filters
Filters are the lungs of your Dyson handheld vacuum. They trap fine dust and allergens. A dirty filter blocks airflow. This makes your vacuum lose suction power. Cleaning the filters regularly is important for performance. Dyson handheld vacuums typically have one or two filters. These are usually washable.
Most Dyson handheld models have a pre-motor filter. This filter often sits at the top of the main body, near the handle. It may be blue or purple. Some models also have a post-motor filter. This one is usually located at the back of the vacuum. Always refer to your user manual for exact filter locations and washing instructions. My experience tells me that regular filter cleaning makes a huge difference.
Washing Dyson Filters
Washing the filter is simple. Remove the filter from your Dyson. Take it to a sink. Rinse it under cold running water. Do not use hot water or detergents. Cold water is enough to remove trapped dust. Squeeze the filter gently. This helps push out water and dirt. Continue rinsing until the water runs clear. You will see dirty water turn clean. This means the filter is getting clean.
After rinsing, shake off excess water. Then, it is crucial to let the filter dry completely. This is the most important step. A damp filter can damage your vacuum’s motor. It can also grow mold. Place the filter in a warm, dry place. Allow it to air dry for at least 24 hours. Some filters need even longer, up to 48 hours. Do not use a dryer or a microwave. Extreme heat can damage the filter material. I usually place mine near a window, away from direct sunlight, for good airflow. Maintaining these filters is similar to the care needed for larger Dyson models; you can learn more about how to clean filters on a Dyson Ball for broader context.
- Steps to Clean Filters:
- Locate and remove the filter(s) from your Dyson.
- Tap the filter gently over a trash can to remove loose dust.
- Rinse the filter under cold running water (no detergents).
- Gently squeeze the filter to release dirty water.
- Continue rinsing and squeezing until the water runs clear.
- Shake off excess water from the filter.
- Place the filter in a dry, well-ventilated area to air dry for at least 24-48 hours.
- Ensure the filter is completely dry before reinserting it into the vacuum.
Cleaning your filters monthly or as recommended by Dyson keeps your vacuum running efficiently. A clean filter ensures maximum suction power. It also extends the life of your machine.
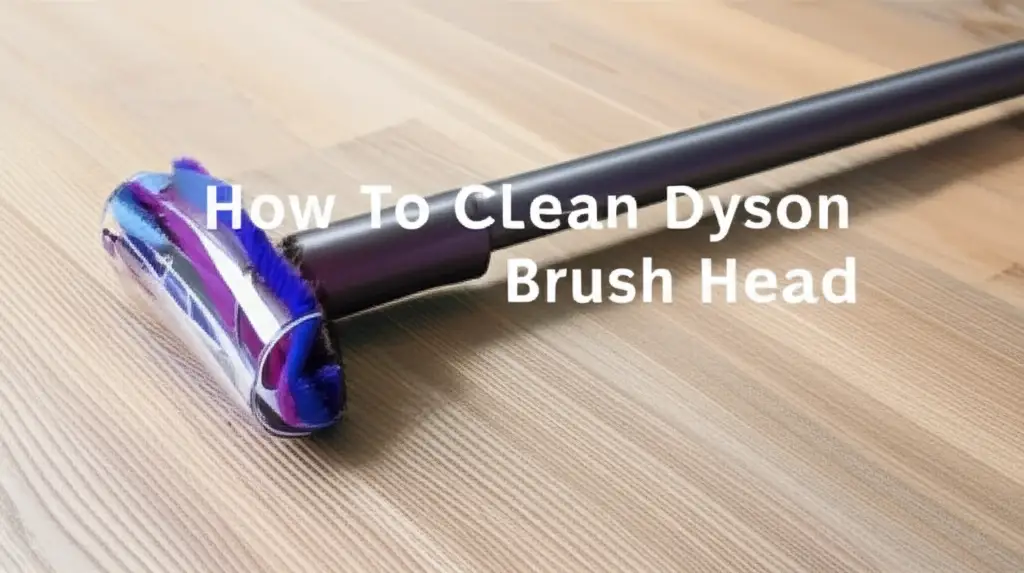
Maintaining the Brush Bar and Attachments
The brush bar on your Dyson handheld vacuum works hard. It spins fast to lift dirt from surfaces. Over time, hair, string, and fibers can wrap around it. This buildup slows the brush bar down. It can even stop it from spinning entirely. A dirty brush bar reduces cleaning effectiveness. It puts strain on the vacuum’s motor. Regular maintenance of the brush bar is simple. It helps your Dyson pick up more dirt.
Most Dyson handheld vacuums allow you to remove the brush bar. This makes cleaning easier. Look for a release mechanism on the cleaner head. It might be a coin-slot screw or a latch. Once released, slide the brush bar out. You will likely see a tangled mess of hair. This is normal. You can also find relevant information on cleaning other cordless vacuum filters like how to clean a Shark vacuum filter on a cordless model.
Cleaning the Brush Bar
Use scissors to carefully cut through any tangled hair. Cut along the length of the brush bar. Be careful not to damage the bristles. Once cut, pull the hair away. A soft brush can help remove smaller debris. Check the ends of the brush bar too. Small bearings or caps are often found here. Hair can get wrapped around these parts. Remove all debris to allow the brush bar to spin freely.
After cleaning the brush bar, inspect the cleaner head itself. Dust and debris can accumulate inside. Use a dry cloth or a soft brush to wipe it clean. Ensure the air channels are clear. Do not wash the brush bar unless your specific Dyson model’s manual states it is washable. Many brush bars contain electronic components and should not get wet. Once clean, reinsert the brush bar. Make sure it clicks into place securely. Spin it by hand to confirm it moves freely.
- Steps to Clean the Brush Bar:
- Detach the cleaner head from your Dyson handheld vacuum.
- Locate and release the brush bar from the cleaner head (refer to your manual).
- Use scissors to cut through tangled hair and fibers on the brush bar.
- Carefully pull all cut hair and debris off the brush bar.
- Use a soft brush to remove any remaining fine dust or particles.
- Inspect the cleaner head for debris and wipe it clean with a dry cloth.
- Ensure the brush bar is free of obstruction at its ends.
- Reinsert the brush bar into the cleaner head, ensuring it is secure.
- Reattach the cleaner head to the vacuum.
Cleaning Attachments
Dyson handheld vacuums come with various attachments. These often include a crevice tool, a combination tool, and a mini-motorized tool. These attachments can also collect dirt and debris. Use a dry or slightly damp cloth to wipe them clean. For stubborn dirt in crevices, use a soft brush. Ensure all attachments are dry before storing them. Cleaning attachments ensures they function correctly. It also prevents dirt from transferring back to clean surfaces. This holistic cleaning approach keeps your entire Dyson system effective. This proactive care helps your vacuum work like new for years. You can apply similar principles to larger models as well, like in maintaining a Dyson Ball Animal 3.
Checking and Clearing Blockages
Your Dyson handheld vacuum relies on clear airflow for strong suction. Even after cleaning the filter and brush bar, suction can still be weak. This often means there is a blockage somewhere in the airway. Blockages can happen in the wand, the main body, or the cleaner head. Identifying and clearing these blockages is important for restoring full power. I have found blockages to be the most common cause of sudden suction loss.
Start by detaching all main components. Remove the cleaner head and the dust bin. Separate the wand (if your model has one). Now, inspect each part individually. Look through the openings of the main vacuum body. Shine a flashlight into the narrow passages. You might see a visible obstruction. Often, a large clump of dust, a small toy, or a piece of paper gets stuck.
Locating Blockages
- Main Vacuum Body: Look into the inlet where the dust bin attaches. Also, check the outlet where air exits towards the motor.
- Wand/Extension Pipe: This is a common place for blockages. Look from both ends of the wand. A broom handle or a long stick can help check.
- Cleaner Head: After removing the brush bar, inspect the inner workings. Check the opening where the cleaner head connects to the wand.
Clearing Blockages Safely
Once you find a blockage, do not try to force it out with your fingers. This can push it deeper. Use a long, blunt object. A broom handle, a sturdy ruler, or the back of a wooden spoon can work. Push the blockage through from the wider end if possible. If the blockage is too stubborn, you might need to use pliers to pull it out. Be careful not to scratch or damage the plastic. For hair or string blockages, scissors can help cut them into smaller pieces first.
After clearing the blockage, reassemble your Dyson handheld vacuum. Test the suction power. It should be noticeably stronger. If the suction is still weak, re-check each component. There might be more than one blockage. Some Dyson models have clear sections. These allow you to spot blockages easily. Always refer to your vacuum’s manual. It might have specific tips for your model. Regular checks prevent small blockages from becoming large problems. This step ensures your Dyson maintains peak performance.
- Steps to Check and Clear Blockages:
- Turn off and unplug the Dyson handheld vacuum.
- Disassemble the vacuum: remove cleaner head, wand, and dust bin.
- Visually inspect each component for blockages:
- Main vacuum body inlets and outlets.
- Inside the wand/extension pipe (look from both ends).
- Inside the cleaner head (after brush bar removal).
- Use a flashlight to illuminate dark areas.
- If a blockage is found, use a long, blunt object (e.g., broom handle) to gently push it through.
- For stubborn hair or string, use scissors to cut it into smaller pieces.
- Avoid using sharp objects that could scratch the plastic.
- Once clear, reassemble the vacuum carefully.
- Test the vacuum to ensure suction power is restored.
This proactive approach prevents buildup. It keeps your Dyson handheld vacuum performing efficiently.
Washing and Drying Detachable Components
Some parts of your Dyson handheld vacuum are safe to wash with water. This applies mostly to the dust bin and certain attachments. Washing these parts removes sticky grime and fine dust that wiping alone cannot handle. It also helps reduce odors that can build up from collected dirt. Always check your Dyson manual. It will confirm which parts are washable and which are not. Never wash electrical components or parts that contain motors.
The dust bin, once detached, can often be rinsed under cold water. Use a small amount of mild dish soap for stubborn residue. Swirl the soapy water inside the bin. Use a soft brush to scrub any stuck-on dirt. Rinse thoroughly with cold water. Ensure all soap residue is gone. Soap can leave a film. This film can attract more dust.
Drying Washable Components
Drying is critical after washing any part of your Dyson. Any moisture left inside can lead to mold growth. It can also cause electrical damage if the part connects to the motor. Always allow parts to air dry completely. This takes time. Place washed components in a well-ventilated area. My trick is to put them on a clean towel or drying rack. Make sure air can circulate around them.
Do not use heat sources like radiators, hair dryers, or direct sunlight. High heat can warp plastic parts. It can also damage seals. A good rule of thumb is to wait at least 24 hours. Some larger or thicker parts may need 48 hours. Visually inspect the parts for any signs of dampness before reassembly. If you feel any cold spots, it is still wet. Proper drying ensures your Dyson handheld vacuum functions correctly and safely. It also helps prevent unpleasant smells.
Steps for Washing Detachable Components:
- Confirm which parts are washable by checking your Dyson manual.
- Detach the washable components (e.g., dust bin, some non-motorized attachments).
- Rinse the components under cold running water.
- Apply a small amount of mild dish soap if needed, and gently scrub with a soft brush.
- Rinse thoroughly with cold water until all soap residue is gone.
- Shake off excess water from the components.
Steps for Drying Components:
- Place washed components in a well-ventilated area.
- Allow them to air dry completely for at least 24-48 hours.
- Avoid using heat sources like dryers or direct sunlight.
- Visually inspect and feel for any dampness before reassembly.
- Reassemble the vacuum only when all parts are bone dry.
This careful approach to washing and drying ensures the longevity of your Dyson handheld vacuum. It also keeps your cleaning tool hygienic and effective.
Reassembling and Testing Your Dyson Handheld Vacuum
Once all the components are clean and completely dry, it is time to put your Dyson handheld vacuum back together. Reassembly is straightforward. It usually involves reversing the disassembly steps. Start with the parts you removed last. Always handle components gently to avoid damage. Correct reassembly ensures your vacuum operates safely and efficiently. My personal experience shows that taking your time here prevents issues later.
Begin by reinserting the dry filter(s). Ensure they click into place securely. A loose filter can reduce suction. Next, reattach the dust bin to the main body. Listen for a click. This indicates it is locked into position. If you removed the brush bar, slide it back into the cleaner head. Make sure the release mechanism locks it. Finally, reattach the cleaner head and any wands or extension pipes. Ensure all connections are firm.
Testing Your Vacuum
After reassembly, it is important to test your Dyson handheld vacuum. Plug it back into the charger briefly, then unplug it. Turn the vacuum on. Listen for the motor sound. It should be smooth and consistent. Check for proper suction by trying to pick up a small amount of dust or crumbs. The brush bar should spin freely and effectively.
If the suction is weak or the brush bar does not spin, turn the vacuum off immediately. Re-check the assembly. A common issue is a filter not seated correctly. Another is a brush bar not fully locked. Or there might be a remaining blockage you missed. Go back through the steps for checking blockages. Ensure all components are completely dry. Moisture can prevent the vacuum from turning on or cause damage.
Steps to Reassemble Your Dyson:
- Ensure all cleaned parts (filters, dust bin, brush bar, attachments) are completely dry.
- Reinsert the filter(s) into their correct slots, ensuring a secure fit.
- Reattach the dust bin to the main vacuum body; listen for a click.
- If applicable, reinsert the brush bar into the cleaner head and secure it.
- Reattach the cleaner head and any wands/extension pipes to the main body.
- Confirm all connections are firm and parts are locked in place.
Steps to Test Your Dyson:
- Plug in and then unplug the vacuum from its charger.
- Turn the vacuum on.
- Listen for a smooth motor sound.
- Test suction by picking up a small amount of debris.
- Observe the brush bar to ensure it spins freely.
- If suction is weak or there are issues, turn off the vacuum and re-inspect components.
Proper reassembly and testing confirm your Dyson handheld vacuum is ready for use. This helps maintain its peak performance for future cleaning tasks.
Frequency of Cleaning and Best Practices
Knowing how often to clean your Dyson handheld vacuum is key to its longevity. Different parts require different cleaning schedules. Regular cleaning prevents problems from starting. It also ensures your vacuum always performs at its best. Think of it like taking care of a car. Small, frequent actions avoid major breakdowns.
The dust bin needs the most frequent attention. You should empty it after every single use. Do not wait until it is completely full. A nearly full bin already reduces suction. For the dust bin itself, a quick wipe down with a damp cloth after every few uses is beneficial. This removes fine dust cling.
Filter Cleaning Schedule
Dyson recommends washing your main filter at least once a month. If you use your handheld vacuum heavily or have pets, you might need to wash it more often. Weekly cleaning might be necessary in busy households. Always follow the 24-48 hour drying time rule strictly. Having a spare filter can be very helpful. You can use the spare while one dries. This prevents downtime for your vacuum.
The brush bar and cleaner head need attention less often. Check them every few weeks. Look for tangled hair or debris. Clean them as needed. If you notice the brush bar spinning slowly, it is time for a check. Blockages in the main body or wand are less common. But if suction suddenly drops, check for them immediately. You can find general vacuum cleaning tips that apply to other models, like a Dirt Devil, if you are interested in broader cleaning knowledge: how to clean a Dirt Devil vacuum.
- Recommended Cleaning Frequencies:
- Dust Bin: Empty after every use. Wipe down inside every 2-3 uses.
- Filters: Wash monthly, or more frequently with heavy use/pets (e.g., every 2 weeks).
- Brush Bar: Check every few weeks; clean as needed when hair or debris accumulate.
- Attachments: Wipe clean after use, especially if visible dirt.
- Blockages: Check whenever suction drops significantly.
Best Practices for Longevity
- Always Store Properly: Store your Dyson handheld vacuum on its charging dock. This ensures it is always ready to go. Keep it in a dry, room-temperature environment.
- Avoid Liquids: Never vacuum liquids with your Dyson handheld vacuum. It is designed for dry debris only. Liquids can severely damage the motor and electrical components.
- Handle Gently: While Dyson vacuums are durable, avoid dropping them. Treat the attachments with care.
- Monitor Suction: Pay attention to your vacuum’s performance. A sudden drop in suction is a sign it needs cleaning or a blockage check.
- Refer to Manual: Your Dyson model’s manual has specific instructions. Always check it for precise cleaning guidance.
Following these best practices keeps your Dyson handheld vacuum working like new. Regular cleaning is an investment. It ensures efficient cleaning for years to come.
Troubleshooting Common Dyson Handheld Vacuum Issues
Even with regular cleaning, your Dyson handheld vacuum might sometimes act up. Knowing how to troubleshoot common issues can save you time and money. Most problems relate to suction, power, or noise. Simple checks often reveal the cause. You can usually fix these issues yourself without professional help. My experience shows that almost all issues come back to improper cleaning or blockages.
Weak Suction
This is the most common complaint. If your Dyson handheld vacuum has weak suction, start by checking the dust bin. Is it full? Empty it completely. Next, check the filters. Are they dirty? Wash them thoroughly and let them dry for at least 24 hours. A damp filter will block airflow. The third step is to check for blockages. Inspect the cleaner head, brush bar, wand, and main body for any obstructions. Clear any debris you find. A blocked brush bar also reduces suction significantly.
Vacuum Not Turning On
If your Dyson does not turn on, first check the battery. Is it fully charged? Ensure the vacuum is properly seated on its charging dock. Sometimes, the charger itself can be faulty. Try a different power outlet. If the battery is old, it might not hold a charge anymore. Dyson batteries have a lifespan. Consider replacing an old battery. Also, ensure all parts are reassembled correctly after cleaning. A loose component can sometimes prevent power.
Unusual Noises
Strange noises usually point to a blockage or a problem with the brush bar. A rattling noise often means something is stuck in the cleaner head or the wand. A high-pitched whine can signal a blocked airflow, putting strain on the motor. Check for blockages thoroughly. If the brush bar makes a grinding noise, it might be tangled with hair or damaged. Remove the brush bar and clean it. Inspect it for any visible damage. If the noise persists after cleaning and checking for blockages, the motor itself might be failing. This is less common but can happen over time.
Brush Bar Not Spinning
If your brush bar is not spinning, first check if it is tangled. Remove it and cut away any hair or string. Ensure the brush bar is reinserted correctly and clicks into place. Sometimes, the cleaner head itself can be blocked. Inspect the connection point where the cleaner head meets the wand. Debris can accumulate there. If the brush bar still does not spin after these checks, the motor within the cleaner head might be faulty. This often requires a replacement part.
- Troubleshooting Steps Summary:
- Weak Suction:
- Empty dust bin.
- Clean and dry filters.
- Check and clear all blockages.
- Clean brush bar.
- Not Turning On:
- Check battery charge.
- Ensure proper charging dock connection.
- Inspect charger and power outlet.
- Verify correct reassembly of components.
- Unusual Noises:
- Check for blockages in all parts.
- Clean and inspect brush bar for damage.
- Ensure proper assembly.
- Brush Bar Not Spinning:
- Clean tangled hair/debris from brush bar.
- Ensure brush bar is correctly reinserted.
- Check for blockages in cleaner head.
- Weak Suction:
Most Dyson handheld vacuum issues have simple fixes. Regular cleaning is the best preventive measure. It reduces the chance of these problems happening in the first place.
FAQ Section
How often should I clean my Dyson handheld vacuum
- Dyson cleaning
- handheld vacuum care
- vacuum maintenance
- Dyson filter
- cordless vacuum
- Dyson brush bar