· Home Care · 14 min read
How To Clean Dyson Humidifier
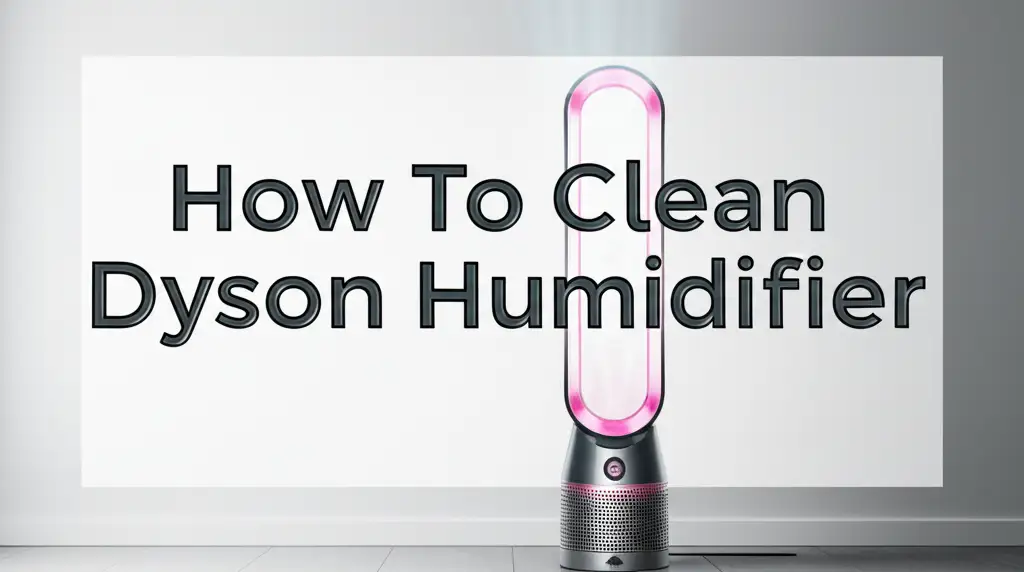
Keep Your Air Fresh: How to Clean Your Dyson Humidifier Effectively
Your home’s air quality matters a lot. A Dyson humidifier adds moisture, making your space feel more comfortable. But like any appliance dealing with water, it needs regular cleaning. I know you want your humidifier to work its best and keep your air pure. This guide helps you achieve just that.
Cleaning your Dyson humidifier properly ensures it provides clean, healthy mist. It stops mold and bacteria from growing inside. We will explore why cleaning is so important, what tools you need, and a clear, step-by-step process. You will also learn about descaling, filter maintenance, and general care tips. By the end, you will feel confident in keeping your Dyson humidifier in top condition.
Takeaway:
- Regular Cleaning Prevents Issues: Clean your Dyson humidifier monthly to avoid mold and mineral buildup.
- Gather Essential Tools: You need citric acid or white vinegar, soft cloths, and brushes.
- Follow Steps Carefully: Disassemble, clean parts, descale, and reassemble correctly.
- Maintain Filters: Check and replace filters as recommended to ensure clean air.
To clean your Dyson humidifier, you must first unplug it and disassemble its main parts. Then, soak the water tank and base in a descaling solution, like citric acid or white vinegar, to remove mineral buildup. Finally, scrub internal components, rinse thoroughly, and allow everything to air dry completely before reassembling.
Why Cleaning Your Dyson Humidifier is Essential for Health and Performance
You might wonder why regular cleaning for your Dyson humidifier is so important. Think about the water inside. Over time, water leaves mineral deposits. This buildup can clog your machine and reduce its efficiency. More importantly, stagnant water creates a perfect home for mold and bacteria.
These unseen guests can then spread into your air through the mist. This means your humidifier, meant to improve your air, could actually be harming it. Dirty humidifiers may cause respiratory problems, allergies, or trigger asthma. Regular cleaning prevents these health risks. It ensures the air you breathe is genuinely clean and beneficial.
Beyond health, cleaning protects your investment. Mineral buildup can damage internal components. This leads to poor performance or even unit failure. A clogged machine works harder to produce mist, using more energy. It also might not put out as much moisture as it should.
A clean Dyson humidifier runs smoothly. It provides the right amount of humidity without extra effort. This extends its lifespan and keeps it running quietly. You get consistent, healthy air quality in your home. This makes the cleaning process a vital part of owning a Dyson humidifier.
Gathering Your Supplies: What You Need to Clean a Dyson Humidifier
Before you start cleaning your Dyson humidifier, you need the right tools. Having everything ready makes the process smoother. You want to use safe and effective cleaning agents for your appliance. I always make sure I have these items on hand.
Here is a list of what you will need:
- Citric Acid: This is my top recommendation for descaling. It is gentle yet effective at dissolving mineral buildup. You can find it in most grocery stores or online.
- White Vinegar: If you do not have citric acid, white vinegar is a good alternative. It also breaks down mineral deposits. Be aware it has a stronger odor, which dissipates after cleaning.
- Soft Cloths or Microfiber Towels: These are perfect for wiping down surfaces. They absorb water well and prevent scratching.
- Small, Soft Brush: A clean toothbrush or a bottle brush works great. These help scrub hard-to-reach areas and remove stubborn residue.
- Mild Dish Soap: A small amount can help clean greasy or slimy areas. Always choose a gentle, non-abrasive type.
- Water: You will need fresh water for rinsing.
- Safety Gloves (Optional but Recommended): Protect your hands from cleaning solutions.
Avoid using harsh chemicals like bleach or abrasive cleaners. These can damage the plastic parts or leave harmful residues. Also, never use metal brushes or scourers. They can scratch delicate surfaces. With these simple supplies, you are ready to give your Dyson humidifier the thorough cleaning it needs.
Step-by-Step Guide: How to Deep Clean Your Dyson Humidifier
Cleaning your Dyson humidifier might seem complicated, but it is straightforward. I will walk you through each step. Follow these instructions to ensure a complete and effective clean.
Disassembling Your Dyson Humidifier
First, safety is key. Always unplug your Dyson humidifier from the power outlet. This prevents any electrical accidents during cleaning. Next, remove the loop amplifier from the base. It usually lifts straight up. Empty any remaining water from the water tank and the base. You might find a little water inside, which is normal. Remove the water tank from the base unit. Set all these parts aside on a clean, dry surface.
Cleaning the Water Tank and Base
Now, let us tackle the main parts. The water tank and the base are where most mineral buildup and residue gather. For the water tank, fill it with a descaling solution. I prefer a citric acid solution. Mix about one tablespoon of citric acid for every gallon of warm water. If using white vinegar, mix equal parts vinegar and water. Pour this solution into the water tank. Let it sit for at least 20-30 minutes, or even a few hours for heavy buildup. This soak loosens the mineral deposits.
While the tank soaks, clean the base unit. The base contains the ultrasonic plate and other components that come into contact with water. Dip your soft brush into the descaling solution. Gently scrub the inside of the base. Pay close attention to the ultrasonic plate. This is the small metal disc that creates the mist. Be careful not to damage it. Use a soft cloth to wipe down all surfaces. For deeper insights into managing various humidifier filters, you can refer to our guide on how to clean Aprilaire humidifier filter. This will give you a broader understanding of humidifier maintenance.
Cleaning the Loop Amplifier and Air Intake
The loop amplifier and air intake areas also need attention. The loop amplifier directs the mist into the room. Dust and debris can collect here. Wipe the inside and outside of the loop amplifier with a damp, soft cloth. For the air intake grilles on the base, use a dry, soft brush or a vacuum cleaner with a brush attachment. This removes dust that can restrict airflow. A clean air intake ensures your Dyson runs efficiently. For general Dyson care, learn how to clean Dyson air filter in other models, as airflow is vital for all Dyson products.
Reassembling Your Humidifier
After soaking, empty the descaling solution from the water tank. Rinse the tank thoroughly with fresh water. Make sure no solution remains. Repeat this for the base unit. Rinse all parts until the water runs clear and you detect no odor of the cleaning solution. Allow all components to air dry completely. This step is very important. Any lingering moisture can encourage mold growth. You can wipe excess water with a clean, dry cloth, then let them air out for several hours. Once dry, reassemble your Dyson humidifier. Place the water tank back on the base. Then, securely place the loop amplifier back on top. Your Dyson humidifier is now clean and ready to provide fresh, healthy mist. For similar cleaning challenges with other brands, check out how to clean Levoit 300s humidifier for comparison.
Descaling Your Dyson Humidifier: Removing Stubborn Mineral Buildup
Water contains minerals like calcium and magnesium. When water evaporates, these minerals remain. They form a hard, crusty layer called scale or mineral buildup. You will often see this white or off-white residue inside your Dyson humidifier’s water tank and base. This buildup is a common issue for all humidifiers, regardless of brand. If you also own a Dyson Hot and Cool, you will find similar mineral challenges when using its humidifier function.
Why is descaling vital? This scale reduces your humidifier’s performance. It can clog the ultrasonic plate, which produces the mist. When the plate is covered, it cannot vibrate effectively. This means less mist output or no mist at all. Beyond performance, scale can harbor bacteria and mold. These microscopic organisms thrive on the mineral surfaces. This makes descaling a critical step in maintaining a hygienic humidifier.
I find that citric acid is the best choice for descaling. It is a natural acid, safe for most appliances, and effective. You can buy food-grade citric acid powder online or at grocery stores. To use it, mix about one tablespoon of citric acid with one liter of warm water. For larger units or heavier buildup, you might use more. Pour this solution into the empty water tank and the base. Ensure the solution covers all areas with scale.
Let the solution sit for at least 30 minutes. For severe buildup, I let it sit for a few hours or even overnight. The acid works to dissolve the mineral bonds. After soaking, use a soft brush to gently scrub any remaining scale. Rinse all parts thoroughly with fresh water multiple times. Make sure no cleaning solution residue remains. Allow the parts to air dry completely before reassembling. This descaling process keeps your humidifier working at its best. It also helps it stay clean and healthy.
Maintaining Filters: Ensuring Optimal Air Quality with Your Dyson
Dyson humidifiers often come with advanced filtration systems. These systems capture particles and gases from the air before the mist is released. This means your humidifier not only adds moisture but also purifies the air you breathe. Understanding how to maintain these filters is crucial for optimal air quality.
Dyson humidifiers typically use a combination of HEPA and activated carbon filters. The HEPA filter captures microscopic particles like allergens, pollen, and dust mites. The activated carbon filter removes gases, odors, and volatile organic compounds (VOCs). These filters are not washable. Trying to wash them can damage their structure and reduce their effectiveness.
You need to replace your Dyson humidifier’s filters regularly. The frequency depends on your usage and local air quality. Dyson recommends replacing filters every 12 months for typical use. However, if you use your humidifier continuously or live in an area with high pollution, you might need to change them more often. Your Dyson machine usually has an indicator light that tells you when a filter change is due.
Replacing the filters is simple. First, turn off and unplug your humidifier. Remove the outer casing or grille to access the filter compartment. Carefully remove the old filter. Dispose of it properly. Insert the new filter, making sure it fits securely. Then, replace the casing. Reset the filter life indicator on your machine, if applicable. Changing filters promptly ensures your Dyson humidifier continues to provide truly clean and healthy air. It protects your family from indoor pollutants.
Regular Maintenance Tips for a Long-Lasting Dyson Humidifier
Keeping your Dyson humidifier in excellent shape goes beyond occasional deep cleaning. Regular, simple maintenance practices make a big difference. I follow these tips to ensure my humidifier lasts longer and performs consistently. These routines prevent small issues from becoming big problems.
First, empty and refill the water tank daily. Do not let water sit in the tank for extended periods. Stagnant water is a breeding ground for mold and bacteria. Each morning, empty any leftover water. Rinse the tank with fresh water before refilling it. This simple habit keeps your water supply clean.
Second, use distilled water if possible. Tap water contains minerals that lead to scale buildup. Distilled water has these minerals removed. Using it significantly reduces the frequency of descaling needed. This protects the internal components and maintains mist output. If distilled water is not practical, consider filtering your tap water before use.
Third, wipe down visible surfaces weekly. Use a soft, damp cloth to clean the exterior of your Dyson humidifier. Pay attention to the mist outlet and any areas where dust might settle. This quick wipe prevents dust from entering the system. It also keeps your appliance looking clean. For similar quick cleaning tips on other humidifiers, review our guide on how to clean a cool mist humidifier.
Fourth, ensure proper storage. If you store your humidifier for the off-season, prepare it correctly. Perform a thorough deep clean and descaling. Make sure all parts are completely dry before storing. Store it in a cool, dry place. A damp environment can encourage mold growth even in a clean unit. Proper storage ensures your Dyson humidifier is ready for use when you need it next. These consistent habits extend your Dyson humidifier’s life and maintain its performance.
Troubleshooting Common Issues After Cleaning Your Dyson Humidifier
Sometimes, even after a thorough cleaning, your Dyson humidifier might not work perfectly. You might notice little or no mist, strange odors, or unusual noises. Do not worry; many of these issues have simple solutions. I have encountered a few myself and found these troubleshooting steps helpful.
No Mist Output: If your Dyson humidifier produces no mist, first check the water level. The tank might be empty or not seated correctly. Ensure the water tank is full and securely placed on the base. Next, check the ultrasonic plate inside the base. Even after cleaning, a small film or tiny mineral spot might remain. Gently wipe it with a soft cloth. If the plate is damaged, it might need replacement, though this is rare. Also, ensure the unit is plugged in and turned on properly.
Strange Odors: A bad smell, even after cleaning, usually means lingering bacteria or mold. You might need a more aggressive descaling and disinfection. Repeat the cleaning process with a stronger citric acid or vinegar solution. Let it soak longer. Ensure every part that touches water is thoroughly scrubbed and rinsed. Allowing parts to air dry completely is also crucial. Any residual moisture can cause odors. A general guide to help clean other small humidifiers can be found at how to clean baby frida humidifier.
Unusual Noises: Dyson humidifiers are known for quiet operation. If you hear new noises, check for proper assembly. Make sure the loop amplifier is seated correctly on the base. A loose part can vibrate and cause noise. Also, inspect the water level. Low water can sometimes cause gurgling sounds. If the noise persists, it could indicate a motor issue, but this is uncommon.
Water Leaks: If your humidifier leaks water, check the seals. Ensure the water tank lid is tightened properly. Also, inspect the base and water tank for cracks. Sometimes, a component is not seated correctly after reassembly. Disassemble and reassemble carefully, ensuring all parts fit snugly. These simple checks usually resolve most post-cleaning issues, getting your Dyson humidifier back to optimal performance.
FAQ Section
How often should I clean my Dyson humidifier?
You should clean your Dyson humidifier at least once a month. If you use it daily or have hard water, clean it every two weeks. Regular cleaning prevents mineral buildup and stops mold growth. This keeps your air clean and extends your machine’s life.
Can I use bleach to clean my Dyson humidifier?
No, never use bleach or abrasive cleaners. Bleach can damage the plastic parts and leave harmful residues. It can also produce dangerous fumes when mixed with certain deposits. Always use citric acid or white vinegar, as recommended by Dyson.
What is the white residue in my humidifier?
The white residue is mineral buildup, also called scale. It comes from minerals in your tap water. These minerals accumulate as water evaporates. Regular descaling with citric acid or vinegar removes this buildup.
Do Dyson humidifier filters need to be cleaned?
No, Dyson humidifier filters are not washable. They are designed for replacement. Washing them can damage the filter material and make them ineffective. Always replace your filters according to Dyson’s recommendations, typically every 12 months.
How long does it take for a Dyson humidifier to dry after cleaning?
It is best to let all parts air dry completely for several hours after cleaning. You can wipe away excess water with a clean cloth. However, allowing air to circulate around all components ensures no moisture remains. This prevents mold and mildew from forming.
Conclusion
Keeping your Dyson humidifier clean is a simple yet vital task. You ensure fresh, healthy air in your home. We covered why cleaning matters for your health and the appliance’s life. We also walked through the necessary supplies and a clear, step-by-step cleaning process. Remember to pay close attention to descaling and filter maintenance.
By following these guidelines, you can keep your Dyson humidifier running at its best. It will provide clean, humidified air for years to come. Do not let mineral buildup or mold compromise your indoor air quality. Make regular cleaning a part of your home maintenance routine. Your lungs will thank you. Take action today and start cleaning your Dyson humidifier for a healthier home environment.
- Dyson humidifier cleaning
- humidifier maintenance
- Dyson AM10 clean

