· Home Care · 16 min read
How To Clean Raydrop Humidifier
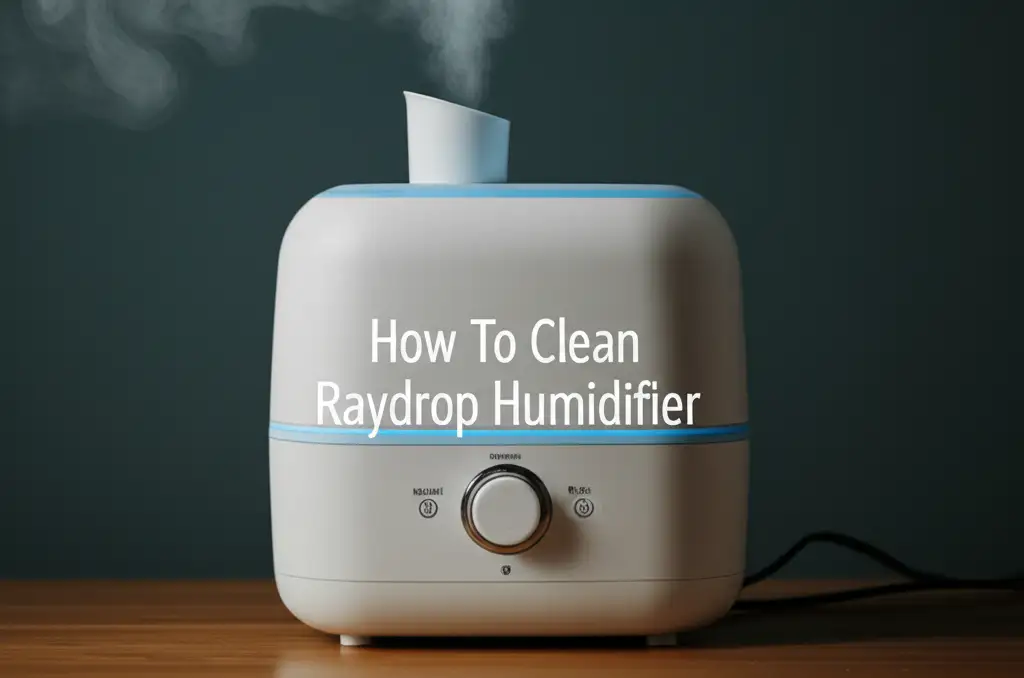
Unlock a Healthier Home: How to Clean Your Raydrop Humidifier
Is your home air feeling dry? A humidifier can bring much-needed moisture. Many people trust their Raydrop humidifier to improve air quality. But did you know a dirty humidifier can make things worse? It is true. A lack of proper cleaning allows mold and bacteria to grow inside the unit. These contaminants then spread into your air when the humidifier runs.
Keeping your Raydrop humidifier clean is simple. Regular maintenance ensures you breathe fresh, clean mist. It also extends the life of your appliance. This guide will walk you through everything. We cover essential cleaning steps. You will learn about descaling, sanitizing, and smart prevention tips. Let’s make sure your humidifier works for your health, not against it.
Takeaway
- Clean Daily: Rinse and dry the water tank daily to prevent film buildup.
- Weekly Deep Clean: Disassemble and deep clean your Raydrop humidifier every week using vinegar or bleach.
- Descale Regularly: Use white vinegar to remove hard water mineral deposits from the base and tank.
- Sanitize for Safety: Use a mild bleach solution to kill mold and bacteria if present.
- Air Dry Thoroughly: Always allow all parts to air dry completely before reassembling.
To clean a Raydrop humidifier, disassemble its parts, rinse the tank daily, and deep clean weekly with white vinegar to remove mineral buildup. For sanitization, use a diluted bleach solution, ensuring all components are thoroughly rinsed and air-dried to prevent mold and bacteria growth, providing fresh, healthy mist.
Why Regular Cleaning is Crucial for Your Raydrop Humidifier
A humidifier adds moisture to the air. This helps relieve dry skin, chapped lips, and respiratory issues. But this helpful appliance can become a health hazard if not cleaned regularly. When water sits in the tank, it creates a damp environment. This environment is perfect for mold, mildew, and bacteria to grow. These unwelcome guests can then spread into your home’s air.
Breathing in mold spores or bacteria can cause health problems. You might experience allergies, respiratory infections, or worsen asthma symptoms. A dirty humidifier can also spread a foul, musty smell throughout your room. Beyond health concerns, mineral deposits from hard water build up inside the unit. These deposits can block the mist output. They also damage the internal components over time. This reduces your humidifier’s efficiency and lifespan. Regular cleaning protects your health. It also keeps your Raydrop humidifier running effectively for years. Consistent maintenance ensures you get clean, healthy mist every time.
Essential Supplies for Cleaning Your Raydrop Humidifier
Cleaning your Raydrop humidifier does not require many special tools. Most items you likely already have at home. Gather these supplies before you begin. Having everything ready makes the cleaning process smooth. It helps you work efficiently and quickly.
Here is what you will need:
- Distilled White Vinegar: This is your primary weapon against mineral buildup. Vinegar is a natural descaler. It dissolves stubborn hard water deposits.
- Bleach (Optional, for Sanitizing): Use regular household bleach. Make sure it is unscented. Bleach is effective at killing mold, mildew, and bacteria. It is a powerful sanitizer. Use it carefully and sparingly.
- Soft Brush or Old Toothbrush: A small brush helps scrub hard-to-reach areas. An old toothbrush is perfect for crevices. It reaches corners inside the tank and base.
- Soft Cloths or Sponges: These are for wiping surfaces. They help dry parts. Avoid abrasive scrubbers that could scratch the plastic.
- Measuring Cups and Spoons: For accurate mixing of cleaning solutions. This ensures proper dilution ratios.
- Small Basin or Sink: You will need a clean space for soaking parts. A sink works well for rinsing too.
Make sure you have all these items ready. This prepares you for a thorough cleaning. Proper tools ensure you can tackle every part of your Raydrop humidifier effectively. For cleaning other humidifier models, the principles often remain similar. You can learn more about general cleaning steps by checking out how to clean a cool mist humidifier or exploring specific guides like how to clean a Crane humidifier.
Step-by-Step Guide to Cleaning Your Raydrop Humidifier
Cleaning your Raydrop humidifier regularly is important. This prevents buildup and keeps your air fresh. I recommend a simple daily rinse and a more thorough weekly deep clean. Follow these steps carefully for best results. Always unplug your humidifier before you begin any cleaning. Safety comes first.
Daily Rinse
- Empty the Water Tank: Pour out any leftover water from the tank. Do this every day. Stagnant water encourages growth.
- Rinse the Tank: Rinse the inside of the water tank with fresh, clean water. Do not use soap for this daily rinse.
- Wipe Dry: Use a clean cloth to wipe the inside of the tank. Dry it as much as possible. This reduces moisture for growth.
- Air Dry: Leave the tank cap off. Allow the tank to air dry completely before refilling. This helps prevent film buildup.
Weekly Deep Clean
Perform this deep clean at least once a week. This tackles mineral deposits and any emerging microbial growth.
- Unplug and Disassemble: First, unplug your Raydrop humidifier from the power outlet. Take apart all removable components. This includes the water tank, base, mist nozzle, and any filters.
- Inspect for Buildup: Look closely at the base and tank. You will see white or pinkish residue. This is mineral buildup or mold.
- Prepare Vinegar Solution: Fill the water tank halfway with undiluted white vinegar. For the base, pour about 1-2 cups of vinegar directly into the water reservoir. Make sure it covers the heating element or ultrasonic disc.
- Soak Components: Place any smaller, removable parts, like the mist nozzle, into a bowl. Pour some vinegar over them. Let all parts soak for at least 30 minutes to one hour. For heavy buildup, you can soak for several hours. Vinegar helps dissolve stubborn deposits.
- Scrub Gently: After soaking, use a soft brush or an old toothbrush. Gently scrub the inside of the water tank. Pay attention to the bottom and sides. Clean the base reservoir too. Focus on the ultrasonic disc or heating element. These parts often collect the most residue. You can refer to guides for other popular models like how to clean a Levoit 300S humidifier or how to clean a Pure Enrichment humidifier for similar cleaning techniques.
- Rinse Thoroughly: This step is very important. Rinse all components under cool, running water. Rinse until you no longer smell vinegar. Ensure no vinegar residue remains.
- Dry Completely: Use a clean, dry cloth to wipe down all parts. Leave them disassembled. Allow them to air dry completely for several hours or overnight. Drying prevents mold from returning.
- Reassemble: Once everything is bone dry, put your Raydrop humidifier back together. Now it is ready for fresh, clean water.
Remember, consistent cleaning is key. It keeps your Raydrop humidifier performing at its best. It also keeps your air clean and healthy.
Deep Cleaning Your Raydrop Humidifier with Vinegar (Descaling)
Mineral buildup is a common issue for humidifiers. Tap water contains minerals like calcium and magnesium. These minerals leave white, crusty deposits. This buildup is called scale. Scale can block the mist output. It also reduces your humidifier’s efficiency. White vinegar is excellent for descaling your Raydrop humidifier. It is a natural and safe acid. Vinegar dissolves these mineral deposits effectively.
Here is how to descale your Raydrop humidifier using vinegar:
- Empty and Disassemble: First, unplug the unit. Empty any remaining water from the tank and base. Take apart all removable pieces. This includes the water tank, base, and any small components.
- Prepare the Tank: Pour 1-2 cups of undiluted white vinegar into the water tank. Add enough water to fill the tank halfway. Swish the solution around to coat the inside surfaces.
- Treat the Base: Pour about 1 cup of undiluted white vinegar directly into the humidifier base. Make sure the vinegar covers the ultrasonic disc or heating element completely. These parts are prone to heavy mineral buildup.
- Soak All Parts: Place any smaller components, like the mist nozzle or cap, into a bowl. Cover them with white vinegar. Let all parts soak for at least 30 minutes. For very heavy scale, let them soak for several hours, or even overnight. The vinegar needs time to break down the minerals.
- Scrub Away Deposits: After soaking, use a soft brush or old toothbrush. Gently scrub all surfaces. Focus on the areas with visible mineral deposits. The vinegar should have loosened them. You will see white flakes coming off.
- Rinse Thoroughly: Rinse all components extensively under cool, running water. It is crucial to rinse until there is no vinegar smell remaining. Any lingering vinegar odor will be released into your air when the humidifier runs.
- Air Dry Completely: Wipe all parts with a clean cloth. Then, allow them to air dry fully. Place them on a clean towel or drying rack. Make sure every piece is bone dry before reassembling the unit. This step prevents any new mold growth.
Descaling with vinegar should be part of your weekly or bi-weekly cleaning routine. This depends on your water hardness. Regular descaling keeps your Raydrop humidifier running smoothly. It ensures your air remains clean and pure. If you own other models, similar descaling methods apply. Consider checking guides like how to clean a Vicks humidifier or how to clean a Homedics humidifier for more descaling advice relevant to various brands.
Sanitizing Your Raydrop Humidifier with Bleach (Mold & Bacteria)
Sometimes, a humidifier can develop stubborn mold or bacteria. This might happen despite regular vinegar cleaning. In these cases, a mild bleach solution is necessary for sanitization. Bleach is a powerful disinfectant. It kills mold, mildew, and bacteria effectively. However, use it with caution. Always ensure proper ventilation and follow safety guidelines.
Here is how to sanitize your Raydrop humidifier with bleach:
- Safety First: Work in a well-ventilated area. Open windows or turn on a fan. Wear rubber gloves to protect your hands. Never mix bleach with vinegar or other cleaning products. This creates dangerous fumes.
- Unplug and Empty: Unplug your Raydrop humidifier. Empty any water from the tank and base. Disassemble all removable parts.
- Prepare Bleach Solution: Mix 1 teaspoon of liquid household bleach (unscented) with 1 gallon of water. Use a clean bucket or basin for this. This creates a very dilute, yet effective, sanitizing solution.
- Sanitize the Tank: Pour the bleach solution into the water tank. Swish it around to coat all inside surfaces. Let it sit for about 10-15 minutes. Do not let it sit longer than 20 minutes, as bleach can degrade plastic over time.
- Sanitize the Base: Pour some bleach solution into the humidifier base. Ensure it covers the ultrasonic disc and water reservoir completely. Let it soak for 10-15 minutes.
- Soak Small Parts: Place smaller components like the mist nozzle, cap, or filter holder into the remaining bleach solution. Allow them to soak for 10-15 minutes.
- Rinse Extensively: This is the most critical step. After soaking, pour out the bleach solution. Rinse all components under cool, running water. Rinse for several minutes. You must remove all traces of bleach. Any bleach residue can be harmful if vaporized into the air. Continue rinsing until you cannot smell any bleach. You can learn more about thorough rinsing techniques from guides like how to clean a Taotronics humidifier.
- Air Dry Completely: Wipe all parts with a clean, dry cloth. Then, allow them to air dry completely. Place them on a clean surface or towel. Ensure every piece is bone dry before reassembly. This prevents re-growth of mold.
Use bleach sanitization only when necessary. Regular daily rinsing and weekly vinegar descaling are usually enough. If you suspect mold or a persistent odor, bleach is your solution. Always handle bleach with care.
Preventing Mold and Buildup in Your Raydrop Humidifier
Prevention is better than cure. This rings true for humidifier maintenance. Taking a few simple steps daily can greatly reduce mold and mineral buildup. These habits will keep your Raydrop humidifier cleaner for longer. They also ensure healthier air in your home.
Here are key strategies to prevent common humidifier issues:
- Use Distilled Water: This is the single most effective way to prevent mineral buildup. Distilled water has no minerals. It leaves no white dust. Using it saves you from frequent descaling. This also extends your humidifier’s life.
- Daily Empty and Rinse: Every day, empty any leftover water from the tank. Rinse the tank with fresh water. Do not leave stagnant water in the unit.
- Air Dry Daily: After rinsing, wipe the tank dry. Then, leave the tank cap off. Allow the tank and base to air dry completely. This removes moisture that mold needs to grow.
- Clean Regularly: Stick to your weekly deep cleaning schedule. Even if you use distilled water, dust and airborne particles can still accumulate. Regular cleaning prevents these issues.
- Avoid Overfilling: Do not fill the water tank above the max fill line. Overfilling can lead to leaks. It can also create excessive moisture.
- Choose the Right Location: Place your humidifier on a hard, flat surface. Keep it away from walls and furniture. Allow for good air circulation around the unit. This helps prevent moisture accumulation.
- Maintain Room Humidity Levels: Do not let your room become too humid. High humidity can encourage mold growth in your home. Use a hygrometer to monitor humidity. Aim for 30-50% relative humidity.
- Handle Filters with Care: If your Raydrop model has a filter, follow the manufacturer’s instructions for cleaning or replacing it. Dirty filters can harbor contaminants. Cleaning your humidifier’s filter, similar to an Aircare humidifier filter, is essential for air quality.
- Store Properly: When not using your humidifier for an extended period, clean it thoroughly. Then, ensure all parts are completely dry. Store it in a cool, dry place.
By adopting these preventative measures, you ensure your Raydrop humidifier remains a source of clean, healthy air. Consistent care makes a big difference. Other brands also benefit from these practices. You can explore how to clean a Canopy humidifier or how to clean a Dyson humidifier for more insights into brand-specific maintenance tips.
When to Replace Raydrop Humidifier Parts or the Unit Itself
Even with diligent cleaning, humidifiers do not last forever. Certain parts wear out. Sometimes, the entire unit needs replacement. Knowing when to replace parts or the whole humidifier ensures continued performance and health benefits.
Here are signs it might be time for a change:
- Filter Replacement: Most humidifiers, including some Raydrop models, use filters. These filters trap minerals and impurities. Over time, filters get clogged. They become less effective. A dirty filter can also reduce mist output. Check your Raydrop manual for recommended filter replacement intervals. This is typically every 2-3 months. If you notice a visible buildup on the filter or reduced mist, it is time for a new one. Remember, specialized filters like an Aprilaire humidifier filter also have their own replacement schedules.
- Persistent Odor or Mold: If you clean your humidifier regularly, including bleach sanitization, but a musty odor or mold keeps returning, it is a bad sign. This might mean mold has grown into parts you cannot reach or clean. In this case, replacing the unit is the safest option for your health.
- Reduced Mist Output: After thorough cleaning and filter replacement, if your humidifier still produces very little mist, its internal components might be failing. This could be due to a worn-out ultrasonic disc or fan motor.
- Unusual Noises: New grinding, rattling, or buzzing noises can indicate mechanical issues. A failing motor or pump can make these sounds. Such issues often mean the unit is nearing the end of its life.
- Leaking: Cracks in the tank or base can lead to leaks. Leaking humidifiers are not only inefficient but can also damage furniture or flooring. Replace any leaking unit immediately.
- Visible Damage: Any significant cracks, breaks, or frayed power cords mean it is time for a new humidifier. Damaged appliances can be a safety hazard.
- Lifespan: The average lifespan of a humidifier is 3-5 years. This depends on usage and maintenance. If your Raydrop humidifier is older than this and showing any of the signs above, consider replacing it. Newer models often have improved features and efficiency.
Investing in a new humidifier when needed is a small price. It ensures you continue to enjoy clean, healthy air without worry.
FAQ Section
Q1: How often should I clean my Raydrop humidifier?
You should rinse and dry your Raydrop humidifier’s water tank daily. Perform a thorough deep clean with white vinegar or a mild bleach solution weekly. If you use hard water, or notice white dust or pink/black residue, clean it more frequently. Consistent cleaning prevents mold and mineral buildup.
Q2: Can I use tap water in my Raydrop humidifier?
Yes, you can use tap water, but it is not ideal. Tap water contains minerals that create white dust and build up as scale inside your humidifier. This buildup reduces efficiency and requires more frequent cleaning. Using distilled water is highly recommended to minimize mineral deposits and maintain cleaner air.
Q3: What if my Raydrop humidifier still smells after cleaning?
If your Raydrop humidifier still smells after cleaning, it means mold or bacteria might be deeply embedded. Try a more aggressive sanitization with a diluted bleach solution, ensuring thorough rinsing. If the smell persists, it might indicate mold in unreachable areas, and replacing the unit could be the safest option for your health.
Q4: Is it safe to use essential oils in my Raydrop humidifier?
Most Raydrop humidifiers are not designed for essential oils unless they have a specific aroma tray or diffuser function. Putting oils directly into the water tank can damage the plastic components, clog the ultrasonic disc, or void the warranty. Always check your model’s manual before using essential oils.
Q5: Can I put my Raydrop humidifier parts in the dishwasher?
No, most humidifier parts, including Raydrop models, are not dishwasher safe. The high heat and harsh detergents in a dishwasher can warp the plastic, damage internal components, or remove protective coatings. Always hand wash humidifier parts using the recommended cleaning solutions for safe and effective cleaning.
Conclusion
Maintaining a clean Raydrop humidifier is crucial. It ensures healthy indoor air quality. It also extends the life of your appliance. We have explored the simple steps to achieve this. Daily rinsing and weekly deep cleaning are your best defense. Use white vinegar for descaling mineral buildup. Employ a mild bleach solution for thorough sanitization when necessary.
Remember, prevention is key. Using distilled water and allowing parts to air dry completely makes a big difference. This stops mold and bacteria before they start. Pay attention to your humidifier’s performance. Know when it is time to replace filters or even the entire unit. By following these straightforward guidelines, you ensure your Raydrop humidifier provides fresh, clean mist. Make regular cleaning a part of your routine. Breathe easier and enjoy a healthier home environment. Your lungs will thank you.
- Raydrop humidifier
- humidifier cleaning
- humidifier maintenance
- clean humidifier
- mold prevention

