· Home Cleaning · 19 min read
How To Clean Evaporator Coil
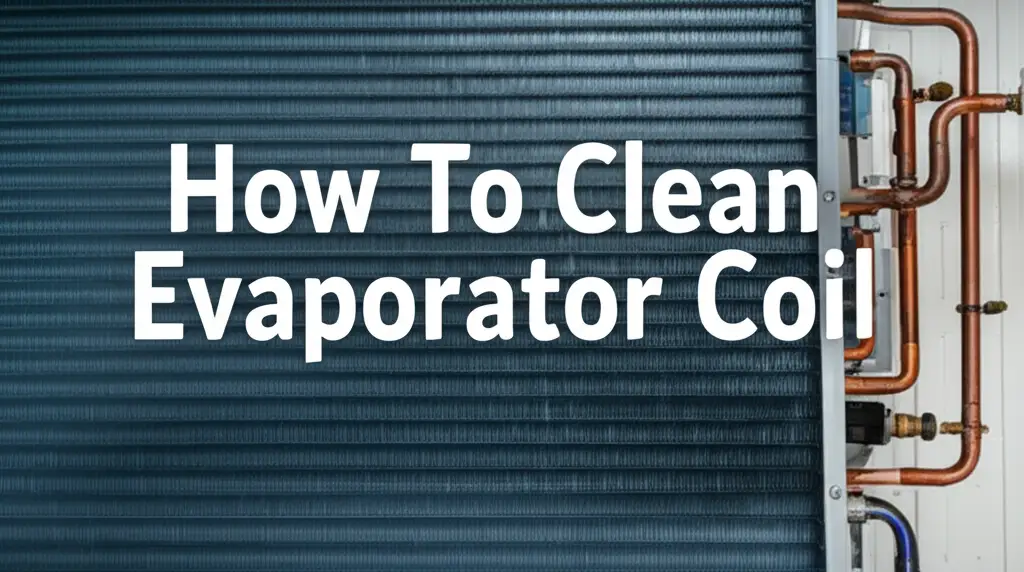
Boost AC Efficiency: How To Clean Evaporator Coil
Do you feel your air conditioner is not cooling as effectively as it once did? Perhaps you notice a strange smell coming from your vents. These are common signs that your AC system, specifically the evaporator coil, might need attention. Cleaning the evaporator coil is a crucial step in maintaining your HVAC system’s performance and ensuring healthy indoor air.
I understand that cleaning an AC unit can seem daunting. However, I am here to guide you through each step. I will show you how to safely and effectively clean your evaporator coil, transforming your AC from sluggish to supremely efficient. A clean coil improves air quality and significantly lowers your energy bills. Let’s make your home more comfortable together.
Takeaway:
- Improve Efficiency: A clean evaporator coil helps your AC run more effectively.
- Save Money: Lower energy consumption means reduced electricity bills.
- Breathe Easier: Cleaning removes mold and allergens, improving indoor air quality.
- Extend Lifespan: Regular maintenance helps your AC unit last longer.
- DIY Friendly: You can clean your evaporator coil with the right tools and steps.
To clean an evaporator coil, you must first power off your AC unit for safety. Then, access the coil within the indoor air handler. Use a specialized no-rinse evaporator coil cleaner or a gentle brush to remove dirt, mold, and debris. This process restores efficiency and improves air quality.
Understanding Your Evaporator Coil: Why Cleaning Matters
The evaporator coil is a vital part of your air conditioning system. It sits inside your indoor air handler unit. Its job is simple: to absorb heat from the air in your home. Refrigerant flows through these coils, becoming cold. As warm indoor air blows over the cold coils, the heat transfers from the air to the refrigerant. This process cools your home’s air.
Over time, this crucial component gets dirty. Dust, lint, pet dander, and other airborne particles constantly pass over the coil. These particles stick to the coil’s damp surface, forming a layer of grime. This buildup creates an insulating barrier. The coil cannot absorb heat efficiently when this barrier exists.
A dirty evaporator coil leads to several problems. Your AC system works harder to achieve the same cooling effect. This increased effort uses more electricity. It also puts stress on the compressor, potentially shortening your unit’s lifespan. Beyond performance, a dirty coil can harbor mold and bacteria. These contaminants then circulate throughout your home, impacting air quality. Cleaning your evaporator coil is not just about maintenance; it is about protecting your wallet and your health.
Signs Your Evaporator Coil Needs Cleaning
How do you know if your evaporator coil is suffering from dirt and grime? Your AC system will often send clear signals. Recognizing these signs early can save you from bigger problems and expensive repairs. Ignoring these warnings can lead to a less efficient system and higher energy costs. I always tell homeowners to pay attention to these indicators.
One of the most common signs is reduced cooling performance. If your AC runs constantly but your home never feels truly cool, a dirty coil might be the culprit. The system struggles to transfer heat effectively because of the insulating layer of dirt. You might notice warm spots in certain rooms or a general lack of crisp, cold air coming from the vents.
Another tell-tale sign is increased energy bills. Since your AC works harder to cool your home, it consumes more electricity. You might see a sudden jump in your monthly utility costs without a corresponding change in usage. This hidden energy drain is often due to an obstructed evaporator coil. The system tries its best, but its efforts are wasted on moving air over dirty surfaces.
You might also detect strange odors. A musty or moldy smell coming from your vents indicates microbial growth on the coil. The damp, dark environment of the evaporator coil is an ideal breeding ground for mold and mildew. This growth not only smells unpleasant but also releases spores into your indoor air. This can worsen allergies and respiratory issues. If you notice a damp, earthy smell, your coil likely needs a thorough cleaning. If you are dealing with mold in other areas, like your bathroom, you might find my guide on how to clean mold in shower helpful for comparison.
Finally, visible ice on your coil is a critical warning sign. If the coil becomes too dirty, airflow decreases significantly. This reduced airflow prevents the coil from absorbing enough heat, causing its temperature to drop below freezing. Condensation on the coil then freezes, forming ice. Ice buildup further restricts airflow, creating a vicious cycle that can severely damage your system. This situation often requires immediate attention to prevent compressor failure. If you see ice, turn off your AC immediately and let the coil thaw before proceeding with cleaning.
Gathering Your Tools: Essential Supplies for Coil Cleaning
Before you begin cleaning your evaporator coil, it is important to gather all the necessary tools and supplies. Having everything ready beforehand makes the process smoother and safer. You do not want to stop mid-task to search for a missing item. I always make a checklist to ensure I have everything before I start.
First and foremost, safety gear is crucial. You will need thick work gloves to protect your hands from sharp edges and cleaning solutions. Safety glasses are also essential to shield your eyes from any splashing chemicals or dislodged debris. A dust mask or respirator can prevent you from inhaling dust, mold spores, or cleaning solution fumes. Your safety comes before anything else.
Next, you will need cleaning agents. A specialized, no-rinse evaporator coil cleaner is highly recommended. These cleaners foam up, encapsulate dirt, and then drain away with the condensate without requiring a separate rinse step. Look for non-acidic, biodegradable options that are safe for your coil’s materials. Alternatively, for lighter dirt or as a pre-treatment for mold, a mixture of water and white vinegar can be used. However, always test a small, hidden area first and ensure it is compatible with your coil material. For more tips on using vinegar for cleaning, check out my article on how to clean shower with vinegar.
You will also need various cleaning tools. A soft-bristle brush, like a toothbrush or a specialized coil fin brush, is excellent for gently scrubbing away stubborn dirt without damaging the delicate fins. A vacuum cleaner with a brush attachment is perfect for removing loose dust and debris before applying liquid cleaner. Consider a shop vac if you anticipate a lot of moisture or heavier debris.
Finally, prepare your work area. You will need old towels or a tarp to protect the floor around your air handler from drips. A small bucket might be useful for collecting any excess water or for mixing homemade solutions. A flashlight is also invaluable for illuminating dark, hard-to-reach areas around the coil. Having these items ready ensures a mess-free and efficient cleaning operation. Just like when you clean a hard-to-reach spot, such as how to clean under a refrigerator, preparation is key.
Step-by-Step Guide: Safely Cleaning Your Evaporator Coil
Cleaning your evaporator coil might seem complex, but it is a manageable DIY task with the right approach. I will walk you through each step. Remember, patience and adherence to safety are your best friends here. Do not rush any part of this process. Let us get your AC unit back to peak performance.
Safety First: Power Down Your AC Unit
This is the most critical step. Before touching anything inside your AC unit, you must completely shut off its power. Go to your thermostat and set it to “off.” Then, locate your outdoor AC unit’s disconnect box and flip the switch to “off.” Finally, and most importantly, find your home’s main electrical panel. Locate the breaker that controls your indoor air handler (often labeled “Furnace,” “AC,” or “HVAC”) and switch it off. Confirm the power is off by trying to turn on the AC from the thermostat. No power means you are safe to proceed.
Accessing the Evaporator Coil
Your evaporator coil is typically housed within the indoor air handler unit. This unit is often found in your basement, attic, utility closet, or garage. You will need to locate the access panel for the coil. It is usually a rectangular metal panel held in place by screws or latches. Use a screwdriver (Phillips or flathead, depending on your unit) to remove the screws. Gently pull the panel away. Be prepared for some dust and possibly some condensation. Take a picture before you remove wires or anything complex; it helps with reassembly.
Initial Dry Cleaning: Vacuuming Loose Debris
Once the coil is exposed, you will likely see a layer of dust and lint. Before applying any liquid cleaner, use a shop vac or a regular vacuum with a brush attachment to remove all loose debris. Gently vacuum the surface of the coil fins. Be careful not to bend the delicate fins. Work slowly and methodically across the entire surface. Pay extra attention to any visible clumps of dirt or hair. This initial dry cleaning prevents mud from forming when you apply liquid cleaner.
Applying the Coil Cleaner
Now it is time for the specialized coil cleaner. Shake the cleaner can well. Hold the can about 6-12 inches away from the coil surface. Apply the cleaner evenly across all the fins, working from top to bottom. Ensure good coverage without oversaturating any one area. Most no-rinse cleaners will foam up on contact, lifting dirt and grime. Follow the specific instructions on your cleaner’s label for dwell time. This is the period the cleaner needs to work. The foam will collapse and drain away with the condensate through the condensate drain line.
If you are dealing with mold, you might consider using a product specifically designed for mold removal on HVAC coils, or a diluted vinegar solution. If using vinegar, ensure it’s a weak solution (e.g., 50/50 water and white vinegar) and spray it lightly. For heavier mold infestations, you might find my guide on how to clean mold with vinegar useful for general principles. Always ensure proper ventilation when using cleaning solutions.
Rinsing and Drying (if applicable)
For most modern, no-rinse coil cleaners, a separate rinsing step is not required. The cleaner is designed to drain away with the normal condensate. However, if your cleaner specifies rinsing, or if you used a homemade solution that leaves residue, you will need to rinse. Use a spray bottle filled with clean water or a garden sprayer on a fine mist setting. Spray a gentle mist over the coils, allowing the water to run down into the condensate pan. Do not use high-pressure water, as it can damage the fins. Allow the coil to air dry completely before proceeding. Proper ventilation helps speed up drying time.
Reassembly and Power On
Once the coil is completely dry and free of visible dirt, you can reassemble your unit. Carefully replace the access panel, aligning it correctly. Secure the panel with the screws or latches you removed earlier. Double-check that all connections are tight and secure. Then, reverse the power-down steps. Go back to your main electrical panel and flip the breaker for your air handler back to “on.” Return to your outdoor unit’s disconnect box and flip that switch to “on.” Finally, set your thermostat to “cool” and select your desired temperature. Listen for the unit to hum to life. You should immediately notice an improvement in airflow and cooling performance.
Tackling Stubborn Issues: Mold, Mildew, and Foul Odors
Sometimes, a basic cleaning is not enough, especially when dealing with persistent mold, mildew, or unpleasant odors. These issues often indicate a more deeply ingrained problem on your evaporator coil. Addressing them effectively requires a slightly more targeted approach. I often encounter systems with these exact challenges.
Mold and mildew thrive in damp, dark environments. Your evaporator coil, constantly condensing moisture from the air, provides ideal conditions for their growth. If you notice a musty, earthy smell, or if you can visibly see black or green fuzzy patches on your coils, you have a mold problem. Standard coil cleaners might remove surface dirt, but they may not kill all mold spores. You need a dedicated antimicrobial cleaner designed for HVAC systems. These cleaners not only remove the visible mold but also inhibit future growth.
When dealing with mold, ventilation is key. Open windows and doors in your work area if possible. Wear a high-quality respirator mask to avoid inhaling spores. Apply the antimicrobial cleaner as directed by the manufacturer, ensuring complete coverage of affected areas. Let it sit for the recommended dwell time. Many of these cleaners are also no-rinse, but always check the label. If heavy mold is present, you may need to gently scrub with a soft brush to dislodge the growth. For general guidance on mold, I often refer to principles outlined in how to clean mold off walls.
Foul odors, beyond the typical musty smell, can sometimes signal bacterial growth or even dead pests inside your air handler. If a musty smell persists after cleaning, it might be an issue with your condensate drain line. A clogged or improperly sloped drain line can lead to standing water in the condensate pan, which becomes a breeding ground for bacteria and mold. Inspect your condensate pan and drain line. You might need to flush the drain line with a mixture of bleach and water (1 cup bleach to 1 gallon water) or use a specialized drain line cleaner to clear blockages. A shop vac can also be used to clear clogs by creating suction at the drain line’s outdoor exit.
After cleaning and addressing any drainage issues, running your fan on “on” (rather than “auto”) for a few hours can help dry out the system more thoroughly. This reduces the moisture available for mold and mildew regrowth. Regular filter changes also play a huge role in preventing these issues. A clean filter reduces the amount of dust and debris reaching the coil, thereby reducing food sources for mold. Consider installing a UV light inside your air handler. These lights effectively kill airborne mold spores and bacteria as air passes through, offering continuous protection against microbial growth on your coil and improving overall air quality. This proactive measure can prevent many future odor and mold problems.
Maintaining Coil Cleanliness: Preventive Measures and Schedule
Cleaning your evaporator coil is not a one-time event. It is an ongoing part of good home maintenance. By adopting a regular cleaning schedule and implementing preventive measures, you can significantly reduce the frequency of deep cleans and keep your AC running optimally. I always emphasize prevention because it saves time, effort, and money in the long run.
The most effective preventive measure is consistently changing your air filter. Your air filter is the first line of defense against dust and debris reaching your evaporator coil. A dirty filter restricts airflow and allows particles to bypass it, accumulating on the coil. I recommend checking your filter monthly and changing it every 1-3 months, depending on usage, pet ownership, and local air quality. High-quality pleated filters (with a MERV rating of 8-11) capture more particles, providing better protection for your coil and improving your indoor air quality. Think of it like maintaining your car’s oil filter; a clean filter keeps the system running smoothly.
Another crucial step is to keep the area around your indoor air handler clean and clear. Ensure there is adequate space around the unit for proper airflow. Avoid storing items that produce a lot of dust or lint, like laundry, near the air handler. Regularly vacuum the area to minimize airborne particles that could be drawn into the system. If your air handler is in a dusty basement or attic, consider sealing any drafts or openings that allow excessive dirt to enter the space.
Regularly inspecting and cleaning your condensate drain line is also vital for preventing mold and moisture buildup on the coil. The condensate drain line can become clogged with algae, mold, and sludge, causing water to back up into the condensate pan. This standing water provides a perfect breeding ground for microbial growth that can spread to your coil. Flush your drain line with a diluted bleach solution (1 cup bleach to 1 gallon water) or white vinegar every few months to prevent clogs. If you notice slow drainage or standing water in the pan, clear the clog immediately. For general home system maintenance, consider how you might maintain other critical systems, like understanding how to clean water filter for clean drinking water.
While DIY cleaning is beneficial, consider scheduling professional HVAC maintenance at least once a year. A professional technician can perform a more thorough cleaning of your evaporator coil using specialized equipment. They can also inspect your entire system for other potential issues, such as refrigerant leaks, electrical problems, or fan motor wear. This comprehensive check-up ensures your system is running safely and efficiently. A professional cleaning and tune-up complement your regular DIY efforts, extending the lifespan of your unit and preventing costly breakdowns.
Benefits of a Clean Evaporator Coil: More Than Just Cool Air
Cleaning your evaporator coil is more than just a chore; it is an investment in your home’s comfort, health, and financial well-being. The benefits extend far beyond simply getting cooler air. I have seen firsthand how a well-maintained coil can transform a home environment. Let me highlight why this effort truly pays off.
Firstly, a clean evaporator coil dramatically improves your AC’s energy efficiency. When the coil is covered in grime, your AC unit has to work significantly harder to transfer heat from your home’s air. This extra effort consumes more electricity. By keeping the coil clean, the heat transfer process becomes much more efficient. Your unit does not have to run as long or as hard to reach and maintain your desired temperature. This translates directly into lower monthly energy bills, putting money back into your pocket. It is one of the simplest ways to save on utility costs.
Secondly, a clean coil leads to better indoor air quality. Dirty coils are breeding grounds for mold, mildew, bacteria, and allergens. As air passes over these contaminated surfaces, it picks up these undesirable particles and circulates them throughout your home. This can trigger allergies, worsen asthma symptoms, and generally create an unhealthy living environment. A clean coil ensures that the air circulating in your home is fresher and free from these irritants. You and your family will breathe easier, especially if you have sensitive individuals.
Thirdly, regular coil cleaning extends the lifespan of your HVAC system. When the evaporator coil is dirty, the entire system is under increased strain. The compressor, which is the heart of your AC, has to work harder and longer. This excessive strain can lead to premature wear and tear, eventually causing expensive breakdowns or even total system failure. By maintaining a clean coil, you reduce the workload on critical components, allowing them to operate within their intended parameters. This means your AC unit will likely last longer, delaying the need for a costly replacement.
Finally, a clean evaporator coil provides consistent and reliable cooling. There is nothing worse than an AC that cannot keep up on a hot day. A dirty coil reduces your system’s cooling capacity, leading to uneven temperatures and less effective dehumidification. With a clean coil, your AC delivers optimal cooling performance. It creates a more comfortable and consistent indoor climate throughout your home. You will enjoy crisp, cool air, even during the peak of summer. The peace of mind that comes from a well-functioning system is invaluable.
FAQ Section
How often should I clean my evaporator coil?
I recommend inspecting your evaporator coil annually. If you use your AC heavily, have pets, or live in a dusty environment, you might need to clean it every year or two. For most homeowners, a thorough cleaning every 2-3 years, complemented by regular filter changes, is a good baseline to maintain efficiency and air quality.
Can I use water to clean evaporator coils?
You can use water, but with caution. A gentle mist from a spray bottle is acceptable for rinsing or for mixing with a mild cleaner like vinegar. However, never use high-pressure water, as it can bend the delicate fins. Most modern coil cleaners are “no-rinse” and designed to drain with condensate.
What happens if I don’t clean my evaporator coil?
If you do not clean your evaporator coil, it will accumulate dirt and grime. This buildup reduces your AC’s efficiency, increases energy bills, and strains the system. It can also lead to poor indoor air quality due to mold and bacteria growth, eventually shortening your unit’s lifespan and causing costly breakdowns.
Is it safe to clean the evaporator coil myself?
Yes, it is generally safe to clean your evaporator coil yourself if you follow proper safety precautions. Always turn off the power to your unit at the breaker first. Wear gloves and safety glasses. If you are uncomfortable accessing the coil or dealing with electrical components, it is always best to call a professional.
What type of cleaner is best for evaporator coils?
The best cleaners are specialized, no-rinse evaporator coil cleaners. These products are formulated to foam up, lift dirt, and then drain away with the condensate, leaving no residue. Look for non-acidic and biodegradable options. For mold, an antimicrobial HVAC coil cleaner is recommended.
Does a dirty evaporator coil affect air quality?
Absolutely. A dirty evaporator coil can harbor mold, mildew, bacteria, and allergens. As air passes over these contaminants, it picks them up and circulates them throughout your home. This can significantly reduce indoor air quality, potentially triggering allergies, asthma symptoms, and causing unpleasant odors.
Conclusion
I hope this comprehensive guide has empowered you to tackle the task of cleaning your evaporator coil. We covered why a clean coil matters, how to spot the signs of a dirty one, and walked through each step of the cleaning process. Remember, a clean evaporator coil is not just about cool air. It is about saving money on energy bills, ensuring healthier indoor air, and extending the life of your valuable HVAC system.
Regular maintenance, especially consistent filter changes, is your best defense against dirt and grime buildup. Do not let your AC unit struggle in silence. Take charge, perform this important cleaning task, and reclaim the comfort and efficiency of your home. You have the knowledge now to make a real difference. Your AC unit, and your wallet, will thank you for it!
- evaporator coil
- clean HVAC
- AC maintenance
- dirty coil
- improve AC efficiency
- DIY cleaning
- indoor air quality