· Home Cleaning · 18 min read
How To Clean Window Ac Unit Filter

How to Clean Your Window AC Unit Filter for Better Air
Summer heat arrives. Your window air conditioner works hard. Did you know a simple cleaning task can make a huge difference? Learning how to clean your window AC unit filter helps keep your home cool and your air fresh. Dirty filters reduce cooling efficiency and can even make you sick. This essential maintenance step is easy to do yourself.
In this article, I will explain why filter cleaning matters. We will cover the tools you need and give you a detailed, step-by-step guide. You will learn how to remove, clean, dry, and reinstall your AC filter correctly. I will also share how often you should do this task. Finally, we will touch on other vital cleaning for your window AC unit. Let’s make your AC perform at its best.
Takeaway
Keeping your window AC unit filter clean is simple. This routine task offers big benefits.
- Improve Air Quality: Remove dust, allergens, and pollutants from your indoor air.
- Increase Efficiency: Allow your AC to cool your room faster and use less energy.
- Extend Lifespan: Reduce strain on your unit’s motor and components.
- Prevent Issues: Stop dirt buildup that can lead to mold or unit breakdowns.
Cleaning your filter means breathing easier and saving money.
To clean a window AC unit filter, first unplug the unit for safety. Open the front panel or grille to access the filter. Carefully slide or pull the filter out. Rinse it under lukewarm water until clear. For stubborn dirt, use a mild detergent. Let the filter air dry completely before putting it back.
Why Regular Window AC Filter Cleaning Boosts Your Home’s Air Quality
Think about the air you breathe inside your home. Your window AC unit works constantly to cool it. During this process, it pulls in not only warm air but also dust, pet dander, pollen, and other airborne particles. These particles then get trapped by the air filter. A clean filter does a good job of catching these things. It stops them from recirculating into your living space.
Over time, this filter collects a lot of debris. When it becomes clogged, it can no longer filter the air effectively. Instead, dust and allergens can blow right through the unit and back into your room. This means you are breathing in poor quality air. This can trigger allergies or respiratory problems for some people. Regular filter cleaning removes these pollutants. It ensures your AC unit delivers cleaner, fresher air. This improves your indoor air quality significantly.
A dirty filter also makes your AC unit work harder. The unit struggles to pull air through the clogged filter. This extra effort means it uses more electricity. Your utility bills go up unnecessarily. By cleaning the filter, you allow air to flow freely. This helps your unit cool your room more efficiently. It reduces energy consumption and saves you money.
Furthermore, a clean filter helps extend the life of your AC unit. When the unit has to work harder, its components wear out faster. This includes the fan motor and the compressor. A clogged filter can also lead to ice buildup on the evaporator coils. This can cause serious damage over time. Regular cleaning reduces stress on the system. It helps your AC run smoothly for many years. This simple task protects your investment.
Neglecting your filter can also lead to other problems. Dirt and moisture trapped in a dirty filter create a breeding ground for mold and mildew. These can produce foul odors. They can also release spores into your home. This further compromises your indoor air quality. Cleaning the filter helps prevent these unhealthy growths. For more details on tackling mold, you can learn how to clean mold from window air conditioner. Proper filter maintenance helps maintain a healthy home environment.
Essential Tools for Cleaning Your Window AC Unit Filter
Before you start cleaning your window AC unit filter, gather all the necessary items. Having everything ready makes the process smoother and faster. Most of these tools are common household items. You likely already own them. You will not need to buy anything special.
First, you will need a soft-bristled brush. An old toothbrush works well for this. This brush helps dislodge stubborn dust and debris from the filter mesh. You might also use a vacuum cleaner with a brush attachment. This can quickly remove the loose dust before wetting the filter. A vacuum saves time and makes less mess.
Next, you will need a source of water. A sink, bathtub, or even a garden hose will work. Lukewarm water is best for rinsing the filter. It helps to loosen dirt without damaging the material. You may also want a spray bottle. This is useful for pre-soaking heavily soiled filters. It helps to soften the dirt before scrubbing.
A mild cleaning solution is often helpful. Dish soap is a great choice. It is gentle yet effective at cutting through grime and grease. Avoid harsh chemical cleaners. These can damage the filter material. They can also leave residues that affect air quality. A mixture of water and white vinegar also works well. Vinegar naturally breaks down dirt and eliminates odors. It is also a good option for addressing any minor mold issues you might spot.
You will also need a clean cloth or towel. This is for wiping down the AC unit itself. It is also useful for gently blotting the filter after rinsing. This speeds up the drying process. A drying rack or a clean, flat surface is also important. You need a place for the filter to air dry completely. Never put a wet filter back into the AC unit.
Finally, safety should always come first. Make sure you have a safe, sturdy step stool or ladder if your AC unit is high up. You will need to reach the filter comfortably. Always wear gloves to protect your hands from dust and cleaning solutions. Having these items prepared ensures a safe and effective cleaning session.
Step-by-Step: Safely Removing Your Window AC Filter
Removing your window AC unit filter is usually a straightforward process. However, safety must be your top priority. Always begin by unplugging your air conditioner from the power outlet. This eliminates any risk of electrical shock. Do not just turn off the unit. Pull the plug completely out of the wall. This step is critical before you touch any part of the AC.
Once the unit is unplugged, locate the filter access. On most window AC units, the filter is behind the front grille or panel. This panel usually has clips, latches, or sometimes small screws. Look for tabs or a release button. These are typically on the sides or top of the front panel. Gently press or pull these to open the panel. The panel might swing open like a door. Sometimes it might detach completely.
With the front panel open, you will see the filter. It typically looks like a mesh screen. It slides into a designated slot. Some filters have small handles or tabs to help you grip them. Carefully pull the filter straight out of its slot. Avoid bending or forcing it. Most filters slide out easily. If it feels stuck, check for any clips or guides you might have missed.
Some older or less common models may have the filter located differently. It might be accessible from the top or side of the unit. Refer to your AC unit’s user manual if you cannot find the filter. The manual will show you the exact location and removal method. Keeping your unit’s manual handy is always a good practice. It provides specific instructions for your model.
As you remove the filter, observe how it fits into the unit. This will make reinstallation much easier later. Note which side faces outward and which side faces inward. Take a mental picture or even a quick photo with your phone. This helps avoid confusion when putting it back. Once the filter is out, you are ready to begin the cleaning process.
You might notice dust and debris inside the unit itself. Do not try to clean the coils or other internal components at this stage. We are focusing only on the filter. If your unit needs a deeper clean beyond the filter, you may need different instructions. For example, you might look into how to clean coils on window ac unit. But for now, focus solely on the filter you have removed.
Cleaning Your Window AC Filter: Methods and Best Practices
Once you have safely removed your window AC unit filter, it’s time to clean it. There are two main methods for cleaning AC filters: dry cleaning and wet cleaning. The method you choose depends on how dirty the filter is. Both methods aim to remove accumulated dust and debris effectively.
Dry Cleaning Method: The dry cleaning method is suitable for filters that are only lightly dusty. This method is quick and easy. First, take the filter outside. Gently tap it against a hard surface to dislodge loose dust. You will see clouds of dust come off. Next, use a vacuum cleaner with a brush attachment. Carefully vacuum both sides of the filter. Make sure to get into all the nooks and crannies of the mesh. This removes most of the surface dust. You can also use a soft-bristled brush. Gently brush the dust away. Always brush from the cleaner side to the dirtier side. This pushes the dust out. Dry cleaning is good for quick, frequent maintenance.
Wet Cleaning Method: The wet cleaning method is best for heavily soiled filters. It is also good for filters that have visible grime or odors. Start by rinsing the filter under lukewarm running water. Position the water flow against the “dirty” side of the filter. This helps push the dirt out rather than into the mesh. Continue rinsing until the water runs clear.
For stubborn dirt or a greasy film, prepare a mild cleaning solution. Mix a few drops of dish soap with lukewarm water in a basin. You can also use a solution of equal parts white vinegar and water. Immerse the filter in the solution. Let it soak for about 10-15 minutes. Soaking helps to loosen embedded dirt. After soaking, gently scrub the filter with a soft-bristled brush or an old toothbrush. Pay attention to heavily soiled areas. Rinse the filter thoroughly under clear, lukewarm water again. Ensure all soap or vinegar residue is gone. Any leftover residue could affect air quality.
When cleaning, always handle the filter gently. Avoid using harsh brushes or abrasive cleaners. These can damage the delicate mesh material. A damaged filter will not clean the air effectively. It might even allow more dirt to pass through. Do not use very hot water either. Excessive heat can warp or degrade the filter material. Lukewarm water is always the safest choice.
After cleaning, visually inspect the filter. Hold it up to a light source. You should be able to see through the mesh clearly. If you still see clogged areas, repeat the cleaning process. A truly clean filter allows for optimal airflow and efficiency. Proper cleaning prevents many common AC unit problems. Remember, a clean filter is key to a high-performing unit.
Properly Drying and Reinstalling Your Clean AC Filter
After cleaning your window AC unit filter, proper drying is crucial. Never put a wet or damp filter back into your air conditioner. Doing so can lead to several problems. Moisture inside the unit creates an ideal environment for mold and mildew to grow. This can cause unpleasant odors. It also introduces unhealthy spores into your home’s air. Dampness can also damage the electrical components inside your AC unit over time. Always ensure the filter is completely dry before reinstallation.
There are several effective ways to dry your AC filter. The simplest method is air drying. After rinsing, gently shake off excess water from the filter. Then, place it on a clean, dry towel or a drying rack. Choose an area with good air circulation. A sunny spot outdoors or near an open window is ideal. Avoid direct sunlight for extended periods if your filter is made of delicate material. This can warp or damage it. Allow several hours for complete drying. Depending on humidity levels, this could take a full day.
To speed up the drying process, you can gently blot the filter with a clean, dry cloth. Do not rub too hard, as this might damage the filter mesh. You can also use a fan to blow air over the filter. Place the filter upright in front of a circulating fan. This increases airflow and helps evaporate moisture faster. Never use a hairdryer or any heat source to dry the filter. High heat can melt or deform the filter material, rendering it useless. Patience is key when drying.
Once you are certain the filter is bone dry, you can reinstall it. Remember the orientation you noted during removal. Slide the clean filter back into its designated slot. Ensure it fits snugly and is fully inserted. There should be no gaps around the edges. A properly seated filter prevents air from bypassing the filter. This ensures all air passes through the clean mesh.
Finally, close the front panel or grille of your window AC unit. Secure any clips, latches, or screws. Double-check that everything is properly closed and latched. Then, you can safely plug your AC unit back into the power outlet. Turn on your unit. You should notice an immediate improvement in airflow and cooling efficiency. The air coming from the unit will feel fresher and cleaner. This simple drying and reinstallation process finishes the filter maintenance.
How Often Should You Clean Your Window AC Filter?
The frequency of cleaning your window AC filter depends on several factors. There is no one-size-fits-all answer. However, generally, I recommend checking your filter at least once a month. This applies especially during periods of heavy use, like summer. Regular checks ensure you catch dirt buildup before it becomes a major problem.
Several environmental factors influence how quickly your filter gets dirty. If you live in a dusty area, your filter will accumulate debris faster. Homes near construction sites, busy roads, or agricultural fields often have more airborne particles. In such environments, weekly checks might be beneficial. Your filter might need cleaning more often than a home in a cleaner, less dusty area.
Pet ownership also plays a significant role. Animals shed dander and hair constantly. This pet hair can quickly clog an AC filter. If you have pets, particularly those with long hair, you should clean your filter every two to three weeks. This helps keep pet allergens out of your air. It also ensures your AC unit does not struggle to push air.
Smoking indoors is another factor. Cigarette smoke contains sticky residues and particles. These can quickly gum up an AC filter. If someone smokes inside your home, clean the filter at least every two weeks. This helps to remove smoke particles. It also prevents unpleasant odors from circulating through your AC unit.
Usage patterns matter, too. If your window AC unit runs almost continuously, its filter will get dirty faster. A unit that runs only a few hours a day will not accumulate as much dirt. For constant use, consider cleaning every two weeks. For occasional use, monthly cleaning might suffice. Always err on the side of cleaning more often rather than less.
Visual inspection is your best guide. When you open the front panel, look at the filter. Can you see a layer of dust or grime? Does it look opaque? If you cannot see through it, or if it has a noticeable coating of dirt, it is time for a clean. Do not wait for your AC performance to drop. Proactive cleaning keeps your unit running optimally.
Keeping a schedule helps. Mark it on your calendar or set a reminder on your phone. Consistent cleaning ensures your AC unit always operates at peak efficiency. It also maintains good indoor air quality. This simple routine can save you money on energy bills. It also extends the life of your window AC unit.
Beyond the Filter: Keeping Your Entire Window AC Unit Clean
While cleaning the filter is critical, your window AC unit has other parts that need attention. Neglecting these areas can lead to reduced efficiency. It can also cause unpleasant odors and even unit breakdown. Regular maintenance beyond just the filter ensures your unit runs optimally. This keeps your home comfortable.
First, consider the evaporator coils. These are located behind the filter. They get cold and absorb heat from the air. Over time, dust and grime can build up on these coils. This creates an insulating layer. This layer prevents the coils from absorbing heat efficiently. Dirty coils make your AC work harder to cool your room. This increases energy consumption. Cleaning the coils is a more involved process. You can learn how to clean coils on window ac unit with a specialized coil cleaner and soft brush. This step improves cooling performance significantly.
The condenser coils are on the outside part of the unit. They release heat to the outside air. These coils can get very dirty from outdoor elements. Leaves, dirt, pollen, and even insect nests can block airflow. Just like evaporator coils, dirty condenser coils reduce efficiency. You can often clean these with a garden hose. Direct a gentle stream of water through the fins from the inside out. For more details, you might explore how to clean outside ac unit with water hose. Ensure the unit is unplugged before cleaning any part of the exterior.
The drain pan and drain line also need attention. As the AC cools, condensation forms. This water collects in a drain pan and flows out through a drain line. Over time, algae, mold, and sludge can build up in the pan and line. This causes blockages. A blocked drain line can lead to water overflowing into your home. It can also create a musty smell. You should periodically check the drain pan for standing water or slime. Clean it with a mild bleach solution or vinegar. Flush the drain line with water to ensure it is clear.
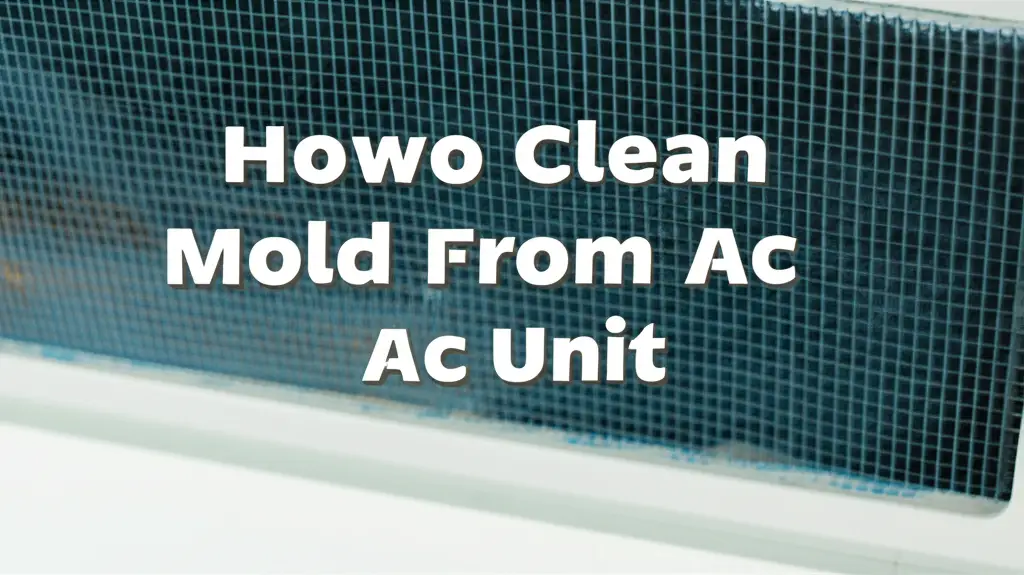
Mold is a common problem in AC units due to the dark, damp environment. If you notice a musty smell or visible black spots, you likely have mold. Beyond the filter, mold can grow on coils, fan blades, and in the drain pan. Addressing mold quickly is important for your health and the unit’s longevity. You can find detailed instructions on how to clean window ac unit mold. Always wear protective gear when dealing with mold.
Finally, wipe down the exterior casing of the window AC unit. Use a damp cloth to remove dust and dirt. This simple step keeps the unit looking good. It also prevents dirt from being drawn into the internal components. Regular, comprehensive cleaning ensures your window AC unit stays efficient. It also helps it provide clean, cool air for many years.
FAQ Section
Q1: Can I clean my window AC filter with just water?
Yes, for lightly dusty filters, rinsing with lukewarm water is often sufficient. It removes loose dirt and dust effectively. For heavier buildup or sticky grime, using a mild soap or a vinegar solution is recommended. Always ensure the water runs clear.
Q2: What happens if I don’t clean my window AC filter?
Not cleaning your filter leads to reduced air quality, higher energy bills, and decreased cooling efficiency. A clogged filter makes your unit work harder. This can lead to premature wear and tear. It also creates a breeding ground for mold and mildew.
Q3: How long does a window AC filter take to dry?
Drying time varies based on humidity and air circulation. It typically takes a few hours to a full day for the filter to dry completely. Always air dry it in a well-ventilated area. Never reinsert a damp filter into the AC unit.
Q4: Can I put my AC filter in the dishwasher?
No, it is not recommended to put your AC filter in a dishwasher. The high heat and harsh detergents used in dishwashers can damage the delicate mesh material of most AC filters. This can warp the filter or reduce its effectiveness.
Q5: What kind of soap should I use to clean my AC filter?
Use a mild dish soap or a mixture of white vinegar and water. These are gentle yet effective at breaking down dirt and grime. Avoid harsh chemical cleaners, as they can damage the filter material and leave harmful residues.
Q6: How do I know if my AC filter needs replacing instead of just cleaning?
Most window AC unit filters are designed to be washable and reusable. However, if your filter shows signs of tearing, crumbling, or permanent discoloration even after cleaning, it might be time for a replacement. Check your unit’s manual for replacement filter information.
Conclusion
Keeping your window AC unit filter clean is a simple yet impactful task. We explored why this small effort yields big rewards. From improving your indoor air quality to boosting energy efficiency, the benefits are clear. You now have a complete understanding of how to clean your window AC unit filter. You know the tools you need and the step-by-step process for removal, cleaning, drying, and reinstallation.
Remember, consistency is key. Regular cleaning ensures your AC unit performs at its peak, saving you money and keeping your home comfortable. Do not underestimate the power of a clean filter. It protects your health by removing airborne pollutants. It also extends the lifespan of your valuable appliance. Make filter cleaning a regular part of your home maintenance routine. Your AC unit, and your lungs, will thank you for it. Start cleaning today for a cooler, cleaner tomorrow.
- AC filter cleaning
- window AC maintenance
- clean AC filter
- improve AC efficiency
- indoor air quality
- air conditioner filter