· RV Maintenance · 20 min read
How To Clean Fresh Water Tank In Rv
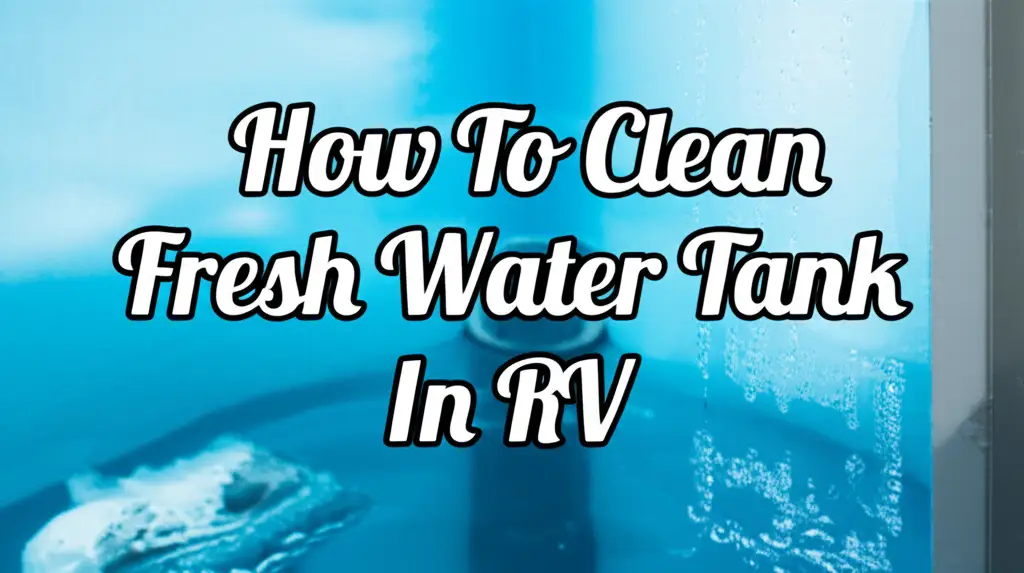
Unlock Crystal-Clear RV Water: How To Clean Your Fresh Water Tank
Imagine waking up in your RV, ready to brew coffee or wash dishes, and the water smells off. This common problem often comes from an unclean fresh water tank. Keeping your RV’s fresh water tank clean is not just about avoiding strange smells. It is essential for your health and the longevity of your RV’s water system. We all want fresh, clean water when on the road.
I know the frustration of dealing with stale or contaminated water during a trip. A well-maintained water system makes every adventure more enjoyable. This guide will walk you through the process of how to clean fresh water tank in RV effectively. We will cover why it matters, what supplies you need, and the step-by-step cleaning methods. You will learn about both common and alternative cleaning solutions. We will also look at how to maintain your tank for lasting freshness. By the end, you will have all the knowledge to ensure crystal-clear water on every journey.
Takeaway:
- Regularly clean your RV fresh water tank to ensure water safety and taste.
- Use appropriate sanitizers like bleach or vinegar, following correct dilution ratios.
- Thoroughly flush the system multiple times after cleaning.
- Implement preventative measures to keep your tank cleaner between uses.
Answer: To clean your RV fresh water tank, drain the tank completely. Then, introduce a diluted sanitizing solution, typically bleach or vinegar, into the tank. Fill the tank, let the solution sit for several hours, and then drain it. Finally, flush the entire water system multiple times with fresh water until no cleaner smell remains.
Why Cleaning Your RV Fresh Water Tank Matters
Your RV’s fresh water tank is vital for comfortable travel. It holds the water you use for drinking, cooking, showering, and washing. Over time, sediment, algae, bacteria, and mineral deposits can build up inside the tank. This buildup leads to several problems. The water may develop an unpleasant taste or odor. More importantly, it can become a breeding ground for harmful microorganisms. These organisms pose health risks to you and your family.
Ignoring tank cleaning can also damage your RV’s plumbing. Mineral deposits can clog lines and fixtures. Algae can grow throughout the system. This leads to costly repairs down the road. Regular cleaning ensures your water is safe, tastes good, and functions correctly. It extends the life of your entire water system. Think of it as preventative care for your RV’s most essential utility. I always make sure this step is part of my routine RV maintenance.
Dirty water can also impact other parts of your RV. For example, if you have a portable air conditioner in your RV that uses water, poor water quality from the tank could affect its operation or even lead to mold inside its water reservoir. Similarly, hard water deposits can build up on your shower head, reducing water flow and efficiency. Cleaning your fresh water tank helps protect these other components from premature wear or damage caused by contaminants or mineral buildup. Keeping the water source pristine sets the stage for a healthy RV environment.
A clean tank contributes to overall RV hygiene. It helps prevent odors from permeating throughout your living space. This also means you do not have to worry about unusual smells when you shower or wash dishes. It is about peace of mind. You want to feel confident in the water quality, no matter where your travels take you. This proactive approach saves you stress and ensures your adventures remain enjoyable.
Essential Tools and Supplies for Tank Cleaning
Before you begin the cleaning process, gathering all necessary tools and supplies makes the job much smoother. Having everything on hand prevents interruptions and ensures a thorough clean. You do not want to be halfway through and realize you are missing something important. Preparation is key to any successful cleaning project, especially when dealing with your RV’s water system.
Here is a list of what you will likely need:
- Non-Scented Household Bleach: This is the most common and effective sanitizer for RV water tanks. Make sure it is plain bleach, not splash-less or scented. Scented bleach can leave a lingering odor. You need about 1/4 cup for every 15 gallons of tank capacity.
- Fresh Water Hose: Use a dedicated hose for your fresh water system. Do not use the same hose for black tank flushing. This prevents cross-contamination.
- Water Source: You will need a reliable source of potable water to fill your tank.
- Measuring Cup: For accurately measuring the bleach.
- Funnel: A funnel helps pour the bleach into your fresh water fill port without spills.
- Gloves: Protect your hands from bleach.
- Eye Protection: Safety glasses are a good idea when working with chemicals.
- Drain Bucket or Container: For catching water during flushing, if not draining directly onto the ground.
- RV Water Filter (Optional but Recommended): Consider an inline water filter when refilling your tank after cleaning. This helps prevent future contaminants.
- Vinegar (Alternative Method): If you prefer a non-bleach method, white vinegar works. You will need about 1 gallon of vinegar for every 15 gallons of tank capacity.
- Baking Soda (Alternative Method): Often used with vinegar or after bleach to neutralize odors. Learn how to clean with vinegar and baking soda for other applications too.
Having these items ready saves time and ensures a complete and safe cleaning process. My checklist always includes these items before I even open the tank cap. A little planning goes a long way in RV maintenance.
Step-by-Step Guide: Cleaning Your RV Fresh Water Tank with Bleach
Cleaning your RV fresh water tank with bleach is a widely accepted and effective method. It thoroughly sanitizes the tank and lines, killing bacteria and viruses. This process involves precise measurements and careful flushing. Always prioritize safety when working with bleach.
Here are the detailed steps:
1. Drain the Existing Water
First, locate your RV’s fresh water tank drain valve. Open it completely to empty all water from the tank. You want to remove as much old water as possible before introducing any cleaning solution. Make sure the hot water heater is bypassed or drained separately. If you have any sediment in your water system, draining helps remove loose particles. This is similar to how you would remove sediment from a well before use. Learn about cleaning sediment out of a well for context.
Once the tank is empty, close the drain valve.
2. Prepare the Bleach Solution
Calculate the correct amount of bleach needed. The standard ratio is 1/4 cup of non-scented household bleach for every 15 gallons of your fresh water tank’s capacity. For example, if you have a 60-gallon tank, you will need 1 cup of bleach. Measure the bleach accurately using a measuring cup.
Pour the measured bleach into a clean bucket or jug. Add a gallon or two of fresh water to the bleach in the bucket. This dilutes the bleach slightly before it enters the tank, helping it mix better.
3. Add Bleach to the Fresh Water Tank
Carefully pour the diluted bleach mixture into your RV’s fresh water fill port. Use a funnel to prevent spills. Avoid direct skin contact with the bleach solution.
After adding the bleach, connect your fresh water hose to a potable water source. Begin filling your RV’s fresh water tank. Fill the tank completely until it is full. This ensures the bleach solution mixes throughout the tank.
4. Circulate the Solution Through the System
Once the tank is full, turn on every hot and cold water faucet inside your RV. Let the water run until you can smell bleach coming from each faucet. This means the bleach solution has reached all the plumbing lines. Do not forget to include the shower, toilet, and outdoor shower, if you have one. Also, open any water inlet valves or refrigerator ice maker water lines to ensure they are also sanitized. See how to clean a refrigerator ice maker water line for another related system.
Once you smell bleach at each fixture, turn off the faucets.
5. Let the Solution Sit
Allow the bleach solution to sit in the tank and lines for at least four hours. For heavily contaminated tanks or systems that have not been cleaned in a long time, let it sit for up to 12-24 hours. This contact time is crucial for the bleach to effectively sanitize and kill bacteria and algae. During this time, you might notice the smell of bleach in the RV. This is normal.
6. Drain and Flush the System
After the appropriate soaking time, open your fresh water tank drain valve again. Completely drain the bleach solution from the tank. Once the tank is empty, close the drain valve.
Now, refill your fresh water tank completely with fresh, clean water. Turn on all your faucets, hot and cold, and let the fresh water run through the system until you can no longer smell any bleach. It is important to flush thoroughly. You might need to refill and drain the tank several times to remove all traces of bleach. I typically flush at least three times, sometimes more. This ensures the water is safe and taste-free for use.
Alternative Cleaning Methods: Vinegar and Other Solutions
While bleach is a powerful disinfectant, some RV owners prefer alternative cleaning methods. These methods are often more natural and can be effective for maintenance cleaning or for those sensitive to bleach. Vinegar, in particular, is a popular choice due to its acidic properties, which help break down mineral deposits and kill some bacteria.
Cleaning with Vinegar
Vinegar is a natural descaler and mild disinfectant. It works well for breaking down hard water deposits and can help eliminate mildew and some types of bacteria. It is generally safer for your plumbing components than strong bleach solutions, especially if you have sensitive rubber seals or plastic parts. You can learn more about cleaning hard water from a shower head as vinegar is often used for that purpose as well.
To use vinegar:
- Drain your RV fresh water tank: Just like with bleach, completely empty your tank.
- Prepare the vinegar solution: Use one gallon of white vinegar for every 15 gallons of your tank capacity. For a 60-gallon tank, you would use 4 gallons of vinegar.
- Add vinegar and fill: Pour the vinegar directly into your fresh water fill port. Then, fill the tank completely with fresh water.
- Circulate and sit: Turn on all hot and cold faucets until you smell vinegar. This ensures the solution fills the lines. Let the solution sit for at least 12-24 hours. Vinegar needs more contact time than bleach to be effective.
- Drain and flush: Drain the vinegar solution from the tank. Refill the tank with fresh water and flush all lines until the vinegar smell is gone. This may require several refills and drains.
Vinegar is excellent for routine cleaning and reducing mineral buildup. It is a gentler option for regular maintenance.
Using Baking Soda
Baking soda is a natural deodorizer and can help with mild cleaning. It is often used in conjunction with vinegar or after a bleach treatment to neutralize any residual odors. It does not sanitize on its own but can improve water taste.
To use baking soda:
- After cleaning (bleach or vinegar): Once you have drained your main cleaning solution, add 1/4 cup of baking soda for every 15 gallons of tank capacity.
- Fill and sit: Fill the tank with fresh water and let it sit for a few hours.
- Drain and flush: Drain the baking soda solution and flush with fresh water.
Baking soda is a good follow-up step to ensure your water tastes truly neutral and fresh. It helps remove any lingering chemical smells.
RV-Specific Tank Cleaners
Several commercial RV water tank cleaners are available on the market. These products are formulated specifically for RV water systems. They often contain non-toxic ingredients designed to break down deposits and sanitize without harsh chemicals. Always follow the manufacturer’s instructions carefully when using these products. They can be a convenient option if you prefer pre-measured solutions. Always check if the product is safe for drinking water systems.
Each method has its benefits. Choose the one that best fits your comfort level and the specific needs of your RV’s water system.
Flushing and Sanitizing Your RV Water System
Flushing your RV water system after cleaning is arguably the most critical step. This process removes all traces of the cleaning solution. It also flushes out any loosened contaminants. Incomplete flushing can leave your water tasting bad or, worse, make it unsafe to drink. Sanitizing is part of the cleaning process, but the post-cleaning flush is what makes the system truly ready for use.
Here’s how to ensure a thorough flush:
1. Initial Drain of Cleaning Solution
After your bleach or vinegar solution has sat for the recommended time, open the fresh water tank drain valve. Let all the solution drain completely from the tank. Ensure it is flowing out fully. If your RV has low-point drains for the hot and cold lines, open those as well. This helps empty the lines faster.
2. Refill the Fresh Water Tank
Once the tank is empty, close all drain valves. Connect your dedicated fresh water hose to a potable water source. Refill your fresh water tank completely with clean water. Do not rush this step. A full tank ensures adequate pressure for flushing all lines.
3. Flush All Faucets and Appliances
Starting with the faucet furthest from the tank, open each hot and cold water faucet. Let the water run for several minutes until you no longer detect any smell of the cleaning solution. This includes:
- Kitchen sink
- Bathroom sink
- Shower
- Toilet (flush several times)
- Outdoor shower (if equipped)
- Any other water-using appliance, such as an ice maker line or a washing machine water inlet valve. See how to clean a water inlet valve on a washing machine.
It is crucial to run water through every single line. This ensures no cleaning solution remains trapped anywhere in your system.
4. Drain and Repeat (Multiple Times)
After flushing all the lines, drain the fresh water tank again. This removes the first flush of water, which will still contain some residual cleaner.
Repeat the refill and flush process at least two more times. For a bleach solution, I typically repeat this process three or even four times. You want to be absolutely sure the water coming out is odorless and tastes clean. A small taste test can confirm the absence of any chemical residue. This thoroughness is vital for safe drinking water.
5. Bypass and Drain Water Heater (If Applicable)
If you did not bypass your water heater before the cleaning process, you should drain and flush it separately after the main tank is clean. Water heaters can hold old water and sediment. They can also trap cleaning solutions. Ensure your water heater is cool before draining it to avoid injury.
A thorough flushing ensures your RV’s water system is clean, safe, and ready for your next adventure. It is worth the extra effort for peace of mind.
Maintaining a Clean RV Water Tank: Best Practices
Cleaning your RV fresh water tank is important, but regular maintenance prevents problems from recurring. A consistent approach keeps your water system in top condition. This means less frequent deep cleans and consistently fresh water. Prevention is always easier than a cure when it comes to RV maintenance.
Here are some best practices for maintaining a clean RV water tank:
- Regular Sanitization: Even if you use your RV often, plan to sanitize your fresh water tank at least once or twice a year. If your RV sits unused for long periods, sanitize it before each trip. This proactive step prevents bacterial and algae growth.
- Use Potable Water Sources: Always fill your RV’s fresh water tank from known, clean, potable water sources. Avoid filling from questionable sources, such as private wells or non-designated taps, unless you are certain of the water quality. Using a dedicated potable water hose helps avoid contamination from garden hoses.
- Employ an Inline Water Filter: Attach an inline water filter to your fresh water hose when filling your tank. These filters catch sediment, chlorine, and other impurities before they enter your tank. This significantly reduces the buildup of particles and improves water taste.
- Drain When Stored: If your RV will be stored for more than a few weeks, especially in warm climates, drain your fresh water tank completely. Stagnant water can quickly become a breeding ground for bacteria and algae.
- Keep Tank Vents Clean: Your fresh water tank has a vent that allows air to enter as water is drawn out. Ensure this vent is free of insects or debris. A blocked or dirty vent can introduce contaminants.
- Rinse After Trips: After each trip, especially if you have used all your water, consider giving the tank a quick rinse. Fill it partially and drain it to remove any loose debris. This is a quick step that makes a difference.
- Consider a Whole-House Filter: For an extra layer of protection, install a whole-house water filter on your RV’s main water line. This filters all water entering the RV, including city water connections. It helps protect faucets, shower heads, and other appliances from sediment and hard water damage.
- Avoid Contamination: Be mindful of anything that goes into your fresh water fill port. Do not use non-potable hoses or containers that have been used for anything else. A small amount of dirt or non-potable water can contaminate the entire tank.
- Check Hoses and Connections: Regularly inspect your fresh water hoses and connections for cracks, leaks, or signs of mold. Replace them if they show wear. A compromised hose can introduce impurities into your system.
By following these practices, you can significantly extend the time between deep cleans. You will also enjoy consistently clean and safe water throughout your RV adventures.
Troubleshooting Common RV Water Tank Issues
Even with regular cleaning and maintenance, RV water tanks can sometimes present issues. Knowing how to troubleshoot these common problems can save you time and frustration. Many issues relate back to water quality or system integrity.
Bad Odor or Taste
This is the most common problem. It typically indicates bacterial or algae growth in the tank or lines.
- Solution: Perform a thorough sanitization with bleach, as described earlier. Ensure you let the solution sit for the full recommended time. Follow with multiple flushes. If the odor persists, consider a second, stronger bleach treatment or a vinegar flush to address mineral buildup.
Slime or Sediment in Water
If you see particles, cloudy water, or feel slime when touching the inside of the tank (if accessible), it is often sediment, algae, or biofilm.
- Solution: Drain the tank completely. A high-pressure flush into the tank opening (if possible) can dislodge loose sediment. Then, perform a bleach sanitization. Ensure you open all low-point drains and flush all faucets. Using an inline water filter when filling can prevent future sediment entry.
Low Water Pressure
Low pressure can be due to a clogged filter, aerator, or mineral buildup in the lines or shower head.
- Solution: First, check your inline water filter; it might need replacement. Next, remove and clean aerators on all faucets. For shower heads, you might need to descale them with vinegar. Sometimes, low pressure points to issues with the RV’s water pump, which may require professional attention. This could also be related to hard water issues similar to those found in home plumbing.
Water Leaks
Leaks can occur at connections, hoses, or the tank itself.
- Solution: Visually inspect all connections and hoses. Look for drips or wet spots. Tighten loose connections. Replace cracked or damaged hoses. If the tank itself is leaking, it might require professional repair or replacement, depending on the severity. Check your drain valve to ensure it is fully closed.
Tank Not Filling Completely
This issue often points to a clogged tank vent or a problem with the fill port.
- Solution: Inspect the tank vent for blockages from insects or debris. Clear any obstructions. Check the fill hose connection to ensure it is not kinked. Sometimes, an RV’s automatic fill valve can malfunction, requiring repair or replacement.
Hot Water Heater Issues
While separate from the fresh water tank, the water heater is part of your overall water system. Odors from the water heater can be mistaken for tank issues.
- Solution: Drain and flush your water heater periodically. Some RV water heaters use an anode rod that can react with water and produce a sulfur smell. Replacing the anode rod can resolve this. Always ensure your water heater is bypassed during tank sanitization if you do not want cleaning solution in it.
By understanding these common issues and their solutions, you can effectively maintain your RV’s water system. This ensures a more enjoyable and worry-free travel experience. Always consult your RV’s owner’s manual for specific instructions regarding your model.
FAQ Section
How often should I clean my RV fresh water tank?
You should clean your RV fresh water tank at least once or twice a year, especially before the start of the RV season. If you use your RV frequently or fill from diverse water sources, consider cleaning it more often, such as every few months. Always clean it if the water develops an odor or taste.
Can I use dish soap or other household cleaners in my RV water tank?
No, you should not use dish soap or other household cleaners in your RV fresh water tank. These products can leave residues that are difficult to flush out. They can also leave an unpleasant taste or smell in your drinking water. Stick to non-scented bleach, white vinegar, or RV-specific tank cleaners.
What if my RV water tank still smells after cleaning?
If your RV water tank still smells after cleaning, it means residual bacteria, algae, or cleaning solution remain. Repeat the sanitization process, ensuring you use the correct concentration of bleach or vinegar. Allow the solution to sit for the maximum recommended time. Then, flush the system thoroughly multiple times.
Is it safe to drink water from the RV fresh water tank after cleaning?
Yes, it is safe to drink water from the RV fresh water tank after cleaning, provided you have flushed the system thoroughly. You must remove all traces of the cleaning solution. The water should be clear, odorless, and taste fresh. If in doubt, use bottled water for drinking and cooking.
How do I prevent algae growth in my RV water tank?
To prevent algae growth, always use an inline water filter when filling your tank. Drain the fresh water tank completely when storing your RV, especially in warm, sunny conditions. Algae need light and stagnant water to grow. Regular sanitization also helps inhibit growth.
Should I clean the hot water heater too?
Yes, you should clean or flush your hot water heater periodically, but separately from the fresh water tank. It is best to bypass the hot water heater during the main tank sanitization. This prevents the cleaning solution from sitting in the heater. Drain the hot water heater to remove sediment, and consider replacing the anode rod regularly.
Conclusion
Cleaning your RV fresh water tank is an essential part of responsible RV ownership. It goes beyond simple hygiene. It ensures your family’s health and preserves your RV’s plumbing system. I have found that a consistent cleaning routine makes my RV trips much more enjoyable. No one wants to deal with foul-smelling or unappealing water when traveling.
We covered the critical reasons for cleaning, the necessary tools, and the detailed steps for a bleach sanitization. We also looked at alternative methods using vinegar and commercial cleaners. The importance of thorough flushing cannot be overstated. Finally, we discussed best practices for ongoing maintenance and troubleshooting common issues. By following these guidelines, you can keep your RV’s fresh water system pristine. This will ensure every drop of water is clean, safe, and ready for your adventures. Prioritize your RV’s fresh water system. Enjoy peace of mind and crystal-clear water on all your journeys.
- RV water tank cleaning
- freshwater system maintenance
- RV sanitation
- water purification RV