· Beauty & Personal Care · 15 min read
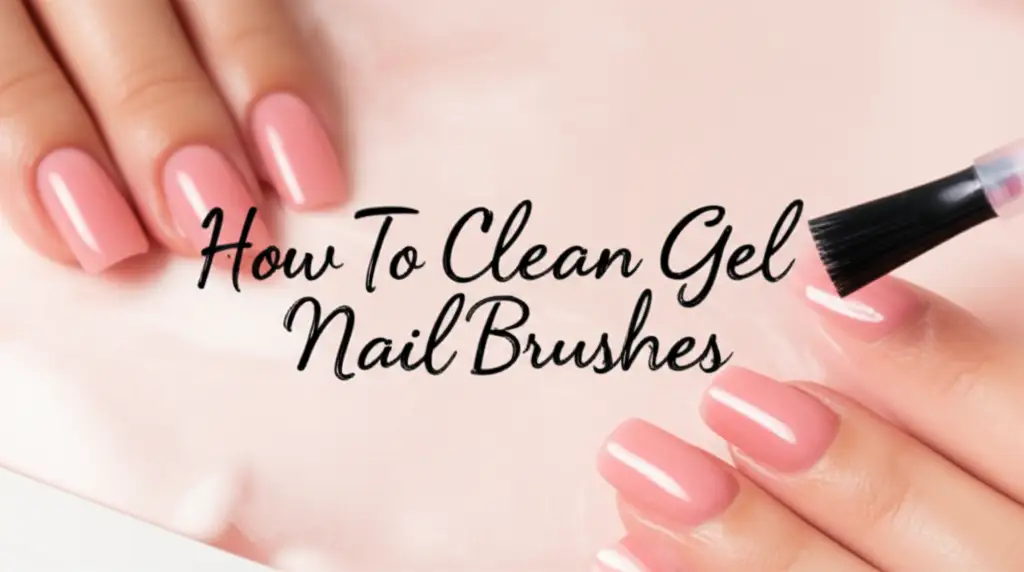
How To Clean Gel Nail Brushes
Clean Gel Nail Brushes: Your Essential Guide
Beautiful gel nails start with great tools. Your gel nail brushes are vital for creating stunning designs. These brushes make your nail art dreams come true. But over time, gel can build up on them. This residue makes your brushes stiff and unusable. Knowing how to clean gel nail brushes properly keeps them in top shape. It ensures every application is smooth and precise.
Cleaning your gel nail brushes extends their lifespan. It also maintains hygiene for your nail applications. Dirty brushes can spread germs or ruin your next design. Imagine trying to create a delicate line with a clumpy brush. It just will not work well. This guide covers why cleaning is important, what supplies you need, and step-by-step cleaning methods. We will also look at deep cleaning, proper storage, and common mistakes to avoid. Get ready to keep your gel nail brushes pristine and ready for any masterpiece.
Takeaway
- Regularly clean gel nail brushes after each use to prevent gel buildup.
- Use isopropyl alcohol or a specialized gel brush cleaner.
- Never use acetone, as it can damage brush bristles.
- Store brushes flat or upright with caps on to protect bristles.
- Proper cleaning maintains brush performance and extends their lifespan.
To clean gel nail brushes, gently wipe off excess gel with a lint-free wipe. Then, dip the brush into a dappen dish filled with isopropyl alcohol or a specialized gel brush cleaner. Swirl the brush to dissolve remaining gel. Finally, reshape the bristles and lay the brush flat to dry away from UV light.
Why Clean Your Gel Nail Brushes?
Cleaning your gel nail brushes is not just a chore. It is an essential part of nail care. Think of it as a small investment in your nail art journey. Dirty brushes can cause many problems. They can ruin your application and shorten the life of your tools. I always make sure to clean mine after every use.
First, proper cleaning ensures hygiene. Uncleaned brushes can harbor bacteria. This bacteria can transfer to your nails and skin. Nobody wants a nail infection. Regular cleaning keeps your tools sanitary and safe to use. It gives you peace of mind with every stroke.
Second, cleaning maintains brush longevity. Gel hardens when exposed to UV light or air. If you do not clean brushes, this gel dries on the bristles. This makes the brush stiff and unusable. Cleaning prevents this hardening. It keeps your bristles soft and flexible. A well-maintained brush lasts much longer.
Third, clean brushes improve application quality. A clean brush allows for smooth and even gel application. You get precise lines and flawless coats. A dirty brush, however, will leave streaks or chunks. It makes your work look messy. This is frustrating when you want a perfect finish. I have seen how much difference a clean brush makes in my own designs. Cleaning your brushes is key to beautiful, healthy nails. It helps you achieve professional-looking results every time.
Essential Supplies for Gel Nail Brush Cleaning
Gathering the right tools makes cleaning your gel nail brushes easy. You do not need many items. The right supplies protect your brushes and get them truly clean. I keep these items handy near my nail station. Having them ready saves time and hassle.
First, you will need lint-free wipes or paper towels. These are crucial for wiping away excess gel. Lint-free wipes prevent tiny fibers from sticking to your brush bristles. Regular paper towels work, but sometimes leave lint. I prefer lint-free wipes for their smoothness. They ensure your brushes are pristine.
Next, choose your cleaning solution. Isopropyl alcohol (99% pure) is a popular and effective choice. It dissolves gel quickly without harsh chemicals. This type of alcohol evaporates fast. This helps your brushes dry quickly. Another excellent option is a specialized gel brush cleaner. These cleaners are formulated specifically for gel. They often condition the bristles too. Some people prefer them for their gentle yet powerful action. Both alcohol and specialized cleaners work well.
You will also need a dappen dish or a small glass container. This holds your cleaning solution. A dappen dish is small and shallow. It is perfect for dipping just the brush head. This minimizes waste of your cleaning solution. A small glass bowl also works. Just ensure it is sturdy and does not tip easily.
Finally, consider a brush cleaning mat or silicone pad. While not strictly essential, these can help. They have textures that aid in dislodging stubborn gel. You can gently rub the brush against the mat. This helps loosen dried gel more effectively. These items ensure thorough cleaning. They are a good addition to your nail care kit.
Step-by-Step Guide to Clean Gel Nail Brushes
Cleaning gel nail brushes correctly protects them and keeps them performing. There are a few effective methods. Each method works well depending on your needs. I will walk you through each one. Remember, consistency is key for brush care.
Dry Wiping Method
The dry wiping method is for quick cleaning between colors or right after use. This method removes most wet gel before it cures. It is fast and simple. You can do this immediately.
First, take a clean, lint-free wipe. Lay it flat on your work surface. Second, gently wipe the excess gel from your brush bristles. Do this by dragging the brush across the wipe. Apply light pressure. Work from the base of the bristles to the tip. This pushes the gel off. Repeat this several times. Use a fresh section of the wipe each time. This prevents reapplying old gel. This method is great for daily maintenance. It prevents buildup.
Isopropyl Alcohol Method
The isopropyl alcohol method is a popular and effective way to dissolve gel. Alcohol breaks down the gel formula. This cleans the brush deeply. This method works well for brushes with a bit more gel.
First, pour a small amount of 99% isopropyl alcohol into a dappen dish. You only need enough to cover the bristles. Second, dip your gel brush into the alcohol. Swirl the brush gently in the liquid. You will see the gel begin to dissolve. Repeat dipping and swirling until the brush appears clean. Do not soak the brush for long periods. Soaking can damage the ferrule. The ferrule is the metal part holding the bristles. Too much soaking can loosen the glue.
Once clean, gently wipe the brush on a lint-free wipe. This removes any remaining alcohol and dissolved gel. Reshape the bristles with your fingers. Make sure they return to their original form. Lay the brush flat on a clean paper towel to air dry. This prevents alcohol from seeping into the ferrule. Avoid drying brushes upright in a cup. This could allow moisture to collect at the ferrule. For broader brush cleaning tips, you might find information on how to clean makeup brushes with alcohol helpful.
Dedicated Brush Cleaner Method
Using a dedicated gel brush cleaner is often the gentlest option. These cleaners are specifically formulated for gel. They clean effectively and often condition bristles. They can be a good investment.
Start by pouring a small amount of the specialized cleaner into a dappen dish. Dip your gel brush into the cleaner. Swirl it gently, just like with alcohol. The cleaner will dissolve the gel. You will see the gel release from the bristles. Continue swirling until the brush looks clean. Some cleaners suggest a short soak. Always check the product instructions.
After cleaning, wipe the brush on a clean, lint-free wipe. This removes excess cleaner and gel residue. Reshape the bristles carefully. Lay the brush flat to air dry completely. These cleaners can leave bristles soft and supple. They prevent them from drying out. This helps maintain the brush’s flexibility. For related insights on tool maintenance, consider reading about how to clean acrylic nail brushes. Many principles of brush care apply across different nail types.
Deep Cleaning Gel Nail Brushes
Sometimes, gel nail brushes need more than a quick clean. This happens when gel hardens on the bristles. Deep cleaning restores brushes. It saves them from being thrown away. I have brought many stiff brushes back to life this way.
Deep cleaning is necessary when gel cures on your brush. This might happen if you forget to clean it immediately. Or, perhaps a tiny bit of gel cured near the ferrule. This hardened gel makes the brush stiff and unusable. Regular cleaning cannot always fix this. A deeper approach is needed.
To deep clean, you will still use isopropyl alcohol or a specialized cleaner. Pour enough solution into a dappen dish to submerge the hardened bristles. Gently press and flex the brush into the solution. Do not force it. You want the alcohol or cleaner to penetrate the hardened gel. You can let the brush sit in the solution for a few minutes. Monitor it closely. Do not leave it for hours, as this can damage the brush.
After a few minutes, gently work the bristles. Use your fingers to loosen the hardened gel. You can also carefully rub the brush against a textured silicone mat. This helps break up the gel. Be very gentle. Do not pull or tug on the bristles. This can cause shedding. Continue working the brush until the gel softens and releases. You might need to refresh the cleaning solution if it becomes cloudy.
Once the gel is mostly gone, thoroughly rinse the brush. Use fresh alcohol or cleaner for a final cleanse. Wipe the brush on a lint-free wipe. Reshape the bristles carefully. Lay the brush flat to dry. Deep cleaning can rescue many brushes. It prolongs their life significantly. It is a valuable skill for any nail enthusiast. For more general brush care methods, explore guides like how to clean makeup sponges and brushes.
Maintaining and Storing Your Gel Nail Brushes
Cleaning is only half the battle. Proper maintenance and storage keep your gel nail brushes in prime condition. This prevents future damage. It ensures your brushes are always ready for your next design. I follow these steps to protect my investment in quality brushes.
After cleaning, always reshape your brush bristles. Use your fingers to gently guide them back into their original shape. This is especially important for detail brushes or flat brushes. Reshaping prevents bristles from splaying. Splayed bristles make precise application difficult. This simple step preserves the brush’s integrity. It ensures its performance.
Proper storage is also crucial. Exposure to UV light will cure any residual gel on your brush. This includes natural sunlight. Always store your brushes away from direct light. Keep them in a dark place. A brush roll, a brush holder with a lid, or a drawer works well. This protects them from accidental curing. It also keeps them clean and dust-free.
Many gel nail brushes come with caps. These caps protect the bristles from dust and damage. They also shield the bristles from light exposure. Always place the cap back on your brush after use and cleaning. Make sure the bristles are completely dry before capping. Capping a wet brush can trap moisture. This could lead to mold or damage.
Store brushes either flat or upright with the bristles pointing up. Storing them bristles-down can bend or deform them. This is especially true if they are not completely dry. A brush stand or a flat brush case is ideal. This ensures bristles remain straight and ready for use. Proper storage extends the life of your brushes. It keeps them looking new. It also saves you money in the long run. Good maintenance habits are key to beautiful nail art.
Common Mistakes to Avoid When Cleaning Gel Nail Brushes
Even with the best intentions, people make mistakes when cleaning gel nail brushes. These mistakes can severely damage your tools. Avoiding them saves you money and frustration. I have learned these lessons over time. Knowing what not to do is as important as knowing what to do.
One major mistake is using acetone. Acetone is great for removing nail polish. It is terrible for gel nail brushes. Acetone is too harsh for the synthetic bristles of gel brushes. It will dissolve the bristles. It can also melt the plastic handle or ruin the glue in the ferrule. This renders your brush useless. Always stick to isopropyl alcohol or specialized gel cleaner. Never let acetone touch your gel brushes.
Another mistake is over-soaking brushes. While a short dip is fine, leaving brushes submerged for long periods is harmful. Soaking can loosen the glue holding the bristles in the ferrule. This leads to bristles falling out. It also swells wooden handles. Always limit the time your brush spends in any cleaning solution. A quick swirl is usually enough.
Harsh scrubbing or pulling on bristles is also damaging. Gel brushes are delicate. Aggressive cleaning can fray the bristles. It can also pull them out. Always use gentle motions. Let the cleaning solution do the work. A soft wipe or a gentle swirl is all that is needed. Treat your brushes with care. They are your precise tools.
Improper drying is another common error. Drying brushes bristles-up allows cleaning solution to seep into the ferrule. This can degrade the glue. Always dry your gel nail brushes flat on a clean surface. This ensures any remaining liquid drips away from the ferrule. This simple step prevents significant damage. Avoid direct sunlight or UV lamps for drying. These can cure any tiny gel residue on the bristles. They will make your brush stiff. Avoid these common pitfalls to keep your gel nail brushes in excellent condition.
When to Replace Your Gel Nail Brushes
Even with the best care, gel nail brushes do not last forever. Knowing when to replace them saves you from frustrating applications. It also helps you maintain the quality of your nail art. I watch my brushes carefully for these signs.
The most obvious sign is splayed or frayed bristles. If the bristles no longer form a sharp point or flat edge, it is time. Splaying happens when bristles permanently separate. Fraying means the tips are damaged. These issues make precise application impossible. You cannot create crisp lines or smooth coats with a splayed brush. Trying to fix them often fails.
Another sign is hardened or clumpy bristles that will not soften. Sometimes, despite deep cleaning, a brush remains stiff. This happens if gel cures too deeply within the bristles. Or, if the brush experienced severe damage. If the bristles feel like a solid block, you cannot use it for fine work. This indicates irreparable damage. It is a clear sign to retire the brush.
The ferrule becoming loose is another issue. The ferrule is the metal band that holds the bristles to the handle. If it wiggles or detaches, the brush is compromised. This can lead to bristles falling out during use. It also indicates a structural failure. A loose ferrule means the brush is no longer reliable.
Finally, consider the overall performance. If your brush simply does not perform as it used to, it might be worn out. It might not pick up gel correctly. Or it might leave uneven streaks. A high-quality brush is essential for good gel application. If your brush is hindering your work, it is time for a new one. Replacing worn-out brushes ensures your nail art remains top-notch.
FAQ Section
Q1: Can I use acetone to clean gel nail brushes?
No, never use acetone to clean gel nail brushes. Acetone is too harsh. It can melt the synthetic bristles of gel brushes. It also dissolves the glue in the ferrule. This will permanently damage your brush. Always use isopropyl alcohol or a specialized gel brush cleaner instead. These are safe and effective.
Q2: How often should I clean my gel nail brushes?
You should clean your gel nail brushes after every single use. Even a small amount of gel left on the bristles can cure and harden. This makes future cleaning much harder. Regular, immediate cleaning prevents gel buildup. It keeps your brushes soft and ready for the next application.
Q3: What’s the best cleaner for gel nail brushes?
The best cleaners for gel nail brushes are 99% isopropyl alcohol or dedicated gel brush cleaning solutions. Isopropyl alcohol effectively dissolves gel. Specialized cleaners are often formulated to also condition the bristles. Both options work well. Choose based on your preference and brush type.
Q4: Can I use water to clean gel nail brushes?
No, water alone is not effective for cleaning gel nail brushes. Gel is not water-soluble. Water will not dissolve the gel. You may use water with a mild soap for a very gentle clean if needed, but it should not be your primary method. Always follow with isopropyl alcohol or a dedicated cleaner.
Q5: How do I store my gel nail brushes after cleaning?
After cleaning and ensuring they are completely dry, store your gel nail brushes flat or upright with the bristles pointing up. Use a brush cap if available. Keep them away from direct sunlight or any UV light source. This prevents accidental curing of residual gel and protects the bristles from dust and damage.
Conclusion
Mastering how to clean gel nail brushes is a skill every nail enthusiast needs. This practice keeps your tools performing beautifully. It ensures your nail art always looks its best. We covered why cleaning is so important for hygiene and brush longevity. We discussed gathering the right supplies like lint-free wipes and isopropyl alcohol. We also walked through effective cleaning methods, including dry wiping and using specialized cleaners.
Remember the key takeaways. Always clean your brushes immediately after use. Use the right cleaning solutions and avoid damaging substances like acetone. Proper drying and storage are also crucial steps for maintaining your brush’s integrity. By avoiding common mistakes, you can significantly extend the life of your valuable tools.
By applying these simple yet powerful techniques, you ensure your gel nail brushes remain pristine. Clean brushes lead to flawless applications. They save you money on replacements. Take care of your tools, and they will take care of your nail art. Start incorporating these cleaning habits today. Elevate your nail game with perfectly maintained gel nail brushes.
- gel nail brush cleaning
- nail tool maintenance
- nail brush care