· Automotive · 15 min read
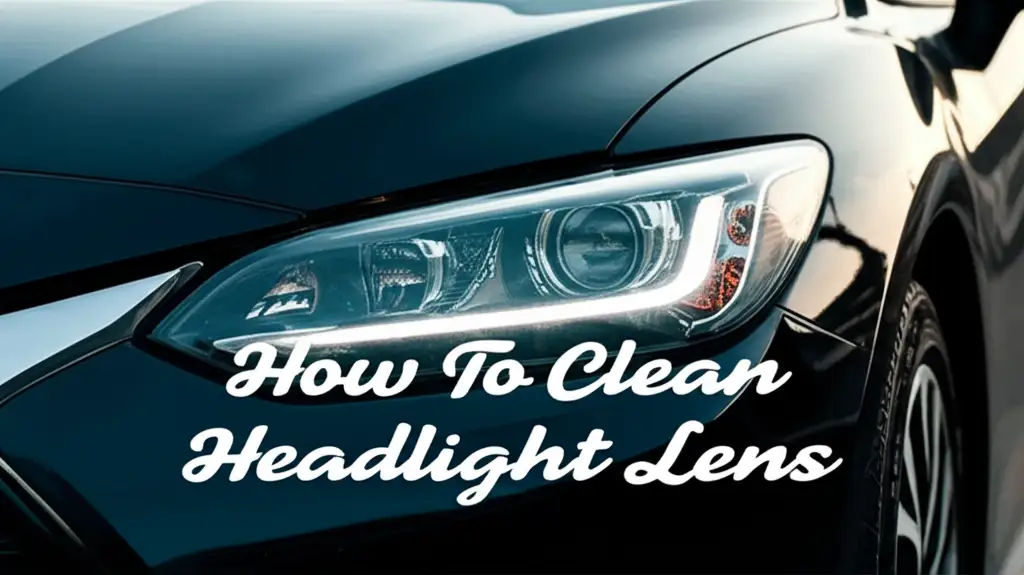
How To Clean Headlight Lens

Restore Clarity: How To Clean Headlight Lens Effectively
Imagine driving at night, and your headlights just don’t seem to cut through the darkness like they used to. This common problem often comes from hazy, yellowed headlight lenses. Over time, these lenses collect grime and suffer from sun damage. A clear headlight lens is crucial for safe driving. It helps you see the road ahead and allows other drivers to see you.
Cleaning your headlight lenses is not just about making your car look better. It also significantly improves your visibility, especially during evening hours or bad weather. This article gives you a complete guide. We explain why headlights get cloudy and what tools you need. You will learn simple DIY methods and more advanced restoration steps. My goal is to help you restore your headlights to their former clarity.
Takeaway
- Hazy headlights reduce visibility and safety.
- Oxidation and UV damage are primary causes of haziness.
- Many DIY methods can improve headlight clarity.
- Headlight restoration kits offer deeper cleaning and protection.
- Regular maintenance prevents future yellowing.
Clear headlights are vital for road safety. You can clean headlight lens surfaces using common household items like toothpaste or baking soda for light haziness. For severe yellowing, a dedicated headlight restoration kit involving sanding and polishing is often necessary to restore full clarity and apply a protective sealant.
Understanding Why Headlights Get Hazy
Have you ever noticed your car’s headlights turning yellow or foggy? This happens for a few key reasons. The material of most modern headlight lenses is polycarbonate plastic. This plastic is durable, but it’s also prone to environmental damage.
Understanding the root causes helps in effective cleaning. It is not just dirt sitting on the surface. Deeper issues are at play, affecting the lens clarity over time. Knowing these causes helps you choose the right cleaning method. It also helps you protect your headlights after cleaning.
UV Damage and Oxidation
The sun’s ultraviolet (UV) rays are a major culprit. These rays break down the protective clear coating on your headlight lenses. This process is called oxidation. It causes the plastic to become yellow and cloudy. You might notice small cracks or a dull finish developing.
Oxidation makes the lens less transparent. This reduces the amount of light that passes through. The light scatters, creating a glare rather than a focused beam. This significantly lowers your visibility on the road.
Road Grime and Environmental Factors
Beyond UV light, other factors contribute to headlight haziness. Road grime, dirt, dust, and chemicals from the environment stick to the lens. Bug splatter and bird droppings also play a role. These substances can etch into the plastic if not cleaned promptly.
Over time, this buildup creates a layer that further dims your headlights. Car washes might remove surface dirt, but they often cannot reverse the oxidation or deeply embedded grime. This combined attack from UV rays and road debris makes your headlights look old and perform poorly.
Essential Supplies for Headlight Lens Cleaning
Before you start cleaning your headlights, gather the right tools. Having everything ready makes the process smoother. You do not want to stop midway to find a forgotten item. The supplies needed depend on the method you choose.
Some methods use common household items. Others require specialized products from an automotive store. Choose your supplies based on the severity of your headlight’s haziness. Always prioritize safety and protect your car’s paint.
Here is a general list of supplies you might need:
- Microfiber cloths: Use several clean ones.
- Painter’s tape: Essential for protecting your car’s paint.
- Water: For rinsing and mixing solutions.
- Spray bottle: Useful for applying water or cleaning solutions.
- Bucket: For washing and rinsing.
- Gloves: To protect your hands from chemicals.
For DIY methods, you might add:
- Non-gel toothpaste: White paste works best.
- Baking soda: A common household abrasive.
- White vinegar: An acid that helps clean.
- Car soap: For initial washing.
For advanced restoration kits:
- Headlight restoration kit: These kits contain sandpaper, polishing compound, and sealant.
- Electric drill (optional): Some kits come with attachments for drills to make polishing easier.
- Rubbing alcohol: For a final wipe-down.
- UV sealant: To protect the restored lens.
Step-by-Step Guide: Cleaning Headlight Lenses with DIY Methods
Many people wonder if they can fix hazy headlights without buying special kits. The good news is, yes, you often can! Simple household items can work wonders for mild to moderate yellowing. These methods are cost-effective and easy to try. I have seen great results with these approaches on many occasions.
Before starting any method, always wash your headlights thoroughly with car soap and water. This removes surface dirt. Then, dry them completely. Apply painter’s tape around the headlight lens. This protects the surrounding paint from any cleaning agents or abrasion. This small step saves you from accidental damage.
Toothpaste Method
The toothpaste method is a popular and surprising solution. The mild abrasives in toothpaste can gently buff away the oxidized layer on the plastic. It is similar to how it cleans your teeth. This method works well for light haziness.
- Apply Toothpaste: Squeeze a generous amount of non-gel, white toothpaste onto a clean microfiber cloth.
- Rub the Lens: Vigorously rub the toothpaste onto the entire headlight lens. Use small, circular motions. Apply firm, consistent pressure. Continue rubbing for 5-10 minutes. The toothpaste will start to look murky as it lifts the oxidation.
- Rinse and Dry: Rinse the headlight thoroughly with clean water. Use a wet microfiber cloth to remove all toothpaste residue. Dry the lens completely with a clean, dry microfiber cloth. You should see a noticeable improvement in clarity.
Baking Soda and Vinegar Solution
This combination creates a gentle abrasive and acidic cleaner. It works by reacting to create a scrubbing action. Vinegar also helps break down grime and oxidation. This method is effective for moderate yellowing.
- Create Paste: In a small bowl, mix two parts baking soda with one part white vinegar to form a paste. The mixture will fizz. This is normal.
- Apply and Scrub: Apply the paste generously onto the headlight lens using a clean cloth. Let it sit for a few minutes. Then, gently scrub the lens using circular motions. Focus on the cloudiest areas.
- Rinse Thoroughly: Rinse the headlight with plenty of clean water. Ensure all the paste is gone. Dry the lens completely with a clean microfiber cloth. Inspect your work. Repeat if needed for better results.
Bug Spray (DEET) Caution
You might have heard about using bug spray with DEET to clean headlights. While it can remove haziness quickly, I strongly advise against it. DEET is a powerful solvent. It can dissolve the plastic of your headlight lens. This leads to permanent damage, cracking, or even a worse haze.
It might offer a temporary fix, but the long-term consequences are severe. Stick to safer, proven methods like toothpaste or restoration kits. Protecting your car’s components is always important. Consider how you might clean other delicate items, like how you would clean a projector lens – gently and with appropriate solutions.
Advanced Headlight Restoration Kits: When to Upgrade
Sometimes, DIY methods just are not enough. If your headlights are severely yellowed, deeply oxidized, or have a gritty texture, you need a more robust solution. This is where dedicated headlight restoration kits come in. These kits contain specialized abrasives and compounds. They are designed to strip away severe damage and leave a protective layer. I find these kits to be very effective for serious cases.
Think of it like major surgery for your headlights. They use a multi-step process that often involves sanding, polishing, and sealing. While more involved, the results are typically professional-grade. This investment significantly improves your night driving safety. It also makes your car look much newer. For stubborn haziness, these kits are the best way to clean headlight lens surfaces effectively.
Headlight restoration kits are different from simple cleaners. They often include:
- Various grits of sandpaper: Starting from coarse (like 800 or 1000 grit) and moving to fine (like 2000 or 3000 grit). This graduated sanding removes layers of damage.
- Polishing compound: This compound restores clarity after sanding. It buffs out the fine scratches.
- Protective sealant/clear coat: This final step protects the newly clear lens from future UV damage and oxidation. It is crucial for long-lasting results.
When you use one of these kits, you are not just cleaning; you are resurfacing the plastic. This process is very similar to how you would restore the clarity of other plastic surfaces, such as plastic headlight covers that might be sold separately or found on other vehicles. The principle of removing damaged layers and applying protection remains consistent across clear plastic components.
The Detailing Process: Achieving Crystal Clear Headlights
Getting truly crystal-clear headlights requires a systematic approach. This detailing process ensures you remove all oxidation and leave a smooth, protected surface. It involves careful preparation and precise execution. This part might seem complex, but following the steps ensures the best outcome. I always follow these steps for a perfect finish.
Taping and Protecting Surrounding Areas
This step is critical before you start any sanding or heavy scrubbing. Painter’s tape or masking tape is your best friend here. Wrap the tape meticulously around the entire perimeter of the headlight lens. Ensure no paint is exposed next to the lens. This protects your car’s finish from accidental scratches or damage from the sanding discs or polishing compounds. This prevents paint marring during the restoration.
Wet Sanding Techniques
Wet sanding is the core of headlight restoration for severe cases. You will typically start with a lower grit sandpaper (e.g., 800 or 1000 grit). Keep the sandpaper and the lens constantly wet during this process. This prevents heat buildup and helps flush away removed material. Sand in uniform, overlapping strokes, either horizontally or vertically. Do not press too hard.
After completing one grit, switch to the next finer grit (e.g., 1500, then 2000, then 3000). Repeat the wet sanding process. Each finer grit removes the scratches from the previous, coarser grit. The lens will look progressively hazier as you sand. This is normal. It means you are removing the damaged outer layer. By the time you reach the finest grit, the lens should have a uniformly hazy, smooth appearance.
Polishing for Shine
Once wet sanding is complete, the lens needs polishing. This step removes the fine sanding marks and brings back the clarity. Apply a small amount of polishing compound onto a foam applicator pad or a microfiber cloth. Work the compound into the lens using firm, circular motions. If you have a drill with a polishing pad attachment, this step is much faster.
Continue polishing until the haziness disappears and the lens becomes clear. You might need to apply more compound and repeat the process a few times. Buff off any residue with a clean microfiber cloth. The lens should now appear transparent. This polishing stage is similar to cleaning any delicate lens, like a Ring camera lens, where clarity is paramount.
Applying a UV Protective Sealant
This final step is the most important for longevity. The newly cleared plastic is now vulnerable to future UV damage. A UV protective sealant or clear coat creates a barrier. Apply the sealant evenly according to the product’s instructions. Some sealants are wipes, others are sprays.
Allow the sealant to cure fully. This usually takes several hours, or even a full day. This protective layer prevents the oxidation from returning quickly. Without this sealant, your headlights will likely yellow again within months. This step ensures your hard work lasts.
Maintaining Headlight Clarity After Cleaning
You have invested time and effort into restoring your headlight lenses. Now, you want those crystal-clear results to last. Proper maintenance is key to preventing future yellowing and haziness. It is easier to keep them clean than to restore them again. I always tell people that prevention is the best approach.
Regular cleaning and protection will extend the life of your clear headlights. This saves you money and keeps your car looking great. Think of it as caring for any other exposed part of your car.
Here are simple steps to maintain headlight clarity:
- Regular Washing: Include your headlights in your regular car wash routine. Use a gentle car soap and a soft sponge or mitt. This removes surface dirt and grime before it can embed.
- Apply UV Protectant: Even after using a restoration kit with a sealant, applying an additional UV protectant periodically is beneficial. Products like car wax designed for clear coats or specific plastic protectants can add an extra layer of defense against the sun’s rays. Apply every few months or as recommended by the product.
- Park in Shade: Whenever possible, park your car in a garage or shaded area. Direct and prolonged exposure to sunlight accelerates UV damage. This simple habit can make a big difference.
- Avoid Harsh Chemicals: Do not use abrasive cleaners, strong degreasers, or ammonia-based window cleaners on your headlight lenses. These can strip the protective coating or damage the plastic. Stick to car-specific cleaning products or mild soap and water.
- Address Issues Promptly: If you notice any slight haziness returning, address it immediately. A quick clean with a mild polish or even toothpaste can prevent it from worsening. Catching it early saves you from needing a full restoration again.
Common Mistakes to Avoid When Cleaning Headlights
While cleaning your headlight lenses can seem straightforward, it is easy to make mistakes that can hinder your results or even damage your car. I have seen many people unknowingly worsen their headlights. Knowing what to avoid is as important as knowing what to do. These pitfalls can lead to wasted effort or costly repairs.
Steering clear of these common errors ensures a safer and more effective cleaning process. Your goal is to restore clarity, not introduce new problems. Pay attention to these warnings.
Here are common mistakes to avoid:
- Not Taping Off Surrounding Areas: This is perhaps the most frequent mistake. Without painter’s tape, you risk scratching your car’s paint with sandpaper or harsh chemicals. Polishing compounds can also etch into clear coat. Always protect the paint first.
- Using Aggressive Abrasives Too Soon: Jumping straight to very coarse sandpaper (like 400 grit) for minor haziness is overkill. This can create deep scratches that are hard to remove. Start with the least abrasive method. Only escalate if necessary.
- Dry Sanding: Never sand your headlight lenses dry. Wet sanding is crucial. Water acts as a lubricant, reduces friction, prevents heat buildup, and flushes away debris. Dry sanding causes deep, irreversible scratches and can melt the plastic.
- Not Rinsing Thoroughly: Leaving cleaning solution, toothpaste, or sanding residue on the lens can cause further damage or incomplete results. Rinse liberally between steps and at the end. Any leftover abrasive will continue to scratch.
- Skipping the UV Protectant: After restoring the clarity, if you do not apply a UV sealant, your headlights will re-haze quickly. The exposed plastic is very vulnerable. This step is essential for long-lasting results.
- Using Household Cleaners Not Designed for Plastics: Glass cleaner with ammonia, strong degreasers, or abrasive kitchen cleaners can damage the polycarbonate lens. Stick to products specifically for automotive plastics or the methods discussed.
- Rushing the Process: Headlight restoration takes time and patience. Rushing through sanding or polishing steps can lead to uneven results or missed spots. Take your time with each grit and ensure full coverage.
FAQ Section
Q1: How often should I clean my headlight lenses?
You should clean your headlight lenses as needed. If you notice a slight yellowing or haziness, address it right away. For preventative measures, apply a UV protectant every few months. Parking your car in the shade also helps reduce the frequency of deep cleaning.
Q2: Can toothpaste really clean foggy headlights?
Yes, toothpaste can clean foggy headlights, especially for light to moderate haziness. The mild abrasive in white, non-gel toothpaste gently buffs away the oxidized layer. It is a cost-effective DIY method. Always use non-gel toothpaste and rub vigorously for best results.
Q3: What is the best way to prevent headlights from re-yellowing?
The best way to prevent re-yellowing is to apply a high-quality UV protective sealant after cleaning. This forms a barrier against the sun’s harmful rays. Reapply this sealant every few months. Parking in the shade and regular gentle washing also significantly help maintain clarity.
Q4: Are headlight restoration kits worth the money?
Yes, headlight restoration kits are definitely worth the money for severely oxidized headlights. They contain specialized products like various sandpaper grits, polishing compounds, and durable UV sealants. These kits provide a comprehensive solution that DIY household methods cannot match for deep damage.
Q5: Can I use car wax as a headlight sealant?
You can use car wax as a temporary sealant, but it is not as effective as a dedicated UV clear coat or sealant from a restoration kit. Car wax offers some protection but typically wears off faster. For long-lasting results, choose a product specifically designed to protect headlight plastics from UV damage.
Q6: How long does a headlight restoration last?
The longevity of a headlight restoration depends on the quality of the sealant used and environmental factors. A good quality UV sealant can last 1-3 years. Regular maintenance, such as parking in the shade and periodic reapplication of UV protectant, can extend this duration even further.
Conclusion
Clear headlights are essential for safe driving and contribute significantly to your car’s appearance. Hazy, yellowed lenses reduce visibility, making night driving dangerous. My aim was to show you that restoring clarity is achievable. You now know how to clean headlight lens surfaces using both simple household items and advanced restoration kits. Whether you choose the quick toothpaste method or a comprehensive kit, the goal is always better visibility.
Remember, prevention is key to maintaining those crystal-clear headlights. Regular cleaning, proper UV protection, and smart parking habits will keep your lenses bright for years. Do not wait until your headlights are dangerously dim. Take action today. Restore your headlight lenses, improve your safety, and make your car shine on the road. Drive safely with clear vision!
- headlight cleaning
- car maintenance
- auto detailing
- headlight restoration
- yellow headlights


