· Gadget Care · 20 min read
How To Clean Headphone Jack
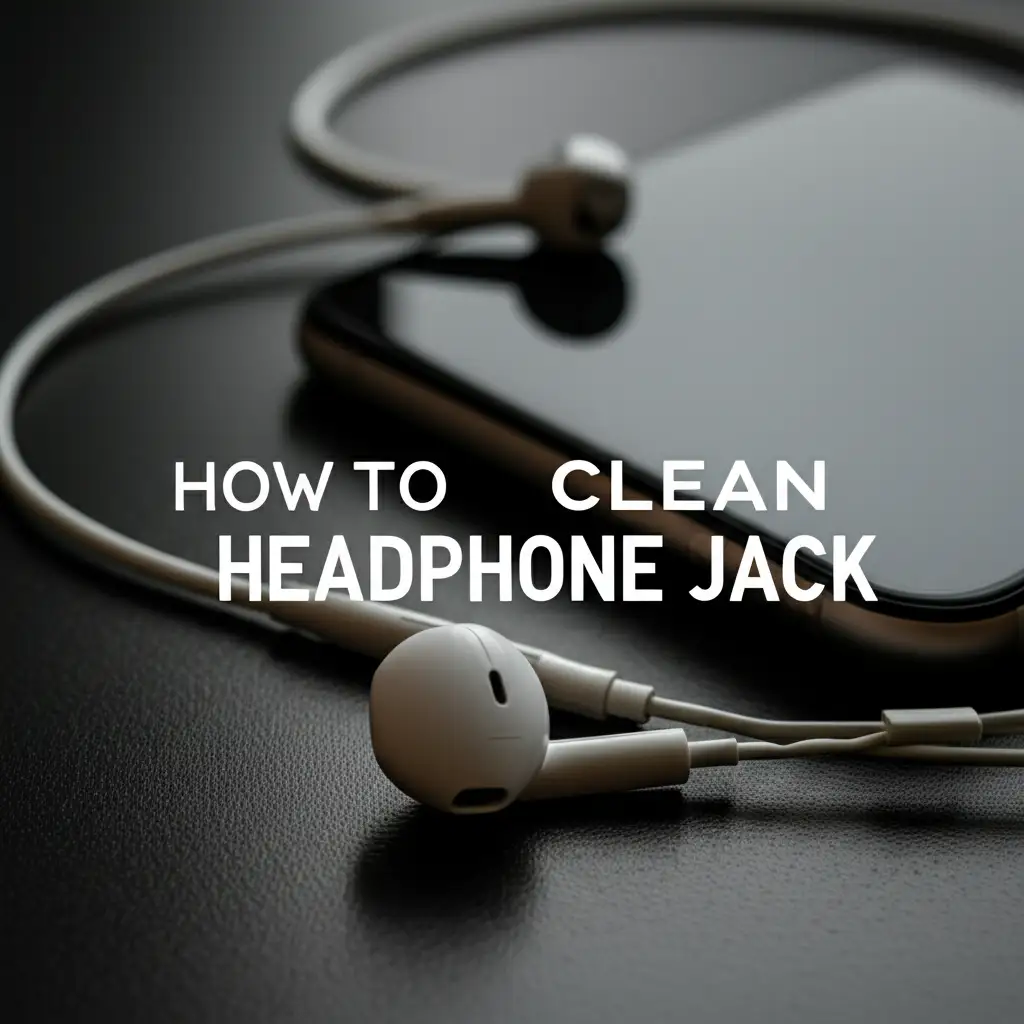
Restore Your Audio: How to Clean a Headphone Jack Effectively
Have you ever plugged in your headphones, only to hear static, muffled sound, or nothing at all? A dirty headphone jack is often the silent culprit behind these frustrating audio problems. Lint, dust, and grime can easily accumulate inside this small port. I find it surprising how much debris can gather in such a tiny space over time. Knowing how to clean a headphone jack properly can save you from buying new headphones or an expensive repair.
This guide will walk you through the entire process. We cover why jacks get dirty, what tools you need, and a step-by-step cleaning method. We also share important safety tips and offer alternative cleaning solutions. You will learn to restore crystal-clear sound to your favorite devices.
Takeaway:
- A dirty headphone jack often causes sound issues.
- Gentle cleaning with simple tools can restore function.
- Always power off your device before cleaning.
- Preventative measures help maintain a clean jack.
To clean a headphone jack, first power off your device. Use a non-conductive tool like a dry cotton swab or toothpick to gently remove visible debris. For deeper cleaning, apply a tiny amount of isopropyl alcohol to the swab and carefully clean the inside of the port. Allow it to dry completely before retesting.
Why Your Headphone Jack Needs Cleaning
Your headphone jack is a small opening on your device. It connects your headphones or earbuds for sound. Over time, this tiny port acts like a magnet for all sorts of debris. Lint from pockets, dust from the environment, and even tiny food particles can find their way inside. This buildup creates a barrier between the headphone plug and the jack’s internal contacts. When this happens, your audio connection becomes weak or stops working completely.
Ignoring a dirty headphone jack can lead to persistent sound problems. You might hear crackling noises or experience intermittent audio. Sometimes, one earbud stops working, or you get no sound at all. Keeping the port clean ensures a reliable and clear audio experience. It also extends the life of your device’s audio components.
Common Symptoms of a Dirty Jack
Recognizing the signs of a dirty headphone jack helps you address the problem early. I have encountered these issues many times myself. It saves you from unnecessary troubleshooting or repairs.
Here are the most common indicators:
- Intermittent Audio: Sound cuts in and out without warning. The connection feels unstable.
- Static or Crackling: You hear fuzzy or crackling noises when headphones are plugged in. This often points to a poor connection.
- Muffled Sound: The audio quality sounds dull or distorted. It lacks clarity.
- No Sound at All: This is the most frustrating symptom. Your device shows headphones are connected, but no sound plays.
- One Side Not Working: Only sound from the left or right earbud comes through. The other side is silent.
- Headphones Not Detected: Your device does not recognize that headphones are plugged in. This prevents audio from routing correctly.
These symptoms do not always mean your headphones are broken. Often, a simple cleaning of the jack resolves the problem.
Sources of Debris
Understanding where the dirt comes from helps in prevention. Our daily habits and environments contribute significantly to jack contamination. I often find lint to be the biggest culprit.
Here are typical sources:
- Pocket Lint: This is the primary offender. Phones and music players ride in pockets filled with fabric fibers. These tiny fibers easily slip into open ports.
- Dust and Dirt: Your device collects environmental dust. Any open port will accumulate airborne particles. Workspaces and outdoor environments are particularly dusty.
- Food Crumbs: Eating near your device can introduce tiny food particles. These crumbs can easily fall into the jack.
- Sweat and Moisture: While less common for solid debris, moisture can attract and bind dust. It can also cause corrosion over time.
- Pet Hair: If you have pets, their hair can find its way into every nook and cranny of your electronics. The headphone jack is no exception.
Regularly inspecting your headphone jack for these common culprits is a good practice. A quick check can prevent major audio headaches down the line. It ensures your device remains ready for clear sound anytime.
Essential Tools for a Safe Headphone Jack Cleaning
Before you start cleaning, gather the right tools. Using the correct items ensures safety for your device and effectiveness in cleaning. I always make sure I have everything ready before I begin. This prevents damaging the delicate internal components of the jack. You probably have most of these items around your home already.
Choosing the right materials is half the battle. They need to be small enough to fit inside the port. They also need to be non-abrasive and non-conductive. This protects the sensitive metal contacts inside the jack.
Recommended Cleaning Tools
Here are the tools I recommend for cleaning a headphone jack:
- Cotton Swabs (Q-Tips): Choose the smallest ones you can find. Sometimes, regular cotton swabs are too large. You can gently compress the tip to make it fit.
- Isopropyl Alcohol (90% or higher): This type of alcohol evaporates quickly. It leaves no residue behind. It is safe for electronics when used sparingly. Do not use rubbing alcohol with lower concentrations or other liquids.
- Toothpicks: Wooden or plastic toothpicks are excellent for dislodging packed-in debris. They are non-conductive and gentle enough not to scratch metal.
- Compressed Air Can: A can of compressed air is great for blowing out loose dust and lint. Use short, controlled bursts. Always hold the can upright to prevent propellant discharge.
- LED Flashlight: A small flashlight helps you see inside the dark port. This allows for precise cleaning. A phone flashlight works perfectly.
- Magnifying Glass (Optional): A magnifying glass gives you an even closer look. This helps identify stubborn debris. It aids in very precise cleaning.
Having these tools ready makes the cleaning process simple and safe. Each tool serves a specific purpose in removing different types of contaminants.
Tools to Avoid
Just as important as knowing what to use is knowing what not to use. Some items can cause irreversible damage to your device. I have seen people try to use metal objects, and it rarely ends well.
Avoid these tools:
- Metal Objects (Paperclips, Needles, Keys): These are a big no-no. Metal objects can easily scratch the internal contacts of the jack. This can lead to short circuits or permanent damage. They conduct electricity, which is dangerous for electronics.
- Water or Other Liquids: Water can cause corrosion and electrical shorts. Other household cleaners can leave sticky residues or damage internal components. Stick to isopropyl alcohol for any liquid cleaning.
- Harsh Abrasives: Anything that can scratch or wear down the metal contacts must be avoided. This includes rough cloths or strong brushes.
- Excessive Force: Never force a tool into the jack. It could bend or break internal components. Be gentle and patient throughout the process.
- Cotton Swabs with Too Much Cotton: Large or overly fluffy cotton swabs can shed fibers inside the jack. This adds to the problem instead of solving it. Trim or compress them if needed.
Using only the recommended tools ensures a safe and effective cleaning. Protecting your device from damage is paramount during this process. A little caution goes a long way.
Step-by-Step Guide: How to Clean Headphone Jack with Cotton Swabs and Isopropyl Alcohol
Cleaning your headphone jack requires patience and a gentle touch. This method uses common household items. It is effective for most types of debris. I always start with the least intrusive methods first. This minimizes any risk to your device.
Follow these steps carefully to achieve the best results.
Preparing for Cleaning
Preparation is crucial for a safe and successful cleaning. Skipping these steps can lead to device damage. I always ensure my workspace is well-lit and clear.
- Power Off Your Device: This is the most critical step. Turn off your smartphone, tablet, laptop, or MP3 player completely. Do not just put it to sleep. This prevents accidental short circuits or damage to the internal electronics. Safety is always first when working with electronics.
- Unplug All Cables: Disconnect any charging cables, USB cords, or other accessories. You want the device to be completely isolated. This reduces any risk of electrical accidents.
- Gather Your Tools: Have your small cotton swabs, isopropyl alcohol, toothpick, and flashlight ready. Place them on a clean, well-lit surface. This makes the cleaning process smooth and efficient.
- Find a Well-Lit Area: Good lighting helps you see inside the dark headphone jack. Use a desk lamp or the flashlight to illuminate the port. This allows you to spot all the hidden lint and grime.
These preparation steps set the stage for a safe and effective cleaning operation. Take your time to ensure everything is ready.
The Cleaning Process
Now comes the actual cleaning. Work slowly and methodically. Your goal is to remove debris without damaging the delicate contacts inside the jack.
- Inspect the Jack: Use your flashlight to look inside the headphone jack. Identify any visible lint, dust, or other foreign objects. Note where the heaviest buildup is located. This initial assessment guides your cleaning strategy.
- Use Compressed Air (Optional, for loose debris): If you have a can of compressed air, give a few short bursts into the jack. Hold the can upright and about an inch away from the port. This helps dislodge any loose dust or lint. Avoid tilting the can too much, as it can spray liquid propellant.
- Gentle Debris Removal with a Toothpick: For packed-in lint or larger debris, use a wooden or plastic toothpick. Carefully insert the toothpick into the jack. Gently scrape the inside edges of the port. Try to hook the debris and pull it out. Work slowly in a circular motion, but avoid pushing the debris further in. I find that pulling debris out is more effective than pushing it around. Be extremely careful not to scratch the metal contacts at the bottom or sides. Think of it like cleaning under a refrigerator where you’re gently pulling out dust bunnies.
- Clean with Isopropyl Alcohol and Cotton Swab:
- Dampen the Swab: Dip the tip of a small cotton swab into isopropyl alcohol.
- Remove Excess: Dab the swab on a paper towel to remove any excess liquid. The swab should be barely damp, not dripping. Too much alcohol can cause damage.
- Insert and Twist: Gently insert the damp cotton swab into the headphone jack. Slowly twist the swab a few times. This helps the alcohol break down grime and the cotton to pick up dirt. Do not force the swab if it does not fit easily. You might need to compress the cotton tip further.
- Repeat if Necessary: Use a fresh, barely damp swab if the first one comes out very dirty. Repeat until the swab comes out clean.
- Allow to Dry: After cleaning with alcohol, give the jack ample time to air dry. Isopropyl alcohol evaporates quickly, but it is important to wait. I recommend waiting at least 15-30 minutes. Ensure no moisture remains inside the port before powering on your device.
- Re-inspect: Use your flashlight again to visually check the inside of the jack. It should look much cleaner. The metal contacts should be shiny and free of obstruction.
This methodical approach helps ensure a thorough and safe cleaning. Patience is your best tool here.
Alternative Methods for Stubborn Debris
Sometimes, lint or dirt can be particularly stubborn. The cotton swab and alcohol method might not be enough. In these cases, you might need slightly different tools or techniques. Always proceed with caution. I have found these alternatives helpful for those tough spots.
These methods focus on dislodging and removing compacted material. They require a steady hand and keen observation.
Using Compressed Air
Compressed air is excellent for non-contact cleaning. It can blast away loose particles that are hard to reach. I use it as a first step often, especially for dusty environments.
- Preparation: Ensure your device is off and unplugged.
- Technique: Hold the compressed air can upright. Position the nozzle about one inch from the headphone jack.
- Short Bursts: Give several short, controlled bursts of air into the port. Avoid continuous spraying. Continuous spraying can release propellant liquid or cause extreme cooling.
- Angle: Angle the nozzle slightly to help direct debris out. Rotate the device to ensure all angles are covered.
Compressed air is effective for light, loose debris. It is generally safe. It might not remove compacted lint or sticky residue.
Gentle Toothpick Method
For deeply embedded lint, a toothpick can be very effective. It allows for precise removal. I often use this method when I can see a solid chunk of lint. Think of it like how you might carefully remove stubborn gunk when cleaning the bottom of a pan.
- Tool: Use a wooden or plastic toothpick. Avoid metal objects entirely.
- Insertion: Gently insert the very tip of the toothpick into the jack. Angle it towards the outer wall of the jack.
- Scooping Motion: Carefully scrape the toothpick along the inner surface. Try to hook the lint or debris. Slowly drag it towards the opening.
- Rotate and Repeat: Rotate the toothpick and repeat the scooping motion around the entire circumference of the jack. This helps loosen and pull out all hidden debris.
- Caution: Do not force the toothpick. Avoid poking the center contact pin. That pin is very delicate. Use a flashlight to guide your movements.
This method requires a very delicate touch. It is best for visible, compacted obstructions.
Specialized Cleaning Kits
For those who want a dedicated solution, specialized cleaning kits exist. These kits usually include tiny brushes or probes. They are designed specifically for small ports.
- Components: Kits often come with fine brushes, non-static tools, and sometimes cleaning solutions.
- Purpose: These tools are shaped to fit small openings. They can reach areas a regular cotton swab cannot.
- Instructions: Always follow the kit’s instructions carefully. Each kit might have unique tools or solutions.
While these kits can be effective, they are not always necessary. The DIY methods described above work for most cleaning needs. However, for recurring issues or extremely delicate ports, a specialized kit might offer peace of mind.
Cleaning Your Headphone Jack Safely: Important Precautions
Cleaning delicate electronic components like a headphone jack demands careful attention. Ignoring safety precautions can lead to permanent damage to your device. My motto is always: “When in doubt, be gentle.” These guidelines ensure you clean effectively without causing harm.
Safety is not just about protecting your device. It also protects you from potential electrical hazards. Always approach electronic cleaning with a cautious mindset.
Device Safety First
Protecting your device is the number one priority. These steps prevent electrical damage and data loss.
- Power Off Completely: I cannot stress this enough. Always power down your device before starting. This cuts off electricity flow. It eliminates the risk of short circuits if you accidentally touch contacts.
- Unplug All Connections: Disconnect chargers, USB cables, and any other peripherals. This further isolates the device. It ensures no current is flowing through the port.
- Remove Battery (If Possible): For devices with removable batteries, take the battery out. This provides an extra layer of safety. Most modern devices do not allow this.
- Work in a Clean, Dry Area: Choose a stable, dry surface for your work. Avoid humid environments. Water and electronics do not mix well.
- Avoid Static Electricity: Static discharge can harm sensitive electronic components. Work on a non-static surface if possible. Avoid wearing wool sweaters that can build up static.
These foundational steps minimize risks during the cleaning process. They ensure your device remains safe and functional.
Handling Liquids and Tools
Using the right tools and liquids properly is critical. Incorrect use can lead to damage or residue buildup. I am very particular about the amount of alcohol I use.
- Use Isopropyl Alcohol Only: Stick strictly to isopropyl alcohol, 90% concentration or higher. It evaporates quickly and leaves no residue. Never use water, soap, window cleaner, or other household chemicals. These can corrode contacts or leave sticky films.
- Sparingly Apply Alcohol: Dampen the cotton swab, do not soak it. The swab should feel slightly moist, not dripping. Excess liquid can seep into the device’s interior. This causes major damage.
- Never Spray Liquids Directly: Do not spray isopropyl alcohol directly into the jack. Always apply it to your cleaning tool first. Direct spraying introduces too much liquid.
- Use Non-Metallic Tools: As mentioned, metal objects can scratch or short circuit the internal contacts. Always use wooden toothpicks, plastic tools, or cotton swabs. These materials are non-conductive and softer.
- Gentle Pressure Only: Apply minimal pressure. The goal is to remove debris, not to scrape or push aggressively. Too much force can bend or break the delicate contact pins inside the jack.
- Let It Dry Completely: After using alcohol, allow plenty of time for the jack to air dry. Wait at least 15-30 minutes. This ensures all moisture has evaporated. Plugging in headphones or powering on the device too soon can cause a short circuit.
- Check for Leftover Fibers: After using cotton swabs, inspect the jack with a flashlight. Ensure no cotton fibers are left behind. These fibers can become new obstructions.
Following these precautions helps you clean your headphone jack effectively and safely. It ensures the longevity and proper function of your device’s audio port. Think of it like being careful when cleaning the bottom of a shower where you need to reach small crevices carefully.
Testing and Post-Cleaning Care for Your Headphone Jack
After you clean your headphone jack, the next important step is to test it. This confirms the cleaning was successful. Beyond testing, learning how to prevent future buildup saves you from repeating the process too often. I always do a thorough check after any cleaning task.
Proper post-cleaning care ensures lasting results. It helps maintain clear audio for a long time.
Testing the Audio Connection
Verifying the fix is simple but essential. This step confirms your efforts paid off.
- Power On Your Device: After the jack has completely dried, turn your device back on.
- Plug In Headphones: Take your headphones and plug them into the now-clean jack. Ensure the plug goes in smoothly and fully.
- Test Audio: Play some audio. This could be a song, a video, or a simple system sound.
- Check Both Sides: Listen carefully to ensure sound comes through both the left and right earpieces.
- Listen for Clarity: Pay attention to the sound quality. Is it clear? Is there any static or crackling?
- Test Microphone (if applicable): If your headphones have a microphone, test its functionality. Make a quick voice recording or call.
- Wiggle Test: Gently wiggle the headphone plug while audio plays. If the sound cuts in and out, there might still be some residue or a deeper issue. Wiggling can sometimes reveal a loose connection that needs more cleaning, or indicates physical damage.
If the audio is clear and consistent, congratulations! Your cleaning was a success. If problems persist, a second, more thorough cleaning might be needed.
Preventing Future Buildup
Prevention is always better than a cure. A few simple habits can keep your headphone jack clean for longer. I incorporate these practices into my daily routine.
- Use Port Covers: Small, inexpensive dust plugs are available. These fit into the headphone jack when it’s not in use. They effectively prevent lint and dust from entering. This is one of the easiest and most effective preventative measures.
- Store Device Properly: Avoid keeping your device loose in pockets or bags filled with lint. Use a dedicated compartment or a clean case. This reduces exposure to debris.
- Clean Pockets/Bags: Regularly empty and clean out your pockets and bags. Remove any accumulated lint or crumbs. This reduces the source of contamination for your device’s ports.
- Avoid Dusty Environments: If possible, minimize using your device in very dusty or dirty environments. Construction sites or workshops are prime examples.
- Regular Gentle Cleaning: Even if you do not have issues, a quick blast of compressed air every few months can help. This keeps the jack clear of new accumulations. Think of it as a form of maintenance, similar to how one might periodically clean a water filter to prevent future issues.
- Use Wireless Alternatives: Consider using Bluetooth headphones or earbuds. This eliminates the need for the physical headphone jack entirely. It removes the risk of port contamination.
By adopting these habits, you significantly extend the time between cleanings. You also ensure consistent, high-quality audio from your device.
When to Seek Professional Help for Your Audio Port
While cleaning often resolves headphone jack issues, sometimes the problem runs deeper. There are instances where DIY cleaning is not enough, or it is too risky. Knowing when to call in a professional can save your device from further damage. I understand the desire to fix things yourself, but sometimes, expertise is truly needed.
Attempting complex repairs without the right tools or knowledge can worsen the situation. It could even void your device’s warranty.
Recognizing Hardware Damage
Not all audio issues stem from a dirty port. Sometimes, the problem is physical damage. Identifying this helps you decide your next steps.
- Wobbly Jack: If the headphone jack itself feels loose or wobbly when you plug in headphones, it might be physically damaged. This suggests internal connections are broken.
- Bent Pins: Carefully look inside the jack with a flashlight. If you see any bent, broken, or corroded metal pins, it is a sign of hardware damage. These pins are crucial for the electrical connection.
- Visible Cracks: Any visible cracks around the jack’s housing can indicate impact damage. This might affect the internal structure.
- Continuous Issues After Cleaning: If you have thoroughly cleaned the jack multiple times and still experience persistent audio problems, it is likely not just dirt. The issue may be with the internal wiring or the jack component itself.
- Device Not Detecting Headphones: If your device consistently fails to recognize that headphones are plugged in, even after cleaning, it points to a faulty jack. This often suggests a circuit board issue.
These are strong indicators that the problem is beyond simple dust and lint. Professional attention is often required for these types of damages.
Professional Repair Options
When you suspect hardware damage, professional repair is the safest and most reliable option. They have the tools, expertise, and replacement parts.
- Manufacturer Service Centers: For devices still under warranty, contact the manufacturer. They can diagnose and repair the issue, often free of charge or at a reduced cost. This is the ideal option to maintain your warranty.
- Authorized Repair Shops: If your device is out of warranty, look for authorized repair shops. These shops use genuine parts and follow manufacturer guidelines. They often offer guarantees on their work.
- Independent Repair Shops: Many independent electronics repair shops can fix headphone jacks. Ask for their experience with your specific device model. Check reviews and ask for a quote before committing. Be cautious of shops that offer suspiciously low prices or do not provide warranties.
- Data Backup: Before sending your device for repair, always back up your important data. Repairs sometimes require a factory reset. This protects your photos, contacts, and documents.
While professional repairs come with a cost, they ensure your device is handled correctly. They provide peace of mind that the job is done right. It is a worthwhile investment for a valuable electronic device.
FAQ Section
Q1: Can I use rubbing alcohol instead of isopropyl alcohol?
No, do not use rubbing alcohol. Rubbing alcohol usually contains lower concentrations of alcohol (70% or less). It also has other ingredients like water or additives. These can leave residue inside the jack. They can also cause corrosion. Always use isopropyl alcohol with a concentration of 90% or higher. It evaporates quickly and completely.
Q2: What if my headphones still don’t work after cleaning the jack?
If your headphones still do not work, first test them with another device. This confirms if the headphones are the problem. If they work elsewhere, the issue might be internal damage to your device’s jack. It could also be a problem with your device’s audio chip. Seek professional repair in these cases.
- headphone jack cleaning
- audio port cleaning
- fix headphone jack
- dirty headphone jack
- sound issues