· Home Cleaning · 20 min read
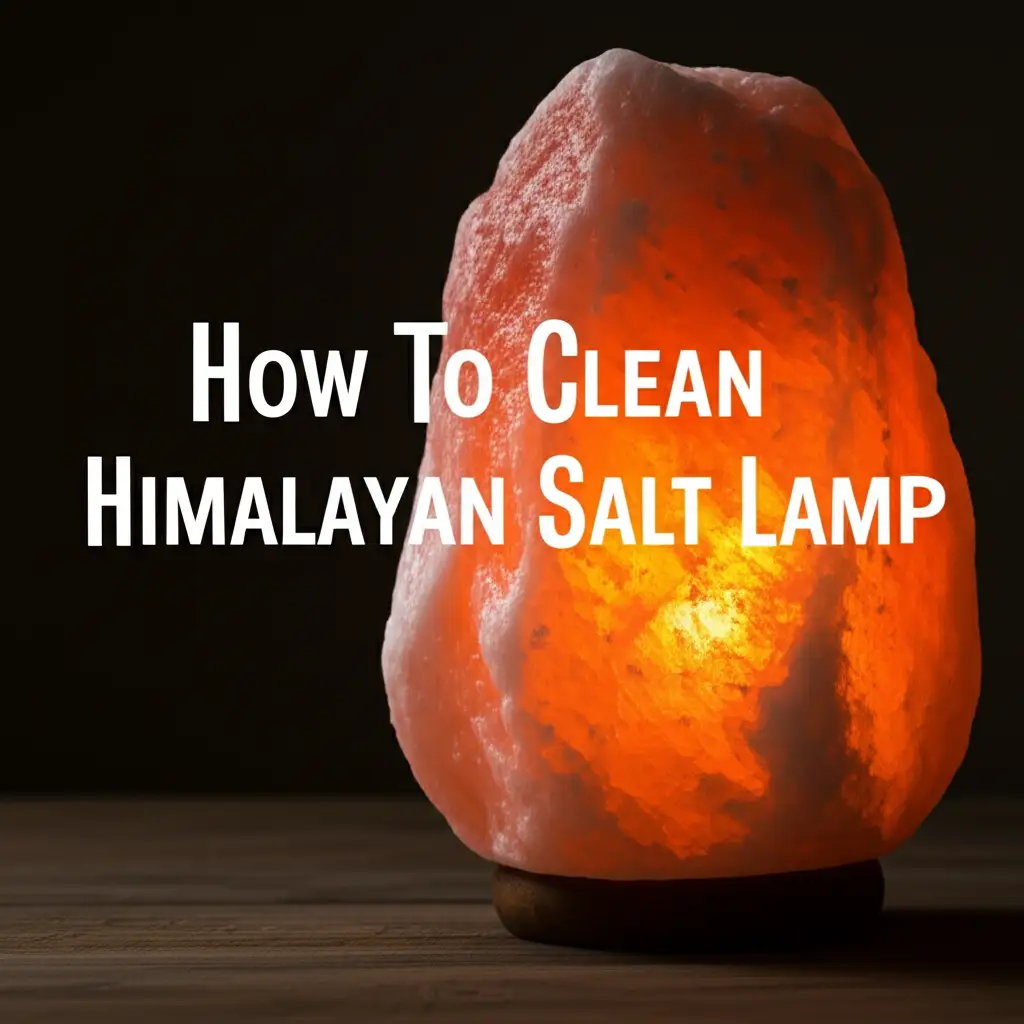
How To Clean Himalayan Salt Lamp
Maintain Your Himalayan Salt Lamp: A Cleaning Guide
Your Himalayan salt lamp adds beauty to any room. It also provides a calming, warm glow. These lamps can accumulate dust. They can also absorb moisture over time. Knowing how to clean a Himalayan salt lamp properly helps maintain its look. It also ensures its functional life. I will show you simple steps. You can keep your salt lamp looking great for years. This guide covers everything. It includes preventing common issues.
This article provides a comprehensive guide. It starts with preparation steps. It covers dry cleaning methods. We discuss addressing moisture issues. We also offer tips for long-term care. You will learn the correct tools to use. You will understand common mistakes to avoid. My aim is to make Himalayan salt lamp cleaning simple. You can enjoy your lamp’s benefits fully.
Takeaway
- Use a dry cloth or brush for regular dusting.
- Wipe away moisture gently with a damp, then dry, cloth.
- Keep the lamp in a dry environment.
- Turn the lamp on often to dry it out.
- Avoid harsh chemicals and excessive water.
To clean a Himalayan salt lamp, turn it off and unplug it first. Use a soft, dry cloth or a small brush to remove dust and debris from its surface. For any moisture, gently wipe with a slightly damp cloth, then immediately follow with a completely dry cloth. Always ensure the lamp is fully dry before turning it back on.
Understanding Your Himalayan Salt Lamp
Himalayan salt lamps are unique. They are carved from salt crystals. These crystals come from the Khewra Salt Mine. This mine is located in Pakistan. Each lamp is a natural product. This means no two lamps are exactly alike. They vary in shape, size, and color intensity. The lamp works by housing a light bulb inside. The bulb heats the salt. This process releases negative ions into the air.
People believe these negative ions can cleanse the air. They might also improve mood. The lamps are hygroscopic. This means they attract water molecules. They pull water from the air. Dust and other airborne particles ride on these water molecules. This process traps impurities on the lamp’s surface. This is why cleaning your lamp becomes important. Over time, the accumulated dust can dull its glow. The trapped moisture can also cause issues. It can lead to the lamp “sweating.” This section helps you understand what your lamp is. This knowledge makes proper care easier. You will learn why certain cleaning methods are best.
The Nature of Salt and Moisture
Salt naturally absorbs water. This property is important for your lamp. When your lamp absorbs moisture, it can appear damp. This dampness might feel sticky. It can also cause salt to dissolve. This dissolving process happens slowly. It leaves a residue on the lamp. This residue is what we call “sweating.” High humidity environments worsen this effect. Bathrooms or basements are risky places for lamps. Leaving the lamp off for long periods can also cause it. The heat from the bulb helps dry the lamp. It evaporates the moisture. This is why keeping it on is often suggested.
Understanding this nature is key. It guides how you clean. It also tells you where to place your lamp. It helps you prevent damage. This knowledge protects your investment. You ensure the lamp lasts. We want your lamp to maintain its beauty. We also want it to function well. Proper care extends the lamp’s life.
Why Regular Cleaning Matters
Regular cleaning of your Himalayan salt lamp is essential. Dust and dirt build up on the surface. This buildup makes the lamp look dull. It can also reduce its claimed air-purifying benefits. A dirty lamp cannot effectively attract moisture. It also cannot release ions as efficiently. Cleaning helps the lamp breathe. It allows it to perform its function better. Clean lamps also maintain their aesthetic appeal. They shine brighter. They also create a clearer, more inviting ambiance.
Beyond appearance, cleaning prevents damage. Excessive moisture buildup can harm the electrical components. The bulb or cord can suffer. Salt can corrode metal parts over time. A clean lamp is a safe lamp. It ensures the longevity of your lamp. It protects your home from potential electrical issues. Regular attention keeps your lamp healthy. It keeps it beautiful and safe for your family.
Essential Tools for Cleaning Your Salt Lamp
Before you start cleaning your Himalayan salt lamp, gather the right tools. Using the correct tools prevents damage. It also makes the cleaning process efficient. You do not need many items. Simple household supplies work best. Avoid harsh cleaners or abrasive materials. These can harm the delicate salt crystal. They can also leave residue. The goal is gentle and effective cleaning.
I always suggest having these items ready. They ensure a smooth cleaning experience. Having everything prepared saves time. It also reduces the risk of accidental damage. Remember, the lamp is salt. Salt reacts with water. This knowledge guides our tool selection. We want tools that minimize water contact. We focus on dryness.
What You Need
Here is a list of the essential tools:
- Soft, Dry Microfiber Cloths: These cloths are gentle. They pick up dust effectively. They do not scratch the salt surface. You will need at least two. One for dusting, one for drying.
- Small, Soft Brush: A paintbrush or a clean, soft toothbrush works well. This helps remove dust from crevices. Salt lamps have many natural grooves. A brush reaches these areas.
- Slightly Damp Cloth (Optional): This is only for sticky residue. It should be barely damp. You will use it very sparingly. We emphasize “slightly.”
- Clean, Dry Towel: Use this to place the lamp on. It provides a clean surface. It also catches any small salt particles.
- Gloves (Optional): Salt can be drying to skin. Gloves protect your hands. They also prevent skin oils from transferring to the lamp.
- A Small Bowl of Clean Water (for damp cloth): Only a small amount is needed. You will dip the cloth. You then wring it out completely.
Having these items ready simplifies the process. You can quickly move from one step to the next. You avoid searching for supplies midway. This preparation ensures a safe and effective clean.
Tools to Avoid
Knowing what not to use is as important as knowing what to use. Certain tools and substances can seriously damage your salt lamp. Avoid these at all costs:
- Harsh Cleaning Solutions: Do not use chemical cleaners. These include glass cleaner, all-purpose sprays, or bleach. They can react with the salt. They can also leave harmful residues. This damages the lamp’s natural properties.
- Abrasive Sponges or Brushes: Steel wool, scouring pads, or stiff brushes will scratch the salt. They will ruin the smooth finish. They can also chip the lamp.
- Excessive Water: Never submerge your salt lamp in water. Do not rinse it under a tap. Salt dissolves in water. Too much water will literally melt your lamp. This is the biggest danger.
- Dish Soap or Detergents: These can leave a film. They also introduce moisture. The residue can attract more dirt. It makes the lamp look dull.
- Paper Towels: These can leave lint. They are not as effective as microfiber for dust. They can also be abrasive on salt if rubbed hard.
Using the wrong tools can ruin your lamp. Always prioritize gentleness and dryness. My experience shows that simple methods are best. They preserve the lamp’s natural beauty and function. Now that you have your tools, we can move to the cleaning process.
Step-by-Step Guide to Cleaning Your Himalayan Salt Lamp
Cleaning your Himalayan salt lamp is a simple process. It requires care and attention to detail. The key is to minimize moisture exposure. I will walk you through each step. Follow these instructions carefully. You will ensure your lamp stays in top condition. This process is divided into general dusting and addressing moisture. Most of the time, simple dusting is enough.
Remember safety first. Always unplug the lamp before you begin. This prevents electrical hazards. It also protects you from accidental shocks. Take your time with each step. Rushing can lead to mistakes. We want to clean the lamp, not damage it.
Step 1: Prepare for Cleaning
Preparation is crucial. It sets the stage for a safe cleaning.
- Unplug the Lamp: This is the most important first step. Locate the power cord. Unplug it from the wall outlet. Remove the bulb and cord assembly from the lamp base. This prevents water contact with electrical parts. It also allows you to clean all surfaces easily.
- Move the Lamp to a Safe Area: Place the lamp on a clean, dry towel. Choose a flat, stable surface. This could be a kitchen counter or a table. The towel protects the surface from salt particles. It also provides a clean workspace. Ensure the area is well-lit. Good light helps you see all the dust.
- Gather Your Tools: Have your microfiber cloths, soft brush, and optional damp cloth ready. Make sure all cloths are clean. Dirt on cloths can scratch the lamp.
This preparation ensures a smooth and safe cleaning experience. You are now ready to tackle the dust and grime.
Step 2: Dry Dusting for Regular Maintenance
Most of the time, dry dusting is all your lamp needs. This method is safe and effective for daily or weekly upkeep. It removes loose dust and minor debris.
- Use a Soft Brush: Take your soft brush. Gently brush off any loose dust from the entire surface of the lamp. Pay attention to the grooves and crevices. Dust tends to settle in these areas. The brush helps dislodge stubborn particles.
- Wipe with a Dry Microfiber Cloth: Follow up with a clean, dry microfiber cloth. Wipe down the entire salt surface. Use gentle, circular motions. The microfiber will pick up the remaining fine dust. It will also polish the surface slightly.
- Clean the Base and Cord: Do not forget the base. Wipe down the wooden or plastic base with your dry cloth. If the cord is dusty, wipe it clean too. Ensure all components are free of dust. This step enhances the lamp’s overall appearance.
This dry cleaning routine is often sufficient. It keeps your lamp looking fresh. It also prevents heavy dust buildup. This process is gentle on the salt. It respects its delicate nature.
Step 3: Addressing Moisture and Sticky Residue
Sometimes, your lamp might feel sticky or damp. This is the “sweating” effect. It happens due to high humidity. It also occurs if the lamp stays off for long periods. This requires a slightly different approach. Remember, less water is always better.
- Prepare a Barely Damp Cloth: Take one microfiber cloth. Dampen a small section of it with clean water. Then, wring it out very thoroughly. The cloth should feel almost dry to the touch. No drips should come from it. This is crucial for avoiding damage.
- Gently Wipe Damp Areas: Use the barely damp cloth. Gently wipe only the sticky or damp areas of the salt lamp. Do not rub hard. Just a light wipe is enough to remove the dissolved salt or grime. Work quickly. Do not let the water sit on the surface.
- Immediately Dry with a Clean Cloth: Immediately after wiping, use a completely dry microfiber cloth. Wipe the area dry. Ensure no moisture remains on the lamp. This step is vital. It prevents further dissolution of the salt. It stops corrosion of components.
- Repeat if Necessary (Sparingly): If some residue remains, repeat the process. Use a fresh, barely damp spot on your cloth. Always follow immediately with a dry cloth. Do not overdo it. Excessive wiping with a damp cloth can cause more issues.
- Clean the Base (if affected): If the base is sticky from salt residue, wipe it clean too. Use the same damp-then-dry method. Ensure all salt residue is removed from the base. This prevents the lamp from sticking to your furniture.
After addressing moisture, your lamp might still feel slightly damp. This is normal. The next step is important.
Step 4: Drying Your Salt Lamp Thoroughly
Proper drying is critical after any moisture exposure. It prevents long-term damage.
- Air Dry in a Warm, Dry Spot (Briefly): If you used any moisture, let the lamp air dry for a short period. Place it in a naturally dry room. Avoid direct sunlight. Sunlight can also cause lamps to sweat. Ensure good air circulation.
- Turn on the Lamp: The most effective way to dry your salt lamp is by turning it on. The heat from the bulb helps evaporate any remaining moisture. Place the bulb and cord back into the lamp base. Plug it in.
- Leave it On: Leave the lamp on for several hours. For lamps that were very damp, leave them on for 24 hours. The warmth will dry the salt completely. It also helps to crystallize any dissolved salt back onto the surface. This step is a natural part of salt lamp care.
This drying process is essential for the lamp’s health. It ensures the salt stays solid. It protects the electrical parts. Your lamp will be clean and ready to shine.
Preventing Common Salt Lamp Problems
Cleaning is only one part of salt lamp care. Preventing problems is equally important. Himalayan salt lamps are natural products. They require specific environmental conditions. Understanding these conditions helps you avoid issues. I have seen many lamps ruined by simple mistakes. These problems are easy to prevent with a little knowledge.
My goal is to help you enjoy your lamp for years. This section provides tips. These tips will stop problems before they start. You can maintain your lamp’s beauty. You also protect its functionality. Proper prevention saves you time and effort later.
Problem 1: Excessive Sweating or Melting
Salt lamps “sweat” when they absorb too much moisture. This causes salt to dissolve. It can leave a watery mess. It also damages the lamp itself.
- Keep the Lamp On: This is the best defense. The heat from the bulb dries the lamp. It evaporates absorbed moisture. I recommend leaving your lamp on most of the time. Turn it off only when not needed for extended periods. For example, if you leave for vacation.
- Choose a Dry Location: Place your lamp in a low-humidity room. Avoid bathrooms, kitchens, or basements. Areas near humidifiers are also bad. A living room or bedroom is usually ideal. Ensure good air circulation. This helps prevent moisture from accumulating.
- Use a Dehumidifier: If you live in a very humid climate, consider using a dehumidifier. This reduces overall room humidity. It protects your lamp. It also benefits your home generally.
- Protect Surfaces: Place a coaster or tray under your lamp. This catches any minor sweat. It protects your furniture from salt damage. Salt can corrode surfaces. This simple step saves your tables.
Problem 2: Dust Buildup and Dullness
Dust naturally accumulates. It makes your lamp look dull. It also impacts the lamp’s ability to ionize.
- Regular Dry Dusting: Dust your lamp frequently. A soft, dry microfiber cloth works best. Wipe it down once a week. This prevents heavy buildup. It keeps the lamp’s glow bright.
- Use a Soft Brush for Crevices: Salt lamps have uneven surfaces. Dust hides in these spots. Use a small, soft brush to reach inside grooves. This ensures a complete clean.
- Proper Placement: Place the lamp away from high-traffic areas. Areas near open windows also gather more dust. This reduces the frequency of heavy cleaning.
Problem 3: Damaged Electrical Components
The bulb and cord are essential. Moisture can damage them. This creates safety risks.
- Ensure Dryness Before Use: Never plug in a damp lamp. Always ensure the lamp is completely dry. This prevents electrical shorts. It also protects the bulb socket.
- Regularly Inspect Cord and Bulb: Check the power cord for fraying. Ensure the bulb is secure. Replace bulbs when they burn out. Use only the recommended wattage. Over-wattage bulbs can overheat the lamp.
- Avoid Submersion: Never ever put the lamp in water. This will destroy the lamp. It will also damage the electrical parts beyond repair. Remember, how to clean silver jewelry with salt involves dissolving agents, but for a lamp, this is destructive.
Problem 4: Lamp Sticking to Surfaces
Dissolved salt can leave a sticky residue. This residue can make the lamp stick.
- Use a Protective Base: Always use a non-porous coaster. A ceramic or glass plate works well. This barrier prevents the salt from directly touching your furniture.
- Wipe Immediately: If you notice any stickiness on the base, clean it immediately. Use a barely damp cloth followed by a dry one. This prevents the salt from drying onto the surface.
- Keep the Lamp On: The heat from the bulb helps prevent stickiness. It keeps the lamp dry. Dry salt does not stick.
By addressing these common issues proactively, you ensure your Himalayan salt lamp remains a beautiful and functional addition to your home. Preventive care is always better than reactive cleaning.
Advanced Care and Maintenance Tips
Beyond regular cleaning, some advanced tips can extend your lamp’s life. These strategies focus on long-term preservation. They also maximize the benefits of your lamp. I have learned these through years of caring for various delicate home items. A Himalayan salt lamp is a unique item. Its care requires a special touch.
Think about how you maintain other valuable items in your home. A lamp also needs consistent attention. These tips go beyond basic dusting. They help you address specific situations. They also prepare your lamp for different conditions.
Storing Your Salt Lamp Safely
Sometimes you need to store your salt lamp. This might be for moving. Or perhaps you want to rotate decor. Proper storage is crucial. Incorrect storage can ruin your lamp. It can absorb moisture and melt.
- Ensure It Is Completely Dry: Before storing, make sure your lamp is bone dry. Leave it on for 24-48 hours. This eliminates all internal moisture.
- Disassemble Carefully: Remove the bulb and power cord assembly. Store these separately. This protects the electrical parts.
- Wrap Tightly in Plastic Wrap: Use several layers of plastic wrap. Wrap the entire salt crystal tightly. This creates a moisture barrier. It protects the lamp from humidity.
- Place in a Sealed Bag or Box: Put the wrapped lamp into a sealed plastic bag. Or place it in an airtight container. Add desiccant packets (like silica gel) inside the box. These absorb any remaining moisture.
- Store in a Dry Place: Choose a cool, dry place for storage. Avoid basements, attics, or garages. These areas often have fluctuating humidity. A closet inside your home is usually best.
Proper storage protects your lamp. It ensures it remains intact. You can enjoy it again when you bring it out.
Dealing with Stubborn Stains or Damage
Most stains on salt lamps are from accumulated dust or dissolved salt. These usually come off with the damp cloth method. However, sometimes other stains occur.
- Minor Surface Scratches: Small scratches are hard to avoid on natural salt. Often, they blend in. If noticeable, gently rub the area with a very fine grit sandpaper (around 400-600 grit). Do this sparingly. Then, wipe away any salt dust. This method is for expert users only. Be careful.
- Deep Pitting or Damage: If your lamp develops deep pitting from severe sweating, it means a lot of salt has dissolved. There is no real repair for this. It is a natural process for salt. The lamp will still function. Its appearance might change.
- Non-Salt Stains (e.g., Ink): For external stains not related to salt or moisture, avoid liquids. You can try gently scraping the stain with a blunt knife edge. Or use the fine sandpaper method very carefully. Always test a small, inconspicuous area first.
Remember, a Himalayan salt lamp is natural. It will not look factory perfect forever. Embrace its changing character.
Maximizing Your Lamp’s Benefits
Beyond cleaning, how you use your lamp matters.
- Consistent Use: Keep the lamp on often. This keeps it dry. It also maximizes its claimed air-purifying benefits. The heat from the bulb continuously releases ions.
- Strategic Placement: Place your lamp in areas where you spend time. A living room, bedroom, or office is ideal. This maximizes your exposure to its glow and potential benefits.
- Pair with Other Clean Air Efforts: A salt lamp helps. But it is not a complete air purification system. Combine its use with good ventilation. Open windows regularly. Consider air purifiers for larger spaces. General cleaning is also important. For example, knowing how to clean glass with vinegar for windows or other surfaces around the lamp contributes to a clean environment.
By following these advanced care tips, you are not just cleaning your lamp. You are investing in its long-term health. You ensure it remains a beneficial and beautiful part of your home. Like caring for white lamp shades which require specific gentle treatment, salt lamps demand a unique approach focused on dryness. This careful maintenance makes all the difference.
Troubleshooting Common Salt Lamp Issues
Even with the best care, you might encounter issues. Some problems are common. Knowing how to troubleshoot them helps. I want you to feel confident managing your lamp. This section covers frequent questions and concerns. It offers practical solutions.
It is important to diagnose problems correctly. A “sweating” lamp is different from a completely melted one. Understanding the cause guides the fix. Most issues relate to moisture or electrical components. We will cover both.
Issue 1: Lamp Is Constantly Sweating
A constantly sweating lamp is the most common complaint. It leaves pools of water. This is a sign of high humidity or insufficient drying.
- Increase On-Time: Leave your lamp on for longer periods. For very humid environments, aim for 24/7 operation. The heat is the lamp’s natural defense against moisture.
- Reduce Room Humidity: Identify the source of humidity. Use a dehumidifier in the room. Ensure proper ventilation. Avoid placing the lamp near steam sources. These include humidifiers, kettles, or showers.
- Relocate the Lamp: Move the lamp to a drier room in your home. A bedroom or living area away from windows might be better.
- Check for Air Circulation: Ensure air moves around the lamp. Do not place it in enclosed spaces. A cupboard or tight shelf can trap moisture.
If your lamp continues to sweat heavily, it might be in an unsuitable environment. Sometimes, the lamp itself might be of lower quality. High-quality lamps are denser. They resist moisture better.
Issue 2: Lamp Not Lighting Up
If your lamp does not light, the problem is usually electrical.
- Check the Bulb: The most common cause is a burnt-out bulb. Unscrew the bulb. Replace it with a new one of the correct wattage. Salt lamps typically use candelabra or appliance bulbs. Ensure the wattage matches the lamp’s rating.
- Check the Power Cord/Dimmer Switch: Inspect the cord for damage. Look for cuts or fraying. If your lamp has a dimmer switch, test it. Sometimes the switch itself can fail. Try a different outlet to rule out outlet issues.
- Inspect the Socket: Ensure the bulb screws in properly. Check for corrosion inside the socket. If corroded due to moisture, clean it carefully when unplugged. Use a dry brush. If severely corroded, replace the cord assembly.
- Fuse Check (if applicable): Some cords have a fuse in the plug. Check if it has blown. Replace it if necessary.
If all else fails, the entire cord assembly might need replacement. These are usually available online.
Issue 3: Lamp Developing a White Crusting
A white crust means dissolved salt has re-crystallized on the surface. This happens when the lamp sweats, then dries.
- Gentle Damp Wipe: Use the “barely damp cloth” method described earlier. Gently wipe away the crust. Follow immediately with a completely dry cloth.
- Regular Dusting Prevents: Consistent dry dusting reduces the frequency of this issue. If you remove the dust regularly, there’s less material for salt to adhere to when it sweats.
- Address Sweating Cause: The crusting is
- Himalayan Salt Lamp
- Salt Lamp Cleaning
- Home Cleaning Tips
- Lamp Maintenance
- Moisture Damage Prevention
- Crystal Lamp Care
- Natural Air Purifier