· Home Appliance Maintenance · 22 min read
How To Clean Homedics Humidifier
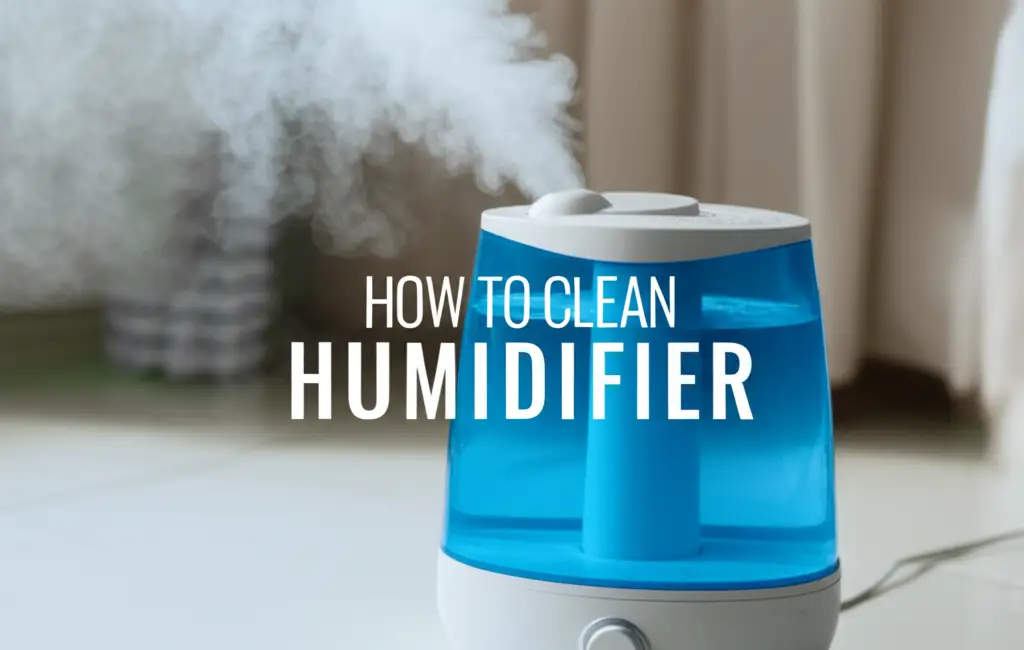
Unlock Fresh Air: How To Clean Your HoMedics Humidifier
Do you use a HoMedics humidifier to keep your home’s air comfortable? Many people do. Humidifiers add essential moisture to dry air. This can relieve dry skin, soothe sinuses, and make breathing easier. However, these helpful devices need regular cleaning. If you do not clean your HoMedics humidifier often, it can become a breeding ground for mold, mildew, and bacteria. These contaminants then release into your air, doing more harm than good.
I understand the importance of clean air in my home. A dirty humidifier defeats the purpose of owning one. It can even make me sick. Keeping your HoMedics humidifier clean is simple. It ensures you breathe truly healthy, fresh air. This guide will walk you through easy steps to clean your HoMedics humidifier. We will cover daily maintenance, deep cleaning, and troubleshooting tips. You will learn how to keep your humidifier running efficiently and safely.
Takeaway
- Clean your HoMedics humidifier regularly to prevent mold and mineral buildup.
- Use white vinegar for effective descaling and gentle cleaning.
- Disinfect with a diluted bleach solution if mold is present.
- Dry all parts completely before reassembly to stop mold growth.
- Perform daily rinses and weekly deep cleans for optimal performance.
How do I clean my HoMedics humidifier?
To clean your HoMedics humidifier, first unplug it and disassemble all removable parts. Use white vinegar to descale mineral buildup in the water tank and base. Scrub away any film or residue. For mold, use a diluted bleach solution. Rinse all parts thoroughly with clean water, then dry them completely before putting the unit back together.
Why Regular Cleaning Matters for Your HoMedics Humidifier
Regular cleaning is not just a suggestion; it is a necessity for your HoMedics humidifier. Think of your humidifier as an air quality device. Its main job is to put clean water vapor into the air. When you do not clean it, the water inside can stagnate. This stagnant water creates a perfect home for various unwanted guests.
These guests include mold, mildew, and bacteria. They thrive in damp environments. Your humidifier’s water tank and base offer exactly what they need to grow. When these contaminants grow, your humidifier sprays them into your air. Instead of fresh, healthy mist, you get airborne spores and germs. This can trigger allergies, worsen asthma, or cause respiratory issues. It defeats the purpose of using a humidifier at all. For health reasons, this regular care is crucial.
Mineral buildup is another big issue. Tap water contains minerals like calcium and magnesium. Over time, these minerals form hard, crusty deposits. You might see white scale on the heating element or transducer. This buildup reduces your humidifier’s efficiency. It can make the mist output weaker. In severe cases, it can even damage the unit. This shortens its lifespan and wastes your investment. Regular cleaning removes these deposits. It ensures your HoMedics humidifier works at its best. It also helps it last longer.
Cleaning your humidifier prevents bad odors too. Stagnant water and microbial growth can create a musty smell. This smell then spreads throughout your room. A clean humidifier produces fresh, odorless mist. I personally find a musty smell very unpleasant. Keeping the humidifier clean helps maintain a pleasant indoor environment. Regular maintenance keeps your air fresh. This simple task protects both your health and your appliance. It ensures you always enjoy clean, beneficial humidity. You might also want to learn how to clean your Dyson humidifier if you own one, as the principles of preventing mold and mineral buildup are similar across brands.
Essential Supplies for HoMedics Humidifier Cleaning
Before you start cleaning your HoMedics humidifier, gather all the necessary supplies. Having everything ready makes the cleaning process smooth and efficient. You probably have most of these items already in your home. I always make sure I have my cleaning kit ready before I begin. This saves me time and effort.
Here is a list of what you will need:
- White Vinegar: This is your best friend for descaling. White vinegar is a natural acid. It breaks down mineral deposits effectively. It also acts as a natural disinfectant. You can find it cheaply at any grocery store. I always keep a large bottle of white vinegar on hand for various cleaning tasks.
- Soft Brushes or Sponges: You will need tools to scrub away residue. A soft-bristle brush, like a toothbrush or a bottle brush, works well for small crevices. A soft sponge or cloth is good for larger surfaces. Avoid abrasive scrubbers. They can scratch or damage the plastic parts.
- Clean Water: You will use this for rinsing. Fresh, clean tap water is perfectly fine. Make sure you have a sink or tub easily accessible for rinsing all the parts.
- Optional: Distilled Water: While not essential for cleaning, using distilled water after cleaning can help prevent future mineral buildup. It contains no minerals. This extends the time between deep cleans.
- Optional: Bleach (Unscented): Use bleach only if you see visible mold or mildew. A small amount of bleach solution effectively kills these growths. Make sure it is unscented household bleach. Do not mix bleach with vinegar. This creates dangerous fumes.
- Optional: Microfiber Cloths or Paper Towels: These are useful for drying the parts thoroughly. Complete drying is very important. It prevents mold from growing back after cleaning.
- Small Bowl or Basin: This is useful for soaking smaller parts.
Make sure your work area is clear and clean. Lay down some old towels if you are worried about spills. I find that cleaning in the kitchen sink works best for me. Having the right tools makes cleaning your HoMedics humidifier simple. It ensures you do a thorough job every time. This preparation sets you up for success.
Step-by-Step Guide: Daily and Weekly HoMedics Humidifier Maintenance
Keeping your HoMedics humidifier clean is an ongoing process. It is not just a one-time deep clean. Regular daily and weekly maintenance stops problems before they start. I follow a consistent routine. It keeps my humidifier running perfectly. This routine is simple and takes very little time.
Daily Maintenance: Quick Rinses for Freshness
Daily care is about preventing standing water issues. It stops microbial growth from taking hold. This is the simplest step in humidifier care.
- Unplug the Unit: Always unplug your HoMedics humidifier from the power outlet. Safety comes first. Never clean an plugged-in appliance.
- Empty Water Tank and Base: Pour out any remaining water from both the water tank and the base. Do not leave stagnant water sitting in the unit.
- Rinse Tank and Base: Rinse the water tank and the base thoroughly with clean tap water. Just a quick rinse helps remove any loose residue or film. This daily rinse prevents slime from forming.
- Refill with Fresh Water: Refill the tank with fresh, cool tap water. Or, use distilled water if you prefer. Distilled water reduces mineral buildup over time.
- Reassemble and Use: Put the tank back on the base. Plug the unit back in. Your humidifier is now ready for another day of use.
This daily routine takes only a few minutes. It makes a big difference in maintaining cleanliness.
Weekly Maintenance: Deeper Clean for Longevity
Weekly cleaning tackles mineral buildup and hidden grime. This is where you use your cleaning supplies more actively. I set a specific day each week for this task. This helps me remember.
- Disassemble the Unit: Unplug the HoMedics humidifier. Then, take apart all removable sections. This usually includes the water tank, the mist nozzle, and the base unit cover.
- Drain All Water: Empty any water from all parts.
- Vinegar Solution for Tank: Pour 1-2 cups of undiluted white vinegar into the water tank. Swish it around to coat the entire interior.
- Vinegar Soak for Base: Pour about 1 cup of white vinegar into the base. Make sure it covers the heating element or transducer. This is the part that produces the mist.
- Soak Smaller Parts: Place smaller, removable parts (like the mist nozzle) into a bowl filled with vinegar. Let them soak along with the tank and base.
- Soak Time: Let all parts soak for at least 20-30 minutes. For heavy mineral buildup, you can soak them for several hours or even overnight. The vinegar needs time to break down the minerals.
- Scrub and Rinse: After soaking, use a soft brush or sponge to gently scrub all surfaces. Pay special attention to areas with visible film or mineral deposits. Rinse all parts thoroughly under clean running water. Make sure no vinegar smell remains. This is important for your health and comfort. You want to make sure all cleaning agents are gone. This helps avoid releasing any chemicals into the air when the humidifier operates.
- Dry Thoroughly: This is a crucial step. Air dry all parts completely before reassembly. Or, wipe them dry with a clean cloth. Any remaining moisture can encourage mold growth. I often leave the parts out on a towel for several hours to ensure they are bone dry. This is especially important for models like the HoMedics Pure Enrichment humidifier or any other cool mist humidifier, as lingering moisture is a common cause of mold.
- Reassemble: Put all the parts back together correctly.
- Refill and Use: Fill the tank with fresh water. Plug in the unit. Your HoMedics humidifier is now clean and ready to provide fresh mist.
Following these daily and weekly steps will keep your HoMedics humidifier in top condition. It protects your health and extends the life of your appliance. These simple habits are key to consistent performance.
Deep Cleaning Your HoMedics Humidifier: Tackling Mineral Buildup
Mineral buildup is a common enemy of humidifiers. Tap water contains dissolved minerals like calcium and magnesium. These minerals solidify when water evaporates. They form a white, crusty scale on the inside surfaces of your HoMedics humidifier. This buildup is not just unsightly. It significantly impacts how well your unit works. It can block the mist output. It can also make the humidifier less efficient. Learning how to clean your water filter can provide a deeper understanding of mineral removal principles.
My method for tackling mineral buildup is always the same: white vinegar. Vinegar is a natural acid. It dissolves these alkaline mineral deposits effectively. This deep cleaning focuses on the parts most affected by scale.
Descaling the Water Tank
The water tank holds the bulk of the water. It often develops a mineral film or scale, especially near the bottom and sides.
- Empty and Rinse: First, empty any old water from the tank. Give it a quick rinse with fresh water.
- Add Vinegar: Pour 1-2 cups of undiluted white vinegar directly into the tank.
- Swish and Coat: Swish the vinegar around. Make sure it coats all the inside surfaces.
- Let it Soak: Allow the vinegar to sit in the tank for at least 30 minutes. For very heavy scale, let it soak for several hours or overnight. The acid needs time to work on the minerals.
- Scrub: After soaking, use a soft bottle brush or a sponge to scrub the inside of the tank. You will see the mineral deposits loosening. Pay attention to any corners or grooves.
- Rinse Thoroughly: Rinse the tank multiple times with fresh, clean water. Continue rinsing until you can no longer smell vinegar. This ensures no vinegar residue will enter your air during operation.
Cleaning the Base Unit and Transducer
The base unit contains the vital components. These include the heating element (for warm mist models) or the ultrasonic transducer (for cool mist models). The transducer vibrates rapidly to create mist. These parts are very prone to mineral buildup.
- Empty and Rinse: Ensure the base is empty of water. Give it a quick rinse.
- Pour Vinegar: Carefully pour about 1 cup of white vinegar into the base. Ensure it covers the transducer or heating element fully. Avoid getting vinegar on any electrical parts outside the water reservoir.
- Soak: Let the vinegar soak for at least 30 minutes. For severe buildup, let it sit longer.
- Gentle Scrubbing: Use a small, soft brush (like an old toothbrush) or a cotton swab. Gently scrub the transducer. Do not use anything abrasive. Do not apply too much pressure. Rough scrubbing can damage this delicate component. The goal is to loosen the mineral scale.
- Rinse Carefully: Gently pour out the vinegar. Rinse the base thoroughly under running water. Again, make sure no vinegar smell remains. Be careful not to splash water onto control panels or other electrical components.
- Wipe Down: Wipe the exterior of the base unit with a damp cloth. Remove any dust or grime.
By consistently applying this deep cleaning method, especially with white vinegar, you will effectively remove mineral buildup. This helps your HoMedics humidifier produce a strong, consistent mist. It also extends the life of your appliance. Regular descaling is a key part of humidifier maintenance. The process is similar to how you would clean a cool mist humidifier of any brand, emphasizing the importance of descaling the transducer.
Eradicating Mold and Mildew from Your HoMedics Humidifier
Sometimes, despite regular cleaning, mold or mildew can appear in your HoMedics humidifier. This often happens if the unit is not dried completely after use or if it sits with stagnant water for too long. Mold appears as black, green, or pink slimy spots. Mildew is usually a white or grayish powdery growth. Both are fungi. They release spores into the air. This can be harmful to your health. I get concerned whenever I spot even a tiny bit of mold. It needs immediate attention.
When to Use Bleach
For visible mold or mildew, white vinegar alone might not be strong enough. You need a stronger disinfectant. Unscented household bleach is effective for killing mold and mildew spores. Always use bleach with caution. Make sure your area is well-ventilated. Never mix bleach with vinegar or other cleaning products. This creates dangerous and toxic fumes. I open windows wide whenever I use bleach.
Steps to Eradicate Mold:
Preparation and Safety:
- Unplug: Always unplug your HoMedics humidifier.
- Disassemble: Take apart all removable parts of your HoMedics humidifier.
- Ventilate: Open windows and doors to ensure good airflow in the room.
- Gloves: Wear rubber gloves to protect your hands from the bleach solution.
Prepare the Bleach Solution:
- Mix 1 teaspoon of liquid, unscented household bleach with 1 gallon (approximately 3.8 liters) of clean water.
- This is a very dilute solution. It is strong enough to kill mold but gentle enough for the plastic parts. Do not use more bleach than recommended. More bleach does not mean better cleaning.
Treat the Water Tank:
- Pour some of the bleach solution into the water tank.
- Swish it around to coat all interior surfaces, especially where mold is visible.
- For stubborn spots, use a soft brush to gently scrub the affected areas.
- Let the solution sit in the tank for about 10-15 minutes. This gives the bleach time to kill the mold.
Treat the Base Unit and Small Parts:
- Pour some of the bleach solution into the base unit. Ensure it covers the transducer and any other areas with mold.
- Soak smaller removable parts (like the mist nozzle) in the bleach solution in a separate bowl.
- Let these parts soak for 10-15 minutes.
Thorough Rinsing (Crucial Step):
- This step is very important. After soaking, empty all the bleach solution from the tank and base.
- Rinse all parts, including the tank, base, and small parts, under fresh running water.
- Rinse them repeatedly. Fill the tank with clean water, shake it, and empty it out. Do this several times.
- Continue rinsing until you can no longer detect any smell of bleach. Any residual bleach can be released into the air when the humidifier runs. This can cause irritation. I often rinse parts five or six times, just to be safe.
Complete Drying:
- After thorough rinsing, it is critical to dry all parts completely.
- Wipe them with a clean, dry cloth.
- Then, let all components air dry thoroughly for several hours. You can place them on a clean towel.
- Ensure there is no moisture left before reassembling the unit. Moisture encourages mold growth.
By following these steps, you can effectively eradicate mold and mildew. This makes your HoMedics humidifier safe to use again. Remember, prevention is key. Regular daily and weekly cleaning, along with thorough drying, will reduce the chances of mold returning. Maintaining proper hygiene in your humidifier ensures healthy air in your home. This process is broadly similar for other humidifiers like the Levoit 300S humidifier or Aqua Oasis humidifier, where mold prevention is a shared concern.
Drying and Reassembling Your HoMedics Humidifier
You have just finished cleaning your HoMedics humidifier. You removed mineral buildup and perhaps even tackled mold. The next crucial steps are drying and reassembling the unit. Skipping these steps, or doing them improperly, can undo all your hard work. Improper drying can lead to new mold growth. Incorrect reassembly can prevent the humidifier from working. I always pay close attention to these final steps.
The Importance of Thorough Drying
Water is essential for a humidifier to work. But lingering water after cleaning is a problem. Microorganisms like mold and bacteria love damp environments. If you put your humidifier back together while parts are still wet, you create a perfect breeding ground. Mold spores can quickly settle and multiply. This means your cleaning effort was wasted. You risk breathing in harmful particles.
- Air Dry is Best: After rinsing all parts, wipe them down with a clean, dry cloth. Then, place all components on a clean towel or drying rack. Ensure good air circulation around them.
- Time is Key: Allow plenty of time for air drying. Depending on humidity levels in your home, this could take several hours. I usually leave my humidifier parts out overnight. This ensures they are completely dry.
- Check All Crevices: Pay special attention to small nooks, crannies, and internal parts. Water can hide in these areas. Use a cotton swab or the corner of a paper towel to dry hard-to-reach spots.
- No Stacking: Do not stack parts on top of each other while drying. This traps moisture. Spread them out to maximize airflow.
Reassembling Your HoMedics Humidifier
Once all parts are completely dry, you can reassemble your HoMedics humidifier. This process is usually straightforward. It generally involves reversing the disassembly steps.
- Start with the Base: Place the main base unit on a stable, flat surface. Ensure any internal components, like the float or mist outlet, are correctly seated.
- Insert Filters/Cartridges (If Applicable): If your HoMedics model uses a demineralization cartridge or wicking filter, insert it now. Make sure it clicks into place securely. Some models, like certain Aprilaire humidifier filter or Aircare humidifier filter systems, have specific filter replacement instructions which are vital for performance.
- Place Water Tank: Carefully place the water tank back onto the base unit. Ensure it sits firmly and correctly. It should fit without force. If it doesn’t fit easily, check that nothing is blocking its path.
- Attach Top Cover/Mist Nozzle: Secure any top covers or mist nozzles. These often twist or click into place. Make sure the mist outlet is clear and points in the desired direction.
- Final Check: Do a quick visual check. Ensure all parts are snugly fitted. There should be no loose components.
- Refill and Power On: Once fully assembled, fill the water tank with fresh, clean water. Then, plug the humidifier back into a power outlet. It should now be ready for use, producing clean, healthy mist.
Proper drying and careful reassembly are the final steps in effective humidifier maintenance. These steps ensure your HoMedics humidifier operates safely and efficiently. They also help prevent future cleaning issues. I feel a sense of satisfaction when my humidifier is sparkling clean and ready to go.
Troubleshooting Common HoMedics Humidifier Cleaning Issues
Even with regular cleaning, you might encounter some common issues with your HoMedics humidifier. These problems often relate directly to cleanliness or maintenance habits. Understanding how to troubleshoot these can save you time and frustration. I have faced a few of these myself. Knowing the quick fixes helps.
Persistent Musty Odor
You cleaned your humidifier, but it still smells musty. This is frustrating.
- Cause: The odor often means mold or bacteria are still present. You might have missed a spot. Or, perhaps the drying was not thorough enough. Sometimes, the smell comes from stagnant water.
- Solution:
- Re-clean with Bleach: If you did not use bleach before, try the diluted bleach solution method. Follow the steps for eradicating mold carefully. Pay extreme attention to rinsing.
- Inspect All Parts: Take apart every single removable piece. Shine a flashlight into all crevices, corners, and tubes. Look for any slimy film or discoloration.
- Thorough Drying: Ensure every part is bone dry before reassembly. Leave parts out for 24 hours if needed, especially in humid environments. Air circulation is key.
- Use Distilled Water: If using tap water, switch to distilled water for a period. This will show if your tap water quality contributes to the odor. Distilled water lacks minerals and impurities.
White Dust Emission
You notice a fine white powder settling on furniture around your humidifier. This is known as “white dust.”
- Cause: White dust comes from minerals in your tap water. When your HoMedics humidifier evaporates water, it leaves these minerals behind. Ultrasonic humidifiers, common among HoMedics models, atomize water, sending these fine mineral particles into the air.
- Solution:
- Use Distilled Water: This is the most effective solution. Distilled water has no minerals, so it produces no white dust. This is what I use if I notice white dust.
- Demineralization Cartridge: Some HoMedics models have demineralization cartridges. Ensure yours is installed and replaced regularly according to the manufacturer’s instructions. These cartridges filter out minerals.
- Regular Descaling: Continue your weekly descaling with white vinegar. This removes accumulated mineral scale from the unit itself. It will not stop dust if using hard water, but it prevents unit damage.
- Consider Other Humidifier Types: If white dust is a major problem, you might consider an evaporative humidifier in the future. These types use wicks to evaporate water and naturally trap minerals, producing less white dust.
Weak Mist Output or No Mist
Your HoMedics humidifier is on, but the mist is weak or absent.
- Cause: This is almost always due to mineral buildup. The transducer (for ultrasonic models) or the heating element (for warm mist models) becomes coated with scale. This prevents it from working efficiently.
- Solution:
- Deep Descale: Perform a thorough deep descaling using white vinegar. Focus heavily on the transducer or heating element in the base unit. Use a soft brush to gently scrub away the buildup.
- Check for Obstructions: Ensure the mist nozzle or outlet is not clogged with debris or scale. Clean it thoroughly.
- Proper Water Level: Make sure the water level in the base unit is adequate. The humidifier needs enough water to draw from.
- Filter Issues (If Applicable): If your model has a filter or wicking pad, check if it needs replacement. A clogged filter can restrict mist output. I always check my filter first.
By understanding these common problems and their solutions, you can keep your HoMedics humidifier performing at its best. Consistent cleaning and prompt troubleshooting are key to maintaining healthy humidity levels in your home.
Advanced Tips for Maintaining Your HoMedics Humidifier
Beyond regular cleaning, a few advanced tips can help you maximize the performance and lifespan of your HoMedics humidifier. These are small habits that make a big difference over time. I have picked up these tips from my own experience and research.
Choose Your Water Wisely
The type of water you use directly impacts how often you need to clean.
- Distilled Water is King: Using distilled water eliminates mineral buildup. Distilled water contains no minerals. This means no white dust and much less descaling. It is an extra cost, but it significantly reduces maintenance effort. For me, the convenience is worth it.
- Filtered Water: If distilled water is not feasible, consider using filtered water from a pitcher filter or a faucet filter. While it will not remove all minerals, it can reduce some. This means less frequent, but still necessary, descaling.
- Avoid Tap Water (If Possible): Hard tap water is the primary cause of mineral buildup and white dust. If you must use tap water, increase the frequency of your deep cleaning and descaling sessions.
Mind the Filter (If Applicable)
Not all HoMedics humidifiers have filters. But if yours does, its maintenance is critical.
- Check User Manual: Refer to your specific HoMedics model’s user manual. It will tell you if your humidifier has a filter. It will also tell you what kind of filter it is (e.g., demineralization cartridge, wick filter).
- Regular Replacement: Filters are designed to trap impurities. Over time, they become saturated and ineffective. Replace demineralization cartridges and wick filters regularly. The manual will specify the replacement schedule, usually every 30-60 days. A clogged filter can reduce mist output and even promote microbial growth. This is a common maintenance item for various humidifiers, whether you are trying to clean a Baby Frida humidifier or a larger home unit.
Strategic Placement Matters
Where you put your humidifier impacts its efficiency and the cleanliness of its surroundings.
- Flat, Stable Surface: Always place your HoMedics humidifier on a flat, stable, water-resistant surface. This prevents spills and ensures stable operation.
- Away from Walls and Electronics: Do not place it directly against a wall. The mist can cause mold growth on painted surfaces. Keep it away from electronics, books, and delicate furniture. The mist can cause damage.
- Good Air Circulation: Place it in an area with good air circulation. This helps the mist disperse evenly throughout the room. It also prevents condensation buildup directly around the unit.
- Elevated Position: Placing the humidifier on a table or dresser (not on the floor) helps the mist spread more effectively. It also keeps it away from floor dust and pets.
Know When to Store It
If you do not use your humidifier year-round, proper storage is vital.
- Deep Clean Before Storage: Before putting your HoMedics humidifier away for the season, perform a thorough deep clean. Descale, disinfect (if needed), and dry every single part completely.
- Store Dry: Store the unit in a cool, dry place. A closet or cupboard is fine.
- HoMedics humidifier
- humidifier cleaning
- mold prevention
- mineral buildup
- descaling
- indoor air quality

