· Home Maintenance · 20 min read
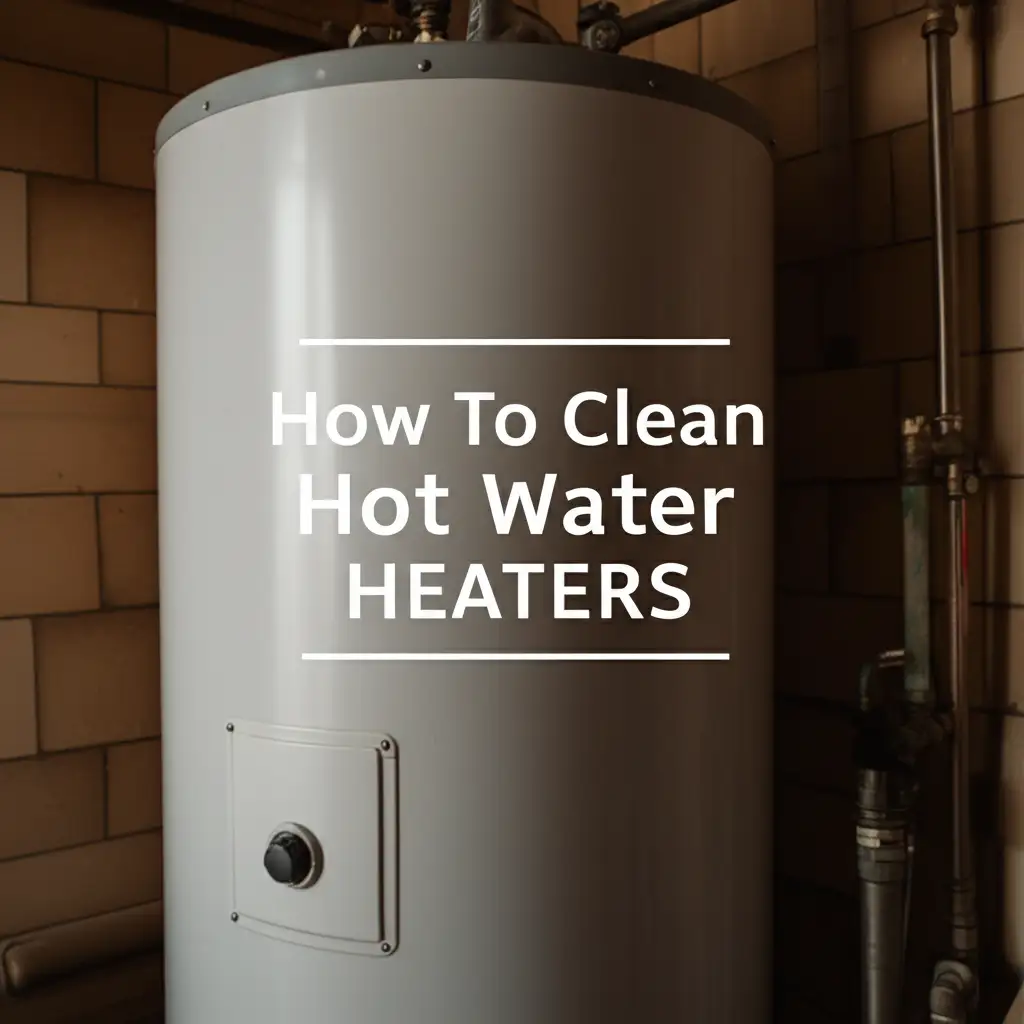
How To Clean Hot Water Heaters
Clean Hot Water Heaters: Boost Efficiency & Lifespan
Have you noticed your hot water isn’t as hot as it used to be? Perhaps strange noises come from your basement or utility closet. These are common signs that your hot water heater needs attention. Cleaning your hot water heater is a vital task often overlooked in home maintenance.
Regular cleaning helps your appliance work better and last longer. It can prevent costly repairs and even improve your water quality. In this comprehensive guide, I will show you how to clean hot water heaters, including flushing sediment, descaling with vinegar, and essential maintenance tips. You will learn about different types of heaters and how to keep them running efficiently.
Takeaway:
- Regularly clean your hot water heater to prevent sediment buildup and maintain efficiency.
- Flushing the tank annually removes harmful deposits and extends the heater’s life.
- Use vinegar for descaling to tackle hard water mineral buildup effectively.
- Always prioritize safety by shutting off power and water before starting.
- Consider professional help for complex issues or if you feel unsure.
Main Query Answer:
To clean hot water heaters, turn off power and water, connect a hose to the drain valve, and flush the tank until the water runs clear, removing sediment. For hard water buildup, follow up with a vinegar descaling process. Regular flushing ensures efficiency and a longer lifespan for your unit.
Why Cleaning Your Hot Water Heater Matters for Your Home
Your hot water heater works hard every day. It provides warm water for showers, dishes, and laundry. Over time, mineral deposits and sediment build up inside the tank. This buildup comes from the water itself, especially if you have hard water.
This layer of sediment acts like an insulator. It forces your heater to work harder to warm the water. This leads to higher energy bills and less hot water. Neglecting this maintenance can also shorten your heater’s life.
Signs Your Water Heater Needs Cleaning
Your water heater often tells you when it needs attention. Listen for popping or rumbling sounds. These noises happen when trapped air and sediment move inside the tank as water heats. You might also notice a drop in hot water supply.
Another sign is water that smells bad or looks rusty. This suggests rust or mineral accumulation. A sudden increase in your energy bill could also point to an inefficient, dirty heater. Paying attention to these signs saves you money and trouble later.
The Impact of Sediment Buildup
Sediment buildup is the enemy of your hot water heater. It settles at the bottom of the tank. This layer gets thicker over time. It can block the drain valve, making cleaning harder. It also reduces the amount of hot water your tank can hold.
Cleaning your hot water heater offers many benefits. It restores heating efficiency, lowers energy costs, and extends the life of your appliance. It also helps prevent unexpected breakdowns and ensures a steady supply of clean, hot water. Regularly flushing your heater is a simple yet effective way to protect your investment.
Essential Tools and Safety Precautions Before You Begin
Before you start cleaning your hot water heater, gather all necessary tools. Safety is also paramount for this task. Working with water and electricity requires careful attention. Taking a few moments to prepare ensures a smooth and safe cleaning process.
You will need certain items to complete the job effectively. These tools are common and usually easy to find. Having them ready saves time and prevents interruptions. Once you have your tools, focus on safety steps to protect yourself and your home.
Gathering Your Cleaning Arsenal
Here is a list of tools you will need for cleaning your hot water heater:
- Garden hose: This will connect to the drain valve.
- Large bucket: Use this to catch any remaining water if the hose doesn’t reach a drain.
- Wrench or socket set: For loosening the drain valve, if needed.
- Flathead screwdriver or breaker bar: To open the pressure relief valve.
- Work gloves: To protect your hands.
- Safety glasses: To protect your eyes from splashes.
- White vinegar (optional): For descaling hard water buildup. You can learn more about this specific cleaning method at how to clean hot water heater with vinegar.
Having these items ready prevents delays once you begin the cleaning process. Ensure your hose is long enough to reach a suitable drain.
Prioritizing Your Safety
Safety comes first when dealing with appliances like water heaters. Follow these crucial steps to ensure your well-being:
- Turn off the power: For electric water heaters, switch off the circuit breaker. For gas heaters, turn the gas valve to the “OFF” position. This prevents the heating elements from activating while the tank is empty.
- Shut off the cold water supply: Locate the cold water shut-off valve on the pipe leading into the top of the water heater and turn it clockwise until it’s completely off. This stops new water from entering the tank.
- Release water pressure: Open a hot water faucet in a sink or bathtub somewhere in your house. This helps release pressure and prevents a vacuum when draining the tank. You can also carefully lift the lever on the temperature and pressure relief (T&P) valve on the water heater itself to release pressure, but be careful as hot water or steam may come out.
- Allow water to cool: If you have just used hot water, give the tank an hour or two to cool down. Draining very hot water can be dangerous and damage your drain lines.
By taking these precautions, you make the cleaning process much safer for yourself and your home. Never skip these steps.
Step-by-Step Guide: How to Flush a Hot Water Heater Tank
Flushing your hot water heater is the most common and effective way to remove sediment. This process is simple enough for most homeowners to do themselves. Regularly flushing ensures your heater runs efficiently and lasts longer. It is a crucial part of routine maintenance.
I usually recommend flushing your hot water heater at least once a year. If you live in an area with very hard water, you might consider doing it more often. This helps prevent large buildups that can damage the tank. Flushing keeps your hot water clean and your energy bills low.
Shutting Down Your Water Heater Safely
Before you do anything, ensure your water heater is safely turned off. I always double-check this step myself. For an electric water heater, go to your home’s main electrical panel. Find the breaker labeled “water heater” and flip it to the “OFF” position.
If you have a gas water heater, locate the gas supply line leading to the heater. There will be a valve on this line. Turn the valve to the “OFF” position. Next, turn the dial on the water heater’s gas control unit to “OFF.” This stops the gas flow. Finally, turn off the cold water supply valve, usually located on the pipe entering the top of your water heater. Open a hot water faucet in your house to relieve pressure.
Draining the Tank Completely
Once the power and water supply are off, you can start draining the tank. Find the drain valve near the bottom of your water heater. It usually looks like a spigot. Attach a standard garden hose to this drain valve. Extend the other end of the hose to a floor drain, a large bucket, or outside your home. Make sure the hose leads to a place where hot, possibly dirty, water can drain safely.
Open the drain valve. You will see water begin to flow out of the hose. If the water drains slowly, it might be due to sediment blocking the valve. You can try briefly opening the pressure relief valve on the top of the heater for a few seconds to help with flow, but be ready for a surge of water. Let the tank drain completely. This can take 20-60 minutes, depending on the tank size. The water coming out may initially be cloudy or contain sediment.
Flushing Out Sediment Buildup
After the tank is empty, the real cleaning begins. Close the drain valve. Slowly turn the cold water supply valve back on, allowing water to flow into the tank. Do not turn the power back on yet. As water fills the tank, it will stir up any remaining sediment at the bottom. The fresh water will then force this sediment out through the still-attached garden hose.
Repeat this process several times: fill the tank, then drain it again. You will notice the water coming out of the hose gets clearer with each flush. Continue flushing until the water runs completely clear and clean. This means you have successfully removed most of the sediment. If your water lines also have sediment issues, you might find useful tips on how to clean sediment from water lines or how to clean sediment from water heater for more targeted advice. Once the water is clear, close the drain valve. Disconnect the garden hose.
Refilling and Restarting Your Water Heater
Now it’s time to refill the tank. Make sure the drain valve is fully closed. Slowly open the cold water supply valve all the way. Let the tank fill completely. You will hear water flowing. Once water flows steadily from the open hot water faucet inside your house, the tank is full. Close the hot water faucet.
Finally, restore power to your water heater. If it’s electric, flip the circuit breaker back to “ON.” For a gas heater, turn the gas control dial back to your desired temperature setting, and turn the gas supply valve back on. It will take some time for the water to heat up again, usually a few hours. I always check for leaks around the drain valve or connections after refilling. This simple flushing process helps your water heater run at its best.
Deep Cleaning with Vinegar: Descaling Your Water Heater
Hard water is a common issue in many homes. It contains high levels of minerals like calcium and magnesium. These minerals can build up inside your hot water heater. This creates a hard, scale-like layer on the heating elements and tank walls. This scale can significantly reduce your heater’s efficiency. Descaling with vinegar is an effective way to remove this stubborn buildup.
Vinegar is a natural, safe, and acidic cleaner. Its acidity helps dissolve mineral deposits without harming your water heater. I find it much safer than harsh chemical descalers. This method is especially important if you notice reduced hot water, strange noises, or have persistent hard water problems. It complements the basic flushing process.
When to Use Vinegar for Descaling
You should consider descaling your hot water heater with vinegar if:
- You live in an area with known hard water.
- You frequently see white, chalky deposits around faucets or showerheads. (This is similar to how to clean hard water off windows or how to clean hard water from shower head which also address mineral buildup.)
- Your water heater makes popping or crackling noises even after a standard flush. This indicates scale on the heating elements.
- The recovery time for hot water seems longer than usual.
- Your hot water output has significantly decreased.
Descaling with vinegar is typically needed every 1-3 years, depending on your water hardness. If your water heater uses water from a well, you might also be interested in how to clean water lines from well, as well water can often be harder and contribute to more scale buildup.
The Vinegar Flushing Process
The vinegar descaling process is similar to a regular flush but with an added step. I typically do this after a preliminary flush to remove loose sediment. Here’s how to do it:
- Prepare the Heater: Follow all initial safety steps as outlined in the flushing guide. Turn off power, shut off cold water supply, open a hot water faucet, and drain the tank completely using a garden hose.
- Add the Vinegar: Once the tank is empty, close the drain valve. For a 40-gallon water heater, you will need about 4-5 gallons of white vinegar. For larger tanks, use more. You can add the vinegar in one of two ways:
- Through the pressure relief valve: This is the easiest method. Attach a funnel to the discharge pipe of the T&P relief valve (or remove the valve if it’s easier). Carefully pour the vinegar into the tank.
- Through the hot water outlet: If you disconnect the hot water outlet pipe, you can pour vinegar directly into the tank. This is more involved and may require professional help.
- Fill with Water and Let Sit: After adding the vinegar, slowly turn on the cold water supply valve. Let the tank fill completely, mixing the vinegar with water. You want the vinegar solution to cover the heating elements and reach all areas where scale might be present. Once the tank is full, close the hot water faucet inside the house.
- Allow Soaking Time: Let the vinegar-water solution sit in the tank for at least 4-6 hours. For very heavy scale buildup, you might let it sit overnight (8-12 hours). The longer it sits, the more time the vinegar has to dissolve the mineral deposits.
- Drain and Flush: After the soaking period, open the hot water faucet inside your house again. Attach the garden hose to the drain valve and open the drain valve. Let the vinegar solution drain completely. The water may appear cloudy or contain flakes of scale.
- Rinse Thoroughly: Close the drain valve. Turn the cold water supply back on to refill the tank with fresh water. Let it fill, then drain it completely again. Repeat this rinse cycle 2-3 times until the water coming out of the drain hose is clear and you no longer smell vinegar. This ensures all vinegar and dissolved scale are gone.
- Restart the Heater: Once rinsed and empty, close the drain valve. Refill the tank completely with cold water. Ensure water flows steadily from an indoor hot water faucet. Close the faucet. Finally, restore power to your hot water heater.
Descaling with vinegar is an effective way to restore your water heater’s performance. It extends its life and helps you enjoy consistently hot water without wasting energy.
Maintaining Tankless Water Heaters: A Different Approach
Tankless water heaters, also known as on-demand water heaters, are different from traditional tank models. They heat water as it flows through, eliminating the need for a storage tank. This design offers energy savings and a continuous supply of hot water. However, like tanked heaters, they are also susceptible to mineral buildup, especially in hard water areas.
Cleaning a tankless water heater involves descaling its internal coils. This process is often called “flushing” or “descaling.” It is crucial for maintaining efficiency and longevity. The process is slightly more involved than flushing a tanked heater, but it is still manageable for many homeowners.
Understanding Tankless Systems
Tankless water heaters contain a series of heating coils. Cold water enters the unit and passes through these coils, where it is rapidly heated by a gas burner or electric element. Minerals present in the water can precipitate out and cling to the inside of these coils. This creates scale.
Scale buildup restricts water flow and reduces heat transfer efficiency. This means your tankless unit has to work harder to heat the water. Over time, severe scaling can lead to decreased hot water output, higher energy bills, and even damage to the heating elements or heat exchanger. Regular descaling prevents these problems.
Step-by-Step Tankless Descaling
Descaling a tankless water heater typically requires a descaling pump kit. This kit circulates a cleaning solution through the unit. You can often rent these kits or purchase them.
- Preparation and Shutdown:
- Turn off the power to the tankless unit (circuit breaker for electric, gas supply valve and unit switch for gas).
- Close the cold water inlet valve and the hot water outlet valve on the tankless unit.
- Locate the two service ports (usually with caps or valves) on the unit’s bottom. These are for flushing.
- Connect Descaling Kit:
- Attach one hose from your descaling pump to the cold water service port.
- Attach another hose from the hot water service port and direct it into a large, clean bucket or bin.
- Place the pump itself inside the bucket. The bucket will hold your cleaning solution.
- Open both service port valves.
- Prepare Cleaning Solution:
- Fill the bucket with about 2-3 gallons of white vinegar. You can use a commercial descaling solution, but white vinegar is effective and safer.
- Ensure the pump’s intake hose is fully submerged in the vinegar solution.
- Circulate the Solution:
- Turn on the descaling pump. The pump will draw the vinegar solution from the bucket, push it through the tankless unit’s coils, and return it to the bucket.
- Allow the solution to circulate for at least 30-60 minutes. For very hard water or neglected units, you might circulate it for 90 minutes or more. You may see some discolored water or small particles returning to the bucket, indicating scale removal.
- Flush and Restart:
- After circulation, turn off the pump.
- Close the service port valves.
- Disconnect the hoses from the service ports.
- Use fresh water to flush the unit: open the cold water inlet valve slightly to allow fresh water to flow through the unit and out the hot water service port (directing it to a drain or bucket) for a few minutes to rinse out all the vinegar and loosened scale.
- Close the cold water inlet valve.
- Reinstall the service port caps or close their valves.
- Open the hot water outlet valve and then the cold water inlet valve completely.
- Turn the power back on to the tankless water heater.
- Open a hot water faucet inside your home to purge any air from the lines.
Descaling your tankless water heater every 1-2 years helps maintain its efficiency and extends its operational life. It is a critical task for anyone with one of these modern units.
Inspecting and Replacing the Anode Rod
Beyond flushing and descaling, there’s another critical component in a hot water heater that needs attention: the anode rod. This simple-looking rod plays a vital role in protecting your tank. Many homeowners are unaware of its existence or its function. I consider checking the anode rod a crucial part of comprehensive water heater maintenance.
Neglecting the anode rod can lead to premature tank failure. Rust is the enemy of steel water tanks. The anode rod acts as a sacrificial protector, drawing corrosive elements away from the tank walls. Understanding its purpose and how to inspect it can save you from costly replacements down the line.
The Anode Rod’s Purpose
The anode rod, often called a “sacrificial rod,” is typically made of magnesium, aluminum, or zinc alloy. It is screwed into the top of your hot water heater tank. Its main job is to prevent rust and corrosion. Inside the water tank, a process called electrolysis occurs. This means tiny electrical currents are naturally present in the water. These currents can cause the steel tank lining to rust.
The anode rod is designed to be more “electrically attractive” than the steel of the tank. Corrosive elements in the water attack the anode rod instead of the tank walls. Over time, the anode rod corrodes and dissolves, sacrificing itself to protect the tank. This is why it’s called a sacrificial rod. If the anode rod is completely consumed, the tank itself becomes vulnerable to rust and leaks.
How to Check and Replace
Checking the anode rod is a bit more involved than flushing, but it’s manageable. You should inspect your anode rod every 3-5 years, or more frequently if you have very hard water or a water softener. Here’s a general guide:
- Prepare the Heater: Follow the same safety steps as for flushing. Turn off power to the water heater, shut off the cold water supply, and open a hot water faucet inside your house to relieve pressure.
- Locate the Anode Rod: The anode rod is usually located on the top of the water heater. It’s often beneath a plastic cap and looks like a large hex head bolt. It might be challenging to find if covered by insulation.
- Drain Some Water: Before removing the rod, drain a few gallons of water from the tank using the drain valve and a garden hose. This reduces pressure and prevents spills when you loosen the rod.
- Remove the Anode Rod: Use a large socket wrench (often 1 1/16” or 1 1/4”) and a breaker bar to loosen and unscrew the anode rod. It can be very tight due to corrosion. Be careful as it’s long and heavy when pulled out.
- Inspect the Rod:
- Good condition: The rod should be relatively thick and uniform.
- Needs replacement: If the rod is thin (less than half its original diameter), pitted, cracked, or heavily corroded with only the core wire remaining, it’s time for a new one.
- Completely gone: If you pull out only the wire, it means the rod has fully sacrificed itself, and your tank has been unprotected.
- Install a New Rod: Wrap the threads of the new anode rod with Teflon tape (plumber’s tape). Carefully screw the new rod into the opening, hand-tightening it first, then using the wrench to tighten it securely. Do not overtighten.
- Refill and Restart: Close the drain valve. Turn on the cold water supply valve to refill the tank completely. Once water flows steadily from the indoor hot water faucet, close the faucet. Restore power to your water heater.
Regularly checking and replacing the anode rod is a small effort that yields big returns. It helps you get the longest possible life out of your hot water heater, preventing unexpected leaks and costly replacements.
Preventative Measures and Regular Water Heater Maintenance Tips
Keeping your hot water heater in top shape goes beyond occasional deep cleaning. Regular, proactive maintenance can extend its life significantly, ensure consistent hot water, and keep energy bills down. I always advise homeowners to adopt a routine maintenance schedule. Small actions today can prevent big problems tomorrow.
These tips apply to both tanked and tankless models, though specific steps might vary. The goal is always to reduce stress on the unit and identify potential issues before they become major failures. A little attention can make a huge difference in your home’s hot water supply.
Establishing a Cleaning Schedule
Consistency is key for water heater longevity. Here is a recommended schedule for various maintenance tasks:
- Annually (at least):
- Flush the tank (tanked heaters): This is the most crucial step for removing sediment. If you have hard water, consider flushing every six months.
- Descale (tankless heaters): Circulate a descaling solution through the unit’s coils. This should also be done annually.
- Test the T&P (Temperature and Pressure Relief) Valve: Carefully lift the lever on the T&P valve for a few seconds. Water should gush out and then stop when released. This confirms the valve is working and not stuck. Be cautious, as hot water will discharge. If water continues to trickle, replace the valve.
- Every 3-5 years:
- Inspect and replace the anode rod (tanked heaters): As discussed, this sacrificial rod prevents tank corrosion. Replacing it extends tank life.
- Monthly (quick checks):
- Visual inspection: Look for any leaks, rust, or corrosion around the unit and its connections.
- Check pilot light (gas heaters): Ensure it’s burning steadily.
- Listen for unusual noises: Popping, banging, or rumbling can indicate sediment buildup.
Setting a reminder on your phone or calendar makes it easier to stick to this schedule.
Monitoring Water Quality
The quality of your water directly impacts your water heater. Hard water is the primary cause of mineral buildup and scale. If you notice signs of hard water (soap scum, spots on dishes, dry skin), consider these actions:
- Test your water: You can buy home testing kits or have your water utility provide information on your local water hardness.
- Install a water softener: If your water is very hard, a water softener can significantly reduce mineral buildup in all your plumbing, including your water heater. This is a larger investment but can save money on appliance longevity and efficiency.
- Consider a sediment filter: For well water or water with high sediment content, installing a whole-house sediment filter can help. This filter catches larger particles before they enter your water heater. This is similar to how to clean under sink water filter as they both deal with filtration. You might also find tips on how to clean sediment from water lines helpful for general plumbing health.
- hot water heaters
- water heater maintenance
- sediment removal
- descaling
- home cleaning