· Outdoor Cleaning · 14 min read
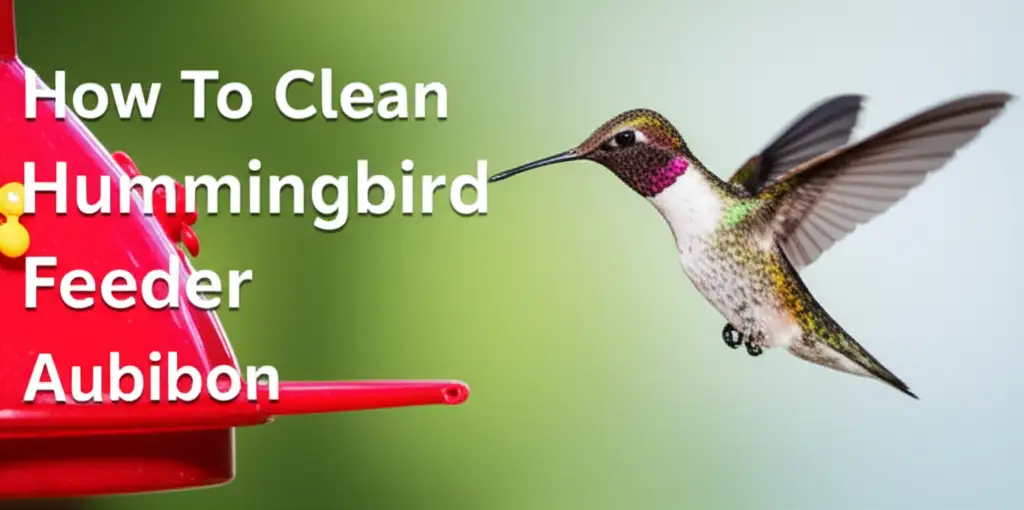
How To Clean Hummingbird Feeder Audubon

Keep Hummingbird Feeders Clean: An Audubon-Approved Guide
Hummingbirds bring bright energy to our gardens. They dart and hover, drinking sweet nectar. Many of us love watching them visit our feeders. However, a dirty feeder can harm these tiny birds. It is very important to keep their food source safe.
Learning how to clean hummingbird feeder Audubon style means you follow best practices. This ensures your feeder offers a healthy meal, not a hazard. This guide will walk you through everything. We cover why cleaning is vital, what tools you need, and a step-by-step cleaning process. We also discuss how often to clean your feeder. We will help you attract more healthy hummingbirds.
Takeaway
- Regular cleaning prevents harmful mold and bacteria growth in feeders.
- Use mild soap, a bleach solution, or vinegar for sanitization.
- Disassemble, scrub thoroughly, rinse completely, and air dry your feeder.
- Clean feeders every 2-3 days, more often in hot weather.
- Audubon advises against red dye and emphasizes thorough rinsing.
To clean a hummingbird feeder, disassemble all parts. Use hot water and a bottle brush to scrub away old nectar and residue. For deep cleaning, soak parts in a mild bleach solution (1 part bleach to 9 parts water) or a vinegar solution. Rinse all components completely to remove any cleaning agents before refilling with fresh nectar.
Why Cleaning Your Hummingbird Feeder Matters
Attracting hummingbirds is a true joy. These small, jewel-toned birds add beauty to any backyard. Yet, the responsibility of feeding them goes beyond simply hanging a feeder. A clean feeder is crucial for their health and safety.
Hummingbird feeders hold sugar water, a perfect breeding ground for mold and bacteria. This happens quickly, especially in warm weather. Mold appears as black spots or fuzzy growth. It can make hummingbirds very sick. Ingesting spoiled nectar can cause mouth infections or even death. We must protect these delicate creatures.
Dirty feeders can also ferment the nectar. Fermented nectar contains alcohol. This is harmful to hummingbirds. It can impair their flight and make them vulnerable to predators. Providing a clean food source shows respect for wildlife. It also ensures the birds keep returning to your garden. Many resources, like those on preventing mold from washing machines, highlight the dangers of unchecked mold growth. The same principles apply to your feeders.
Unclean feeders also deter hummingbirds. Birds have good senses. They will avoid a feeder with bad-smelling or discolored nectar. If your feeder goes unvisited, a lack of cleanliness may be the reason. Regular cleaning attracts more birds. It also ensures they find a safe, fresh food supply. Keeping feeders clean protects the birds and enhances your bird-watching experience.
Essential Tools for Cleaning Hummingbird Feeders
Cleaning a hummingbird feeder is not difficult. Having the right tools makes the job much easier. You do not need many items. Simple household supplies often work best. Gathering these items before you start saves time.
First, you need a good brush. Bottle brushes with long handles are ideal for the main reservoir. Smaller brushes, often called feeder brushes or tube brushes, are perfect for cleaning feeding ports and small crevices. These brushes reach all the hidden spots. They ensure no sticky residue remains. You can find these brushes at pet stores or bird supply shops.
Next, you need a cleaning solution. Hot water is always the first step. For deeper cleaning, you have a few options. Mild dish soap, like unscented dish soap, is good for regular cleaning. Avoid strong detergents or perfumed soaps. These can leave harmful residues. Many people use a bleach solution for sanitizing. A common ratio is one part bleach to nine parts water. This kills bacteria and mold effectively. Another popular choice is white vinegar. Vinegar is a natural disinfectant. You can use a solution of one part vinegar to four parts water. For tips on cleaning with natural solutions, consider how to clean with vinegar and baking soda for other household tasks.
Finally, you need a large basin or bucket. This helps soak feeder parts. It also keeps your cleaning area tidy. A clean towel or paper towels are useful for drying. Remember, never use abrasive scrubbers. They can scratch the feeder. Scratches create tiny hiding places for mold. Always choose soft brushes and cloths.
Step-by-Step Guide: How to Clean Hummingbird Feeder Audubon Style
Cleaning your hummingbird feeder the Audubon-approved way follows a simple process. It ensures maximum cleanliness and bird safety. This routine makes feeder maintenance easy. Let’s break it down into clear steps.
Step 1: Disassemble the Feeder
Start by taking apart your feeder. Remove the top, base, and any individual feeding ports. Some feeders have multiple parts. Separate everything you can. This allows you to reach all surfaces. Old nectar is sticky. It hides in small areas. Full disassembly makes cleaning effective.
Step 2: Empty and Rinse
Empty any old nectar into the trash. Do not pour it on your plants. Sugary water can attract unwanted pests. Rinse all parts thoroughly with hot water. This removes loose debris and sticky residue. Hot water helps dissolve hardened sugar. It is a good first flush.
Step 3: Scrub with Soap and Water
Now, it is time to scrub. Use a mild, unscented dish soap and hot water. Scrub every part of the feeder. Use a bottle brush for the reservoir. Use small brushes for feeding ports and nectar channels. Pay close attention to corners and edges. These areas often collect mold or old nectar. Ensure you remove all visible grime. Some cleaning principles, like those for cleaning stains on wood, emphasize thorough scrubbing.
Step 4: Disinfect the Feeder
After scrubbing, disinfect the feeder. This kills any remaining bacteria or mold spores. You have two main options:
- Bleach Solution: Mix one part bleach with nine parts hot water. Soak all feeder parts in this solution for 10-15 minutes. This is very effective against pathogens.
- Vinegar Solution: Mix one part white vinegar with four parts hot water. Soak feeder parts for at least 30 minutes. Vinegar is a natural, non-toxic disinfectant.
Many prefer vinegar due to its safety profile. For example, similar natural cleaning methods are useful for tasks like how to clean a shower with baking soda. Whichever you choose, ensure all parts are submerged.
Step 5: Rinse Thoroughly
This is the most critical step. Rinse all feeder parts repeatedly with clean, cool water. Rinse until you cannot detect any smell of bleach or vinegar. Residue from cleaning agents is very harmful to hummingbirds. They are tiny and sensitive. Even small traces can make them sick. Hold parts under running water. Shake them to dislodge trapped water. Continue rinsing until you are completely sure.
Step 6: Air Dry Completely
Let all feeder parts air dry completely. Place them on a clean towel or drying rack. Ensure they are dry before reassembling. Moisture can lead to new mold growth. Direct sunlight can help dry and further sanitize. Avoid using paper towels to dry the inside. Paper fibers can stick to the feeder. Once dry, reassemble your feeder.
Frequency and Best Practices for Feeder Maintenance
Knowing how to clean is only half the battle. Knowing when to clean is just as important. Regular maintenance is key to keeping hummingbirds healthy. The cleaning frequency depends mostly on the weather and how many birds visit.
In mild weather, clean your feeder every 2-3 days. This is a good baseline. If temperatures rise above 80°F (27°C), you need to clean more often. Nectar spoils very quickly in the heat. Daily cleaning is best during hot spells. If you notice the nectar looks cloudy or you see any black spots, clean it immediately. Do not wait for the scheduled cleaning time.
Best practices go beyond just cleaning. Consider where you place your feeder. Choose a shady spot. Direct sunlight makes nectar ferment faster. It also dries out the feeding ports. A shady location keeps the nectar fresh for longer. This reduces the need for constant refilling and cleaning.
Monitor your feeder daily. Check the nectar level. Look for signs of spoilage. Also, check for pests like ants or bees. If you see ants, use an ant moat. This is a small cup filled with water that hangs above the feeder. Ants cannot cross the water. If bees are a problem, try feeders with smaller feeding ports. These are harder for bees to access. Maintaining a schedule ensures hummingbirds always have a safe meal. It also helps you spot problems early.
Common Problems and Troubleshooting Feeder Cleaning
Even with regular cleaning, you might encounter issues. Hummingbird feeders face specific challenges. Knowing how to troubleshoot these helps keep your tiny visitors safe. Let’s look at some common problems and their solutions.
Mold is the most frequent and serious issue. It appears as black specks, fuzzy patches, or a cloudy film inside the feeder. Mold spores can be everywhere. They grow rapidly in sugary, moist environments. If you see any mold, immediately take down the feeder. Do not just rinse it. You must perform a deep clean using bleach or vinegar solution. Make sure to scrub every part. For stubborn mold, you might need to soak parts longer. Remember, even a small amount of mold is dangerous. Insights from cleaning other items, like removing black mold off wood, show how persistent mold can be. Thorough cleaning is the only answer.
Ants and bees are another common nuisance. Ants are attracted to the sweet nectar. They can crawl into the feeder, contaminating the food. To stop ants, use an ant moat. Fill it with water. Hang it above your feeder. Ants cannot cross the water barrier. Another option is to rub a thin layer of petroleum jelly on the hanger. Be careful not to get it on the feeder itself. Bees also like nectar. Some feeders have “bee guards” which are small plastic pieces covering the feeding ports. These allow hummingbird tongues to access the nectar but block bees. If bees persist, consider moving the feeder. Sometimes, a different location helps.
Sometimes, nectar leaks from the feeder. Leaks waste nectar and attract pests. Check that all feeder parts are assembled tightly. Look for cracks in the plastic or glass. If you find cracks, it is time to replace the feeder. Rubber seals can wear out over time. If your feeder has seals, check them for damage. Replace them if needed. Keeping the feeder in good repair prevents many issues.
Audubon’s Recommendations for Responsible Feeder Care
The National Audubon Society is a leading voice in bird conservation. They offer excellent guidance on responsible bird feeding. Their recommendations for hummingbird feeder care focus on bird health and safety above all else. Following Audubon’s advice ensures you are providing the best care.
Audubon strongly emphasizes cleanliness. They state that a dirty feeder does more harm than good. They recommend cleaning feeders every 1-2 days when temperatures are over 75°F. In cooler weather, every 3-4 days is sufficient. This frequent cleaning prevents the growth of harmful bacteria and fungi. They also advise using a weak bleach solution (one part bleach to nine parts water) or very hot water for cleaning. Always rinse thoroughly. This removes all traces of cleaning agents. Any residue can be toxic to hummingbirds.
A crucial Audubon recommendation is to avoid red dye in homemade nectar. Many commercial nectars include red dye. Manufacturers believe it attracts hummingbirds. However, scientific evidence suggests red dye is unnecessary. Hummingbirds are attracted to the red color of the feeder itself. The dye offers no benefit to the birds. Some studies suggest it might even be harmful. Artificial dyes are chemicals. Birds do not need them in their diet. Stick to a simple sugar-water solution.
Audubon also advises on the correct nectar recipe. They recommend a simple solution of four parts water to one part white granulated sugar. Do not use honey or artificial sweeteners. Honey can grow harmful bacteria that affect hummingbirds. Artificial sweeteners offer no energy for the birds. They need the sugar for fuel. Always boil the water and sugar. Let it cool before filling the feeder. This helps dissolve the sugar completely. It also extends the nectar’s shelf life slightly. Follow these simple guidelines. You will support healthy hummingbirds.
Beyond Cleaning: Nectar Preparation and Feeder Placement
Proper cleaning is vital, but so are the other aspects of feeder maintenance. How you prepare the nectar and where you place your feeder greatly impact hummingbird visits and their well-being. These small details make a big difference.
Let’s talk about nectar preparation first. The best nectar recipe is simple: four parts water to one part white granulated sugar. For example, use four cups of water for every one cup of sugar. Boil the water first. Then, add the sugar and stir until it dissolves completely. Let the solution cool to room temperature before filling your feeder. Do not use brown sugar, powdered sugar, or artificial sweeteners. Brown sugar and powdered sugar contain other ingredients or are not pure sucrose. Honey can promote fungal growth that is deadly to hummingbirds. Stick to plain white table sugar. This provides the pure energy source they need. Make only enough nectar for a few days. Store any extra in the refrigerator for up to a week.
Feeder placement also plays a crucial role. Choose a location that is visible to hummingbirds. Bright colors on the feeder help attract them. Place the feeder in a spot with partial shade, especially during the hottest part of the day. Direct sun makes the nectar ferment much faster. This means you will need to clean the feeder more often. Also, avoid placing feeders directly over valuable plants or furniture. Dripping nectar can make a sticky mess.
Consider safety from predators. Cats are a major threat to hummingbirds. Place feeders away from dense shrubbery where cats might hide. Hang feeders high enough to be out of reach of ground predators. If squirrels are a problem, use a squirrel baffle above the feeder. Lastly, position feeders where you can easily see them. This lets you enjoy watching the hummingbirds. It also helps you monitor the feeder’s cleanliness and nectar levels. Good placement makes a safer and more enjoyable experience for both you and the birds.
FAQ Section
Q1: How often should I clean my hummingbird feeder?
You should clean your hummingbird feeder every 2-3 days in mild weather. In hot temperatures above 80°F (27°C), clean it daily. Nectar spoils quickly in heat. If you see any signs of mold or cloudiness, clean it immediately. Regular cleaning prevents harmful bacteria growth and keeps the nectar fresh for the birds.
Q2: Can I use dish soap to clean a hummingbird feeder?
Yes, you can use a mild, unscented dish soap to clean your hummingbird feeder. Use it with hot water to scrub away old nectar and residue. However, for sanitizing, it is better to use a dilute bleach solution or white vinegar. Always rinse the feeder parts completely after using any soap or cleaning agent. No residue should remain.
Q3: What if I see mold in my feeder?
If you see mold, immediately remove the feeder. Disassemble all parts. Scrub thoroughly with a brush and hot water. Then, soak the parts in a bleach solution (1 part bleach to 9 parts water) or a vinegar solution (1 part vinegar to 4 parts water) for at least 15-30 minutes. Rinse extensively until no smell remains.
Q4: Is red dye necessary in hummingbird nectar?
No, red dye is not necessary in hummingbird nectar. Hummingbirds are attracted to the color red on the feeder itself. Artificial dyes offer no nutritional value to the birds. Some sources suggest they could even be harmful. It is best to stick to clear sugar water made from white granulated sugar and water.
Q5: How long does hummingbird nectar last?
Homemade hummingbird nectar lasts about 2-3 days in the feeder at room temperature. In hot weather, it may spoil in just one day. Nectar stored in the refrigerator can last up to a week. Always check for cloudiness, mold, or fermentation before refilling your feeder. Dispose of any spoiled nectar promptly.
Q6: Do hummingbirds remember feeders?
Yes, hummingbirds have excellent spatial memory. They remember the locations of reliable food sources, including feeders. Once they find your feeder, they are likely to return year after year, often arriving around the same time. Consistent feeding and a clean, safe feeder encourage their repeated visits.
Conclusion
Keeping your hummingbird feeder clean is more than just good practice; it is vital for the health and safety of these amazing birds. By following this Audubon-approved guide on how to clean hummingbird feeder Audubon style, you provide a safe and healthy food source. This simple act of regular maintenance makes a big difference in their lives.
We covered the importance of cleanliness. We looked at the essential tools you need. We walked through a step-by-step cleaning process. We discussed how often to clean. We also talked about common problems and Audubon’s specific recommendations. Remember, a clean feeder prevents harmful mold and bacteria. It ensures hummingbirds get fresh, uncontaminated nectar. Your efforts contribute to their well-being. Continue to monitor your feeder. Keep it sparkling clean. You will enjoy the vibrant presence of hummingbirds in your garden for seasons to come.
- hummingbird feeder cleaning
- Audubon feeder maintenance
- bird feeder hygiene
- nectar feeder care
- outdoor cleaning tips
- bird safety
- preventing mold in feeders


