· Tech Cleaning & Maintenance · 21 min read
How To Clean Keyboard Cover
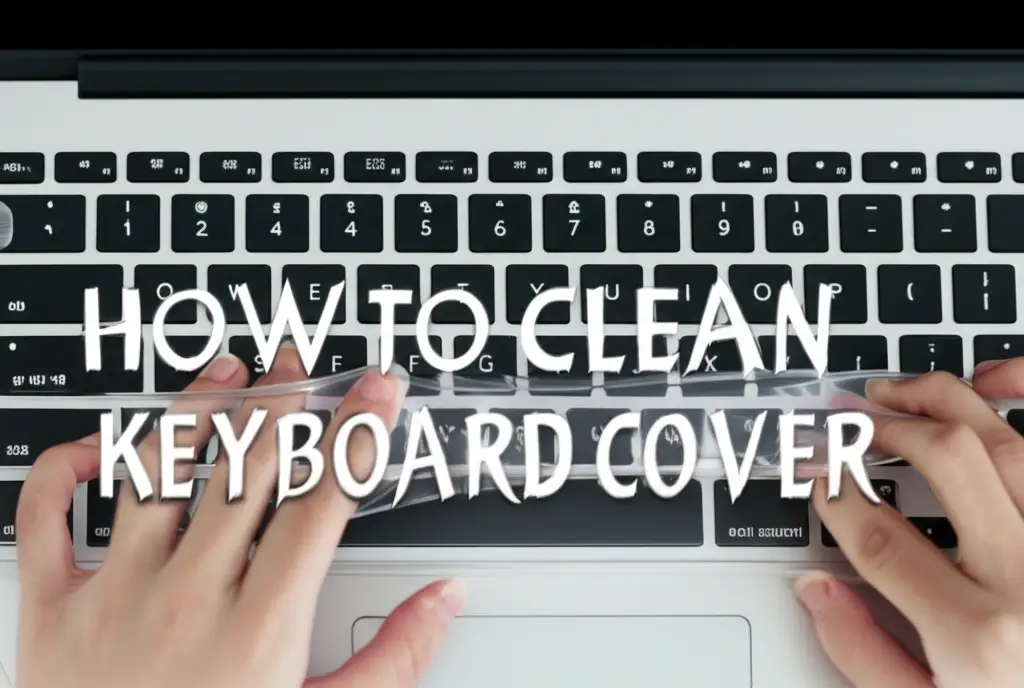
How to Clean Keyboard Cover: A Complete Care Guide
Your keyboard cover works hard. It shields your laptop or desktop keyboard from dust, crumbs, spills, and everyday grime. Over time, however, this protective barrier gathers its own share of dirt. Learning how to clean keyboard cover correctly keeps your workspace hygienic and your equipment looking new. A clean keyboard cover also feels better under your fingertips. This guide provides clear steps to refresh your keyboard cover, no matter its material. We will explore different cleaning methods, essential tools, and tips for lasting cleanliness.
Takeaway
To clean your keyboard cover effectively:
- Identify the material: silicone or TPU.
- Gather mild soap, water, and soft cloths.
- Remove the cover from the keyboard.
- Gently wash by hand, avoiding harsh chemicals.
- Rinse thoroughly to remove all soap.
- Air dry completely before reattaching.
- Clean regularly to prevent buildup and maintain hygiene.
How to Clean Keyboard Cover
Cleaning your keyboard cover involves removing it, gently washing with mild soap and water, rinsing thoroughly, and allowing it to air dry completely before reattaching. Specific steps vary slightly based on material, but this general method ensures hygiene and extends its life.
Understanding Your Keyboard Cover: Types and Materials
Before you start cleaning, you need to know what kind of keyboard cover you have. Most covers are made from one of two materials: silicone or thermoplastic polyurethane (TPU). Each material has unique properties that affect how you clean it. Understanding these differences helps you choose the right method. This step prevents damage and ensures a thorough clean.
Silicone Keyboard Covers
Silicone covers feel soft and flexible. They offer a good grip on the keys. These covers resist spills well and feel comfortable to type on. Silicone is also very durable. You can usually stretch them a little without causing damage.
However, silicone can attract dust and lint easily. It can also become a bit sticky over time. This stickiness traps dirt, making the cover look dull. You might see fingerprints or smudges more clearly on silicone. Regular cleaning helps remove this sticky layer and keeps the cover feeling fresh.
TPU Keyboard Covers
TPU covers are thinner and feel more rigid than silicone. They offer a clearer view of the keyboard’s backlight. TPU is known for its strength and resistance to oils and abrasions. Many people prefer TPU for its less “rubbery” feel.
TPU covers are less prone to becoming sticky. They tend to collect dirt in the gaps between keys more. While durable, TPU can sometimes show scratches more easily. Proper care ensures its clarity and protective qualities remain. Knowing your cover type prevents damage during cleaning.
Gathering Your Cleaning Arsenal: Essential Tools and Solutions
Cleaning a keyboard cover does not require many special tools. You likely have most items at home already. Using the right supplies ensures a safe and effective cleaning process. Prepare everything before you begin. This makes the job quicker and simpler.
Mild Cleaning Solutions
You need a gentle cleaner for your keyboard cover. Harsh chemicals can damage the material or leave a residue. I always recommend starting with the simplest option first. This protects your cover and your keyboard underneath.
- Dish Soap and Water: A small amount of mild dish soap mixed with warm water works perfectly. This solution cuts through grease and grime without harming silicone or TPU. Make sure the soap is dye-free and unscented if possible.
- Rubbing Alcohol (Isopropyl Alcohol): For tougher spots or disinfecting, you can use rubbing alcohol. Dilute it with water for most cleaning. Alcohol evaporates quickly, which is good for electronics. However, use it sparingly on silicone as it can dry it out over time. Always test in a small, hidden area first.
- Gentle Hand Soap: Liquid hand soap, like the kind you use for washing hands, is also a good option. It is mild and designed for skin contact, so it is safe for your cover. Just make sure it does not contain strong moisturizers or harsh chemicals.
Necessary Tools and Supplies
Having the right tools ready helps you clean thoroughly. These items support the cleaning process from start to finish. You will find them useful for different stages of the cleaning.
- Soft Microfiber Cloths: These cloths are gentle and absorb water well. They will not scratch your keyboard cover. Use one for washing and another for drying.
- Cotton Swabs or Q-Tips: These are perfect for reaching small crevices or cleaning around individual key outlines. They help remove dirt trapped in tight spots.
- Small Soft Brush (Optional): A clean, soft toothbrush or a dedicated detailing brush can help dislodge stubborn crumbs. Use it gently to avoid scratching the surface.
- Clean Sink or Basin: You will need a clean area to wash the cover. A kitchen sink or a plastic basin works well. Make sure it is free from other cleaning product residues.
- Paper Towels (Optional): You can use these for initial blotting or to clean up any spills during the process. However, for the final dry, microfiber cloths are better.
Remember to keep your actual keyboard safe while cleaning the cover. Before you remove the cover, power down your laptop or computer. This prevents accidental key presses. Also, always check if your keyboard itself needs a clean. Sometimes, dust and debris can get under the cover. If your keyboard keys feel sticky, you might also need to clean the keyboard itself. You can find useful tips on how to clean sticky keyboard keys or even how to clean greasy keyboard in other guides.
Step-by-Step Guide: Cleaning Silicone and TPU Keyboard Covers
Cleaning your keyboard cover is a simple process. The key is to be gentle and thorough. I break it down into easy steps for both common materials. This ensures your cover gets the care it needs without damage.
Step 1: Remove the Keyboard Cover Safely
First, power off your computer or laptop. Unplug it from the power source. This prevents any electrical accidents. It also stops accidental key presses. Gently lift the keyboard cover from your keyboard. Most covers come off easily without force.
Once removed, give it a good shake. This helps remove loose dust, hair, and crumbs. You can also hold it over a trash can and gently tap it. This initial step makes the wet cleaning easier. Check for any large debris still clinging to it.
Step 2: Prepare Your Cleaning Solution
Get a clean sink or a basin. Fill it with warm water. Add a few drops of mild dish soap. Stir the water gently to mix the soap. You want a slightly soapy solution, not a sudsy mess. The water should feel warm, not hot. Hot water can sometimes deform certain plastics or silicone over time.
For an extra disinfecting step, you can use rubbing alcohol. Mix 70% isopropyl alcohol with water in a 1:1 ratio. Put this in a spray bottle. This is good for occasional deeper cleans. Do not use full-strength alcohol on your cover.
Step 3: Gentle Washing by Hand
Submerge your keyboard cover in the soapy water. Let it soak for a minute or two. This helps loosen stuck-on dirt. Do not let it sit too long, especially TPU covers.
Use your fingers or a soft microfiber cloth to gently rub the cover. Pay attention to areas that look dirty or feel sticky. For silicone covers, you might notice a slick feeling as you rub. This is the oil and residue coming off. For TPU covers, focus on the gaps between the key impressions.
If you see crumbs stuck in crevices, use a cotton swab. Dip the swab in the soapy water. Gently wipe along the edges of the keys. A soft brush can help with stubborn bits. Be very careful not to scrub too hard. The goal is to clean, not to damage. If you have concerns about getting water into your actual keyboard, check out tips on how to clean laptop keyboard after spill.
Step 4: Rinse Thoroughly
Rinsing is a crucial step. Soap residue can make your cover feel sticky again once it dries. Rinse the keyboard cover under cool, running water. Make sure all soap bubbles disappear. Continue rinsing until the cover feels clean and not slippery.
Hold the cover up to the light. Look for any remaining soapy film. If you find any, rinse it again. Thorough rinsing prevents streaks and residue buildup. This step makes sure your keyboard cover stays clear and clean after drying.
Step 5: Initial Drying and Air Drying
After rinsing, gently shake the cover to remove excess water. Lay it flat on a clean, dry microfiber cloth. Gently pat it down to absorb more moisture. Do not wring or twist the cover. This can stretch or deform it.
Once you have blotted most of the water, let it air dry completely. Place it on a clean surface or hang it over a drying rack. Choose a spot with good airflow. Avoid direct sunlight or high heat sources. Heat can damage or warp the material. Drying can take a few hours. Make sure it is bone dry before putting it back on your keyboard. Any moisture could damage your device. For more tips on keyboard maintenance, you might want to learn how to clean Apple keyboard or even how to clean Logitech keyboard for brand-specific advice.
Dealing with Stubborn Stains and Sticky Residue
Sometimes, basic washing is not enough. Your keyboard cover might have tough stains or a persistent sticky feel. These issues often come from spills like coffee or soda, or from prolonged skin oil contact. Do not worry; there are solutions for these problems. Handling these issues requires a bit more focus.
Addressing Sticky Residue on Silicone
Silicone keyboard covers can develop a sticky or gummy texture over time. This happens from skin oils, dust, and food particles. A simple wash might not remove all of it. This residue feels unpleasant. It also attracts more dirt.
- Rubbing Alcohol Wipe: For persistent stickiness, try a solution of 70% isopropyl alcohol mixed with an equal part of water. Dampen a clean microfiber cloth with this solution. Gently wipe down the sticky areas of the silicone cover. The alcohol helps break down oils and residues. Ensure the cloth is damp, not wet. Alcohol evaporates quickly, which is good.
- Baking Soda Paste (for extreme stickiness): If alcohol does not work fully, make a thin paste with baking soda and a tiny bit of water. Apply this paste to the sticky spots. Gently rub with your fingers or a soft cloth. Baking soda is a mild abrasive that can lift stubborn residue. Rinse very thoroughly afterward. Make sure all baking soda is gone.
Removing Stains from Food or Drinks
Spills happen. Coffee, tea, or soda can leave noticeable stains on your keyboard cover. Act quickly for the best results. Dried stains are harder to remove.
- Immediate Action for Spills: If a spill just happened, remove the cover right away. Rinse it under cool water immediately. This often washes away most of the liquid before it sets. Then proceed with the standard wash using mild dish soap.
- Targeted Cleaning for Dried Stains: For dried stains, create a stronger soapy solution. Use a slightly higher concentration of dish soap in warm water. Soak the stained area for a few minutes. Use a cotton swab or a corner of a soft cloth to gently rub the stain. For very dark stains, a diluted bleach solution (1 part bleach to 10 parts water) can be used very carefully on white or clear covers, but test in an inconspicuous area first. This method is usually not for colored covers.
- Alcohol for Ink Stains: If you have ink or marker stains, a small amount of rubbing alcohol on a cotton swab can help. Dab it directly on the stain. Gently blot the area. Do not rub vigorously. Rinse with water immediately after the stain lifts. You can also explore options on how to clean keyboard switches if the spill penetrated your cover.
Always rinse your keyboard cover completely after using any stronger cleaning agent. This removes residues that could degrade the material or attract new dirt. Proper drying remains essential. You want your cover completely dry before placing it back onto your keyboard. This protects your valuable electronics. For more general keyboard cleaning tips, consider looking up guides on how to clean laptop keyboard.
Drying and Reattaching Your Keyboard Cover Correctly
Proper drying is as important as the cleaning itself. A damp keyboard cover can cause damage to your laptop or desktop keyboard. Moisture can lead to shorts or corrosion. Taking the time to dry it completely ensures safety and prolongs the life of both your cover and your device. Reattaching it correctly also helps the cover do its job best.
Ensuring Complete Dryness
After rinsing your keyboard cover, remove as much water as possible. Gently shake off excess water. Then, lay the cover flat on a clean, absorbent microfiber towel. Gently press another dry towel on top to blot out more moisture. Do not wring or twist the cover. This can stretch or deform it, making it fit poorly later.
The best way to dry it completely is to air dry it. Find a clean, dry area with good air circulation. You can place it on a drying rack or lay it on a clean towel. Avoid direct sunlight or using heat sources like hair dryers. High heat can cause the material to warp, shrink, or become brittle. Silicone and TPU are sensitive to extreme temperatures. Allow several hours for it to air dry. For a very thin cover, it might take less time. For a thicker one, it could be overnight. Feel every part of the cover. Make sure it feels completely dry to the touch. Check the crevices around the key impressions too. Even a tiny bit of moisture can be a problem.
Reattaching Your Keyboard Cover
Once your keyboard cover is perfectly dry, it is time to put it back on. Make sure your computer or laptop is still turned off and unplugged. This is a safety measure. It also prevents accidental inputs as you replace the cover.
- Align the Cover: Carefully align the keyboard cover with your keyboard. Most covers have specific cutouts for keys that help you line them up. Start at one corner or edge.
- Press Gently: Slowly press the cover down, working your way across the keyboard. Ensure each key impression aligns with its corresponding key. This helps the cover sit flat and securely. You want a snug fit.
- Check for Air Bubbles: For very thin TPU covers, you might see small air bubbles. Gently press them out towards the edges. This helps the cover adhere properly and provides a clear view of the keys.
- Test Key Responsiveness: Once the cover is in place, power on your computer. Briefly test a few keys. Make sure they press down without issue. The cover should not interfere with normal typing. If a key feels stiff, reposition the cover slightly.
A properly dried and reattached cover will protect your keyboard effectively. It will also look clean and feel good to use. Regular cleaning and correct reattachment extend the life of your keyboard cover and your valuable electronics. Remember, maintaining your keyboard’s cleanliness under the cover is also important. Resources like how to clean keys on keyboard can offer additional insights.
Preventative Measures: Keeping Your Keyboard Cover Clean Longer
Cleaning your keyboard cover regularly keeps it looking new. However, preventing it from getting too dirty in the first place saves you time and effort. Small habits make a big difference. These tips help maintain your keyboard cover’s cleanliness day-to-day. They also extend the time between deep cleans.
Mindful Eating and Drinking Habits
One of the biggest sources of keyboard cover grime is food and drinks. Crumbs, sticky residues, and liquid spills are common. I know it is tempting to snack at your desk. But being mindful makes a huge impact.
- Avoid Eating Over Your Keyboard: Try to finish eating before you use your computer. If you must snack, move away from your keyboard. Even small crumbs can get under the cover. Sticky fingers can transfer oils and dirt.
- Use Covered Drinks: If you have drinks near your keyboard, use a cup with a lid. This prevents accidental splashes. A spill on your keyboard, even with a cover, can be a big problem. A keyboard cover prevents most liquid damage, but not all. If you accidentally spill something on your actual keyboard, remember that quick action is key. You can find guidance on how to clean laptop keyboard after spill if that happens.
- Wash Hands Before Use: Our hands carry oils, dirt, and bacteria. Washing your hands before typing reduces the transfer of these contaminants to your keyboard cover. This simple habit keeps your cover much cleaner.
Regular Quick Wipes
Daily or weekly quick wipes can prevent major grime buildup. This takes only a minute but makes a big difference. It stops dirt from settling in. It also keeps your cover feeling fresh.
- Use a Damp Cloth: Lightly dampen a microfiber cloth with water. Gently wipe the surface of your keyboard cover. This removes dust, fingerprints, and light smudges. You can do this daily.
- Disinfecting Wipes (Alcohol-Free): For a quick sanitization, use a tech-safe disinfecting wipe. Choose wipes that are alcohol-free. Alcohol can sometimes dry out silicone or cause damage to the clear finish of TPU. These wipes remove germs and light dirt.
- Brush Off Crumbs: Keep a small, soft brush nearby. Use it to quickly brush away any visible crumbs or debris. Do this a few times a week. This prevents crumbs from getting under the cover or embedding into the material.
Protect from Direct Sunlight and Heat
Just like during drying, direct sunlight and excessive heat can damage keyboard cover materials. Over time, UV rays can cause silicone to degrade and become discolored. TPU can become brittle or warp.
- Position Your Workspace: If possible, place your computer away from direct sunlight. This protects your keyboard cover and your entire device.
- Avoid Hot Environments: Do not leave your laptop in a hot car. Do not place it near heat vents or radiators. Consistent high temperatures shorten the life of your cover.
By following these preventative measures, your keyboard cover will stay cleaner longer. This means less frequent deep cleaning. It also helps your cover continue its important job of protecting your keyboard effectively. Maintaining a clean keyboard area also helps keep your actual keyboard cleaner. For comprehensive cleaning, you might also look into how to clean keyboard without removing keys for under-cover cleaning.
Common Mistakes to Avoid When Cleaning Keyboard Covers
Cleaning seems simple, but some common errors can damage your keyboard cover or even your device. Knowing what to avoid is just as important as knowing what to do. I often see people make these mistakes. Skipping them saves you trouble and cost.
Using Harsh Chemicals or Abrasive Materials
This is one of the most frequent mistakes. People often think stronger cleaners work better. But for keyboard covers, harsh chemicals can be very damaging.
- Avoid Bleach (Undiluted) or Ammonia-Based Cleaners: These strong chemicals can degrade the material of silicone and TPU. They can cause discoloration, brittleness, or a sticky residue that is hard to remove. Always stick to mild soap and water.
- Do Not Use Abrasive Sponges or Scrub Brushes: Rough materials can scratch your keyboard cover. Even if you cannot see the scratches, they can create micro-tears. These tears collect dirt more easily. They can also lead to the cover breaking down faster. Always use soft microfiber cloths or your bare hands.
- Steer Clear of Solvents (e.g., Acetone, Nail Polish Remover): These are extremely harsh. They will almost certainly melt or permanently damage your keyboard cover. Keep them far away from your tech accessories.
Not Drying Completely Before Reattaching
This mistake poses a serious risk to your electronic device. Any moisture left on or under the keyboard cover can seep into your keyboard.
- Electrical Short Circuits: Water and electronics do not mix. Moisture can cause a short circuit in your keyboard’s internal components. This leads to malfunction or permanent damage.
- Corrosion: Over time, moisture can cause corrosion on the metal parts of your keyboard. This damages circuits and key mechanisms.
- Mold or Mildew Growth: A damp environment, especially in a dark space under the cover, can lead to mold or mildew. This creates unpleasant odors and can affect your health.
- Warping or Bubbling: If reattached while damp, the cover might stick unevenly. It might also warp as it dries in place. This affects fit and typing comfort.
Always ensure the cover is bone dry before putting it back. Give it extra time if you are unsure. Trust me, waiting a few more hours is better than buying a new keyboard. For insights on cleaning the keyboard underneath, consider learning about how to clean Mac keyboard under keys or similar guides for your specific computer.
Stretching or Forcing the Cover
Keyboard covers are designed to fit precisely. Forcing or stretching them can damage their shape and fit.
- Improper Fit: If you stretch the cover, it might not sit snugly on the keys anymore. This reduces its effectiveness at keeping out dust and spills. It also makes typing feel less natural.
- Tears or Rips: Forcing a cover can cause it to tear, especially around the edges or key cutouts. A torn cover offers less protection.
- Reduced Durability: Repeated stretching weakens the material over time. This makes the cover degrade faster.
Always handle your keyboard cover gently. Align it carefully when reattaching. Do not try to force it onto your keyboard. If it does not fit easily, check if it is aligned correctly. If you care for your keyboard, you will find information about how to clean a MacBook Pro keyboard or how to clean Surface Pro keyboard helpful for specific models.
By avoiding these common errors, you protect your keyboard cover. You also protect your valuable electronic device. Proper cleaning and care extend the life of both.
FAQ Section
How often should I clean my keyboard cover?
You should clean your keyboard cover at least once a month for general hygiene. If you eat or drink near your computer often, or if you notice it getting dirty quickly, clean it every week or two. Regular light cleaning prevents heavy buildup.
Can I put my keyboard cover in the washing machine?
No, you should not put most keyboard covers in a washing machine. The harsh agitation and detergents in a washing machine can damage the delicate material. It can stretch, tear, or warp silicone and TPU covers. Always wash your keyboard cover by hand with mild soap and water.
What if my keyboard cover feels sticky after cleaning?
If your keyboard cover still feels sticky after cleaning, it might have soap residue or persistent oil buildup. Rinse it again thoroughly under running water to remove all soap. For silicone, try wiping it with a microfiber cloth slightly dampened with a 1:1 solution of 70% isopropyl alcohol and water.
Can I use glass cleaner on my keyboard cover?
It is not recommended to use glass cleaner on your keyboard cover. Many glass cleaners contain ammonia or other chemicals that can be too harsh for silicone or TPU. These chemicals can cause discoloration, brittleness, or create a permanent hazy film. Stick to mild dish soap and water.
How do I remove pet hair from my keyboard cover?
For pet hair, first shake the cover to dislodge loose hair. Then, use a lint roller or adhesive tape to lift off remaining hairs. For embedded hairs, a gentle wash with mild soap and water usually works. A soft brush or cotton swab can help dislodge stubborn hairs during the wash.
Is it safe to use disinfecting wipes on my keyboard cover?
Yes, you can use disinfecting wipes, but choose alcohol-free options. Wipes containing high amounts of alcohol can dry out or damage the material over time. Look for wipes marketed as “tech-safe” or “electronics cleaning wipes.” Always test a small area first.
Conclusion
Keeping your keyboard cover clean is a simple but important task. It protects your valuable electronics from dust, spills, and everyday grime. By following the steps on how to clean keyboard cover thoroughly, you ensure a hygienic workspace. You also extend the life of your keyboard and its protective cover. Remember to use mild cleaning solutions, gentle hand washing, and thorough drying.
Make cleaning your keyboard cover a regular habit. This small effort brings big benefits. Your keyboard will stay looking new, and typing will feel more pleasant. Take action today to refresh your keyboard cover and maintain a clean, efficient workspace. Your clean keyboard cover is a small step towards a healthier, more productive computing experience.
- keyboard cover cleaning
- silicone keyboard protector
- laptop hygiene
- keyboard maintenance tips
- tech accessories care