· Kitchen Maintenance · 17 min read
How To Clean Kitchen Cabinets Without Removing Finish
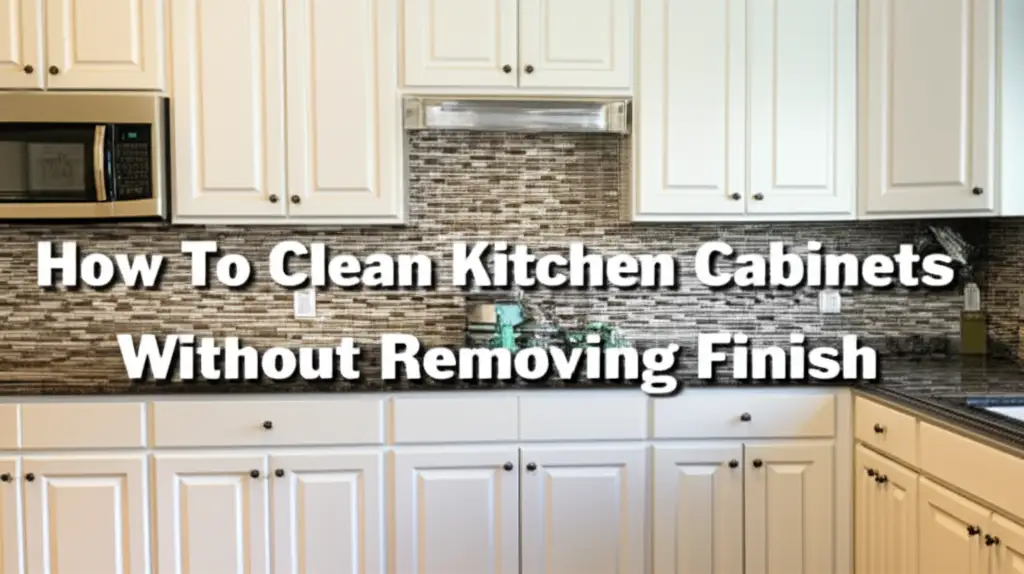
Restore Your Kitchen Cabinets: Clean Without Damaging Finish
Your kitchen cabinets endure a lot. They face splatters, fingerprints, and daily grime. Over time, these can dull their appearance. You want them clean, but removing their protective finish is a big concern. I understand this worry completely.
Keeping your kitchen cabinets spotless does not mean damaging their beautiful surface. This article shows you how to clean kitchen cabinets without removing finish. We will explore safe and effective methods. You will learn about the right tools and solutions for various cabinet materials. I will share simple steps to tackle everything from everyday dust to stubborn grease. By the end, you will have the knowledge to maintain your cabinets’ beauty for years.
Takeaway
- Identify your cabinet finish before cleaning.
- Use mild, appropriate cleaning solutions.
- Clean gently with soft cloths and sponges.
- Always dry cabinets thoroughly to prevent water damage.
- Protect your cabinets with regular maintenance.
To clean kitchen cabinets without removing finish, identify the cabinet material and its protective layer. Use gentle, non-abrasive cleaning agents like mild dish soap and water, or vinegar solutions. Always test in an inconspicuous spot first, wipe with soft cloths, and dry immediately to preserve the surface integrity.
Understanding Your Cabinet Finish: Key to Safe Cleaning
The most important step before you start cleaning your kitchen cabinets is knowing what kind of finish they have. Different finishes react differently to cleaning agents. Using the wrong product can cause damage. It could dull the shine, strip the color, or even peel the protective layer. Understanding your cabinet’s material and finish helps ensure safe and effective cleaning.
Identifying Wood Finishes
Many wood cabinets have a protective topcoat. This layer shields the wood from moisture and scratches. Common wood finishes include varnish, polyurethane, and lacquer. These finishes are durable but can be sensitive to harsh chemicals. A good way to check is by looking at the surface. If it has a hard, shiny, or satin feel, it likely has one of these clear coatings. They generally tolerate mild soap and water.
Cleaning Painted Cabinets Safely
Painted cabinets are popular for their versatility. Their finish is a layer of paint, often with a clear coat on top. Paint can chip or scratch more easily than a hard lacquer. Abrasive cleaners or scrub brushes can remove the paint. For painted cabinets, a very gentle approach is best. Use soft cloths and non-damaging solutions. This helps prevent color fading or paint lifting.
Laminate and Thermofoil Care
Laminate and thermofoil cabinets are often made from particleboard or MDF. They have a thin, decorative layer of plastic or vinyl applied to their surface. These materials are generally quite durable and resistant to water and stains. However, they can still be scratched or delaminated by harsh chemicals. Avoid abrasive cleaners or scouring pads. Excess moisture can also cause the edges to peel. A simple damp cloth with a mild cleaner works well for these types.
Essential Tools and Gentle Cleaning Solutions
Gathering the right tools and choosing gentle solutions protects your cabinet finish. Harsh chemicals or abrasive scrubbers can cause irreversible damage. My goal is always to clean effectively without harming the surface. This list covers what you need for a safe and successful cabinet cleaning.
Recommended Tools for Cabinet Cleaning
You do not need a lot of fancy equipment to clean your cabinets. Simple tools work best. I always start with a few clean microfiber cloths. These cloths are soft and absorbent. They pick up dirt without scratching surfaces. Have at least two on hand: one for cleaning and one for drying.
- Soft Sponges: For light scrubbing on tough spots, a soft sponge is useful. Avoid the abrasive side of any sponge.
- Spray Bottle: A spray bottle makes applying your cleaning solution easy and even. It helps control the amount of liquid you use.
- Small Soft Brush (Optional): For intricate details or carved areas, a soft-bristled brush, like an old toothbrush, can reach tight spots. Be very gentle when using it.
- Bucket: A small bucket for your cleaning solution or rinse water is helpful.
Homemade Gentle Cleaning Solutions
Many effective cabinet cleaners are already in your pantry. These solutions are mild and safe for most finishes. They help you avoid harsh chemicals found in some commercial products.
- Mild Dish Soap and Water: This is my go-to for general cabinet cleaning. Mix a few drops of mild dish soap into warm water. This solution cuts through light grease and grime. It is safe for almost all finishes, including wood, painted, and laminate.
- Vinegar Solution: White vinegar is a natural degreaser and disinfectant. Mix equal parts white vinegar and water in your spray bottle. This solution is great for cutting through sticky residues and light grease. For more information on using these household staples, you can explore how to clean with vinegar and baking soda.
- Baking Soda Paste (for stubborn spots): For very sticky or greasy spots, a paste of baking soda and a little water can work wonders. Apply it gently. Baking soda is a mild abrasive, so use it sparingly and with caution on delicate finishes.
What to Avoid
Never use abrasive cleaners, scouring pads, or steel wool on your cabinets. These can scratch or strip the finish. Avoid strong detergents, ammonia-based cleaners, and anything with high alcohol content. These chemicals can dissolve or damage protective coatings. Always test any new cleaning solution on an inconspicuous area first. This ensures it will not harm your cabinet’s finish.
Step-by-Step Guide to Removing Everyday Grime and Dust
Kitchen cabinets accumulate dust and light grime quickly. Regular cleaning prevents buildup, making deeper cleans less frequent. This simple process helps maintain your cabinets’ fresh look. It keeps them clean without damaging their finish.
Prepare the Area
Before cleaning, clear off any items on top of or in front of your cabinets. This gives you easy access to all surfaces. If you have decorative items, move them aside. Lay down a towel or drop cloth on your countertop to catch drips. This protects your surfaces from water damage.
Initial Dusting
Start by removing loose dust and crumbs. Use a dry, soft microfiber cloth to wipe down all cabinet surfaces. Pay attention to crevices and decorative molding. A soft brush or a vacuum cleaner with a brush attachment can help with hard-to-reach areas. This step prevents dust from turning into mud when you apply your cleaning solution.
Apply the Cleaning Solution
Now, it is time to apply your chosen gentle cleaning solution. I prefer using a spray bottle for even distribution. Lightly mist a section of your cabinets. Do not drench the surface. A damp cloth also works well if you prefer. Dip your microfiber cloth into the mild dish soap and water solution, then wring it out very well. The cloth should be damp, not dripping.
Gentle Wiping and Drying
Wipe the cabinet surface gently with your damp, solution-applied cloth. Work in small sections. Pay attention to areas around handles and knobs, where fingerprints and grime build up most. Do not scrub aggressively. Let the solution do the work. After wiping, immediately follow with a clean, dry microfiber cloth. Drying is crucial to prevent water spots and moisture damage. This is especially true for wood cabinets, where standing water can dull or lift the finish. Ensure the surface is completely dry before moving to the next section. For more general advice on maintaining cleanliness, remember that proper drying is key to preventing water stains, similar to how one might approach how to clean a ceiling for overall spotless results.
Regular Maintenance Tips
To keep your cabinets consistently clean, make this a regular task. A quick wipe-down every week can prevent heavy grease buildup. For quick clean-ups, a damp cloth is often enough. This routine saves you from needing intensive cleaning sessions later. It also extends the life and beauty of your cabinet finish.
Tackling Stubborn Grease and Sticky Residue
Kitchen cabinets, especially those near the stove, can accumulate tough grease and sticky residues. These spots require more targeted attention. My approach focuses on dissolving the grime gently, preventing harm to the cabinet finish.
Targeted Solutions for Grease
Grease can be challenging, but certain household items work wonders. My top choice for cutting through grease without harsh chemicals is a stronger dish soap solution or white vinegar.
- Stronger Dish Soap Solution: Mix a few drops more of mild dish soap into warm water. Apply this slightly more concentrated solution to a soft cloth. Gently press the cloth onto the greasy spot for a few seconds. This allows the soap to break down the grease. Then, wipe away.
- Vinegar Power: White vinegar is an excellent degreaser. For stubborn grease, I use a 50/50 mix of white vinegar and water. Spray it directly onto the greasy area. Let it sit for 2-3 minutes. The acidity helps dissolve the grease. Then, wipe clean with a soft cloth. For specific advice on powerful natural cleaning, you might find tips on how to clean baked on grease from pans useful, as the principles of dissolving grease are similar.
Dealing with Sticky Spots
Sticky residues, like dried food splatters or adhesive goo, can be tricky. Here are some gentle methods:
- Baking Soda Paste: For a tough, sticky spot, a paste of baking soda and a few drops of water can be effective. Apply the paste directly to the sticky area. Let it sit for 5-10 minutes. The mild abrasive quality of baking soda helps lift the residue. Gently rub with a soft cloth or sponge. Wipe clean and rinse.
- Mineral Oil or Vegetable Oil (for adhesives): For sticky adhesive residues, believe it or not, oil can work. Apply a tiny amount of mineral oil or vegetable oil to a cotton ball. Gently rub the sticky spot. The oil helps loosen the adhesive. Wipe away the residue. Then, clean the oily spot with your mild dish soap solution to remove any oiliness.
Gentle Rubbing Techniques
No matter the solution, the technique is key. Avoid harsh scrubbing. If a spot is stubborn, reapply your solution and let it sit longer. Use gentle, circular motions. You want to lift the grime, not abrade the finish. Always use a clean, soft microfiber cloth. As you work, fold your cloth to a clean section to avoid spreading dirt. Finish by wiping the area with a clean, damp cloth, and then immediately dry it completely. This prevents watermarks and protects your cabinet finish.
Restoring Shine and Protecting Cabinet Finishes
Cleaning removes dirt, but restoring shine and protecting the finish adds the final touch. It keeps your cabinets looking new and helps them resist future grime. This step is essential for long-term cabinet care.
Polishing Methods for Various Finishes
Once your cabinets are clean and dry, consider polishing them. The right polish can enhance their natural beauty and provide a layer of protection.
- For Wood Cabinets: If your wood cabinets look dull, a wood-specific polish can revive their luster. Choose products that are free of silicone, as silicone can build up over time. A natural option is a very small amount of food-grade oil, like olive oil or mineral oil. Apply a tiny drop to a soft cloth. Rub it into the wood in the direction of the grain. Buff immediately with a clean, dry cloth until no residue remains. This nourishes the wood and brings out its natural shine.
- For Painted and Laminate Cabinets: These finishes generally do not require a polish. If they appear dull after cleaning, it might be due to residual film. Re-wipe them thoroughly with a clean, damp cloth and then dry them immediately. For an added layer of protection and shine on painted cabinets, you can use a very thin layer of car wax (non-abrasive, Carnauba-based) once a year. Apply sparingly, let it haze, then buff to a shine. Always test in an inconspicuous area first.
Preventive Measures for Long-Term Care
Prevention is the best form of protection. By taking a few proactive steps, you can significantly reduce the wear and tear on your cabinet finishes.
- Wipe Up Spills Immediately: Accidental food splatters, water drips, or grease marks should be wiped away as soon as they happen. The longer they sit, the harder they are to remove and the more likely they are to damage the finish.
- Use Splatter Guards: When cooking, especially frying, use splatter guards on pans. This minimizes the amount of grease and food particles that reach your cabinets.
- Ventilate Your Kitchen: Good ventilation during cooking helps reduce airborne grease and moisture. Use your range hood or open a window. This prevents a greasy film from building up on all kitchen surfaces, including cabinets.
- Regular Light Cleaning: A quick daily or weekly wipe-down with a damp microfiber cloth can prevent heavy buildup. This simple routine makes deep cleaning less necessary.
- Protect Cabinet Interiors: Consider shelf liners for the inside of your cabinets. These protect the interior finish from spills and scratches caused by dishes and food items.
By incorporating these simple polishing and preventive measures into your routine, your kitchen cabinets will not only stay clean but also look beautiful and last longer. This proactive approach helps preserve the finish without the need for harsh chemicals or abrasive methods.
Specific Care for Different Cabinet Materials
While general cleaning rules apply, certain cabinet materials benefit from specific care. Knowing these nuances helps you clean more effectively and protect your investment. I always adjust my approach based on the cabinet type.
Wood Cabinet Considerations
Wood cabinets are a classic choice, but they require particular attention. Their finish can be sensitive to moisture and harsh chemicals.
- Moisture is the Enemy: Wood swells and warps when exposed to too much water. Always wring your cleaning cloth thoroughly. It should be damp, not wet. Dry the cabinets immediately after cleaning. Do not let water sit on the surface.
- Gentle Cleaners Only: Stick to mild dish soap and water or a specialized wood cleaner. Avoid ammonia-based cleaners, abrasive pads, or strong degreasers. These can strip the protective finish or dull the wood.
- Grain Direction: When wiping, follow the wood grain. This helps lift dirt from the natural grooves and prevents streaking.
- Periodic Conditioning: For unfinished or lightly finished wood, a food-grade mineral oil or beeswax polish can condition the wood. This helps prevent drying and cracking. Do this only a few times a year.
Painted Cabinet Touch-Ups
Painted cabinets offer a fresh look, but their surface can be more delicate than sealed wood.
- Avoid Abrasion: Painted surfaces can scratch or chip easily. Never use scrubbing pads or harsh brushes. Soft microfiber cloths are best.
- Spot Cleaning: For small marks, try a magic eraser very gently in an inconspicuous area first. Some painted finishes can lose their sheen with abrasive cleaning. Wipe the spot, then clean the whole panel.
- Gentle Solutions: Mild soap and water are ideal. Avoid strong acids or solvents that can lift the paint.
- Repairing Chips: If you have small chips or scratches, keep a small amount of matching paint on hand for touch-ups. This maintains a uniform appearance and prevents further damage.
Laminate/Thermofoil Durability
Laminate and thermofoil cabinets are known for their durability and ease of cleaning. However, they are not indestructible.
- Edge Care: The edges of laminate and thermofoil can be prone to peeling if exposed to excessive heat or moisture. Be extra careful to wipe these edges dry immediately. Avoid direct steam from kettles or dishwashers.
- No Abrasives: While tough, these surfaces can scratch. Stick to soft cloths and sponges.
- Heat Protection: Excessive heat can cause thermofoil to blister or delaminate. Use heat shields or keep heat-generating appliances away from these cabinets.
- Simple Cleaners: A simple wipe-down with a damp cloth and mild soap is usually all that is needed. They do not require polishing or conditioning.
By tailoring your cleaning methods to the specific material of your kitchen cabinets, you ensure their longevity and maintain their beautiful appearance without risking damage to the finish.
Common Mistakes to Avoid When Cleaning Cabinets
Cleaning kitchen cabinets seems simple, but common errors can lead to irreversible damage. My experience has taught me what to avoid. Steering clear of these mistakes will protect your cabinet finish and keep them looking their best.
Using Abrasive Scrubbers or Chemicals
This is the biggest mistake I see. Abrasive scrubbers, steel wool, or even the rough side of a kitchen sponge will scratch your cabinet finish. These scratches dull the surface over time. Strong chemicals like bleach, ammonia-based cleaners, or harsh degreasers can strip the protective finish from wood, melt thermofoil, or discolor painted surfaces. Always opt for soft cloths and mild, pH-neutral solutions. If a product feels harsh, it probably is.
Over-Wetting Surfaces
Excessive moisture is a cabinet’s enemy. Drenching cabinets with water or leaving them wet can cause significant damage.
- Wood Cabinets: Too much water can penetrate the finish, causing wood to swell, warp, or crack. It can also lead to white water spots or a hazy appearance.
- Laminate/Thermofoil: Water can seep into seams and edges, causing the laminate or thermofoil layer to bubble, peel, or delaminate from the core material.
Always wring out your cleaning cloth thoroughly. It should be damp, not dripping. And always dry the cabinet surface immediately and completely after cleaning.
Ignoring Manufacturer Guidelines
Many cabinet manufacturers provide care instructions. These guidelines are specific to their products and finishes. Ignoring them can void warranties or lead to unexpected damage. Before using any new cleaning product or method, it is wise to check if your cabinet manufacturer has specific recommendations. If you do not have the original instructions, a quick search online for your cabinet brand often provides valuable information.
Neglecting Regular Maintenance
Waiting for cabinets to become visibly dirty or sticky before cleaning them is a mistake. Heavy buildup of grease and grime is much harder to remove gently. This often tempts people to use harsher methods, which then risk damaging the finish. A quick, regular wipe-down (e.g., weekly or bi-weekly) with a damp cloth prevents significant accumulation. This routine saves you time and effort in the long run and helps preserve the cabinet finish. Consistent, gentle cleaning is far better than infrequent, aggressive cleaning.
FAQ Section
Q1: Can I use vinegar on all kitchen cabinet finishes?
Vinegar is generally safe for many cabinet finishes when diluted. However, highly acidic solutions can dull or etch certain surfaces, especially unsealed wood or porous paint. Always dilute white vinegar with an equal part of water. Test this solution on an inconspicuous spot first to ensure it does not harm your specific cabinet finish.
Q2: How often should I clean my kitchen cabinets?
For general light cleaning, I recommend wiping down your kitchen cabinets weekly. This removes everyday dust and fingerprints. A deeper clean, focusing on grease and stubborn spots, is usually needed every 1-3 months, depending on your cooking habits and how much grease builds up.
Q3: What if my cabinets have deep scratches?
Cleaning cannot fix deep scratches. For minor surface scratches on wood cabinets, you might try a wood repair marker or a scratch cover polish. For deeper damage or chips on painted or laminate cabinets, consult a professional. Sometimes, a touch-up paint kit from the manufacturer can help with small chips.
Q4: How do I remove crayon marks from cabinets?
For crayon marks, first try rubbing gently with a soft cloth dampened with warm water and mild dish soap. If that does not work, a tiny dab of mineral oil or even mayonnaise can help dissolve the crayon wax. Apply, let it sit briefly, then gently wipe away. Always follow with a clean, damp cloth and dry thoroughly.
Q5: Are commercial cabinet cleaners safe?
Many commercial cabinet cleaners are safe, but you must read labels carefully. Look for products specifically designed for your cabinet material (wood, painted, laminate) and finish. Avoid those with harsh chemicals like ammonia, bleach, or abrasive particles. Always test a new product in an hidden area first.
Q6: What’s the best way to clean white kitchen cabinets?
White kitchen cabinets show dirt easily. The best way is to clean them regularly with a mild solution of dish soap and water. For tougher scuffs or yellowing, a paste of baking soda and water applied gently can work. Always use a soft microfiber cloth and dry immediately to prevent water spots or streaks on the light finish.
Conclusion
Keeping your kitchen cabinets clean without damaging their finish is entirely possible. It is about understanding your cabinet’s material, choosing the right gentle solutions, and adopting careful cleaning practices. I have shown you that simple tools and common household ingredients can achieve remarkable results. You do not need harsh chemicals or abrasive scrubbing.
Remember to identify your cabinet finish first. Then, use mild dish soap, water, or diluted vinegar. Always wipe with soft cloths and dry surfaces immediately. This prevents moisture damage and preserves your cabinet’s beauty. By following these steps and avoiding common mistakes, your kitchen cabinets will remain a beautiful, durable part of your home for many years. Start your gentle cleaning routine today. Your cabinets will thank you for it!
- cabinet cleaning
- kitchen cabinet care
- gentle cleaning
- finish preservation
- grease removal