· Kitchen Maintenance · 20 min read
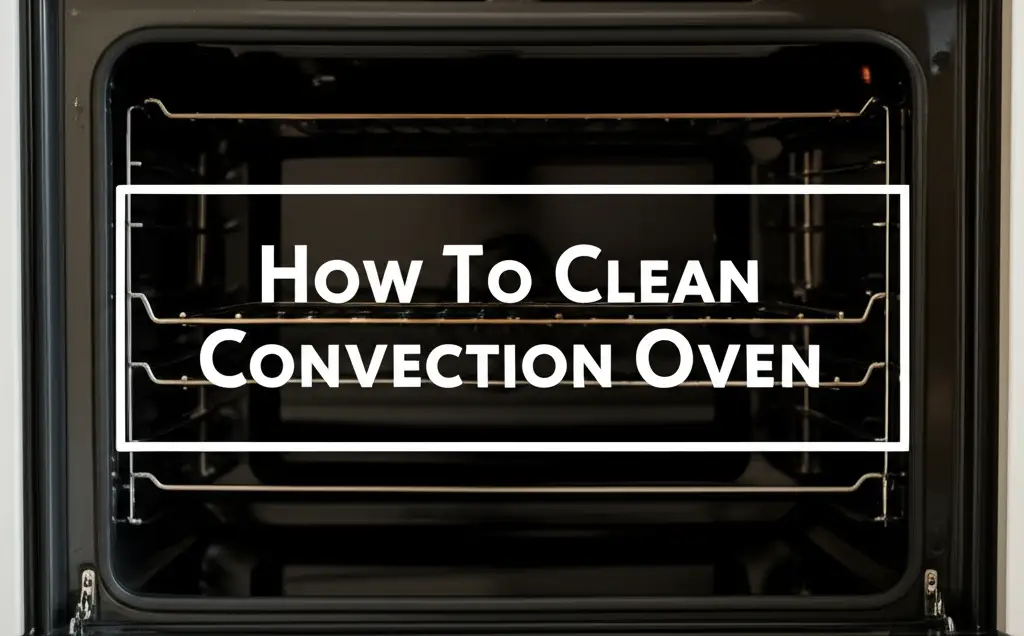
How To Clean Oven Coils

Clean Oven Coils: A Simple Guide
Dirty oven coils can make your kitchen messy. They can also affect how well your oven works. Food spills and grease often build up on these heating elements. This build-up causes smoke, odors, and inefficient cooking. Cleaning oven coils helps keep your appliance running smoothly. It also makes your kitchen a cleaner, safer place.
This article shows you how to clean oven coils effectively. We will discuss both exposed electric coils and hidden heating elements. You will learn about the right tools and important safety steps. I will share methods for common dirt and stubborn grease. You will also find tips for keeping your coils clean in the long run. Let’s make your oven shine again.
Takeaway
- Always unplug the oven before you start cleaning.
- Clean exposed coils with a damp cloth and mild soap or baking soda paste.
- Wipe hidden coil areas carefully, never spray water directly.
- Address spills immediately to prevent baked-on residue.
- Regular maintenance helps keep coils working efficiently and safely.
To clean oven coils, first, ensure the oven is off and cool. Unplug it from the wall for safety. Carefully remove exposed coils, or access hidden areas. Wipe away loose debris. Use a damp cloth with mild soap or a baking soda paste to gently scrub away dirt and grease. Make sure everything is dry before you plug the oven back in.
Understanding Your Oven Coils: Exposed vs. Hidden Elements
Ovens use different types of heating elements to cook food. Knowing your oven’s heating element helps you clean it properly. Most electric ovens have either exposed coils or hidden elements. Each type needs a specific cleaning approach.
Exposed oven coils are easy to spot. They sit on the bottom or top of the oven cavity. These are typically found in older electric stove models. They look like metal spirals that glow red when hot. These coils heat up quickly and directly. They transfer heat to your food. Food spills often land directly on them. This makes exposed coils visible targets for dirt. They are also often removable, which can make cleaning them easier.
Newer electric ovens often have hidden heating elements. You cannot see these coils directly. They are underneath the oven floor. The oven floor itself heats up and cooks the food. This design creates a flat, smooth surface inside the oven. It looks much cleaner. Spills do not land directly on the heating coil. They land on the oven floor instead. Cleaning these types of ovens focuses on the bottom panel. You clean the surface above the hidden coil. Even though the coil is hidden, you still need to clean the area around it. This helps prevent smoke and odors.
Both types of coils perform the same function. They create heat. Keeping them clean is important for several reasons. Dirty coils can cause bad smells when you cook. Food particles on coils can burn and smoke. This affects the taste of your food. Dirty coils also reduce heating efficiency. Your oven might take longer to preheat. It may use more energy. A clean coil system helps your oven last longer. It makes sure your meals cook evenly. Knowing your coil type is the first step to effective cleaning. It helps you choose the right method.
Essential Tools and Safety Precautions for Coil Cleaning
Before you start cleaning your oven coils, gather the right tools. You also must follow important safety rules. Using the correct items makes the job easier. Following safety steps keeps you safe from harm. Cleaning oven parts can be dangerous if you are not careful.
Here are the tools you will need:
- Rubber Gloves: These protect your hands from cleaning solutions. They also keep your hands clean from grease and grime.
- Soft Cloths or Microfiber Towels: You will use these for wiping surfaces. They are gentle and will not scratch the coils or oven interior.
- Mild Dish Soap or Baking Soda: These are effective and safe cleaning agents. Baking soda mixed with water creates a paste that tackles tough spots.
- Spray Bottle: If you use a liquid cleaner or a water-based solution, a spray bottle helps apply it evenly.
- Non-abrasive Scrubber or Soft-bristle Brush: These help remove stuck-on food without damaging the coils. Avoid steel wool or harsh scouring pads.
- Bucket or Bowl: You will need this for mixing cleaning solutions. It also holds water for rinsing cloths.
Safety is the most important part of this task. Always put your safety first.
- Unplug the Oven: This is critical. Before touching any part of your oven, unplug it from the wall outlet. This prevents electric shock. Do not just turn it off. Pull the plug.
- Let the Oven Cool Completely: Never clean hot coils. Wait until the oven is cold to the touch. This prevents burns.
- Ensure Good Ventilation: Open windows or turn on your kitchen fan. This helps clear any fumes from cleaning products. Some cleaning agents can produce strong smells.
- Avoid Excessive Water: Water and electricity do not mix. Never spray large amounts of water directly onto heating elements. A damp cloth is enough. Excessive moisture can damage electrical components.
- Do Not Use Harsh Chemicals: Avoid oven cleaners designed for the oven interior on coils. These can damage the coil material. They can also leave residue that burns off later. Stick to mild soaps or natural cleaners like baking soda.
By following these guidelines, you can clean your oven coils safely and effectively. You protect yourself and your appliance.
Step-by-Step Guide: How to Clean Exposed Electric Oven Coils
Cleaning exposed electric oven coils is straightforward. These coils are often removable, which makes the job easier. Regular cleaning prevents build-up and keeps your oven working well. Follow these steps for a clean and efficient stove.
First, ensure safety. Make sure your oven is completely off and cool. Unplug the oven from the wall outlet. This step is vital to prevent electrical shock. Do not skip it. If you cannot reach the plug, turn off the breaker for the oven at your home’s electrical panel.
Next, remove the coils. Most electric stove coils lift right out. Gently grasp the coil where it plugs into the oven. Pull it straight out from the receptacle. Be careful not to bend or damage the metal prongs. Set them aside on a protected surface like a towel or newspaper. Some ovens might have coils that are not designed to be fully removed. In this case, you will clean them in place. Be extra careful not to get water into the connection points.
Now, remove loose debris. Use a dry cloth or a soft brush to wipe away any crumbs or food particles. You can also use a vacuum cleaner hose attachment to suction up loose dirt. This prevents making a muddy mess later.
Prepare your cleaning solution. For light dirt, a damp cloth with a few drops of mild dish soap works well. For tougher grime, make a paste with baking soda and a small amount of water. It should be thick, like toothpaste. You can learn more about using natural solutions by checking out our guide on how to clean oven with baking soda. Apply the paste directly onto the dirty areas of the coil. Let it sit for 15-30 minutes. This allows the baking soda to break down grease and food residue.
Gently scrub the coils. Use a non-abrasive sponge or a soft-bristle brush. Scrub the areas where dirt and grease have built up. Do not use metal scrubbers or abrasive pads. These can scratch the coil’s surface. Scratches can reduce the coil’s lifespan. Be gentle around the electrical connection point. Do not let water get into it.
Wipe and rinse. Use a clean, damp cloth to wipe off the cleaning solution and loosened grime. Rinse your cloth often. Keep wiping until all residue is gone. For baking soda paste, it might take a few wipes to remove all of it. Ensure the coils are completely dry before putting them back. You can use a dry towel. Let them air dry for an hour or two.
Once the coils are fully dry, carefully reinsert them into their receptacles. Push them firmly until they are secure. Then, plug your oven back into the wall. Your exposed coils are now clean and ready for use. This method helps maintain your electric stove’s performance and appearance. Always prioritize safety during this process. For general oven maintenance, consider our article on how to clean grease from oven.
Cleaning Hidden Oven Coils and Bottom Elements
Many modern ovens feature hidden heating elements. This means the actual heating coil is beneath the oven floor. While you do not clean the coil directly, you must clean the surface above it. This area still collects spills and grease. Cleaning this part of your oven maintains its efficiency and prevents odors.
Before starting, ensure your oven is completely cool. Then, unplug the oven from the wall outlet. Safety comes first. Pull the plug to disconnect power. This prevents any risk of electric shock. If you cannot reach the plug, turn off the circuit breaker for your oven.
The hidden element means you will clean the oven’s bottom surface. This surface is usually smooth. It might be enamel or porcelain. Start by removing any loose crumbs or food debris. Use a dry cloth or a soft brush. You can also use a vacuum cleaner with a hose attachment. This step prevents smearing loose dirt.
Next, identify the type of spill. If it is a fresh spill, wipe it up immediately with a damp cloth. This is the easiest way to manage spills. If the spill is baked on, it requires more effort. For tough, baked-on grease, make a paste. Mix baking soda with a small amount of water. Apply this paste generously over the soiled areas. Let the paste sit for a few hours or even overnight. This allows the baking soda to break down the grime. For severe oil spills, our guide on how to clean oil out of oven might offer additional tips.
After the paste has worked, gently scrub the area. Use a non-abrasive sponge or a plastic scraper. Avoid metal tools. They can scratch the oven’s surface. Be firm but gentle. Work in small sections to remove the softened grime. For the oven’s general interior, especially the bottom, you might find our article on how to clean bottom of oven very helpful.
Wipe away all cleaning residue. Use a clean, damp cloth to wipe the surface repeatedly. Rinse your cloth often to ensure you are not just spreading dirt. Make sure all baking soda paste or cleaning solution is gone. It is important to leave no residue. Any residue can burn and create odors the next time you use the oven.
Finally, allow the oven interior to air dry completely. You can leave the oven door ajar. This helps ventilation. Ensure the surface is bone-dry before you plug the oven back in. Plug it back in only when you are certain there is no moisture. Cleaning the area above hidden coils keeps your oven hygienic and efficient. It also helps prevent issues like smoke and foul smells during cooking. Regular wiping of spills immediately can greatly reduce the need for deep cleaning.
Tackling Stubborn Stains and Baked-On Grease on Oven Coils
Stubborn stains and baked-on grease are common problems on oven coils. Regular cooking can cause food to drip and burn onto the heating elements. This leaves behind hard, crusty residue. These spots can cause smoke and odors. They can also affect your oven’s performance. Removing them requires a bit more effort.
First, always ensure safety. The oven must be completely cool. Unplug your oven from the power outlet. This step is critical before you touch any part of the oven. This prevents any risk of electric shock.
For exposed coils, remove them if possible. Place them on a flat, protected surface. If your coils are not removable, you will clean them in place. Be extra careful with non-removable coils. Avoid getting any liquid near the electrical connections.
The best solution for baked-on grease is often a paste. Mix baking soda with just enough water to form a thick paste. The consistency should be like toothpaste. This paste is an excellent, natural abrasive. It helps lift hardened grime. Apply a generous layer of this baking soda paste directly onto the stubborn stains. Ensure the entire stained area is covered. You can also use a mixture of baking soda and vinegar for extra power, but apply the baking soda first, then spray with vinegar for a fizzing action. This combination helps loosen tough, caked-on grease.
Let the paste sit for a while. For light stains, 30 minutes might be enough. For very stubborn, baked-on grease, let it sit for several hours. Overnight is even better if the stains are severe. The longer the paste sits, the more it breaks down the hardened food particles and grease. This makes scrubbing easier.
After the soaking time, gently scrub the stained areas. Use a non-abrasive scrubber, a soft brush, or a damp sponge. Work in small circular motions. Apply gentle pressure. Avoid using harsh steel wool or abrasive cleaners. These can scratch or damage the coil’s protective coating. Such damage can shorten the life of your heating element. Continue scrubbing until the stains loosen and come off. You might need to reapply the paste for very tough spots.
Wipe away all residue thoroughly. Use a clean, damp cloth to wipe the coils. Rinse the cloth often. Repeat this wiping process until the coils are completely free of cleaning paste and loosened grime. Leaving any residue can cause smoke or odors the next time you use the oven. After wiping, make sure the coils are completely dry. Use a dry towel. Then, let them air dry for at least an hour. This ensures no moisture remains.
Once dry, carefully reinstall the coils if you removed them. Then, plug your oven back in. Your coils should now be much cleaner. Tackling stubborn stains this way helps maintain your oven’s efficiency. It also prevents unpleasant smells. Regular attention to spills can prevent future tough build-ups. If you are dealing with other types of oven grime, our guide on how to clean gas oven grates offers more general cleaning advice applicable to different oven parts.
Maintenance Tips: Keeping Your Oven Coils Clean Longer
Cleaning oven coils can be a chore. But with a few simple habits, you can keep them clean for longer. Regular maintenance prevents the build-up of food spills and grease. This saves you time and effort in the long run. It also helps your oven run more efficiently.
The best defense is immediate action. When food spills or splatters inside your oven, address it right away. Wait for the oven to cool down completely. Then, wipe up the spill before it bakes onto the coils or oven floor. Fresh spills are much easier to clean than baked-on ones. A damp cloth is usually enough for fresh spills. This simple step prevents stubborn stains from forming. For more specific cleaning issues, such as dealing with various materials that can get stuck, our articles on how to clean burnt plastic from oven or how to clean melted plastic from oven can be helpful.
Be mindful when cooking foods that might spill. Use bakeware that contains splashes. For example, use deeper dishes for casseroles or roasted meats. Avoid overfilling baking pans. You can also place an oven liner or a sheet of aluminum foil on the rack below your food. This catches drips. Make sure the liner does not cover the vents or touch the heating elements directly. This could interfere with air circulation or pose a fire risk. If you use foil, ensure it is secure and does not move.
Clean your oven regularly, not just the coils. A generally clean oven means less chance for grime to spread. Wipe down the oven interior after each major cooking session. This includes the oven racks and walls. Regular wiping prevents grease from accumulating. Grease can drip onto the coils over time. For tips on cleaning other parts of your oven, check out our guide on how to clean oven racks without bathtub.
For ovens with exposed coils, periodically remove them for a quick wipe down. Even if they do not look very dirty, a light cleaning can remove invisible grease film. This helps maintain their heating efficiency. Do this every few weeks, depending on your cooking frequency. For hidden coils, make sure to wipe the oven bottom panel frequently. This prevents residue from baking onto the surface above the element.
Consider your cooking habits. If you often bake or roast at high temperatures, spills might bake on faster. Adjust your cleaning frequency based on your usage. A little effort often prevents a lot of work later. Keeping your oven coils and the rest of your oven clean ensures a functional and pleasant cooking environment. It also extends the life of your appliance.
Troubleshooting Common Coil Issues and When to Call a Pro
Sometimes, cleaning your oven coils is not enough. You might notice issues like uneven heating, strange smells even after cleaning, or visible damage. These signs mean your coils might have problems beyond simple dirt. Knowing when to troubleshoot yourself and when to call a professional saves time and prevents further damage.
One common issue is uneven heating. If your food cooks unevenly, one of your heating elements might be faulty. For exposed coils, check if the coil glows red all the way around when hot. If parts of it remain dark, that section is not heating. This indicates a broken internal wire. For hidden elements, you might notice hot or cold spots on the oven floor. This suggests uneven heat distribution from the element below. Before diagnosing a problem, make sure the oven is truly preheated.
Another sign of coil trouble is sparking. If you see sparks coming from an oven coil during use, turn off the oven immediately. Unplug it from the wall. Sparks often mean a short circuit or damage to the coil itself. A minor spark might happen if there’s a piece of food burning on the coil. But persistent sparking is dangerous. Do not use the oven until you fix this issue.
Smoke and strong odors that persist after cleaning also point to problems. If you have thoroughly cleaned your coils and oven interior but still smell burning plastic or chemicals, something might be wrong. This could be old, uncleaned residue hidden somewhere. It might also be a sign of a damaged coil or wiring. If the smell is new or very strong, it is a concern.
Visible damage is a clear indicator. Look for cracks, breaks, or blisters on the coil’s surface. If an exposed coil is bent or looks deformed, it might be faulty. For hidden elements, a cracked oven floor might suggest a problem with the element underneath, or previous damage that needs professional assessment.
So, when should you call a professional?
- Persistent Sparking: This is a safety hazard. Do not attempt to fix electrical shorts yourself.
- No Heat or Uneven Heating: If a coil does not glow at all, or only partially, it is likely broken. Replacing a coil involves electrical work.
- Visible Damage: Cracked or broken coils need replacement. A professional ensures proper installation.
- Strange Electrical Smells: If you smell burning plastic, ozone, or a burning electrical smell, call a technician. This indicates a wiring issue or overheating component.
- Error Codes: Many modern ovens display error codes for component failures. Refer to your oven manual. If the code points to a heating element problem, professional help is usually needed.
A professional appliance technician can diagnose these issues safely. They have the right tools and knowledge to replace faulty components. Attempting complex electrical repairs yourself can be dangerous. It can also void your oven’s warranty. Regular cleaning helps prevent many problems. But for electrical and mechanical failures, trust an expert.
FAQ Section
Can I use the self-clean cycle for oven coils?
No, you should not use the self-clean cycle to specifically clean oven coils. The self-clean cycle works by reaching very high temperatures. This temperature burns off food residue on the oven’s interior walls. These extreme temperatures can damage exposed electric coils. It can reduce their lifespan. For hidden coils, the self-clean cycle cleans the surface above the element, but not the element itself. Always follow manual cleaning steps for your coils.
How often should I clean oven coils?
The frequency depends on how often you use your oven and what you cook. For light use, a thorough cleaning every 3-6 months might be enough. If you cook often or have frequent spills, check your coils monthly. Wipe up fresh spills immediately. This prevents baked-on grime and reduces the need for deep cleaning.
What causes oven coils to get dirty?
Oven coils get dirty mainly from food spills and splatters. When you roast or bake, grease and food particles can drip onto the heating elements. These spills then bake on and carbonize due to the high heat. This creates stubborn stains and residue. Over time, this build-up causes smoke, odors, and can affect heating efficiency.
Is it safe to clean oven coils with water?
Yes, it is safe to use a damp cloth with water and mild soap. However, you must be careful. Never spray water directly onto the coils or their electrical connections. Excessive water can damage the electrical components. Always ensure the oven is unplugged and completely dry before plugging it back in. A damp, not wet, cloth is the key.
Why are my oven coils sparking after cleaning?
If your oven coils spark after cleaning, it could be for a few reasons. Sometimes, if the coils were not completely dry, residual moisture can cause minor sparks. More seriously, it could mean the coil was damaged during cleaning, creating a short. Or, it might be a new electrical fault unrelated to cleaning. Turn off the oven immediately, unplug it, and check for visible damage. If sparking continues, do not use the oven and call a professional.
Can dirty coils affect cooking?
Yes, dirty oven coils can absolutely affect your cooking. Built-up food residue and grease can act as insulators. This makes the coils less efficient at transferring heat. Your oven might take longer to preheat. It could also cook food unevenly. Dirty coils also produce smoke and foul odors during cooking. This can taint the flavor of your food.
Conclusion
Keeping your oven coils clean is an important part of home maintenance. It goes beyond just making your kitchen look good. Clean coils ensure your oven works efficiently. They prevent unpleasant odors and smoke during cooking. Most importantly, clean coils help maintain a safer cooking environment. We have covered methods for exposed and hidden heating elements. You learned about essential safety steps and tools. We also discussed how to tackle stubborn baked-on grease.
Remember to always prioritize safety by unplugging your oven. Be gentle with cleaning products. Act quickly on spills to prevent long-term build-up. Regular care for your oven coils will extend your appliance’s life. It will also help you cook delicious meals without unwanted smells or uneven heating. Make cleaning oven coils a regular part of your cleaning routine. Your kitchen, and your meals, will thank you. Start today for a cleaner, better cooking experience!
- oven cleaning
- electric stove
- household cleaning