· Cleaning Tips · 19 min read
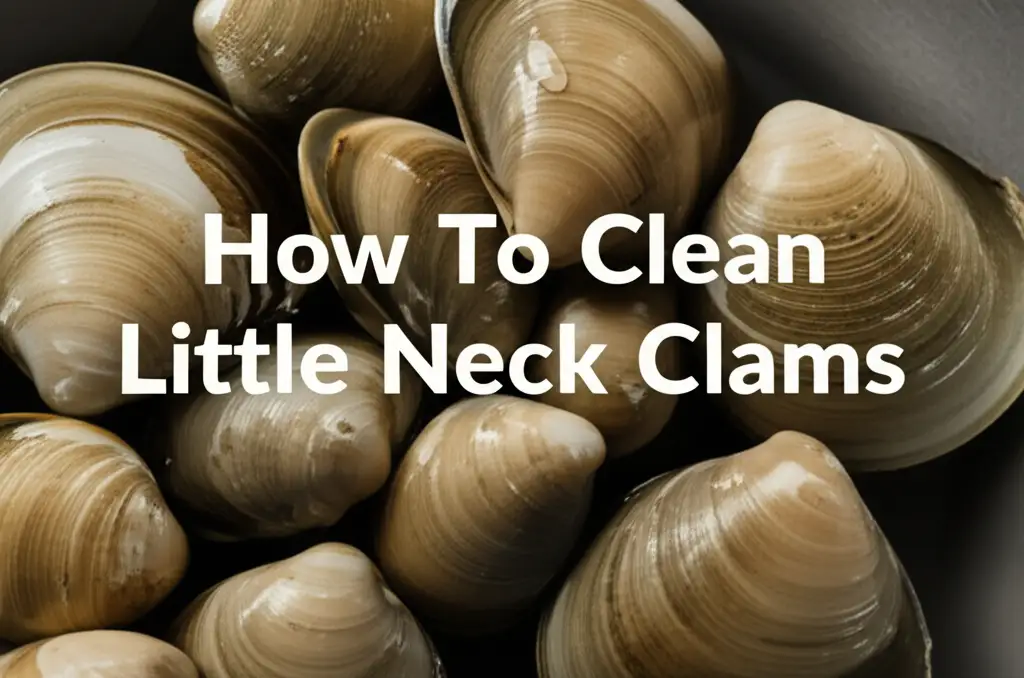
How To Clean Little Neck Clams
Mastering Little Neck Clam Cleaning for Culinary Delights
Imagine a plate of perfectly cooked clams. They are tender, flavorful, and free of any grit. Achieving this delightful experience starts long before the cooking. It begins with proper cleaning. Little Neck clams are a popular choice for many recipes.
But they often come with sand and impurities inside their shells. This guide will show you exactly how to clean Little Neck clams. We will cover every step, from selecting fresh clams to the final rinse.
You will learn easy ways to make sure your clams are grit-free and delicious. Get ready to prepare your clams like a pro.
Takeaway
- Inspect Carefully: Always check clams for freshness before starting. Discard any open or damaged ones.
- Purge Effectively: Use a saltwater bath to encourage clams to release sand. This is the most important cleaning step.
- Rinse Thoroughly: Scrub each clam shell under cold, running water for a final clean.
- Store Properly: Keep cleaned clams cold and moist if not cooking right away.
To clean Little Neck clams, first inspect them for freshness. Then, purge them in a saltwater solution for 30 minutes to several hours, allowing them to expel sand. Finally, scrub each clam under cold, running water before cooking.
Understanding Little Neck Clams: Why Cleaning Matters
You pick up a bag of fresh Little Neck clams. They look ready for your recipe. However, these clams often carry hidden guests. Sand, grit, and sometimes even tiny bits of mud live inside their shells. Clams are filter feeders. They draw water in to get food particles. In doing so, they also take in tiny sand grains from their environment. If you do not clean them well, these impurities will end up in your dish. No one wants to bite into a sandy clam. It ruins the taste and texture. It can even make your meal less enjoyable.
Proper cleaning makes your clams taste better. It also makes them safe to eat. Raw shellfish can carry bacteria. While cleaning does not remove all bacteria, it lowers the risk. You are washing away surface dirt and making sure the clam is alive. A dead clam can spoil quickly and make you sick. This means cleaning is not just about taste. It is also about health and safety. Taking the time to clean your clams well is a simple step. It makes a big difference in your final dish.
The Hidden Truth About Clam Impurities
Clams live in sandy or muddy beds. This is their natural home. As they breathe and eat, they filter water. Fine particles of sand and dirt get trapped inside their digestive systems. These particles are not harmful if swallowed, but they are certainly unpleasant. Imagine eating a sandy soup. It takes away from the joy of the meal. Proper cleaning targets these hidden bits. It makes sure your clams are purely clam.
The Culinary Cost of Neglect
Skipping the cleaning step has a high cost for your cooking. Your seafood pasta might have crunch where it should be smooth. Your clam chowder could feel gritty. Every bite becomes a game of “will I find sand?” This takes away from the delicate flavor of the clam itself. A well-cleaned clam offers a pure taste of the ocean. It lets the natural sweetness of the clam shine. So, taking a few extra steps now saves your meal later.
Essential Tools and Setup for Clam Preparation
Before you begin cleaning your Little Neck clams, you need to gather a few simple tools. Having everything ready makes the process smooth and easy. You do not need any special equipment. Most items are likely already in your kitchen. First, you will need a large bowl. This bowl should be big enough to hold all your clams comfortably. They need room to breathe and move. A plastic or glass bowl works best. You will also need a colander. This helps drain water and rinse the clams easily. A stiff brush, like a vegetable brush, is also helpful. It helps scrub the clam shells clean.
Next, you need cold water. Fresh, clean tap water is fine for rinsing. However, for purging, you will need non-iodized salt. Table salt often contains iodine, which clams do not like. It can make them refuse to open and release sand. Pickling salt or sea salt works well. Make sure it does not have iodine. You might also need a clean towel or paper towels. These help dry your workspace. A clean, clear space is important. It helps you see any dirt and keeps your clams fresh.
Gathering Your Clam Cleaning Arsenal
Your clam cleaning journey starts with preparation. Think of it as setting up a small clam spa. You need enough space. A large sink area works well. Fill your large bowl with cold water. Have your colander nearby. Your salt should be measured and ready. A clean surface ensures that you do not add more dirt to your clams. It creates an efficient workflow. This simple setup saves you time and effort. It lets you focus on cleaning the clams right.
Creating the Ideal Cleaning Zone
A good cleaning zone is well-lit and organized. This helps you spot any problem clams. It also keeps your tools within reach. Make sure your sink is clean. Any residue in the sink could transfer to your clams. I always clean my sink area before starting with seafood. This makes me feel confident about the hygiene. Having a dedicated spot for your tools means you are not scrambling mid-process. It helps you keep your focus on the important task of cleaning.
Initial Inspection and Sorting Your Little Neck Clams
The very first step in cleaning Little Neck clams is a thorough inspection. This step is vital for food safety and taste. You want to make sure every clam you cook is alive and healthy. Start by looking at each clam individually. Hold it in your hand. Feel its weight. A healthy clam should feel heavy for its size. It should smell like the ocean, not fishy or strong. If a clam smells bad, throw it away immediately. A bad smell means the clam is dead. Eating dead clams can make you very sick.
Next, check the shells. They should be tightly closed. If a clam shell is slightly open, tap it gently. Tap it against a hard surface or with another clam. A live clam will slowly close its shell within a minute or two. If it does not close, it is dead. Discard it. Also, look for any cracked, chipped, or broken shells. Clams with damaged shells might be dead or have been exposed to contaminants. These also need to be discarded. Do not take risks with broken clams. It is better to lose a few clams than to risk your health.
The Tap Test: Listening for Freshness
The tap test is a simple way to check if a clam is alive. Pick up a clam with an open shell. Give it a gentle tap. You can tap it on the counter or against another clam. Watch the shell closely. If the clam is alive, the shell will slowly pull together and close. This shows the clam is reacting to the stimulus. It is a sign of life. If the shell stays open or closes quickly and then reopens, the clam is likely dead. Trust your instincts here. If it does not seem right, toss it.
Visual Cues for Healthy Clams
Beyond the tap test, look for other visual signs. Healthy clam shells might have some mud or grit on the outside. This is normal. The color can vary slightly depending on where they came from. What you want to avoid are clams with shells that look slimy or have any strange discoloration. Also, make sure there are no tiny holes in the shell, which could indicate a problem. A healthy clam looks robust and intact. It is firm and feels right in your hand.
The Purging Process: Getting Rid of Grit and Sand
The most important step in cleaning Little Neck clams is purging. This process helps the clams naturally expel any sand or grit they have inside. You do this by soaking them in a saltwater solution. Clams are filter feeders. When they are in clean saltwater, they think they are in their natural environment. They will then open up and start filtering the clean water. As they do this, they push out any sand, mud, or impurities they have inside their bodies. This makes your clams completely grit-free.
To prepare the saltwater bath, you need a large bowl and non-iodized salt. Do not use regular table salt with iodine. Iodine can harm the clams or make them unwilling to open. Pickling salt, sea salt, or kosher salt without iodine works best. Mix about 1/3 cup of salt for every gallon of cold water. Stir until the salt dissolves completely. The water should feel slightly salty, similar to seawater. Place your inspected, healthy clams into this solution. Make sure the water covers all the clams. Do not overcrowd the bowl. Clams need space to breathe and purge effectively. Too many clams in a small space can deplete the oxygen.
Let the clams soak for at least 30 minutes, and ideally for 2 to 4 hours. You can even soak them overnight in the refrigerator. During this time, the clams will slowly filter the clean water. They will release sand and grit to the bottom of the bowl. You might see a fine layer of sediment at the bottom when you are done. This shows the purging worked. Just like keeping your well water clear, making sure clams are free of grit takes specific steps. We aim to remove all the fine particles. Learn more about effective sediment removal by checking out our guide on how to clean sediment out of a well.
Preparing the Saltwater Bath
The right saltwater concentration is key. It mimics their natural habitat. If the water is too fresh, they will not open. If it is too salty, they might get stressed. Always use cold water. Warmer water can encourage bacteria growth. It also makes clams less active. A good rule of thumb is to use water straight from the tap and keep the bowl in a cool place. If soaking for several hours, you might want to change the water once or twice. This keeps the environment clean for the clams.
The Science Behind Purging
Clams use siphons to take in and expel water. This is how they eat and breathe. When you put them in clean saltwater, they begin their natural filtering action. They draw in water, filter out particles, and then expel the water. The sand and grit inside their digestive system get flushed out during this process. This natural mechanism is why purging is so effective. It is a gentle and efficient way to clean them from the inside.
Rinsing and Scrubbing: The Final Touches
After the crucial purging process, your Little Neck clams are almost ready. But there is one final step. You need to give them a good rinse and scrub. This removes any external dirt, mud, or leftover sand that might still cling to their shells. It also washes away any impurities released during purging that might be floating in the water. Start by carefully removing the clams from the saltwater bath. Do not just pour the water out. This can stir up the sand that the clams have released. Lift the clams out gently, leaving the sandy water behind.
Place the clams in a colander in your sink. Turn on cold, running water. Take each clam one by one. Use a stiff brush, like a vegetable brush, to scrub the outside of the shell. Pay attention to any ridges or crevices where dirt can hide. Scrub vigorously but carefully. You want to remove all visible dirt. This step is important for presentation and hygiene. After scrubbing, give the clam a final rinse under the cold water. Put the cleaned clams into a separate clean bowl. Continue this process for all your clams. Make sure you get every single one.
This final rinse ensures a truly clean product. It prepares your clams for cooking. After handling raw seafood, cleaning your kitchen surfaces and tools becomes very important. You want to make sure your preparation area is truly clean. This ensures no leftover residues remain. For example, using a strong cleaner like vinegar can help eliminate lingering odors and sanitize surfaces effectively. Just as you might use vinegar to clean tough spots in your kitchen, like when you clean your dishes, it is effective for general cleaning. You can learn more about thorough kitchen cleaning by checking out our guide on how to clean dishwasher with vinegar. This helps maintain a hygienic cooking environment.
Scrubbing Each Clam for Perfection
Taking the time to scrub each clam individually is a small effort with a big reward. It makes your clams look pristine. It removes any lingering external grit. This step makes sure your final dish is not only delicious but also visually appealing. Think of it as polishing a gem. Each clam deserves its moment under the brush. This ensures that every part of the clam is ready for cooking.
The Cold Water Refresh
Rinsing under cold water is not just about cleaning. It also helps keep the clams fresh and firm. Cold water helps close their shells tightly. This protects them until you are ready to cook. It is like a refreshing shower for them. This final step seals in their freshness. It also prepares them for their journey into your recipe. A cold rinse is the perfect ending to the cleaning process.
Storing Cleaned Little Neck Clams Safely
After you have meticulously cleaned your Little Neck clams, you might not be ready to cook them right away. Proper storage is essential to keep them fresh and alive until you are ready. Clams are living creatures. They need specific conditions to survive outside of water. Storing them incorrectly can lead to spoilage. This means wasting your effort and your money. The key is to keep them cold, moist, and able to breathe. Never store cleaned clams in an airtight container or submerged in fresh water. Both can kill them quickly.
The best way to store cleaned clams is in the refrigerator. Place them in a bowl. Cover the bowl with a damp cloth or paper towels. This keeps them moist. Make sure the cloth is only damp, not soaking wet. The dampness helps mimic their natural environment. The cloth also allows air to circulate. Clams need to breathe. If you cover them tightly, they will suffocate. This will cause them to die and spoil. Place the bowl on the lowest shelf of your refrigerator. This is usually the coldest part. Do not put them directly on ice, as melting ice can be fresh water. This can also kill the clams.
Cleaned Little Neck clams should be cooked within 1-2 days. The sooner you cook them, the better they will taste. Always check them again right before cooking. Give them a quick sniff test. Tap any open shells. Discard any clams that smell bad or do not close. Following these storage tips ensures your hard work cleaning them pays off. It means you get to enjoy fresh, delicious clams when you are ready.
Short-Term Storage for Peak Freshness
For short-term storage, keeping clams in the fridge is the best method. The damp cloth provides humidity. It prevents the clam shells from drying out. This also stops them from opening prematurely. A breathable cover is vital. It allows oxygen to reach the clams. This keeps them alive and healthy. Avoid placing anything heavy on top of the clams. They are delicate. They can crack under pressure.
Keeping Them Alive Until Cook Time
The goal of storage is to keep clams alive. Live clams are safe and flavorful. Dead clams should never be cooked or eaten. The low temperature of the refrigerator slows down their metabolism. This helps them stay alive longer. The dampness prevents dehydration. Remember, you cleaned them to remove grit from live clams. So, keep them alive! When you finish cooking your delicious clams, you might also have to clean up your cooking tools. Keeping your pots and pans sparkling clean is a simple task. Learn how to manage general kitchen cleaning by looking at our guide on how to clean bottom of pan. This helps keep your cooking area tidy.
Common Mistakes to Avoid When Cleaning Clams
Cleaning Little Neck clams seems straightforward. However, some common mistakes can undo all your efforts. Avoiding these pitfalls ensures your clams are truly clean and safe to eat. Knowing what not to do is just as important as knowing what to do. One major mistake is using fresh tap water for purging. Clams live in saltwater. They need a salty environment to encourage them to open and filter. Soaking them in fresh water will stress them out. It will make them close up. They will not release any sand. This means your clams will still be gritty when you cook them. Always use a proper saltwater solution.
Another mistake is using hot or even warm water. Clams are sensitive to temperature. Warm water can kill them quickly. It also encourages bacteria growth. Always use cold water for all steps: purging, rinsing, and even storing. Cold water keeps the clams happy and active. It also keeps them safe. Overcrowding the bowl during purging is another common error. Clams need space. If too many clams are packed into a small bowl, they will quickly use up all the oxygen. This will suffocate them. They will die before they have a chance to purge. Use a large enough bowl. Or clean them in smaller batches if you have many clams.
Finally, do not forget to discard dead or broken clams. It might seem like a waste. But cooking a dead clam can ruin your entire dish. It can also pose a health risk. Always perform the inspection and tap test. Be ruthless in discarding any clams that do not pass the test. A few bad clams can spoil the whole batch. By avoiding these common mistakes, you can ensure your Little Neck clams are perfectly clean every time.
Pitfalls of Improper Soaking
Improper soaking techniques are the biggest reason for gritty clams. Using chlorinated tap water without salt is a problem. The chlorine and lack of salt shock the clams. They will not filter. Not changing the water during a long soak also lessens the effect. The water becomes dirty with expelled sand. The clams then re-filter that dirty water. Change the water regularly for the best results.
Overlooking the Obvious Signs
Ignoring the signs of a dead clam is risky. A wide-open shell that does not close is a clear sign. A foul smell is another. Some people try to cook these anyway. This is never a good idea. Dead clams release toxins quickly. They can make your whole dish taste bad. Even worse, they can cause food poisoning. Always inspect and discard. Your health is worth more than a few clams. Using simple, natural cleaners like vinegar can help keep your kitchen truly spotless. It is a good choice for many cleaning tasks. You might explore effective cleaning tips with resources like how to clean mold with vinegar for general household cleaning needs.
Frequently Asked Questions (FAQ)
Q1: Can I clean clams with fresh water instead of saltwater? A1: No, you should not clean clams with fresh water. Clams are saltwater creatures. Soaking them in fresh water will stress them out and cause them to close their shells. They will not purge any sand or grit. Always use a saltwater solution made with non-iodized salt for effective purging. This mimics their natural habitat and encourages them to open and clean themselves.
Q2: How long do Little Neck Clams last after cleaning? A2: Cleaned Little Neck clams are living organisms and have a limited shelf life. They should be cooked as soon as possible after cleaning, ideally within 1 to 2 days. Store them in the refrigerator in a bowl covered with a damp cloth. Never store them in an airtight container or submerged in water, as they need to breathe.
Q3: What should I do if a clam doesn’t open after cooking? A3: If a clam remains closed after cooking, it means it was likely dead before cooking or died during the process. For food safety, you should always discard any clams that do not open after cooking. Do not try to pry them open, as they could contain bacteria or spoilage. It is better to be safe than sorry.
Q4: Can I freeze cleaned clams for later use? A4: Freezing cleaned, raw clams is generally not recommended. The freezing and thawing process can damage their delicate tissues and make them tough or rubbery. It is much better to freeze clams before cleaning if you plan to store them long-term. For best results, cook clams fresh after cleaning them.
Q5: Why do clams sometimes taste sandy even after cleaning? A5: If your clams still taste sandy, it usually means the purging process was not effective enough. This can happen if the saltwater solution was not correct, if the clams were overcrowded, or if they were not soaked for long enough. Ensure you use the right salt concentration and allow sufficient time for the clams to filter out all the grit.
Q6: Is it safe to eat a clam if its shell is slightly open before cooking? A6: A slightly open shell does not always mean a clam is dead. Perform the “tap test.” Gently tap the clam shell. If the clam is alive, it will slowly close its shell within a minute or two. If the shell remains open or does not close, the clam is dead and should be discarded to avoid any health risks.
Conclusion
Cleaning Little Neck clams is a simple yet essential step for enjoying delicious seafood. It transforms potentially gritty ingredients into culinary delights. By following these clear steps, you can ensure your clams are grit-free and safe. We started by understanding why cleaning matters. We then covered gathering your essential tools. We talked about how to inspect each clam. The most important step, purging, was next. This process removes sand from the inside. Finally, we discussed the last rinse and proper storage.
You now know how to clean Little Neck clams. This skill will enhance your cooking. It helps you prepare meals that taste pure and fresh. No more worries about sandy bites. You are ready to create amazing clam dishes. So go ahead, get your fresh clams, and start cleaning. Your taste buds will thank you! Enjoy cooking with your perfectly cleaned clams.
- clam cleaning
- seafood preparation
- little neck clams
- fresh clams
- shellfish safety