· Beauty, Cleaning · 20 min read
How To Clean Makeup Brush
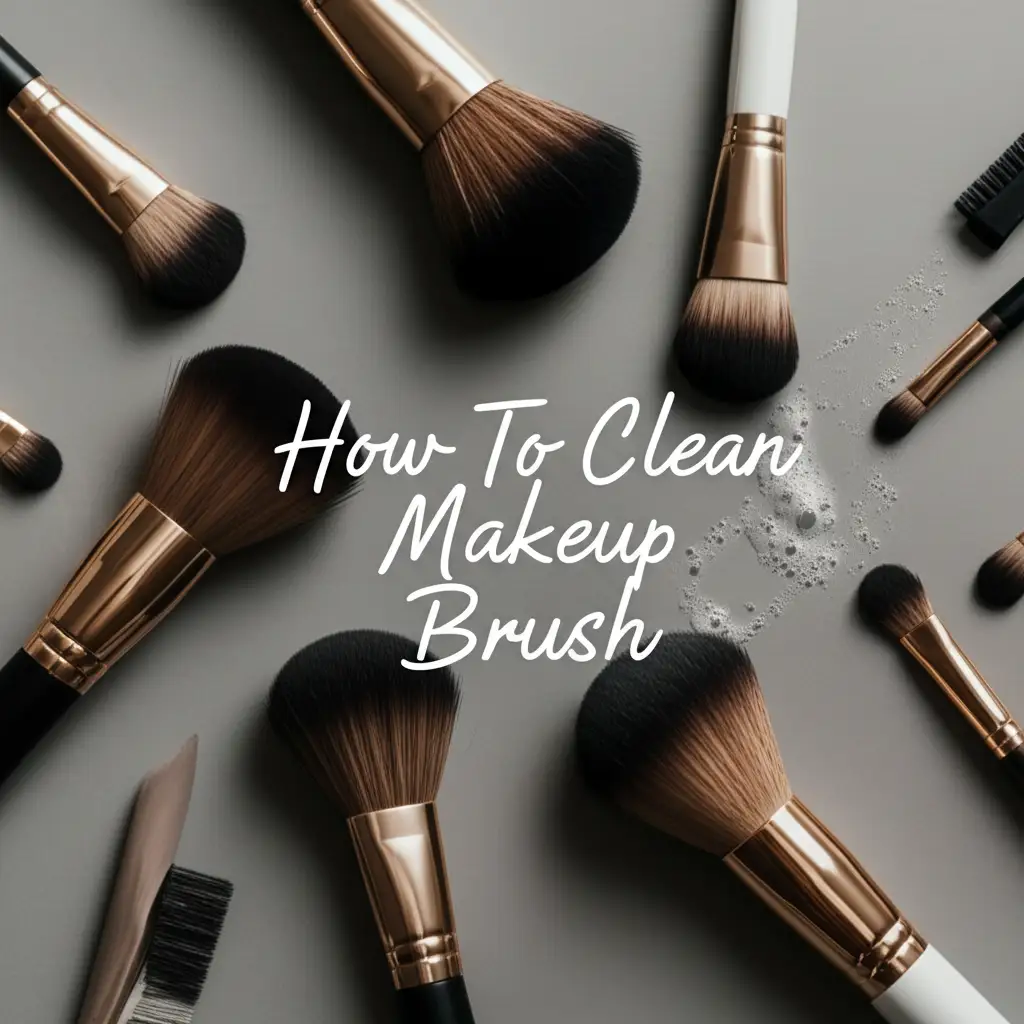
Unlock Radiant Skin: How To Clean Your Makeup Brushes
Hello there! Have you ever wondered about the secret to flawless makeup application? It often starts with something simple: a clean brush. Many people do not realize how crucial cleaning makeup brushes is. Dirty brushes can cause skin problems and ruin your makeup look. We are here to help you keep your brushes spotless.
Cleaning your makeup brushes is not just about keeping them neat. It is about protecting your skin from bacteria and prolonging your brush life. Unclean brushes collect dead skin cells, oils, and old makeup. This creates a breeding ground for germs. Using dirty brushes can lead to breakouts, irritation, and even infections. This guide will walk you through everything you need to know. We will cover why cleaning matters, what products to use, and step-by-step methods for both deep and quick cleaning.
Takeaway
- Regularly clean makeup brushes to prevent skin issues and improve makeup application.
- Use gentle cleansers like baby shampoo or specific brush soaps.
- Deep clean brushes weekly and quick clean daily.
- Dry brushes properly to avoid mold and preserve their shape.
Quick Answer: How to Clean Makeup Brush
To clean makeup brushes, wet the bristles with lukewarm water. Apply a gentle brush cleanser or baby shampoo to the bristles. Gently swirl the brush on a cleaning mat or your palm to create a lather. Rinse thoroughly under running water until the water runs clear. Reshape the bristles and lay brushes flat or upside down to dry completely.
Why Cleaning Your Makeup Brushes Matters
You might think that cleaning makeup brushes is an extra chore. It is, however, a necessary step in any good beauty routine. Dirty brushes can ruin your skin and makeup. Let us explore the key reasons why keeping your brushes clean is so important.
First, dirty brushes are a breeding ground for bacteria. Every time you use a makeup brush, it picks up oil, dead skin cells, and dirt from your face. It also collects makeup product. All of these things mix together on the bristles. Over time, this creates a perfect environment for bacteria to grow. When you use a dirty brush, you are putting these bacteria directly onto your face. This can lead to acne, rashes, and other skin irritations. Cleaning your brushes regularly helps to stop this germ transfer. It keeps your skin clear and healthy.
Second, clean brushes ensure better makeup application. When bristles are clogged with old makeup, they cannot pick up new product well. This means your foundation might look streaky. Your eyeshadow might not blend smoothly. Clean brushes allow for an even and flawless application. They pick up just the right amount of product. This helps you achieve a professional-looking finish every time. You will notice a big difference in how your makeup sits on your face.
Third, cleaning extends the life of your brushes. Good makeup brushes are an investment. You want them to last a long time. Dirt and product buildup can break down the bristles and glue that hold them together. This makes brushes shed or lose their shape faster. Regular cleaning preserves the quality of the bristles. It keeps them soft and functional. Proper care means you will not need to replace your favorite brushes as often. This saves you money in the long run.
Finally, clean brushes prevent cross-contamination. If you use the same dirty brush for different makeup products or colors, you mix them. This can change the color or texture of your products. It also spreads germs between different makeup items. Cleaning brushes between uses, or at least weekly, keeps your makeup products pure. It helps maintain their intended look and performance. Remember, a clean brush is a happy brush, and it makes your skin happy too.
When to Clean Your Makeup Brushes
Knowing when to clean your makeup brushes is just as important as knowing how. The frequency depends on how often you use them and what kind of makeup you apply. We will look at guidelines for different brush types.
For brushes used with liquid or cream products, you should clean them more often. This includes foundation brushes, concealer brushes, and cream blush brushes. These types of products stick to bristles more. They also create a moist environment where bacteria can grow quickly. I recommend cleaning these brushes after every 1-2 uses. If you use them daily, aim for a quick clean every day. A deep clean should happen at least once a week. This prevents heavy buildup and keeps germs away from your skin.
Powder brushes, like those for setting powder, blush, and bronzer, can go a bit longer between washes. They pick up less oil and moisture from your face. Still, they collect dead skin cells and makeup powder. For these brushes, a deep clean once a week or every two weeks is usually enough. If you have sensitive skin or are prone to breakouts, consider weekly cleaning. Daily quick cleans are still a good idea if you use them every day.
Eye makeup brushes, such as eyeshadow brushes, eyeliner brushes, and eyebrow brushes, also need frequent cleaning. These brushes come close to your eyes, which are sensitive. Bacteria near your eyes can cause infections. I suggest cleaning eye makeup brushes after every 2-3 uses. For those used with cream eyeshadows or gel liners, clean them after each use. A deep clean for all eye brushes should be at least once a week. Keeping these brushes clean helps prevent eye irritation and infections.
Remember, if you share brushes, or if you are a professional makeup artist, you must clean brushes after every single use. This prevents the spread of germs between different people. Even if you only use brushes on yourself, pay attention to signs of dirt. If bristles look clumpy, feel stiff, or show visible makeup buildup, it is time for a wash. Regular cleaning habits make your beauty routine healthier and more effective. You can also learn how to keep other beauty tools clean, like how to clean makeup sponges and brushes for a complete hygiene routine.
Essential Tools and Products for Makeup Brush Cleaning
Having the right tools and products makes cleaning your makeup brushes much easier. You do not need many expensive items. Simple solutions often work best. Let us go over what you should have on hand.
First, you need a good cleanser. Many types of cleansers work well. Gentle baby shampoo is a popular choice. It is mild enough for delicate bristles and good for sensitive skin. You can also use gentle bar soap, like unscented glycerin soap. Some beauty brands make specific makeup brush cleansers. These are designed to break down makeup and oils effectively. Choose one that is gentle and free of harsh chemicals. If you are interested in DIY solutions, some people use how to clean makeup brushes with vinegar or alcohol for deep sanitizing, but use these with care as they can be strong.
Next, consider a cleaning mat or textured glove. These tools have ridges and bumps. They help create friction to scrub makeup from the bristles. You can also use the palm of your hand, but a mat provides better scrubbing power. Silicone mats are affordable and easy to find. They come in various textures for different brush sizes. Using a mat helps clean brushes faster and more thoroughly.
You also need lukewarm running water. This helps rinse away the soap and dirt. Make sure the water is not too hot. Hot water can melt the glue that holds the bristles to the handle. It can also damage the bristles themselves. Lukewarm water is perfect for cleaning without causing harm.
For drying, you will want clean towels and possibly a brush drying rack. Soft, absorbent towels are great for gently squeezing out excess water. A brush drying rack allows brushes to dry upside down. This prevents water from seeping into the ferrule (the metal part) and loosening the glue. If you do not have a rack, laying them flat on a clean towel works too. Just make sure the bristles hang over the edge of a counter for airflow.
Finally, think about quick cleaning products for daily maintenance. This includes brush cleaning sprays or wipes. These are not meant for deep cleaning. They are good for quick touch-ups between washes. They help remove surface makeup and sanitize lightly. Having these items ready makes your cleaning routine simple and effective.
Step-by-Step Guide: How to Deep Clean Makeup Brushes
Deep cleaning your makeup brushes is vital for hygiene and performance. It removes embedded makeup, oils, and bacteria. Follow these steps for a thorough clean.
Step 1: Prepare Your Work Area Find a space near a sink with running water. Gather your supplies: your dirty makeup brushes, brush cleanser (baby shampoo or specific brush soap), a silicone cleaning mat or your palm, and clean towels. Make sure you have enough time to clean and dry your brushes properly. Drying takes several hours, often overnight.
Step 2: Wet the Bristles Hold a brush with the bristles pointing downwards. Turn on lukewarm water. Gently wet the bristles. Make sure water only touches the bristles. Do not let water get into the ferrule (the metal part that connects the bristles to the handle). Water inside the ferrule can weaken the glue. This makes the bristles fall out over time. Keep the handle dry.
Step 3: Apply Cleanser Put a small amount of brush cleanser onto your cleaning mat or the palm of your hand. About a pea-sized amount is usually enough for one brush. You can also wet a bar of soap and rub the brush directly onto it. The goal is to get soap onto the wet bristles.
Step 4: Lather and Swirl Gently swirl the wet, soaped-up brush onto the textured surface of your cleaning mat or your palm. You will see a lather form. The dirty makeup will start to release from the bristles. Continue swirling until the lather looks clean, not discolored with makeup. Be gentle; do not press too hard. This can damage the bristles. For very dirty brushes, you might need to repeat this step. You can see how this process is similar when you how to clean a face brush used for cleansing.
Step 5: Rinse Thoroughly Hold the brush under lukewarm running water again, bristles pointing downwards. Rinse until all suds are gone. Continue rinsing until the water runs completely clear. Squeeze the bristles gently to ensure no soap remains. Repeat the lather and rinse steps if necessary, especially for brushes used with heavy makeup.
Step 6: Squeeze Out Excess Water Gently squeeze the bristles with your fingers to remove most of the water. Then, press the brush onto a clean, dry towel. This helps absorb more water and reshape the bristles. Be careful not to pull or tug on the bristles.
Step 7: Reshape and Dry Reshape the brush head to its original form. Lay the brush flat on a clean towel, with the bristles hanging over the edge of a counter or table. This allows air to circulate around the bristles. Another option is to use a brush drying rack that holds brushes upside down. This is the best method to prevent water from going into the ferrule. Let brushes air dry completely. This can take several hours or even overnight. Do not use a hairdryer or direct heat, as this can damage bristles and glue. Make sure brushes are fully dry before storing them. This prevents mold growth.
Quick Cleaning Methods for Daily Use
Deep cleaning is essential, but it takes time. For daily maintenance, quick cleaning methods are a lifesaver. These methods remove surface makeup and lightly sanitize your brushes between deep washes. They are perfect for touch-ups or switching between colors.
One popular quick cleaning method uses a brush cleaning spray. You can buy these sprays from beauty brands. To use it, spray the cleanser directly onto a clean paper towel or cloth. Then, gently swirl your brush on the damp towel. You will see the makeup transfer from the brush to the towel. Keep swirling until no more makeup comes off. This method works well for powder brushes and eyeshadow brushes. It dries very quickly, so you can use your brush almost immediately. Some people even use alcohol for a quick clean. You can learn more about this method in articles on how to clean makeup brushes with alcohol.
Another quick cleaning option is a dry brush cleaning sponge. These sponges usually come in a tin. They have a rough texture that helps remove powder makeup from bristles. You just swirl your brush on the sponge to remove one color. This prepares the brush for the next color. It is excellent for eyeshadow brushes when you are using multiple shades in one session. These sponges do not clean brushes deeply, but they are great for color switching.
Makeup wipes can also work for a very quick clean. Take a fresh makeup wipe. Gently wipe your brush bristles on the wipe. This removes some surface makeup. This method is not as effective as sprays or dry sponges, but it is useful in a pinch. It is more for removing basic residue. Remember, quick cleaning does not replace deep cleaning. Think of it as a daily refresh, not a thorough wash.
These quick methods help you maintain brush hygiene between full washes. They prevent heavy buildup and keep your makeup looking fresh. Daily quick cleaning also makes deep cleaning easier when the time comes. Incorporate a quick clean into your daily beauty routine. Your skin and your makeup will thank you.
Special Considerations for Different Brush Types
Not all makeup brushes are the same. Different types of brushes need slightly different cleaning approaches. Understanding these differences ensures effective cleaning and prolongs brush life.
First, consider the bristle material: natural versus synthetic. Natural hair brushes, often made from animal hair like goat or squirrel, are very soft. They are best for powder products because they pick up and distribute powder beautifully. When cleaning natural hair brushes, be extra gentle. Avoid harsh soaps or strong scrubbing. These can strip the natural oils from the bristles. This makes them brittle and prone to shedding. Use a mild shampoo, like baby shampoo, and gentle swirling motions. Rinse them thoroughly but quickly. Natural hair brushes can take longer to dry.
Synthetic brushes are typically made from nylon or other man-made fibers. These brushes are more durable and less porous. They work best with liquid, cream, and gel products. Their smooth surface does not absorb product. This makes them easier to clean. You can use a wider range of cleansers on synthetic brushes, including stronger brush soaps. They can handle a bit more scrubbing. Synthetic brushes also dry faster than natural hair brushes. For example, your foundation brush is likely synthetic, and you can clean it vigorously.
Second, consider the brush function: face versus eye brushes. Face brushes, like foundation, powder, and blush brushes, are large. They pick up a lot of product. They also cover a large area of your face. This means they accumulate a lot of dirt, oil, and dead skin cells. You need to deep clean these brushes regularly and thoroughly. Ensure all makeup is out from the dense bristles.
Eye makeup brushes are smaller and finer. These include eyeshadow, eyeliner, and eyebrow brushes. They are used around the delicate eye area. It is vital to keep them very clean to prevent eye infections. Due to their small size, they might need extra attention to get all the pigment out. Use a fine-textured cleaning mat section for precision. Since you often switch colors with eye brushes, quick cleaning is especially important between shades. Always ensure they are completely dry before use.
Finally, think about specialty brushes. Sponge applicators, like those for concealer or foundation, need specific care. You can find information on how to clean these in resources like how to clean sponges makeup. Lip brushes, often small and used with sticky products, need careful cleaning to remove all residue. They can also transfer bacteria from the mouth area. Clean lip brushes after every use. By considering these differences, you can tailor your cleaning approach for each brush type. This keeps your entire brush collection in top condition.
Drying and Storing Your Clean Brushes
Proper drying and storage are just as important as the cleaning process itself. Incorrect drying can damage brushes. Bad storage can undo all your cleaning efforts. Let us look at the best ways to dry and store your cleaned makeup brushes.
After cleaning and squeezing out excess water, the drying process begins. The most crucial rule is to dry brushes with the bristles facing downwards or flat. Never dry brushes upright with the bristles pointing up. This allows water to drip down into the ferrule (the metal part holding the bristles). Water trapped in the ferrule can loosen the glue. This makes bristles shed or even fall out completely. It also creates a moist environment. This can lead to mold and mildew inside the brush head.
To dry brushes effectively, lay them flat on a clean, dry towel. Make sure the bristles hang over the edge of a counter or table. This allows air to circulate all around the bristles. Good airflow speeds up drying time. For even better results, use a brush drying rack. These racks hold brushes upside down. This ensures water drips away from the ferrule. It is the safest and most efficient way to dry your brushes.
Patience is key during drying. Do not try to speed up the process with a hairdryer or direct heat. High heat can melt the glue in the ferrule. It can also warp or damage the delicate bristles, especially natural hair ones. Let brushes air dry completely. This can take several hours, often overnight, depending on the brush size and density. Before storing, gently fluff the bristles. Check that they are fully dry to the touch, including the center of the brush head. If they feel even slightly damp, let them dry longer.
Once your brushes are completely dry, it is time for proper storage. Store brushes in a clean, dry place. Avoid humid environments like bathrooms. Humidity can encourage germ growth. Keep brushes in an upright holder or a drawer. If using a holder, ensure it is clean. This prevents them from picking up new dirt. A brush roll or case is great for travel. It protects bristles from getting squashed. You might also consider cleaning your how to clean makeup bag regularly. This ensures all your beauty items stay clean. Good storage keeps brushes clean and ready for your next flawless makeup application.
Common Mistakes to Avoid When Cleaning Brushes
Cleaning makeup brushes seems simple, but small errors can damage them. Avoiding these common mistakes will keep your brushes in great shape. You will also protect your skin.
One major mistake is getting water into the ferrule. The ferrule is the metal part that connects the bristles to the handle. This is where the glue holds the bristles in place. If water repeatedly gets inside, it can dissolve the glue. This causes the bristles to shed or fall out. Always hold your brushes with the bristles pointing downwards when rinsing. Keep the handle and ferrule dry. This prevents damage and prolongs brush life.
Another mistake is using harsh cleansers. Strong soaps, detergents, or extremely hot water can strip the natural oils from bristles. They can also break down the glue. This applies especially to natural hair brushes. Harsh chemicals can make bristles brittle, causing them to shed. They can also irritate your skin when you use the brush later. Stick to mild cleansers like baby shampoo or specialized brush cleaners. Lukewarm water is always best. Avoid solutions like strong dish soap unless it is very diluted and used for synthetic brushes only. Some people use strong cleaners like how to clean makeup brushes with alcohol, but this should be done carefully to avoid damage.
Over-scrubbing or pulling on bristles is also a common error. While you need friction to clean, being too aggressive can damage the brush shape. It can also cause bristles to fray or break. Use gentle swirling motions on a cleaning mat or your palm. Do not press down too hard. Treat your brushes with care, especially natural hair ones. They are delicate tools.
Improper drying is another significant issue. Never dry brushes upright with the bristles pointing up. This traps water in the ferrule, leading to glue breakdown and mold. Also, do not use a hairdryer or direct heat. High heat can melt glues and damage bristles. Always lay brushes flat or hang them upside down. Ensure they are completely dry before storing. Storing damp brushes encourages mold and bacteria growth. This will make your cleaning efforts pointless.
Finally, neglecting to clean brushes regularly is a big mistake. Infrequent cleaning leads to massive product buildup. This makes brushes harder to clean. It also allows bacteria to multiply. As mentioned earlier, this can cause skin problems. Stick to a regular cleaning schedule. Deep clean weekly or bi-weekly. Do quick cleans daily for high-use brushes. Avoiding these mistakes ensures your brushes stay effective, hygienic, and last longer.
FAQ Section
How often should I clean makeup brushes?
You should deep clean makeup brushes used with liquid or cream products (like foundation or concealer brushes) once a week. For brushes used with powder products (like blush or eyeshadow brushes), deep clean them every one to two weeks. Quick clean high-use brushes daily. This keeps them hygienic and effective.
Can I use dish soap to clean makeup brushes?
You can use a very mild dish soap, diluted with water, for synthetic makeup brushes. Dish soap is strong and can dry out natural hair bristles. It can also break down the glue in the ferrule over time. Baby shampoo or specialized brush cleansers are generally safer and gentler options for all brush types.
What happens if I don’t clean my makeup brushes?
Not cleaning makeup brushes leads to product buildup, dirt, oil, and bacteria accumulation. This can cause skin issues like acne, irritation, and infections. Dirty brushes also perform poorly, making makeup application streaky or uneven. Unclean brushes also have a shorter lifespan.
How do I dry makeup brushes properly?
After cleaning, gently squeeze out excess water. Reshape the bristles. Lay brushes flat on a clean towel with bristles hanging over the edge of a counter. For best results, use a brush drying rack to hang brushes upside down. Always air dry completely. Never use a hairdryer or direct heat.
Can makeup brushes be cleaned with just water?
No, water alone cannot effectively clean makeup brushes. Water can rinse off some surface dirt. However, it does not break down oil-based makeup, dead skin cells, or bacteria. You need a cleanser (like soap or brush shampoo) to thoroughly remove all residue and sanitize the bristles.
Is it okay to use shampoo to clean makeup brushes?
Yes, gentle shampoos, especially baby shampoo, are excellent for cleaning makeup brushes. They are mild enough not to damage bristles or dissolve glues. They effectively remove makeup and oils. Regular hair shampoo can also work, but avoid harsh or strong formulas with many added chemicals.
Conclusion
Keeping your makeup brushes clean is an important part of a healthy beauty routine. We have walked through why it matters, how often to clean them, and the right tools to use. We covered step-by-step deep cleaning and quick daily methods. Remember, proper drying and avoiding common mistakes are also vital. By following these simple steps, you keep your brushes performing their best. You also protect your skin from germs and irritation.
A clean brush is a key to flawless makeup application and clear skin. Make brush cleaning a regular habit. It might seem like a small task, but its impact is big. You will notice a positive difference in your complexion and the longevity of your favorite tools. Take the time to care for your brushes, and they will take care of you. Start your brush cleaning routine today!
- makeup brush cleaning
- brush hygiene
- beauty tools
- cosmetic brushes
- clean brushes
- makeup care