· Nail Care · 15 min read
How To Clean Nail Stamper
How To Clean Nail Stamper: Essential Care Tips for Perfect Nail Art
Do you love creating stunning nail art designs? A nail stamper is your best friend for intricate patterns and precise transfers. However, a dirty stamper can ruin your beautiful designs. Residue, dust, and dried polish reduce its effectiveness, leading to blurry or incomplete transfers.
Maintaining a clean nail stamper is crucial for consistent, crisp results. Proper cleaning ensures your stamper remains tacky and ready for its next use. It also extends the life of your valuable nail art tools. This guide will walk you through the best methods to clean your nail stamper, ensuring every manicure looks professional. We will cover daily cleaning, deep cleaning, and vital tips for long-term care.
Takeaway
- Always use a lint roller or sticky tape for daily cleaning. This is the safest method.
- Never use acetone or harsh chemicals on your stamper head. They cause permanent damage.
- Wash with mild soap and water only when necessary, and always air dry.
- Store your stamper properly to protect its delicate surface from dust and damage.
How do you clean a nail stamper effectively?
To effectively clean a nail stamper, gently press its head onto a sticky lint roller or use sticky tape after each use. This lifts off any remaining polish without damaging the delicate silicone or jelly surface. Avoid using acetone, nail polish remover, or abrasive materials, as these can permanently degrade the stamper’s functionality and tackiness.
Understanding Your Nail Stamper: Materials and Care Needs
Nail stampers are typically made from silicone or jelly. These materials are soft and delicate, designed to pick up polish effectively from stamping plates. Each type has a specific texture that allows for precise image transfer. Knowing your stamper’s material helps you choose the right cleaning method.
Silicone stampers often feel firmer but are still very gentle. Jelly stampers are softer and squishier. Both require specific care to maintain their tackiness and pick-up ability. Improper cleaning can cause them to become less effective. They may even stop picking up polish at all.
The surface of a nail stamper is porous and can easily absorb chemicals. This means harsh solvents like acetone will dry out and damage the material over time. A damaged stamper will not pick up designs cleanly. It can also warp or crack, making it useless for nail art.
Proper care preserves the integrity of your stamper. It ensures you get clear, crisp images every time you stamp. Understanding these nuances helps you extend the life of your stamping tool. It also protects your investment in quality nail art supplies.
The Golden Rule: Dry Lint Roller Method for Daily Cleaning
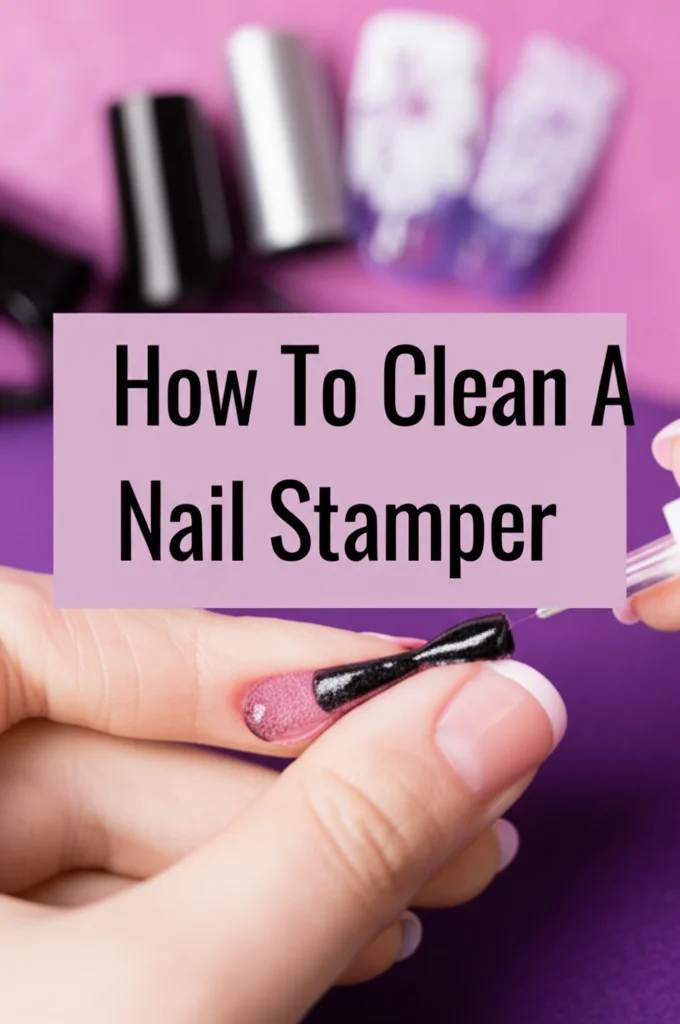
The dry lint roller method is the safest and most recommended way to clean your nail stamper. This method works perfectly for both silicone and jelly stampers. It removes residual polish and lint without harming the delicate surface. I use this method daily, and my stampers stay in top condition.
After you transfer a design to your nail, some polish often remains on the stamper head. Immediately pressing the stamper onto a sticky lint roller or a piece of strong tape will lift off this leftover polish. The sticky surface grabs the polish cleanly away from the stamper. This leaves your stamper ready for the next design or storage.
This method is crucial because it avoids any liquid cleaners. Liquids, especially harsh ones, can degrade the stamper material over time. A dry clean prevents loss of tackiness. It also prevents the stamper head from becoming cloudy or sticky in the wrong way. A clean stamper picks up designs more efficiently, ensuring crisp and clear transfers.
Using a lint roller is simple and quick. Just roll the stamper head across the adhesive surface a few times until no polish remains. For small bits of polish, a single press is often enough. This gentle approach is key to maintaining your stamper’s delicate balance of tackiness and softness. It keeps your tool performing at its best for a long time.
Gentle Cleaning for Stubborn Residue: Tape and Mild Soap
Sometimes, a dry lint roller alone might not remove all the polish, especially if it’s dried on or if you have particularly sticky stamping polishes. For these stubborn residues, a slightly more intensive but still gentle approach is needed. This involves using sticky tape or, in rare cases, a very mild soap and water solution.
For slightly more challenging spots, I often reach for a piece of packing tape or scotch tape. Press the stamper firmly onto the sticky side of the tape. Then, peel it off slowly. The stronger adhesive of tape can pull off dried bits of polish that a lint roller might miss. Make sure to use a fresh piece of tape for each cleaning action to ensure maximum stickiness.
If your stamper head feels greasy or significantly loses its tackiness due to oil transfer from fingers, a careful wash with mild soap can help. Choose a gentle dish soap, like one designed for sensitive skin, and use a tiny amount. Wet the stamper head slightly under cool running water. Apply a small drop of soap to your finger, and gently rub the stamper head. Do not scrub hard. Rinse it thoroughly under cool water to remove all soap residue.
After washing, it is critical to let the stamper air dry completely. Do not wipe it with a towel, as lint particles can stick to the wet surface. Place it on a clean, dry surface, stamper head facing up, and let it air out for several hours. This method should be used sparingly, perhaps only a few times a year, to preserve the stamper’s lifespan. Over-washing can still diminish its tackiness.
What NOT to Use: Avoiding Damaging Chemicals and Tools
This is arguably the most important section when learning how to clean nail stamper. What you don’t use is just as crucial as what you do use. Certain chemicals and tools can cause irreversible damage to your stamper, making it useless for nail art. I learned this the hard way with a favorite stamper, so please learn from my mistake!
Never use acetone or nail polish remover on your stamper head. These solvents are extremely harsh on silicone and jelly materials. Acetone will immediately dissolve or degrade the delicate surface, making it cloudy, brittle, or permanently sticky in a way that repels polish. The stamper will lose its ability to pick up designs cleanly, becoming completely ineffective. Even “acetone-free” removers can contain harsh chemicals that cause similar damage.
Avoid using abrasive tools or materials. This includes nail files, sandpaper, cotton balls, or rough cloths. Rubbing the stamper head with any abrasive material will scratch or alter its smooth surface. This affects its ability to pick up fine details from stamping plates. Cotton balls, in particular, can leave tiny fibers stuck to the stamper, which then transfer to your nails. For other delicate nail tools, understanding how to clean them properly is just as important. For instance, cleaning your nail brushes requires different methods to preserve their bristles. Similarly, cleaning acrylic nail brushes demands specific care to maintain their shape and effectiveness.
Do not wipe your stamper with alcohol or rubbing alcohol. While less destructive than acetone, alcohol can still dry out the silicone or jelly over time, reducing its tackiness. It can also leave a residue that interferes with polish pickup. Stick to the dry lint roller method for daily cleaning. Save mild soap and water for only the most stubborn grime when absolutely necessary. Proper care ensures your stamper remains a reliable tool for creating stunning nail art.
Restoring Your Stamper: Tackiness Revival Tips
Even with the best care, sometimes a nail stamper can lose some of its original tackiness. This might happen after extended use, if it gets slightly dusty, or if natural oils from your skin transfer onto it. A less tacky stamper struggles to pick up designs cleanly, leading to frustration. But don’t worry, there are a few simple tricks to revive its stickiness.
One common reason for reduced tackiness is the accumulation of oils and dust. To address this, gently wash your stamper head with a small amount of mild dish soap and cool water. Use your fingertips to lightly rub the surface. Rinse it thoroughly under running water, ensuring no soap residue remains. Then, allow the stamper to air dry completely, away from dust. This process often removes invisible films that hinder polish pickup.
Another technique for restoring tackiness involves gentle buffing. This should be done very carefully and only as a last resort. Use a soft, lint-free cloth or a non-abrasive nail buffer (one that is very fine-grained, like 4000 grit or higher). Lightly and briefly rub the surface of the stamper head in small circles. The goal is not to remove material but to slightly rough up the surface texture to expose fresh, tacky material. Do this for only a few seconds. Over-buffing will permanently damage the stamper. This method can also be applied to other delicate nail tools like glass nail files, where knowing how to clean a glass nail file properly extends its life.
If your stamper is still not performing well, consider testing different stamping polishes. Some polishes adhere better to certain stamper types. Also, ensure your stamping plates are perfectly clean. A dirty plate can prevent the stamper from picking up the design properly, making it seem like the stamper is at fault. These revival tips can help bring your stamper back to life for flawless nail art.
Cleaning Stamping Plates and Scrapers: A Complete Kit Approach
Achieving perfect nail art stamping isn’t just about a clean stamper; your entire kit needs attention. Stamping plates and scrapers are equally important components that require proper cleaning. Neglecting these tools can lead to blurry designs or difficulty picking up images, even with a perfectly clean stamper. Taking a complete kit approach ensures all parts work in harmony.
Stamping plates are typically metal plates with etched designs. After each use, they accumulate polish residue in their grooves. If this polish dries, it makes future stamping impossible. The best way to clean stamping plates is to use a non-acetone nail polish remover and cotton pads. Apply the remover to a cotton pad and wipe the plate clean, making sure to get into all the etched lines. For more stubborn, dried polish, you might need to let the remover sit for a few seconds before wiping. Always ensure the plate is dry before applying new polish. For a detailed guide, you can learn how to clean nail stamping plates thoroughly.
Scrapers are used to spread polish evenly over the design on the stamping plate and remove excess. They can be plastic, metal, or even old credit cards. After each scrape, polish builds up on the edge. I recommend wiping your scraper clean with a paper towel or cotton pad soaked in non-acetone polish remover immediately after use. This prevents polish from drying and hardening on the scraper’s edge, which can create streaks in your next stamped design.
Maintaining your entire stamping kit ensures optimal performance. A clean plate allows for clear image transfer, a clean scraper ensures even polish distribution, and a clean stamper picks up the design perfectly. By keeping all your tools pristine, you save time, reduce frustration, and consistently achieve beautiful, professional-looking nail art. This holistic approach makes all the difference in your stamping success.
Maintaining Optimal Performance: Storage and Handling
Proper storage and careful handling are just as important as cleaning for maintaining your nail stamper’s optimal performance. How you store your stamper when not in use directly impacts its lifespan and effectiveness. Careless handling can also lead to premature damage. I always ensure my stampers are stored correctly to keep them ready for my next creative burst.
After cleaning your stamper, it’s crucial to store it in a way that protects its delicate surface. Many stampers come with a dust cap or a small container. Always place the cap back on the stamper head or return it to its case. This prevents dust, lint, and other airborne particles from settling on the sticky surface. Dust and debris on the stamper can prevent it from picking up polish properly. They can also transfer to your nails, ruining your manicure.
Store your stamper away from direct sunlight and extreme temperatures. Heat, especially, can cause the silicone or jelly material to become sticky in an undesirable way, or even melt and deform. A cool, dry place like a drawer or a nail polish organizer is ideal. Avoid storing it with other tools that might scratch or puncture the soft stamper head. Keeping it isolated prevents accidental damage.
When handling your stamper during use, always pick it up by the handle, not the head. Avoid touching the silicone or jelly part with your fingers more than necessary. Oils from your skin can transfer to the stamper, reducing its tackiness over time. Also, be gentle when pressing the stamper onto the plate or your nail. Excessive force is not needed and can potentially damage the delicate stamper head or deform the image. Gentle, controlled motions are key for successful stamping and long-lasting tools.
Troubleshooting Common Stamper Issues: Beyond Cleaning
Even with perfect cleaning and care, you might encounter issues with your nail stamper. Sometimes, the problem lies beyond simple dirt or residue. Understanding common issues and their solutions can save you from frustration and ensure your nail art projects are always a success. I’ve faced these challenges too, and knowing how to troubleshoot makes a big difference.
One frequent issue is the stamper not picking up polish. If cleaning hasn’t helped, the stamper might need to be “primed.” This involves gently buffing the surface with a very fine grit buffer block (like 4000 grit or higher) or even just a magic eraser. The goal is to very lightly abrade the surface to increase its porosity and tackiness. Do this extremely gently, for only a few seconds, as over-buffing can ruin the stamper. Another reason for poor pickup could be the stamping polish itself. Some polishes are not formulated for stamping; they need to be highly pigmented and thick.
Another problem can be designs looking blurry or incomplete. This might not be the stamper’s fault at all. It could be due to your stamping technique. Ensure you are scraping the polish quickly and firmly across the plate at a 45-degree angle. Then, roll the stamper over the design in one smooth, swift motion. Do not press straight down or rock the stamper. Practice your technique on paper first if needed. Your scraper also plays a role; a nicked or dirty scraper can leave uneven polish on the plate.
Temperature and humidity can also affect stamper performance. In very humid environments, polish might dry too quickly on the plate before you can pick it up. In very cold conditions, polishes might thicken, making them harder to pick up. Try to stamp in a comfortable room temperature. If all else fails, consider that your stamper might simply be at the end of its life. Like any tool, stampers wear out over time, especially with frequent use. Replacing an old, worn-out stamper can solve persistent issues and bring back the joy of effortless nail art.
FAQs About Cleaning Your Nail Stamper
1. Can I use acetone to clean my nail stamper?
No, absolutely do not use acetone or nail polish remover on your nail stamper. Acetone is a harsh solvent that will permanently damage the delicate silicone or jelly material. It causes the stamper head to become sticky, cloudy, brittle, or completely lose its ability to pick up polish. Stick to dry methods for cleaning.
2. How often should I clean my nail stamper?
You should clean your nail stamper immediately after every single use. This prevents polish from drying onto the delicate surface, making future cleaning easier and preserving the stamper’s effectiveness. A quick press onto a lint roller or sticky tape is usually sufficient after each design transfer.
3. Why is my nail stamper not picking up polish even after cleaning?
If your stamper is clean but not picking up polish, several factors could be at play. The stamper might have lost tackiness over time; try gently washing with mild soap and air drying. Your stamping polish may not be suitable, or your technique might need adjustment. Ensure your stamping plate is also perfectly clean.
4. What kind of lint roller should I use for my nail stamper?
Use a standard, sticky lint roller with disposable adhesive sheets. The adhesive pulls off polish residue and lint without damaging the stamper’s surface. Avoid lint rollers designed for fabric, as they may not be sticky enough or could leave fibers. Strong packing tape or scotch tape also works well.
5. Can I wash my nail stamper with water?
You can wash your nail stamper with cool water and a very small amount of mild dish soap, but only as a last resort for very stubborn residue or to restore tackiness. Do this sparingly, perhaps a few times a year. Always rinse thoroughly and allow the stamper to air dry completely, without wiping, to prevent lint.
6. How should I store my nail stamper to keep it clean?
Store your nail stamper in its original case or with a dust cap covering the head. This protects the delicate surface from dust, lint, and airborne particles. Keep it in a cool, dry place, away from direct sunlight and extreme temperatures, to prevent material degradation and maintain its tackiness.
Conclusion
Keeping your nail stamper clean is a simple yet vital step for achieving beautiful, professional-looking nail art. By consistently using the gentle dry lint roller method, you preserve your stamper’s delicate surface and ensure it always picks up designs perfectly. Remember to avoid harsh chemicals like acetone, as they can cause irreversible damage to your valuable tools. Treat your nail stamper with care, and it will serve you well for countless manicures.
Incorporating these cleaning and maintenance practices into your nail art routine will not only extend the life of your stamper but also elevate the quality of your designs. A well-maintained stamper ensures crisp, clear transfers every time, making your nail art journey more enjoyable and rewarding. So, embrace these cleaning tips, and get ready to create stunning nail art effortlessly!
- nail stamper
- clean nail stamper
- nail art
- stamping tools
- silicone stamper
- nail hygiene
- cleaning tips
- beauty tools

