· Home Cleaning · 14 min read
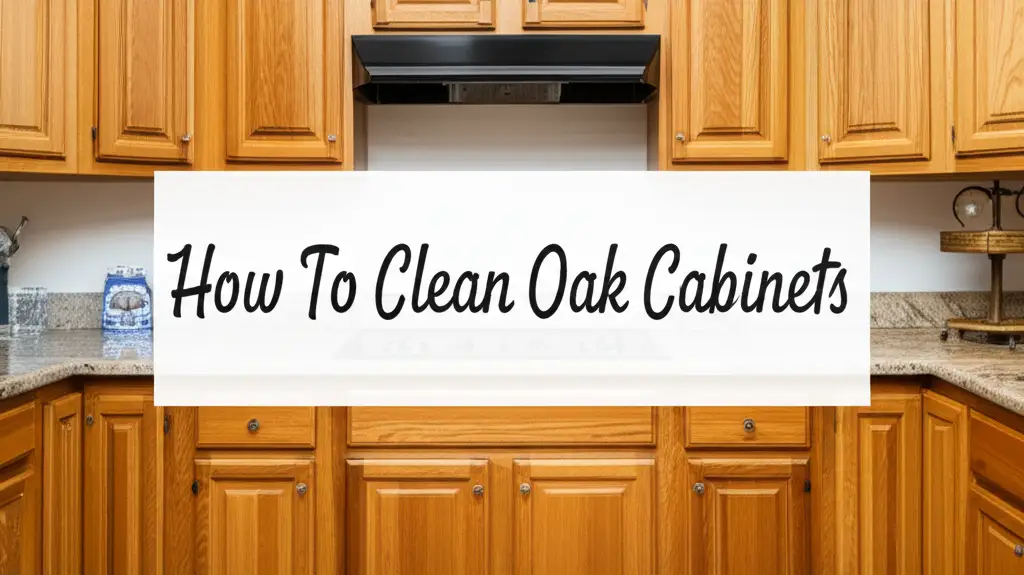
How To Clean Oak Cabinets

Clean Oak Cabinets: Your Complete Guide to a Spotless Kitchen
Oak cabinets bring warmth and beauty to any kitchen. Their natural grain patterns make them a favorite choice for many homes. Yet, over time, kitchen use can lead to dirt, grease, and grime buildup. Proper cleaning is important to keep them looking their best.
I often hear questions about how to clean oak cabinets safely. Many worry about damaging the wood or its finish. This article will show you the best ways to tackle everyday spills and tough grime. We will cover everything from gentle daily care to deep cleaning methods. You will learn about the right tools and products. We will also explore how to protect your oak cabinets for years of beauty.
Takeaway
- Understand your cabinet’s finish before cleaning.
- Use gentle, natural cleaners for most jobs.
- Clean cabinets regularly to prevent grime buildup.
- Tackle grease and stains with specific methods.
- Protect your cabinets after cleaning for lasting beauty.
Cleaning oak cabinets means using gentle solutions and soft cloths. This approach removes dirt and grease without harming the wood’s finish. Always test a cleaning method on an unseen spot first. This helps ensure safety for your specific cabinet type.
Understanding Oak Cabinet Finishes for Proper Cleaning
Before you clean oak cabinets, you must know their finish type. The finish protects the wood and determines the best cleaning approach. Using the wrong cleaner can strip the finish or damage the wood itself. Understanding this step protects your investment.
Types of Oak Cabinet Finishes
Oak cabinets come with different finishes. Some have a clear sealant like polyurethane or lacquer. This finish creates a protective layer on the wood surface. Other cabinets might have a stain with no topcoat, or be painted. Waxed or oiled finishes are also common on older cabinets. Each finish reacts differently to cleaning agents.
Why Finish Matters for Cleaning
A sealed finish is more resistant to water and cleaning solutions. You can use mild soap and water on these. Unsealed wood or cabinets with an oil finish absorb liquids more easily. Harsh chemicals can dry out wood or leave streaks on some finishes. For example, abrasive cleaners can scratch a sealed surface. Strong degreasers might strip a wax finish. Always choose a cleaner that respects your specific cabinet’s protective layer. You want to clean the surface, not remove its protection. Learning about your cabinet’s finish helps you choose safe products. This knowledge helps to clean kitchen cabinets without removing finish.
I always check a small, hidden area first. This step confirms the cleaner’s safety on your specific cabinet finish. Under a cabinet door or inside a drawer are good spots. This simple test prevents big problems later. It helps you keep your beautiful oak cabinets safe during cleaning.
Gathering Essential Supplies to Clean Oak Cabinets
Having the right tools makes cleaning oak cabinets easier and safer. You do not need many items. The best supplies are often simple household products. They clean effectively without harsh chemicals.
Gentle Cleaning Solutions
Mild dish soap is your main cleaner for most oak cabinets. A few drops in warm water create a good solution. White vinegar mixed with water is also very effective, especially for grease. Make sure the vinegar solution is diluted. You can also use a wood-specific cleaner that says it is safe for oak. Avoid abrasive cleaners. These can scratch or dull the finish. I usually start with the mildest option first. This helps protect the cabinet surface.
Tools for Safe Cleaning
You will need several soft cloths. Microfiber cloths work very well. They absorb dirt and water without scratching. Keep one cloth wet with your cleaning solution and another dry for wiping. A soft-bristle brush can help clean detailed areas or stubborn spots. An old toothbrush works well for tight corners. A spray bottle helps apply solutions evenly. Remember, always have a dry cloth ready. This helps dry the cabinets immediately after cleaning. This prevents water damage. These simple tools are often enough to clean wood cabinets effectively.
I find that preparing all my supplies beforehand saves time. It also makes the cleaning process smooth. Lay out your cloths, mix your solutions, and gather your brushes. This preparation helps ensure you clean your oak cabinets efficiently. It also ensures you protect them at the same time.
Daily and Weekly Care for Your Oak Cabinets
Regular cleaning prevents dirt from building up. This makes deep cleaning less frequent. Consistent, light cleaning keeps your oak cabinets looking fresh. It also helps them last longer. I always tell people that prevention is the best approach.
Light Dusting and Wiping
Dust collects on cabinet surfaces. This dust can mix with kitchen grease and become sticky. A soft, dry microfiber cloth works well for daily dusting. Simply wipe down cabinet fronts and sides. For a quick weekly clean, dampen a cloth with plain warm water. Wipe surfaces gently. Then immediately dry them with a separate, clean cloth. This simple step removes light grime and fingerprints. It stops dirt from hardening. This regular routine helps your oak cabinets maintain their natural beauty.
Quick Spill Cleanup
Kitchen spills happen often. Food, drinks, or cooking splatters can land on cabinets. Clean spills immediately. Do not let them dry. Use a damp cloth to wipe the spill away. Then dry the area. Acidic foods like tomato sauce or citrus juice can damage wood finishes quickly. Wipe these up as fast as you can. Prompt action prevents stains and protects the wood finish. Waiting even a short time can make a big difference. I always keep a damp cloth nearby when cooking. This allows for instant cleanup. This simple habit keeps your oak cabinets looking new for longer periods.
These daily and weekly habits are small efforts. Yet, they make a huge impact on the long-term condition of your oak cabinets. They protect the finish and prevent tough cleaning jobs later. You will find your kitchen stays cleaner with less effort.
Deep Cleaning Grease and Grime from Oak Cabinets
Kitchen cabinets, especially those near the stove, collect grease. This grease attracts dust and creates sticky grime. Deep cleaning removes this tough buildup. It brings back the original look of your oak cabinets.
Tackling Stubborn Grease
For heavy grease, a stronger solution is needed. Mix one part white vinegar with two parts warm water in a spray bottle. You can also add a few drops of mild dish soap. Spray the solution lightly onto a microfiber cloth, not directly onto the cabinet. Wipe the greasy areas. For very thick grease, let the solution sit for a few minutes. Then gently scrub with a soft sponge or brush. Do not rub too hard. Always wipe with a clean, damp cloth afterwards. Then dry thoroughly. This method works well to clean grease from kitchen cabinets without harsh chemicals.
Another effective method uses baking soda. Make a paste with baking soda and a little water. Apply the paste to greasy spots. Let it sit for 5-10 minutes. The baking soda helps absorb the grease. Gently rub with a soft cloth. Then wipe away the paste with a damp cloth. Make sure to rinse the area thoroughly with a clean, damp cloth and dry it. This method is safe for most finishes. It lifts tough grease without damaging the wood.
Removing Sticky Residue
Sticky residue can come from cooking oils or sugary spills. This residue feels unpleasant and collects more dirt. For sticky spots, try a solution of warm water and a few drops of dish soap. Dip a soft cloth in the soapy water. Wring it out well. Gently rub the sticky area. The soap helps break down the stickiness. If the residue is very stubborn, use a small amount of mineral oil on a cloth. Rub gently. The oil can help loosen the sticky layer. After removing the stickiness, wipe the area with a clean, damp cloth. Dry it completely. This is a good way to clean sticky kitchen cabinets.
I find that patience is key with tough grease and sticky spots. Do not rush the process. Let the cleaning solutions work their magic. Gentle but persistent effort gives the best results. You will see your oak cabinets shine again.
Removing Common Stains from Oak Cabinets
Even with regular cleaning, stains can appear on oak cabinets. Accidents happen in the kitchen. Knowing how to treat specific stains helps restore your cabinets. You can often remove stains without damaging the wood.
Water Marks and Rings
Water marks or rings happen when moisture sits on the cabinet surface. These appear as light or dark spots. For light water marks, try rubbing them gently with a soft cloth. You can also use a mixture of equal parts white vinegar and olive oil. Apply a small amount to the mark. Rub with the grain of the wood. The oil helps to condition the wood, and the vinegar helps lift the stain. For deeper water stains, a small amount of toothpaste (non-gel) can work. Rub it lightly with your finger or a soft cloth. Wipe it off immediately. Then wipe with a damp cloth and dry.
Food Stains
Food stains, like from coffee, wine, or tomato sauce, can set into the wood. Clean these as soon as you notice them. For fresh stains, a damp cloth with mild soap often works. For dried food stains, make a paste of baking soda and water. Apply the paste to the stain. Let it sit for a few minutes. Gently rub with a soft cloth or sponge. Wipe clean with a damp cloth. Always dry the area well afterwards. Be careful not to use too much water. This helps prevent new water marks.
Ink or Marker Stains
Ink or marker stains are tricky on wood. For fresh ink, try rubbing alcohol on a cotton swab. Dab the stain lightly. Do not rub vigorously, as this can spread the ink. For older or stubborn ink stains, a small amount of mineral spirits on a cloth can work. Test this in a hidden area first. Mineral spirits can affect some finishes. Apply very little product. Rub gently. Wipe clean with a damp cloth and then dry. If the stain remains, consider a wood repair marker that matches your cabinet color. This can help hide the mark. I always try the least aggressive method first for any stain. This protects the cabinet finish.
Restoring Shine and Protecting Your Clean Oak Cabinets
After a thorough cleaning, your oak cabinets will look much better. Now, you can take steps to restore their natural luster and protect them. This final step enhances their beauty and extends their life. It helps seal the cleaned surface.
Polishing and Conditioning
Once your cabinets are clean and dry, consider polishing them. A good wood polish or cabinet cream adds shine. It also helps to condition the wood. This protects against future dirt and moisture. Look for products specifically for wood or cabinets. Apply a small amount to a clean, soft cloth. Rub it onto the cabinet surface following the wood grain. Buff lightly with a separate, clean cloth. This brings out the natural shine of the oak. It makes the wood look rich and healthy. You can also use a very small amount of olive oil on a cloth for a natural shine. Wipe any excess oil immediately. This step makes your oak cabinets look new. For general wood care, these steps are similar to what you might do to clean oak floors for their shine.
Minor Scratch Repair
Small scratches can happen over time. They are often cosmetic. You can often make them less noticeable. For light scratches, try a wood repair marker or scratch cover. Choose a color that matches your oak cabinets. Apply the marker lightly to the scratch. Wipe off any excess immediately. Some furniture polishes also contain agents to hide minor scratches. If the scratch is deep, you might need a wood filler stick. Press the stick into the scratch. Wipe away excess. This fills the void and makes the scratch less visible. These small repairs help keep your cabinets looking flawless. They prevent minor damage from becoming bigger problems.
I always take pride in the final polishing step. It truly transforms the cabinets. It is like giving them a protective, glowing coat. This step locks in all the cleaning efforts you have put in.
Preventing Future Damage and Maintaining Oak Cabinets
Keeping your oak cabinets clean is an ongoing process. Good habits prevent significant buildup and damage. This proactive approach saves time and effort in the long run. It also protects your investment.
Regular Cleaning Habits
Make cleaning your oak cabinets a regular part of your kitchen routine. A quick wipe-down after cooking prevents grease from settling. Use a damp cloth for spills right away. Dust cabinet fronts weekly with a dry microfiber cloth. A monthly wipe with a mild soap and water solution is also good. This consistent care stops dirt from becoming tough grime. It makes your cabinets easy to maintain. Regular attention means you rarely need to do heavy deep cleaning. This habit saves you effort.
Protecting from Heat and Moisture
Heat and moisture are wood’s enemies. Steam from kettles or dishwashers can damage cabinet finishes. Use your range hood when cooking. Open windows or use a fan to reduce humidity. Place a mat or cloth under coffee makers and toasters to catch steam. If you boil water often, move the kettle away from your cabinets. Wipe up any condensation immediately. Do not leave wet cloths on cabinet surfaces. These actions help prevent warping, peeling finishes, or water stains. They protect the wood integrity of your cabinets.
Avoiding Harsh Cleaners
Many cleaning products are too strong for oak cabinets. Avoid abrasive scrubbers like steel wool. Stay away from harsh chemicals such as ammonia-based cleaners, bleach, or silicone polishes. These can strip the finish, leave residue, or dry out the wood. Stick to mild soap and water, or cleaners specifically designed for wood cabinets. Always read product labels. When in doubt, test a new cleaner on a hidden area first. Remember, the goal is to clean your cabinets, not to clean kitchen cabinets without removing finish. Gentle cleaning extends the life and beauty of your oak cabinets.
By following these simple rules, your oak cabinets will stay beautiful. They will look great for many years to come. These proactive steps are much easier than trying to fix damage later.
FAQ Section
How often should I clean my oak cabinets?
You should dust your oak cabinets weekly. Wipe down greasy or sticky spots as they appear. A general wipe with mild soap and water is good every one to two months. Perform a deep clean to remove stubborn grease every six months or once a year. Regular care prevents heavy buildup.
Can I use vinegar to clean oak cabinets?
Yes, you can use white vinegar to clean oak cabinets. Mix one part white vinegar with two parts warm water. Add a few drops of mild dish soap for extra cleaning power. Always apply the solution to a cloth, not directly to the cabinets. Rinse with a clean damp cloth and dry immediately.
What if my oak cabinets are unsealed?
Unsealed oak cabinets absorb liquids easily. Do not use much water on them. Use a soft, dry cloth for dusting. For dirt, use a very lightly dampened cloth with mild soap solution. Wipe and dry very quickly. Consider applying a wood conditioner or wax specifically made for unsealed wood to protect them.
How do I remove sticky residue from oak cabinets?
For sticky residue, mix warm water with a few drops of dish soap. Dip a soft cloth into the solution and wring it out well. Gently rub the sticky area. For very stubborn stickiness, a small amount of mineral oil on a cloth can help loosen it. Wipe clean and dry.
What products should I avoid on oak cabinets?
Avoid abrasive cleaners, steel wool, and scouring pads. Do not use ammonia-based cleaners, bleach, or silicone polishes. These products can damage the finish, dry out the wood, or leave a sticky residue. Stick to gentle, wood-safe cleaning solutions.
How can I restore the shine to dull oak cabinets?
After cleaning, you can restore shine using a wood polish or cabinet cream. Apply a small amount to a clean, soft cloth. Rub it gently along the wood grain. Buff the surface lightly with a separate, clean cloth. This step brings out the natural luster and helps protect the wood.
Conclusion
Keeping your oak cabinets clean helps them last longer and look their best. We covered many steps, from understanding finishes to tackling tough stains. You now know the right tools and cleaning solutions. Remember that gentle, consistent care is key. Regular dusting and quick cleanups prevent major issues. Deep cleaning handles stubborn grease and grime effectively. Protecting the finish after cleaning adds beauty and durability.
I find that a well-maintained kitchen feels much better. Your oak cabinets are a big part of your kitchen’s look. Give them the care they deserve. Start your cabinet cleaning journey today. You will enjoy a beautiful, clean kitchen for many years.
- clean oak cabinets
- wood cabinet cleaning
- kitchen cabinet care
- grease removal
- cabinet maintenance
- cleaning tips


