· Kitchen Cleaning · 18 min read
How To Clean Oven After Self Clean
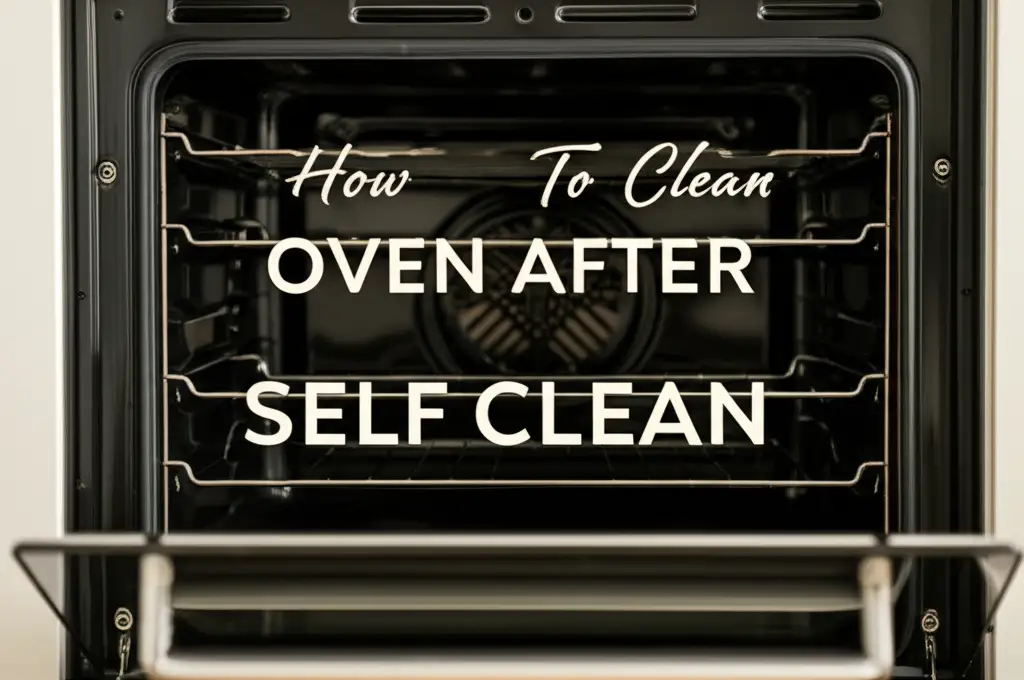
Clean Oven After Self Clean: Your Guide to a Spotless Finish
There is nothing quite like running the self-clean cycle on your oven. You hit the button, walk away, and envision a perfectly pristine interior. However, when the cycle finishes, a layer of fine ash often covers everything. This residue can feel frustrating after waiting hours for the cycle to complete.
But do not worry. Cleaning your oven after its self-clean cycle is a simple process. I will show you how to effectively remove all the leftover ash and residue. We will cover necessary tools, safety steps, and specific cleaning methods. You will learn to clean oven after self clean, ensuring your appliance looks truly spotless inside and out.
Takeaway
- Always let your oven cool completely after the self-clean cycle.
- Vacuum or wipe up loose ash first to avoid spreading it.
- Use natural cleaners like baking soda and vinegar for sticky residue.
- Clean oven racks, door glass, and interior surfaces thoroughly.
- Regular maintenance prevents heavy buildup and simplifies future cleaning.
To clean your oven after self-clean, wait until it is fully cool. Vacuum or wipe up loose ash. For stubborn residue, use a damp cloth with a mild cleaner like vinegar and water or a baking soda paste. Wipe down surfaces thoroughly, including racks and the door glass, until all residue is gone.
Understanding the Self-Clean Process and Why Residue Remains
Self-cleaning ovens use extremely high temperatures to burn off food spills. This intense heat turns food debris into ash. It is a smart way to deal with baked-on grime. The process often takes several hours to complete.
The oven locks during the cycle for safety. This prevents anyone from opening the door while temperatures are very high. Once the cycle finishes, the oven must cool down. This cooling period is crucial before you start any cleaning. The burned food becomes a fine, powdery ash. This ash is what you need to remove. It is a normal part of the process.
The residue you see is simply carbonized food particles. The self-clean feature does not remove the ash; it only converts the grime into an easy-to-remove form. Think of it like a fireplace. The fire burns the wood, but you still need to sweep out the ash. Your oven works similarly. You must manually clean up this leftover ash. Ignoring the ash can lead to odors the next time you cook. It also makes your oven look dirty despite running a cleaning cycle. So, cleaning after the self-clean cycle is a necessary last step for a truly clean oven.
Essential Tools and Safety Precautions Before You Begin
Before you start cleaning your oven, gather the right tools. Having everything ready makes the job easier and faster. You will need a few simple items that you likely already own. I always make sure I have these things on hand before tackling any major cleaning task.
First, you will need a small vacuum cleaner with a hose attachment. A shop vac works perfectly for this. If you do not have one, a dustpan and brush can also work, but it will be messier. Next, grab a few clean microfiber cloths or soft rags. These are great for wiping surfaces without scratching them. A spray bottle is also very useful. Fill it with water or a mild cleaning solution. For stubborn spots, a non-abrasive scrubber or a plastic scraper can help.
Now, let us talk about safety. Safety is very important when cleaning an appliance that gets hot. The most important rule is to wait until your oven is completely cool. Never open the oven door during or immediately after the self-clean cycle. High temperatures can cause severe burns. Make sure the oven is cool to the touch. I often wait several hours, or even overnight, to be safe. Good ventilation is also key. Open windows and turn on your kitchen fan. This helps clear any lingering odors from the self-clean cycle. Wearing rubber gloves protects your hands from ash and cleaning solutions. Some people also prefer to wear safety glasses. This protects your eyes from any dust or splashes. Always avoid harsh chemical cleaners after a self-clean cycle. The oven’s surfaces are already exposed to extreme heat. Strong chemicals can damage them or create harmful fumes. For most cleaning after self-clean, natural solutions like baking soda and vinegar work perfectly. They are safe and effective. You can learn more about combining these powerful natural cleaners here: how to clean with vinegar and baking soda.
Step-by-Step Guide to Removing Loose Ash and Debris
Once your oven is completely cool, you can begin the cleaning process. This first step focuses on removing the bulk of the ash and loose debris. It is a simple but important part of getting your oven spotless. Skipping this can make the next steps much harder.
Step 1: Ensure the Oven is Completely Cool This is the most critical first step. Touch the inside surfaces of the oven. They must be cool to the touch. If the oven is still warm, wait longer. Patience protects you from burns. I always give it plenty of time, often waiting until the next morning.
Step 2: Open the Oven Door Fully and Remove Racks Gently open the oven door all the way. This gives you full access to the interior. Next, carefully pull out all oven racks. The self-clean cycle does not always clean the racks perfectly. They might have some ash or stubborn residue on them. We will clean them separately later. Set them aside on a protected surface, like an old towel or newspaper.
Step 3: Vacuum Up Loose Ash and Debris This is where your vacuum cleaner comes in handy. Use a shop vac or a regular vacuum with a hose attachment. Carefully vacuum all the loose ash from the bottom of the oven. Also, vacuum the sides, back, and top interior. The vacuum picks up fine particles much more efficiently than a cloth. It prevents the ash from spreading around your kitchen. Be thorough. Get into all the corners and crevices. If you do not have a vacuum, use a dustpan and a small brush. Sweep the ash into the dustpan. This method is a bit messier but works.
Step 4: Wipe Down Interior Surfaces with a Dry Cloth After vacuuming, a thin layer of ash might still cling to the surfaces. Take a dry, clean microfiber cloth. Gently wipe down the inside walls, ceiling, and bottom of the oven. This removes any remaining loose particles. Do not wet the cloth yet. Wetting the ash at this stage can create a muddy mess. The goal here is to remove as much dry ash as possible. Fold your cloth frequently to use a clean section. This prevents you from simply spreading the ash around. By taking these initial steps, you prepare the oven for a deeper cleaning. You will find that dealing with the remaining stubborn stains is much easier now.
Tackling Stubborn Stains and Baked-On Grime
Even after removing all the loose ash, some stubborn spots might remain. These are typically areas where food was heavily baked on. Or, they might be remnants of particular spills. Do not worry; natural solutions often work best for these areas. I find these methods incredibly effective and safe.
Natural Solutions: Baking Soda and Vinegar
Baking soda is a powerful, non-abrasive cleaner. It works wonders on baked-on grease and residue. Here is how I use it:
Create a Baking Soda Paste: In a small bowl, mix about half a cup of baking soda with a few tablespoons of water. Stir until it forms a thick paste. The consistency should be like toothpaste. It needs to be thick enough to stick to vertical surfaces. For a comprehensive guide on using baking soda for oven cleaning, you can refer to this resource: how to clean oven with baking soda.
Apply the Paste: Spread the baking soda paste generously over any remaining stubborn stains. Make sure the paste covers the grime completely. For very tough spots, apply a thicker layer. You can use an old toothbrush or a soft sponge to spread it.
Let it Dwell: This is the most important part. Let the baking soda paste sit on the stains for at least 4-6 hours. For extremely tough, baked-on grime, leave it overnight (12 hours). The baking soda needs time to break down the carbonized residue. This process softens the grime, making it easier to wipe away.
Wipe Away: After the dwell time, take a damp cloth. Begin wiping away the dried baking soda paste and the loosened grime. You might need to rub a bit on stubborn areas. If some spots are still stuck, apply more paste and let it sit longer.
Rinse with Vinegar: Fill your spray bottle with white vinegar. Lightly spray the areas where you applied the baking soda. The vinegar will react with any remaining baking soda, causing a fizzing action. This helps to lift away any last bits of residue. It also neutralizes odors and leaves surfaces streak-free. Wipe again with a clean, damp cloth to remove the vinegar solution. Finish by wiping with a dry cloth for a sparkling finish. The combination of how to clean with vinegar and baking soda is truly effective.
Addressing Difficult Spots
Sometimes, spills like melted plastic or hardened oil can leave especially tough marks. These require specific approaches.
Melted Plastic: If you had plastic melt in your oven before the self-clean, it can be very difficult. The self-clean cycle might have burned it into a hard, carbonized lump. For these spots, a plastic scraper can be useful. Gently chip away at the hardened residue. Be very careful not to scratch the oven enamel. Apply more baking soda paste directly to the plastic residue. Let it sit for a very long time, even 24 hours. The goal is to soften it enough to scrape or wipe away. For more detailed instructions on this specific problem, see: how to clean melted plastic from oven.
Hardened Oil or Grease: Sometimes, self-clean does not fully vaporize thick oil spills. These can leave behind a dark, sticky residue. Apply the baking soda paste very thickly to these areas. The longer it sits, the better. You might need a bit more elbow grease when wiping. A stiff-bristled brush (not wire) can help scrub these areas gently without scratching. For persistent oil spills, specific methods can help. Check out this guide: how to clean oil out of oven.
Remember to work in sections. Tackle one stubborn area at a time. This makes the overall job feel less overwhelming. A little patience goes a long way when dealing with tough oven grime.
Cleaning Oven Racks, Door, and Interior Glass
A truly clean oven means sparkling racks, a clear door, and spotless interior glass. The self-clean cycle often does not get these parts perfectly clean. They usually need separate attention. I find cleaning these components outside the oven is far easier.
Cleaning Oven Racks
Your oven racks might still have baked-on residue or ash. Do not put them through the self-clean cycle. The extreme heat can damage their finish or warp them.
Here are a few effective ways to clean oven racks:
Soaking Method: This is my preferred method. Find a large tub or your bathtub. Line it with old towels to protect the surface. Place the oven racks inside. Fill the tub with hot water. Add about half a cup of dish soap or a cup of baking soda. Let the racks soak overnight. The hot water and cleaning agent will soften the grime. The next morning, the residue should wipe off easily with a sponge. For tough spots, use a non-scratch scrubber.
Baking Soda Paste for Racks: If soaking is not an option, you can use the baking soda paste method. Apply a thick layer of baking soda paste to the dirty spots on the racks. Let it sit for several hours or overnight. Then, scrub with a damp cloth or brush. Rinse thoroughly.
Aluminum Foil Method: Some people find success with the aluminum foil method. Wrap the racks tightly in aluminum foil. Then, place them in a tub with hot water and a dryer sheet. The dryer sheet is supposed to help loosen grime. Let them soak overnight. The foil might help contain the mess. For more details on this technique, you can read: how to clean oven racks with aluminum foil.
Bar Keepers Friend: This product is excellent for stainless steel and can be effective on oven racks. Wet the racks. Sprinkle Bar Keepers Friend on a damp cloth or sponge. Scrub the racks, focusing on stained areas. Rinse thoroughly. Always test a small, inconspicuous area first. This method is covered in detail here: how to clean oven racks with bar keepers friend.
Once clean, dry the racks completely before putting them back in the oven.
Cleaning the Oven Door and Interior Glass
The oven door glass often shows streaks or baked-on splatters. Cleaning it makes a huge difference in your oven’s appearance.
Exterior Door: Wipe the outside of the oven door with a multi-surface cleaner or a damp cloth. A glass cleaner works well for the exterior glass.
Interior Door and Glass: This area needs more attention. It usually has the most residue.
- Baking Soda Paste: Apply a thick layer of baking soda paste directly to the inside of the oven door glass. Spread it evenly.
- Dwell Time: Let the paste sit for 20-30 minutes, or longer for heavier grime.
- Scrape and Wipe: Use a plastic scraper or a razor blade (if your oven glass is safe for this; check your manual first and be extremely careful). Gently scrape away softened residue. Then, wipe away the paste with a damp cloth. You might need to rinse and wipe several times.
- Vinegar Finish: Spray a little white vinegar on the glass. Wipe with a clean, dry microfiber cloth. This removes streaks and leaves the glass sparkling clear.
Some ovens have removable glass panels. Check your oven’s manual to see if you can remove the glass for easier cleaning. If you can, cleaning both sides of the glass will give you the best results. A clean oven door truly transforms the look of your entire kitchen.
Final Touches and Maintenance Tips for a Sparkling Oven
You have done the hard work of cleaning your oven after its self-clean cycle. Now, it is time for the final touches. These steps ensure every part of your oven shines. They also help keep it clean longer. I find these last efforts make the biggest difference in maintaining a spotless kitchen.
The Finishing Wipe-Down
After all the scrubbing and wiping, a final wipe-down is essential. Take a clean, damp microfiber cloth. Wipe down all interior surfaces of the oven once more. This includes the walls, floor, and ceiling. Make sure to remove any remaining baking soda residue or streaks. Then, follow with a dry microfiber cloth. This step is crucial for preventing streaks and leaving a polished finish. A dry cloth buffs the surfaces, making them gleam. I always make sure to get into every corner. No one wants to see a film or dust after a thorough clean.
Exterior Polishing
Do not forget the exterior of your oven. Wipe down the entire outside surface. Use a multi-surface cleaner or a simple damp cloth. Pay attention to the control panel and knobs. Greasy fingerprints can accumulate quickly. If your oven is stainless steel, use a dedicated stainless steel cleaner. Polish it with the grain to avoid streaks. This makes the whole appliance look new. It completes the cleaning job, making your oven a focal point in your kitchen.
Regular Maintenance for Lasting Cleanliness
Maintaining your oven regularly is key. It prevents heavy buildup. This makes future self-clean cycles and subsequent cleaning much easier.
- Wipe Up Spills Immediately: This is the golden rule. If food spills or splatters while cooking, wipe it up as soon as the oven cools. Fresh spills are always easier to clean than baked-on ones. A quick wipe prevents them from turning into stubborn stains.
- Use Oven Liners: Consider placing an oven liner on the bottom of your oven. These are usually silicone or Teflon mats. They catch drips and spills. When they get dirty, you just remove and wash them. This protects the oven floor from accumulating grime.
- Spot Clean as Needed: If you notice a small spill or splash, do not wait for the next self-clean cycle. Tackle it right away. A little baking soda paste on a small spot can save you a lot of effort later.
- Consider Self-Clean Frequency: How often you use the self-clean cycle depends on your cooking habits. For average use, running it every 3-6 months is usually sufficient. Over-using it can potentially wear down oven components faster. Follow your manufacturer’s recommendations.
By following these final steps and adopting a routine of regular maintenance, your oven will stay cleaner longer. You will spend less time on deep cleaning and more time enjoying your kitchen. A clean oven is not just about looks. It also helps your food cook more evenly and prevents odors.
Troubleshooting Common Post-Self-Clean Issues
Even after a thorough cleaning, sometimes unexpected issues can arise. It is normal to encounter a few small problems. Knowing how to troubleshoot these can save you time and frustration. I have faced these common problems myself, and I have learned simple ways to fix them.
Persistent Odors
One of the most common issues after a self-clean cycle, even after cleaning, is a lingering odor. This smell often comes from residual burnt food particles. It can also be from the cleaning products used, if not fully rinsed.
- Ventilation is Key: Ensure good airflow in your kitchen. Keep windows open for several hours. Run your kitchen exhaust fan at full power. This helps dissipate any lingering fumes.
- Baking Soda Absorber: Place an open box of baking soda inside the cool oven overnight. Baking soda is excellent at absorbing odors.
- Citrus or Vinegar Bowl: Place an oven-safe bowl filled with water and lemon slices or white vinegar inside the oven. Heat the oven to 300°F (150°C) for 20-30 minutes. Let it cool. The steam helps neutralize odors. The citrus adds a fresh scent.
Streaks on Oven Surfaces or Glass
If your oven surfaces or glass still show streaks, it means residue was left behind. This is usually from cleaning solutions not being fully wiped away.
- Wipe, Rinse, Dry: Use a clean, damp microfiber cloth to wipe down the streaky areas again. Make sure the cloth is free of any cleaning product residue. Then, immediately follow with a separate, clean, dry microfiber cloth. Buff the surface until it is streak-free.
- Vinegar for Glass: For glass, a light spray of white vinegar followed by a dry cloth works wonders. Vinegar is a natural degreaser and streak-free cleaner.
White Powdery Residue
Sometimes, after cleaning, a white powdery film might remain on surfaces. This is typically dried baking soda residue that was not fully wiped away.
- Damp Cloth and Rinse: Take a very damp, clean cloth. Wipe down all affected surfaces thoroughly. The water helps re-dissolve the baking soda.
- Vinegar Spray: Lightly spray the areas with white vinegar. The fizzing reaction will help break down any remaining baking soda. Wipe again with a clean, damp cloth, then dry. You might need to repeat this a few times until all the white residue is gone.
Oven Not Turning On After Self-Clean
This is a less common issue, but it can be alarming. After the self-clean cycle, some ovens might experience a temporary power issue or electronic glitch.
- Check the Breaker: First, check your home’s electrical circuit breaker box. The high heat of the self-clean cycle can sometimes trip the oven’s dedicated breaker. Find the breaker labeled for your oven and switch it off for a minute, then switch it back on.
- Oven Lock Release: Ensure the oven door lock mechanism has fully disengaged. Sometimes, it might stick slightly. Gently try to open and close the door a few times. Do not force it.
- Consult Your Manual: If the oven still does not turn on, refer to your oven’s user manual. It will have specific troubleshooting steps for your model. It might also indicate error codes.
- Professional Help: If all else fails, contact the manufacturer’s customer service or a qualified appliance technician. There might be an internal component that needs professional attention.
By addressing these common issues, you can ensure your oven is not only visibly clean but also fully functional and free of lingering problems.
Conclusion
Cleaning your oven after its self-clean cycle is a vital step. The self-clean feature does the heavy lifting by burning away grime. But the leftover ash requires your attention. It is not just about aesthetics; removing this residue ensures your oven performs its best. We walked through the process, from understanding why ash remains to tackling stubborn stains. I shared my best tips for dealing with racks, glass, and even common post-clean issues.
Remember to always prioritize safety by waiting for the oven to cool completely. Use simple, natural cleaners like baking soda and vinegar. They are effective and safe for your appliance. Vacuuming loose ash prevents a mess. Targeted cleaning for stubborn spots makes all the difference. Finally, regular small maintenance helps keep your oven in top shape. You now have all the tools and knowledge. You can confidently clean oven after self clean and achieve a truly spotless finish. Your efforts will result in a cleaner kitchen and better cooking. Enjoy your wonderfully clean oven!
- oven cleaning
- self-cleaning oven
- ash removal
- kitchen maintenance
- appliance care