· Kitchen Cleaning · 13 min read
How To Clean Gas Burners
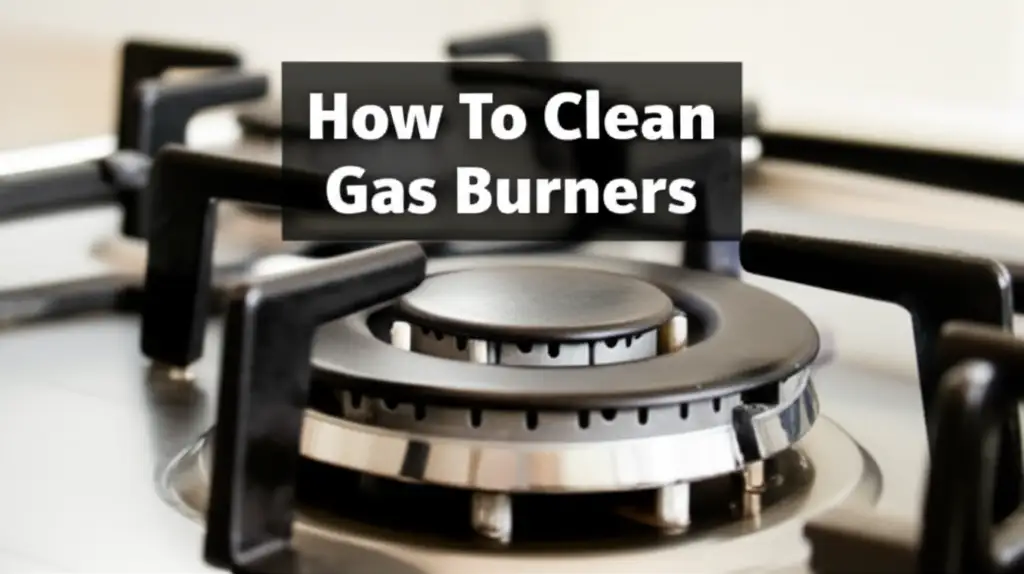
How To Clean Gas Burners
A clean kitchen brings me joy. Dirty gas burners, however, can make any kitchen feel less inviting. They also affect how well your food cooks. Over time, food spills, grease, and grime build up. This buildup can clog burner ports. Clogged ports lead to uneven flames and reduced efficiency. Learning how to clean gas burners properly helps maintain your stove’s performance. It also makes your kitchen look great. This guide will walk you through everything. We will cover the tools you need. We will show you step-by-step cleaning methods. We will also discuss important safety tips. Get ready to restore your gas burners to their shining best.
Takeaway:
- Restore cooking efficiency by cleaning clogged burner ports.
- Remove stubborn grease and food spills from gas burner components.
- Extend the lifespan of your gas stove and its parts.
- Ensure safer operation of your kitchen appliances.
- Improve the overall appearance of your kitchen.
To clean gas burners, remove grates and caps. Soak them in warm soapy water. Scrub with a non-abrasive brush or sponge. Clear clogged burner ports with a toothpick. Rinse, dry, and reassemble. This process restores efficiency and appearance.
Understanding Your Gas Burners: Parts and Purpose
Before we dive into cleaning, let us understand what we are working with. Gas stoves have several parts that get dirty. Knowing these parts helps you clean them effectively. It also helps you understand how they work together. We want to clean everything that affects burner function.
First, you have the grates. These are the heavy metal supports on top of the stove. They hold your pots and pans. Grates often collect spills and food debris. Underneath the grates, you find the burner caps. These are flat, round pieces that sit directly over the burner heads. They distribute the flame evenly. Burner caps are removable and get very greasy.
Below the caps are the burner heads themselves. These are the main components that ignite the gas. They have small holes around the edge called burner ports. Gas flows through these ports and ignites. These ports are crucial for a proper flame. If they get clogged, your flame will be weak or uneven. The igniter is a small pin located near the burner head. It creates the spark that lights the gas. Keeping this clean is also important for proper function.
Each of these parts requires a specific cleaning approach. Neglecting any part can affect cooking performance. Regular cleaning of these parts ensures your gas stove operates at its best. It also prevents dirt from becoming permanent. Understanding these components makes the cleaning process easier and more organized.
Essential Tools and Cleaning Agents for Gas Burners
You need the right tools for a successful cleaning job. Gathering everything beforehand saves time. It also ensures you have what you need for tough grime. Many of these items are probably already in your home. We aim for simple, effective solutions.
First, you need rubber gloves to protect your hands. Hot water and cleaning agents can be harsh on skin. A large basin or sink is essential for soaking parts. You will need warm water. Dish soap is a basic but powerful degreaser. It cuts through fresh grease easily. For tougher stains, baking soda is a fantastic abrasive. It gently scrubs away stuck-on food. White vinegar is another ally. It helps break down hard water stains and grease.
You will need various scrubbing tools. A non-abrasive sponge is good for general wiping. An old toothbrush works wonders for small crevices. A soft brush or nylon brush is useful for scrubbing grates and burner heads. For clogged burner ports, a paperclip or toothpick is perfect. Do not use metal brushes or harsh steel wool. These can scratch or damage the burner parts. Also, have some clean cloths or paper towels ready for drying. A vacuum cleaner with a hose attachment can pick up crumbs before wet cleaning. Having these items ready makes cleaning efficient. You can tackle any mess with confidence.
Step-by-Step Guide: Cleaning Detachable Gas Burner Parts
Cleaning your gas burners starts with detaching the parts. This makes them easier to clean thoroughly. Always ensure your stove is off and completely cool before you begin. Safety is always first when working with gas appliances.
First, remove all grates from the stove top. Set them aside. Then, lift off the burner caps from each burner head. These are usually loose and lift right off. Some burner heads may also lift off. Follow your stove’s manual for specific instructions. Place all these removable parts into a large basin or sink. Fill the basin with very warm water. Add a generous amount of dish soap to the water. Let these parts soak for at least 20 to 30 minutes. For heavily soiled parts, you can let them soak for a few hours or even overnight. Soaking helps loosen dried food and grease. This makes scrubbing much easier.
Once soaked, take each part out and scrub it. Use a non-abrasive sponge or a soft brush for the grates. Focus on areas with burnt-on food. For burner caps, an old toothbrush is great for getting into grooves. Cleaning burners on a gas stove often means paying attention to these small parts. Rinse each part thoroughly under running water. Make sure no soap residue remains. This step ensures proper functioning after reassembly. Set them aside to dry completely before putting them back. Remember, completely dry parts prevent future issues.
Tackling Stubborn Grime: Deep Cleaning Gas Burner Heads
Sometimes, soaking and scrubbing the detachable parts is not enough. The burner heads themselves can accumulate tough grime. This grime often clogs the small burner ports. Clogged ports lead to weak or uneven flames. A deep clean for these fixed parts is necessary for optimal performance.
Begin by inspecting the burner heads. Look for visible food particles or grease around the small holes, the burner ports. For dried-on food, you can make a paste. Mix baking soda with a little water until it forms a thick paste. Apply this paste directly onto the grime. Let it sit for 15-20 minutes. The baking soda will help break down the tough residue. After the paste has worked, use a soft brush or an old toothbrush. Gently scrub the paste and the grime away. Be careful not to force anything.
The most common issue with burner heads is clogged ports. Gas flows out of these ports to create the flame. If they are blocked, the gas cannot escape properly. Take a thin, rigid item like a paperclip or a toothpick. Gently insert it into each burner port. Wiggle it around to dislodge any debris. Do not use anything larger or metallic. This can damage the burner ports. Avoid using harsh chemicals or abrasives on the burner heads. They can corrode the metal. Once you have cleaned the ports, wipe the burner head with a damp cloth. Ensure all baking soda residue is gone. Proper cleaning of your gas oven means ensuring all parts, including burner heads, are clean. Allow the heads to air dry completely before replacing any parts.
Cleaning the Igniter and Stove Surface Around Burners
Cleaning the igniter is important for proper stove function. The igniter creates the spark that lights the gas. If it is dirty, it may not spark. This means your burner will not light. Cleaning the igniter is a simple process.
First, locate the igniter. It looks like a small white ceramic pin next to each burner head. Grease and food debris can build up on it. This blocks the electrical current. Take a soft, dry cloth or a cotton swab. Gently wipe the igniter. If there is stubborn grime, you can dampen the cloth slightly with rubbing alcohol. Do not use water. Water can damage the igniter. Be very gentle. The igniter is fragile. Avoid bending or breaking it. A clean igniter ensures a consistent spark. This helps your burner light quickly every time. For more specific guidance on this component, consider checking our guide on how to clean an igniter on a gas stove.
After cleaning the igniter, clean the stove surface around the burners. Food spills and splashes happen often. Use a non-abrasive cleaner designed for stove tops. Spray it onto the surface. Let it sit for a few minutes to loosen grime. Then, wipe it away with a clean cloth or sponge. For tough, burnt-on spots, you can make a paste of baking soda and water. Apply it to the spot. Let it sit for 10-15 minutes. Then, gently scrub with a non-abrasive scrubber. Wipe clean. Always rinse the surface with a damp cloth to remove any cleaner residue. A clean surface makes your entire kitchen look tidy. It also prevents new grime from affecting your burners.
Safety Precautions and Post-Cleaning Maintenance
Safety is paramount when cleaning gas appliances. Gas is highly flammable. Always prioritize safety steps before and after cleaning. This protects you and your home. My own experience taught me the importance of these checks.
Before you start cleaning, turn off the gas supply to your stove. You can usually do this by turning a valve behind or under the stove. If you are unsure, turn off the main gas supply to your house. This prevents accidental gas leaks. Ensure the stove and all burner parts are completely cool. Hot surfaces can cause burns. Never use highly flammable cleaners near open flames or gas lines. Avoid harsh chemical cleaners that can damage the stove’s finish or components. Always work in a well-ventilated area. Open windows or turn on your kitchen fan. This disperses any fumes from cleaning products. After cleaning, ensure all parts are completely dry before reassembling. Moisture can interfere with igniters. It can also cause corrosion over time.
Once everything is clean and dry, carefully reassemble the burner parts. Place the burner heads back in their spots. Then, put the burner caps on top. Finally, replace the grates. Turn the gas supply back on. Test each burner to ensure it lights properly and has an even flame. A blue flame is good. A yellow or orange flame indicates an issue. It might mean a clogged port or a burner cap placed incorrectly. Regular cleaning prevents major buildup. I recommend cleaning your gas burners thoroughly every few months. Wipe up spills immediately. This simple maintenance keeps your stove running efficiently. It also keeps it looking good. This practice extends the life of your appliance.
Common Gas Burner Cleaning Mistakes to Avoid
Many people make small errors when cleaning gas burners. These mistakes can reduce cleaning effectiveness. They can also damage your stove. I want to help you avoid them.
One common mistake is using harsh abrasive cleaners or tools. Steel wool, abrasive scrubbers, or strong chemical degreasers can scratch the burner parts. They can also corrode the metal finish. This damages the look and function of your burners. Stick to soft brushes, sponges, and non-abrasive cleaners. Another mistake is leaving parts wet. Moisture can cause rust over time. It can also interfere with the igniter’s ability to spark. Always ensure all burner caps, grates, and heads are completely dry before reassembly. You can air dry them or use a clean towel.
Ignoring the burner ports is another frequent oversight. Many cleaners focus only on the surface. But clogged ports prevent proper gas flow. This leads to inefficient cooking. Use a toothpick or paperclip to clear these tiny holes. Do not use a metal needle. A metal needle can widen or deform the port. Incorrectly reassembling parts is also a common error. If a burner cap is not seated correctly, the flame will be uneven. It may even lift off the burner head. Always double-check that caps are flat and stable. Finally, not turning off the gas supply before cleaning is a serious safety risk. Always prioritize safety. By avoiding these common mistakes, you ensure a safe and effective clean. Your gas burners will thank you for the proper care.
FAQ Section
How often should I clean gas burners? You should clean gas burners thoroughly every 2-3 months for regular use. Wipe up small spills immediately. This prevents tough buildup. Daily wiping of the grates and stove top helps a lot. It keeps your stove looking good.
Can I put gas burner parts in the dishwasher? Many gas burner grates and caps are safe for the dishwasher. Check your stove’s manual first. Some materials may not be dishwasher safe. For instance, cast iron grates often need hand washing to prevent rust. Cleaning gas stove grates in a dishwasher can save time, but confirm compatibility.
What causes gas burner flames to be uneven? Uneven flames usually mean clogged burner ports. Food debris or grease blocks the small holes where gas exits. It can also mean a misaligned burner cap. Cleaning the ports with a toothpick and ensuring the cap is seated properly usually fixes this.
Is it safe to use abrasive cleaners on gas burners? No, it is not safe to use abrasive cleaners. They can scratch or damage the finish of your burner parts. They might also corrode the metal over time. Stick to gentle cleaners like dish soap, baking soda, and vinegar.
How do I clean a clogged gas burner? To clean a clogged gas burner, remove the burner cap and head. Soak them in warm, soapy water. Use a toothpick or paperclip to clear out the small burner ports. Gently poke through each hole. Rinse and dry completely before reassembly.
What if my igniter doesn’t spark after cleaning? If your igniter does not spark, it might still be wet or have residue. Ensure it is completely dry. You can gently wipe it with a dry cloth or a cotton swab. Sometimes, minor damage can occur if too much pressure was applied during cleaning.
Conclusion
Cleaning your gas burners might seem like a big job. However, it is a straightforward process. It provides significant benefits for your kitchen. We have covered every step you need to know. From understanding the parts to deep cleaning stubborn grime, you now have the knowledge. You learned how to clean gas burners effectively. You also learned the tools and safety measures required.
Regular cleaning helps your stove work better. It ensures even cooking. It also extends the life of your appliance. A clean stove makes your entire kitchen feel fresh. Do not let spills and grease build up. Take the time to properly clean each component. You will be amazed by the difference. I feel much better when my cooking space is sparkling. So, gather your supplies. Follow these steps. Enjoy a cleaner, more efficient kitchen experience. Your gas burners will shine. Your food will cook better. This small effort brings big rewards.
- gas burner cleaning
- stove cleaning
- kitchen maintenance
- appliance care
- home cleaning tips
- DIY cleaning