· Home Maintenance · 19 min read
How To Clean Paint Sprayer
Keep Your Paint Sprayer Clean and Ready
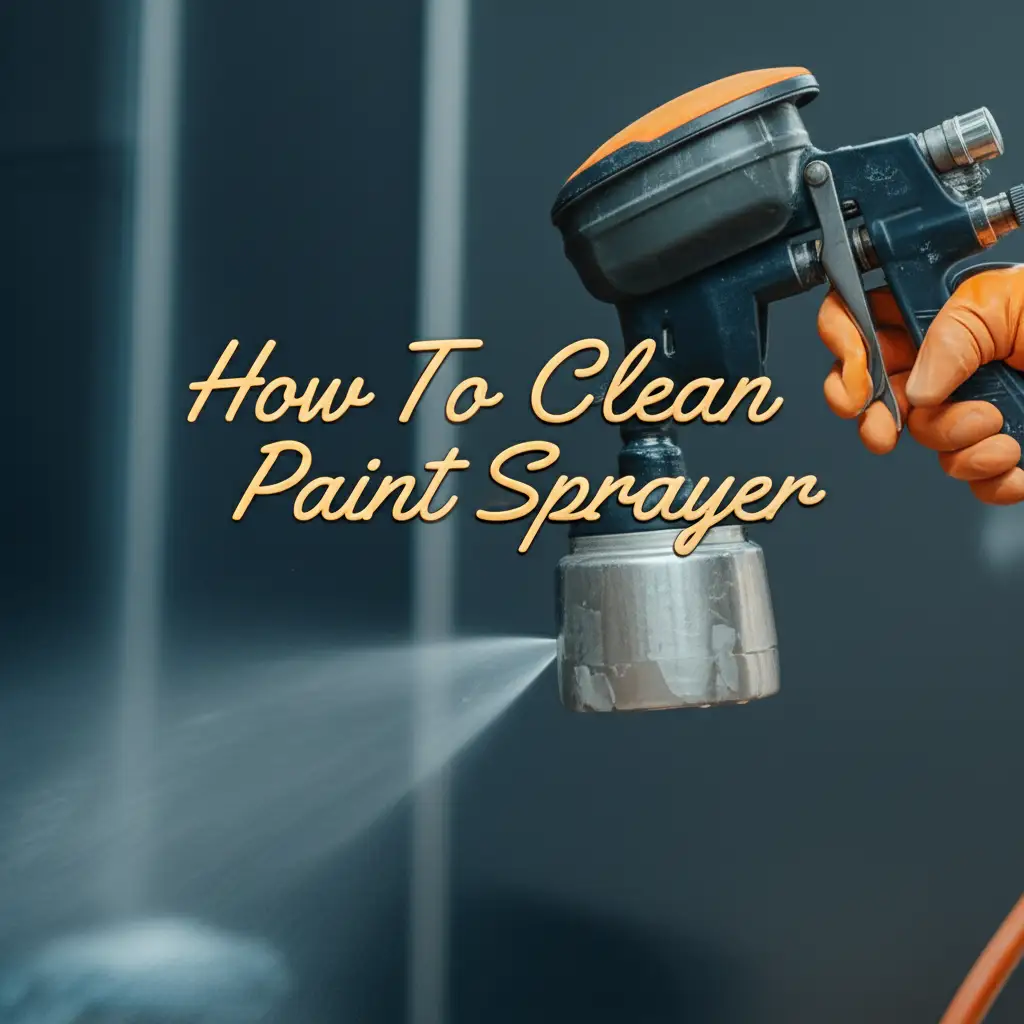
A paint sprayer makes quick work of large painting jobs. It helps you get smooth, even coats of paint on many surfaces. But after the painting finishes, one crucial step remains: cleaning the sprayer. Skipping this part causes big problems. Paint dries inside, clogging lines and nozzles. This damages the sprayer. It also affects how well it works next time.
Cleaning your paint sprayer properly saves you time and money. It keeps your tool in top condition. This guide shows you exactly how to clean a paint sprayer. We will cover water-based and oil-based paints. You will learn about important tools, step-by-step cleaning, and how to store your sprayer. Follow these steps to keep your sprayer working like new. Ensure your next painting project goes smoothly.
Takeaway:
- Clean your paint sprayer immediately after use.
- Use the correct cleaning solution for your paint type (water for latex, solvent for oil-based).
- Always relieve pressure before disassembling any parts.
- Disassemble and clean each component thoroughly.
- Store the sprayer with pump protector for long-term health.
To clean a paint sprayer, first relieve its pressure. Then, flush the system with the correct cleaning solution. Disassemble components like the gun and nozzle. Clean each part by hand, removing all paint residue. Reassemble the sprayer only after all parts are dry and clean.
Why Cleaning Your Paint Sprayer Is Important
Cleaning a paint sprayer is not just a suggestion. It is a necessary part of tool ownership. Many people finish a project and want to put their tools away. They might feel tired after a long day of painting. However, ignoring the cleaning process leads to serious issues. Paint starts to harden inside the sprayer lines and components very quickly.
This hardened paint creates clogs. These clogs block the flow of paint during future use. A clogged sprayer delivers inconsistent spray patterns. It might stop spraying altogether. This forces you to stop work and troubleshoot. Proper cleaning prevents these issues. It keeps the sprayer running efficiently.
Prevent Costly Damage
Paint sprayers are significant investments. They contain precise internal parts. Dried paint acts like concrete inside these parts. It can damage seals, valves, and pumps. This damage often means expensive repairs. Sometimes, it means buying a new sprayer entirely. Regular cleaning protects these delicate components. It extends the life of your equipment.
Think about the time and money you save. A well-maintained sprayer performs reliably for many years. A neglected one breaks down fast. Cleaning takes a little time now. It saves a lot of hassle and expense later. This care ensures your tool is ready for any job.
Ensure Flawless Results
A clean sprayer makes good paint jobs. When the sprayer is clean, paint flows smoothly. It sprays evenly. This gives you a professional, streak-free finish. If the sprayer has old, dried paint inside, it sprays unevenly. This causes splatters, streaks, or an inconsistent coat. Nobody wants a paint job that looks bad.
Poor spray results can mean more work. You might need to re-sand or re-coat surfaces. This adds extra time and materials to your project. Proper cleaning ensures your sprayer performs at its best. It delivers the perfect finish you expect every time. Just like caring for your brushes improves results, cleaning your sprayer does too. Learn more about keeping your painting tools clean by checking out our guide on how to clean paint brushes and rollers.
Essential Tools and Supplies for Cleaning
Cleaning a paint sprayer requires more than just water or a rag. Having the right tools and supplies makes the job easier. It also ensures you clean the sprayer completely. Gather these items before you start. This way, you will not need to stop in the middle of cleaning. Being prepared saves time and effort.
Your specific supplies depend on the type of paint you used. Water-based paints need water. Oil-based paints need solvents. Always check the paint can label for cleanup instructions. This label tells you the correct cleaning agent to use. Using the wrong cleaner can harm your sprayer. It might not remove the paint effectively either.
Here is a list of common items you will need:
- Two Large Buckets: One for initial flushing, one for soaking parts.
- Cleaning Solution:
- For water-based paint (latex, acrylic): Warm water and mild soap.
- For oil-based paint, lacquer, or stains: Mineral spirits, paint thinner, or lacquer thinner.
- Nylon or Brass Brushes: Small brushes, like a toothbrush or those specifically designed for sprayer nozzles.
- Rags or Shop Towels: For wiping down parts and cleaning spills.
- Protective Gear: Safety glasses, chemical-resistant gloves, and a respirator (especially for solvents).
- Nozzle Cleaning Needle: A small, thin wire tool often included with the sprayer.
- Pump Protector/Storage Fluid: For long-term storage, often called pump armor.
Always work in a well-ventilated area. This is very important when using chemical solvents. Fumes can be harmful. Proper ventilation protects your health.
Step-by-Step Cleaning for Water-Based Paints
Water-based paints like latex and acrylic are common. They are easier to clean from sprayers than oil-based paints. However, prompt cleaning is still essential. Dried latex paint becomes very difficult to remove. Start the cleaning process as soon as you finish spraying. Do not let the paint sit in the sprayer.
This method works for most standard water-based paint sprayers. This includes many models from popular brands. For instance, if you have a Graco sprayer and use latex paint, these steps apply directly. Getting into a routine for cleaning ensures your sprayer is always ready. Check our detailed guide on how to clean a Graco paint sprayer for more brand-specific tips.
Initial Flushing
- Relieve Pressure: First, turn off the sprayer. Disconnect the power. Then, engage the spray gun safety lock. Aim the gun into a waste bucket. Trigger the gun to release any remaining pressure. This is a critical safety step.
- Remove Excess Paint: Disconnect the paint hose from the sprayer unit. Pour any remaining paint from the paint container back into its original can. Scrape out as much paint as possible. This reduces waste and makes flushing easier.
- Flush with Water: Fill the paint container with warm, clean water. Reconnect it to the sprayer. Place the suction tube into the clean water. Direct the spray gun into a separate empty bucket. Turn on the sprayer. Spray the clean water through the system until it runs clear. This flushes out most of the paint from the lines and pump.
- Repeat Flushing: Empty the dirty water from the bucket. Refill the paint container with fresh water. Flush the system again. You might need to do this a few times. Continue until only clear water comes out.
Detailed Component Cleaning
After flushing, you need to clean the individual parts. Paint residue hides in small crevices.
- Disassemble the Spray Gun: Unscrew the air cap, fluid tip, and needle from the spray gun. Some sprayers also have filters in the handle. Remove these as well.
- Soak Parts: Place all removed parts into a bucket of warm, soapy water. Let them soak for about 10-15 minutes. This helps loosen dried paint.
- Brush Clean: Use small brushes to scrub each part. Pay close attention to the fluid tip and air cap. Ensure all paint residue is gone. Use the nozzle cleaning needle to clear any tiny holes in the tip. Hold parts up to light to check for blockages.
- Clean Hoses: Run water through the paint hose. Ensure no paint remains inside. For tough spots, a long brush can help.
- Wipe Down Unit: Use a damp rag to wipe the exterior of the sprayer unit. Clean the paint container thoroughly.
- Rinse and Dry: Rinse all cleaned parts with clean water. Make sure no soap residue remains. Lay all parts out on a clean cloth to air dry completely. Reassemble the sprayer only when everything is dry. This prevents rust and mold.
Cleaning Your Sprayer After Oil-Based Paints or Stains
Cleaning a paint sprayer after using oil-based paints, lacquers, or stains is different. These materials require a specific type of cleaner. Water will not work. You must use a chemical solvent. Solvents dissolve oil-based products effectively. Always read the paint can label to confirm the correct solvent. Mineral spirits, paint thinner, or lacquer thinner are common choices.
The process shares similarities with water-based cleaning. However, safety steps become much more important. Solvents produce fumes. They can irritate skin and eyes. Proper ventilation and personal protective gear are non-negotiable. Many Wagner sprayers can handle various types of paint, including oil-based. If you own a Wagner, these steps will be very helpful. Find more general tips on how to clean a Wagner paint sprayer here.
Choosing the Right Solvent
Different oil-based products need specific solvents.
- Mineral Spirits or Paint Thinner: These work well for most oil-based paints and oil-based stains. They are less aggressive than lacquer thinner.
- Lacquer Thinner: Use this for lacquer and shellac. It is a stronger solvent. It evaporates quickly.
- Xylene or Acetone: These are very strong solvents. Use them only for specific coatings like epoxies or two-part paints. Always check the paint manufacturer’s recommendation.
Never mix different solvents. Store them in clearly labeled containers. Dispose of used solvent properly according to local regulations.
Safety First
Before starting, ensure good ventilation.
- Open Windows and Doors: Provide cross-ventilation in your workspace.
- Use Fans: Fans help move air out of the area.
- Wear Protective Gear:
- Safety Glasses/Goggles: Protect your eyes from splashes.
- Chemical-Resistant Gloves: Nitrile or butyl rubber gloves are best. Latex gloves might not hold up against strong solvents.
- Respirator: A respirator with organic vapor cartridges is highly recommended. It protects your lungs from harmful fumes.
Avoid open flames or sparks. Solvents are highly flammable. Do not smoke. Do not work near water heaters or other ignition sources.
Step-by-Step Solvent Cleaning
- Relieve Pressure: Just like with water-based paints, turn off the sprayer, disconnect power, engage the safety lock, and spray into a waste bucket until pressure is gone.
- Remove Excess Paint: Drain unused oil-based paint from the container back into its can.
- Initial Flush with Solvent: Pour the correct solvent into the paint container. Place the suction tube into the solvent. Aim the spray gun into a designated waste bucket (for solvent waste). Turn on the sprayer. Spray the solvent through the system. Continue until the solvent runs clear. This can take several passes.
- Repeat Flush: Discard the dirty solvent safely. Add fresh solvent to the container. Flush the system again. Repeat until no paint residue is visible in the flushed solvent.
- Disassemble and Clean Parts:
- Unscrew the air cap, fluid tip, and needle from the spray gun. Remove any filters.
- Place all removed parts into a small container of fresh solvent. Let them soak for a few minutes.
- Use small brushes to scrub each part. Pay extra attention to the tip and nozzle. Clear all holes with a nozzle cleaning needle.
- Run solvent through the paint hose.
- Wipe Down and Dry: Use solvent-dampened rags to wipe the exterior of the sprayer and the paint container. After scrubbing, rinse all parts with clean solvent. Lay them out on a clean, dry surface. Allow them to air dry completely. Solvents evaporate faster than water. However, ensure no residue remains before reassembly. Reassemble when all parts are dry.
Deep Cleaning and Troubleshooting Common Issues
Sometimes, a standard cleaning is not enough. This happens when paint dries inside the sprayer. Or, it happens if you neglect cleaning for too long. Deep cleaning methods remove stubborn blockages. Knowing how to troubleshoot common issues saves you from frustration. It also helps avoid costly repairs. A paint sprayer can clog from many things. It could be old paint, debris, or even paint that is too thick.
When your sprayer stops spraying or sprays unevenly, a clog is often the cause. Do not force the sprayer. This can cause more damage. Instead, follow these steps to find and fix the problem. Understanding these techniques helps you maintain your sprayer for peak performance. You might even find solutions to general paint drying issues. If you have ever wondered how to clean spray paint that has dried on a surface, the principles of dissolving the paint are similar.
Clearing Clogs and Blockages
Clogs are the most common sprayer problem. They usually occur in the nozzle, gun, or intake filter.
- Check the Nozzle Tip: Most clogs happen here. First, turn off the sprayer and relieve pressure. Remove the spray tip. Check for dried paint or debris. Use the small nozzle cleaning needle to push through any blockages. For stubborn clogs, soak the tip in the appropriate cleaning solution for several hours or overnight.
- Inspect the Gun Filter: Many spray guns have a small filter inside the handle where the hose connects. Unscrew the handle. Pull out the filter. Clean it thoroughly with a brush and cleaning solution. Replace it if it is damaged.
- Clean the Intake Filter/Screen: The suction tube often has a filter or screen at its end. This prevents debris from entering the pump. Remove it and clean it. Ensure no paint or gunk is stuck.
- Flush the Hose: Disconnect the hose from both the sprayer unit and the gun. Run cleaning solution through it from both ends. For very stubborn clogs, you might need to use a high-pressure water hose (for water-based paints) or a compressed air line (carefully, for solvent-based paint if all solvent is out and area is ventilated).
- Back-Flush: Some advanced sprayers allow back-flushing. This reverses the flow. It pushes clogs back out of the system. Consult your sprayer’s manual for this feature.
Dealing with Dried Paint
Dried paint inside the pump or lines is a serious issue. It takes more effort to remove.
- Soaking Internal Components: If you suspect paint is dried deep inside, you might need to disassemble the pump section. This is a more advanced step. Refer to your sprayer’s manual. Soak affected parts in the appropriate strong solvent (for oil-based) or hot soapy water (for water-based) for an extended period.
- Professional Service: For severe internal clogs, especially in the pump, professional repair might be necessary. Do not attempt to force tools into delicate internal mechanisms if you are unsure. This can cause irreparable damage.
- Preventative Measures: The best way to deal with dried paint is to prevent it. Always clean your sprayer immediately after use. Never leave paint in the system overnight or for extended periods. Use pump protector fluid for storage.
Regular cleaning and proper care drastically reduce the chances of dried paint issues.
Proper Storage for Long-Term Sprayer Health
After thoroughly cleaning your paint sprayer, proper storage is the final step. Storing your sprayer correctly protects it from damage. It prevents rust and corrosion. It also ensures the seals and pump stay lubricated. This keeps your sprayer ready for its next use. Improper storage leads to costly repairs or a completely ruined unit.
Think about the environment where you store tools. High humidity and extreme temperatures harm electronic equipment. A paint sprayer is a piece of equipment that works with high pressure. Its internal parts need protection. Taking a few extra minutes for storage extends your sprayer’s life significantly.
Winterization and Long-Term Storage
If you plan to store your sprayer for more than a few weeks, especially in cold climates, winterization is key. This process prevents internal components from drying out or freezing.
- Use Pump Protector Fluid: This specialized fluid, often called “Pump Armor” or “Storage Fluid,” is crucial.
- How to Use: After the final cleaning flush (with water or solvent), drain any remaining cleaning solution from the system.
- Pour a small amount of pump protector into the suction tube.
- Turn on the sprayer briefly (for a few seconds). Spray the fluid into a waste bucket. You will see it come out. This coats the internal pump and fluid passages. It prevents corrosion and keeps seals lubricated.
- Consult your sprayer’s manual for the exact amount needed. Too much is better than too little.
- Drain Hoses and Gun: Ensure all hoses are drained of any liquid. Remove the spray gun. Drain any moisture or fluid from it.
- Disassemble Nozzle and Filters: Remove the nozzle, tip, and filters. Clean them thoroughly and dry them completely. Store them separately in a small, sealed bag or container. This prevents small parts from getting lost.
- Store in a Dry, Temperature-Controlled Area: Choose a storage location that is dry and free from extreme temperature changes. Basements or garages can be good, but avoid areas with high humidity. Freezing temperatures can cause residual water to expand and crack pump components. High heat can dry out seals.
- Cover the Unit: Place a dust cover or a large plastic bag over the sprayer unit. This protects it from dust and debris. Dust can get into tiny openings and cause issues later.
- Hang Hoses Neatly: Coil hoses loosely. Hang them to prevent kinking or cracking. Kinks can create weak points in the hose.
Following these steps ensures your paint sprayer remains in excellent condition. It will be ready for your next project, even after months of storage.
Maintenance Tips to Extend Your Sprayer’s Life
Cleaning your paint sprayer after each use is the primary maintenance step. However, a sprayer needs more than just cleaning for a long life. Regular checks and minor upkeep tasks make a big difference. These simple habits prevent issues before they become major problems. They also ensure your sprayer always performs at its best.
Think of it like car maintenance. You change the oil regularly, not just when it breaks down. The same idea applies to your paint sprayer. A little attention now saves a lot of headaches later. These practices keep the machine efficient and reliable. They also protect your investment in quality tools.
Daily Checks for Performance
Before and after each use, perform quick checks. This helps spot potential issues early.
- Inspect Hoses: Look for cracks, kinks, or wear on the paint hose and air hose (if applicable). Damaged hoses can leak, reduce pressure, or burst. Replace them if you see damage.
- Check Filters: Examine all filters—intake, gun, and manifold filters. Ensure they are clean and free of debris. Clogged filters restrict flow and cause poor spray patterns. Clean or replace them as needed.
- Examine the Nozzle and Tip: Check the spray tip for wear. A worn tip creates an uneven or wide spray pattern. Replace it when it no longer produces a sharp, clean fan pattern. Nozzles wear out over time.
- Look for Leaks: Before and during use, check all connections for leaks. Tighten any loose fittings. Leaks reduce pressure and cause mess.
- Test Pressure Relief: Briefly test the pressure relief valve. Ensure it functions correctly. This is a safety feature.
When to Replace Parts
Parts wear out. Knowing when to replace them is crucial.
- Spray Tips: As mentioned, worn tips affect performance. Replace them regularly. The lifespan of a tip depends on paint type and usage.
- Filters: Filters are consumables. Replace them if they are too clogged to clean. Or, replace them if they tear.
- Packing and Seals: Over time, the packing and seals inside the pump and gun wear down. You might notice leaks or a loss of pressure. These parts are replaceable. Consult your sprayer’s manual for part numbers and replacement instructions.
- Hoses: Replace hoses if they show significant wear, bulges, or leaks that cannot be fixed by tightening.
- Pistons/Cylinders: For high-end airless sprayers, internal pump components like pistons or cylinders can wear. This is less common but indicates a need for professional service or specific part replacement.
Always use genuine replacement parts from your sprayer’s manufacturer. This ensures compatibility and maintains performance. Following these maintenance tips ensures your paint sprayer remains a valuable and efficient tool for many projects to come.
FAQ Section
How often should I clean my paint sprayer?
You should clean your paint sprayer immediately after every use. Do not let paint dry inside. Even a short break can allow paint to harden, especially with fast-drying paints. Prompt cleaning prevents clogs, saves time, and protects your equipment from damage.
Can I use a universal cleaner for all paint types?
No, you cannot use a universal cleaner for all paint types. Water-based paints require warm water and soap. Oil-based paints, lacquers, and stains need specific chemical solvents like mineral spirits or lacquer thinner. Using the wrong cleaner will not dissolve the paint and can damage your sprayer.
What if paint dries inside the sprayer?
If paint dries inside your sprayer, it will cause clogs and reduced performance. For minor clogs, try soaking the affected parts in the appropriate cleaning solution for an extended period. Use small brushes and nozzle cleaning needles to clear blockages. For severe internal drying, professional service might be needed.
How do I store my sprayer long-term?
For long-term storage, always clean your sprayer completely. Then, run a pump protector fluid through the system. This fluid lubricates internal parts and prevents corrosion. Disassemble and thoroughly dry all components. Store the sprayer in a dry, temperature-controlled environment away from extreme heat or freezing temperatures.
Is it okay to clean a paint sprayer with paint still in it?
No, it is not okay to clean a paint sprayer with paint still in it. You must remove all remaining paint from the container before starting the cleaning process. This ensures you flush out actual paint residue, not just mix it with the cleaning solution. Always drain excess paint back into its can first.
What is pump armor?
Pump armor, also called storage fluid or pump protector, is a specialized liquid. You run it through your paint sprayer’s system before long-term storage. It coats the internal pump and seals. This prevents corrosion, keeps parts lubricated, and stops them from drying out. It helps ensure your sprayer is ready for use when you need it next.
Conclusion
Cleaning your paint sprayer is a simple but vital task. It protects your investment. It ensures great results on every painting job. We have covered why cleaning matters. We looked at the right tools and supplies. We also walked through the steps for water-based and oil-based paints. Remember, immediate action after painting is key. Do not let paint dry in the system.
Beyond cleaning, consistent maintenance and proper storage are important. These steps extend your sprayer’s life. They keep it performing reliably for years. From flushing lines to using pump protector, each step contributes to the longevity of your equipment. So, make cleaning a routine part of your painting process. Your sprayer will thank you. Now you know how to clean a paint sprayer effectively. You are ready for your next project. Keep your tools clean, and your projects will always look their best.
- paint sprayer cleaning
- sprayer maintenance
- paint tool care
- cleaning equipment

