· Outdoor Cleaning · 22 min read
How To Clean Pavers Around Pool
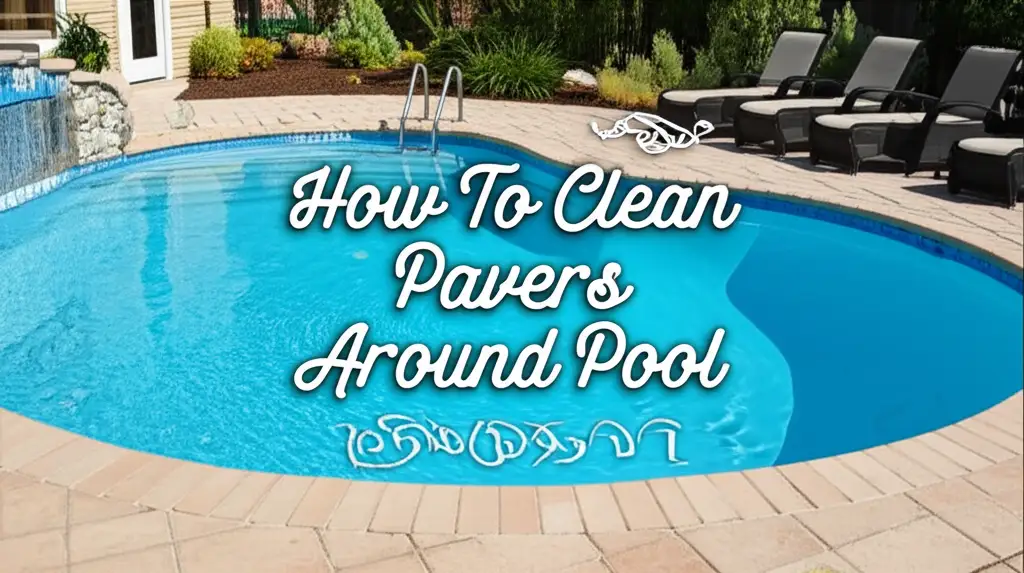
How To Clean Pavers Around Pool Effectively
Imagine a beautiful summer day. You step outside to your pool, ready for a swim. But wait, your pool deck pavers look dirty. They might have green algae, unsightly stains, or even weeds pushing through. This takes away from the inviting look of your outdoor space.
Cleaning pavers around a pool is a common task for homeowners. These surfaces face constant exposure to water, sunlight, chemicals, and foot traffic. Over time, this leads to grime buildup, mold, mildew, and other stubborn marks. Keeping your pool area clean is important for safety and appearance. Slippery algae can cause falls. Stains make your beautiful outdoor space look neglected. This article will show you exactly how to clean pavers around your pool. We will cover everything from basic cleaning to tackling tough stains. You will learn the best tools, solutions, and techniques to restore your pool deck’s sparkle.
Takeaway:
- Regular cleaning prevents buildup and keeps your pool area safe.
- Use the right tools and cleaning solutions for effective paver care.
- Address specific stains like algae, mold, and efflorescence with targeted methods.
- Consider pressure washing for deep cleaning, but use it carefully.
- Sealing pavers protects them and simplifies future cleaning.
To effectively clean pavers around a pool, begin by sweeping away loose debris. Then, apply a suitable cleaning solution, such as diluted bleach or a specialized paver cleaner, scrubbing tough spots with a stiff brush. Finally, rinse the area thoroughly with a garden hose or a low-pressure setting on a pressure washer.
Why Pool Pavers Need Regular Cleaning
Pavers around your pool face unique challenges. They are often wet from splashes. They get direct sunlight. These conditions create a perfect environment for many issues. Understanding these problems helps you clean effectively.
Regular cleaning stops these problems from getting worse. It keeps your pool deck safe. It also makes your outdoor area look much better. You do not want a dirty space when you relax by the pool.
Common Issues Affecting Pool Pavers
Several factors contribute to dirty pool pavers. Algae and mold are very common. They thrive in damp, warm conditions. If you see green or black patches, these are likely algae or mold. They make surfaces slippery and dangerous. Leaves, dirt, and general debris also collect. This organic matter breaks down and stains the pavers. Rain washes dirt onto the surface. Pool chemicals can also leave residues. Over time, calcium buildup or efflorescence may appear. These leave white, chalky marks.
Benefits of Maintaining Clean Pavers
Keeping your pool pavers clean offers many benefits. First, it ensures safety. Algae and mold create slippery surfaces. Cleaning removes these hazards. Second, it improves appearance. A clean pool deck enhances your home’s curb appeal. It makes your outdoor living space more inviting. Third, regular cleaning extends the life of your pavers. It prevents damage from prolonged exposure to dirt and chemicals. Clean pavers resist staining better. They look new for longer. This saves you money on costly repairs or replacements in the future.
Essential Tools and Cleaning Solutions for Pavers
Before you start cleaning, gather the right supplies. Having the correct tools makes the job easier. It also helps you achieve better results. Choosing the right cleaning solution is also important. Different types of dirt or stains need different products.
You can often find these items at home improvement stores. Always read product labels carefully. Make sure the solution is safe for your specific paver material. You want to clean the pavers without causing damage.
Must-Have Tools for Paver Cleaning
- Stiff-bristled brush or broom: Use this for scrubbing dirt and stains. A stiff broom can remove loose debris.
- Garden hose with spray nozzle: Essential for rinsing off dirt and cleaning solutions. A good nozzle helps with pressure.
- Pressure washer (optional, with caution): A pressure washer speeds up cleaning. You must use it on a low-pressure setting. High pressure can damage pavers or blast out joint sand.
- Buckets: You will need buckets for mixing cleaning solutions. They also help with rinsing.
- Safety gear: Wear gloves to protect your hands from chemicals. Safety glasses protect your eyes from splashes.
- Push broom or squeegee: Useful for spreading cleaning solutions or moving water.
Recommended Cleaning Solutions
- Mild dish soap and water: This is great for general dirt and grime. Mix a few drops of soap in a bucket of warm water. It is a gentle and safe option.
- White vinegar solution: Vinegar is acidic. It works well for light mold, mildew, and some efflorescence. Mix equal parts white vinegar and water. For other vinegar cleaning tasks, you might find tips on how to clean pool tile with vinegar.
- Bleach solution: Use bleach for tough mold, mildew, or algae. Mix one part bleach with two parts water. Always test a small, hidden area first. Bleach can sometimes lighten colors.
- Specialized paver cleaner: Many manufacturers offer specific cleaners. These are designed for pavers. They often target tough stains like oil or rust. Always follow the manufacturer’s instructions.
- Efflorescence remover: This is a specific acidic cleaner. It removes white, chalky mineral deposits. These cleaners are stronger. Use them with care.
- Degreaser: For oil or grease stains, a commercial degreaser works best. Apply directly to the stain. Let it sit before scrubbing.
Remember to protect nearby plants when using stronger chemicals. Rinse very well after cleaning. This removes all chemical residue.
Step-by-Step Guide to Basic Paver Cleaning
Regular, gentle cleaning is the best way to maintain your pool pavers. This routine prevents serious buildup. It keeps your pool deck looking fresh. I recommend doing this basic clean every few weeks or once a month. It makes deeper cleaning less frequent.
This process is straightforward. It uses simple tools and mild solutions. You can easily fit it into your regular outdoor chores. Let us walk through the steps together.
1. Clear the Area
Start by removing everything from the paver surface. This includes pool toys, furniture, planters, and any decorations. Sweep the entire area thoroughly. Use a stiff broom to remove loose dirt, leaves, sand, and other debris. Pay close attention to the gaps between pavers. Loose debris can trap moisture and promote growth. This step ensures you are cleaning the pavers directly, not just pushing dirt around.
2. Rinse the Pavers
Once swept, rinse the pavers with a garden hose. Use a strong spray nozzle. This initial rinse removes any remaining loose dirt. It also wets the surface, which helps the cleaning solution work better. The water should flow away from the pool area. You do not want too much dirty water entering your pool. A good rinse prepares the pavers for cleaning.
3. Apply a Mild Cleaning Solution
Now, it is time to clean. For general dirt and grime, I use a simple solution. Mix a few drops of mild dish soap into a bucket of warm water. Apply this solution evenly over the pavers. You can pour it directly from the bucket or use a watering can. Make sure the entire surface is damp with the solution. For a large area, work in sections. This prevents the solution from drying out.
4. Scrub the Surface
Let the cleaning solution sit for about 5-10 minutes. This allows it to penetrate the dirt. Then, use a stiff-bristled brush or a push broom to scrub the pavers. Apply good pressure. Work in small sections to ensure thorough cleaning. Pay extra attention to any visibly dirty areas or light stains. You will see the dirt lifting from the surface. Scrubbing helps loosen stubborn grime.
5. Final Rinse
After scrubbing, rinse the pavers thoroughly with your garden hose. Start from the highest point and work your way down. This ensures all the dirty water and cleaning solution washes away. Keep rinsing until the water runs clear. You do not want any soap residue left behind. Residue can attract new dirt or make the surface slippery. A thorough rinse is key to a clean, residue-free finish.
Tackling Specific Stains: Algae, Mold, Oil, and More
Sometimes, basic cleaning is not enough. Pavers around pools can develop specific types of stains. These need more targeted treatment. I have seen everything from green algae to dark oil spots on my pavers. Each type of stain requires a different approach. Using the correct method ensures effective removal without damaging the pavers.
Always test any new cleaning solution in an inconspicuous spot first. This helps avoid discoloration or damage. Work safely, wearing gloves and eye protection.
1. Removing Algae and Mold
Algae and mold are very common problems for pool pavers. They thrive in damp, shaded areas. Algae often appears as green, slippery patches. Mold can be black or dark green. They both make your pavers dangerous.
- Bleach Solution: For tough algae or mold, mix one part household bleach with two parts water. Apply this mixture directly to the affected areas. Let it sit for 15-20 minutes. The bleach will kill the growth.
- Scrub and Rinse: After soaking, scrub the areas with a stiff brush. You will see the algae or mold lift away. Rinse the area thoroughly with clean water. Make sure no bleach residue remains. You can also use a specialized outdoor cleaner designed for mold and mildew. This type of cleaner is effective on algae on pool screen enclosures too. For general mold issues, you may even find tips on how to clean mold with vinegar.
2. Dealing with Efflorescence
Efflorescence appears as a white, powdery residue on pavers. It is caused by mineral salts coming to the surface. Water evaporates, leaving the salts behind. This is a very common issue with concrete products.
- Dry Brush First: Start by brushing away as much of the efflorescence as possible when the pavers are dry. This removes loose mineral deposits.
- Vinegar Solution: For light efflorescence, a solution of equal parts white vinegar and water can work. Apply it and let it bubble. Then scrub with a stiff brush and rinse.
- Commercial Efflorescence Remover: For heavy efflorescence, you might need a specialized cleaner. These are typically acidic. Follow product instructions carefully. Always test in a small area first. Rinse very well after use.
3. Cleaning Oil and Grease Stains
Oil and grease stains are tough. They often come from spills around grilling areas or from pool equipment. They can soak deep into the paver.
- Immediate Action: Act fast if you see a fresh spill. Blot up as much oil as possible with paper towels or an absorbent cloth. Do not rub the stain.
- Absorbent Material: For fresh stains, sprinkle kitty litter, sand, or sawdust directly onto the stain. Let it sit for several hours or overnight. It will absorb the oil. Sweep it up the next day.
- Degreaser: For set-in oil or grease stains, use a commercial concrete degreaser. Apply it according to the product directions. Let it penetrate, then scrub with a stiff brush. Rinse thoroughly with hot water. You might need to repeat this process several times for deep stains.
4. Removing Rust Stains
Rust stains usually come from metal furniture or rust in the water. They leave an orange-brown mark. These can be difficult to remove.
- Commercial Rust Remover: Look for a rust remover specifically designed for concrete or masonry. These products contain acids that dissolve rust.
- Application and Rinse: Apply the product directly to the rust stain. Follow the manufacturer’s instructions for dwell time. Scrub gently with a non-wire brush. Rinse the area thoroughly with water. Never use a wire brush on pavers as it can leave metal residue that will rust again.
Remember that patience is key when dealing with tough stains. Some stains may require multiple applications or different methods.
The Power of Pressure Washing Pavers
Pressure washing can be a game-changer for deeply soiled pavers. It removes years of dirt, grime, and stubborn stains quickly. However, it requires caution. Using a pressure washer incorrectly can damage your pavers. It can also blast out the joint sand between them. This is something I have learned over time.
When done right, pressure washing restores pavers to almost new condition. It is a powerful tool. Let us discuss how to use it safely and effectively.
When to Use a Pressure Washer
A pressure washer is best for:
- Large areas: It significantly reduces cleaning time compared to hand scrubbing.
- Heavy buildup: For deeply embedded dirt, moss, and extensive algae growth that a brush cannot handle.
- Annual deep cleaning: Many people use a pressure washer once a year for a comprehensive clean.
Avoid using a pressure washer on new pavers. The joints need time to settle. Also, be careful with old, damaged, or loosely laid pavers. High pressure can dislodge them.
Safe Pressure Washing Techniques
Using a pressure washer requires attention to detail.
- Clear and Rinse: First, sweep all loose debris. Rinse the pavers with a garden hose to pre-wet them.
- Choose the Right Nozzle: Use a wide-angle nozzle (e.g., 25-degree or 40-degree white or green tip). A zero-degree (red) nozzle is too powerful and will damage your pavers.
- Adjust Pressure: Start with a lower PSI (pounds per square inch) setting. For most pavers, 1500-2000 PSI is sufficient. Some units have adjustable pressure.
- Maintain Distance: Hold the nozzle at least 12-18 inches away from the paver surface. Closer distances increase the pressure significantly.
- Consistent Strokes: Use smooth, overlapping strokes. Work in one direction, then overlap your next stroke by a few inches. Do not linger in one spot, as this can etch the paver. Keep the wand moving constantly.
- Work in Sections: Clean a small section at a time. This helps you manage runoff and ensures even cleaning.
- Rinse Thoroughly: After cleaning a section, rinse off any loosened dirt and debris.
Re-sanding After Pressure Washing
Pressure washing often removes some of the joint sand between pavers. This sand is crucial for stability. If the sand is gone, pavers can shift. Weeds can also grow easily.
- Allow to Dry: Let the pavers dry completely, usually for 24-48 hours.
- Spread New Sand: Once dry, sweep polymeric sand or fine-grade joint sand over the entire paver surface. Polymeric sand hardens when wet, forming a strong bond.
- Sweep into Joints: Use a stiff broom to sweep the sand into all the paver joints. Ensure all gaps are filled.
- Vibrate (Optional): Some people use a plate compactor with a pad or gently tamp the pavers to settle the sand.
- Mist and Cure: Lightly mist the polymeric sand with water following the product instructions. This activates the polymer and hardens the sand. Do not flood the area.
Re-sanding is a vital step after pressure washing. It restores the structural integrity of your paver system. It also helps prevent future weed growth.
Managing Weeds and Moss Between Pavers
Weeds and moss growing in paver joints are a common nuisance. They detract from the appearance of your pool deck. They can also create uneven surfaces. Removing them is an important part of paver maintenance. I have battled these many times. There are several ways to tackle this.
Preventing weeds and moss from returning is even better. Proper joint filling and sealing play a big role. Let us look at the best strategies.
Methods for Weed Removal
- Manual Weeding: This is the most direct method. Use a weeding tool, a stiff brush, or even a screwdriver to scrape out weeds and their roots from between the pavers. It is labor-intensive but very effective for small areas. Ensure you remove as much of the root as possible to prevent regrowth.
- Boiling Water: For a natural approach, pour boiling water directly onto the weeds. This kills the plant cells. Be careful not to splash boiling water on yourself or nearby plants. It is a good option for small, scattered weeds.
- Vinegar Solution: A strong solution of white vinegar (undiluted or slightly diluted) can kill weeds. Spray it directly onto the weeds on a sunny day. The acid burns the plants. Be careful not to get vinegar on desirable plants or grass.
- Weed Killers: Chemical weed killers are effective for persistent weeds. Choose a non-selective weed killer for quick results. Apply according to product instructions. Avoid spraying near your pool water. Always rinse the area thoroughly after the solution has had time to work. Some products are specifically designed for cracks and crevices.
Controlling Moss Growth
Moss loves damp, shaded conditions. It spreads easily and makes pavers slippery.
- Improve Drainage and Sunlight: The best long-term solution is to reduce moisture. Ensure water drains away from the pavers. Trim back overhanging branches to increase sunlight exposure.
- Scrubbing and Cleaning: For existing moss, scrub it away with a stiff brush and a solution of water and bleach (one part bleach to two parts water). You can also use a specialized moss remover. Rinse thoroughly after scrubbing.
- Pressure Washing: A pressure washer on a low setting can effectively remove moss. Follow the safety guidelines mentioned earlier.
Preventing Future Growth with Joint Sand
The key to preventing weeds and moss is properly filled joints.
- Polymeric Sand: This is the best option for filling paver joints. It is a mix of sand and polymer additives. When activated with water, it hardens. This creates a durable, flexible bond that resists weed growth and ant infestations.
- Application: After cleaning your pavers and ensuring they are dry, sweep polymeric sand into the joints. Use a stiff broom to work it deep into all gaps.
- Activation: Lightly mist the sand with water, following the manufacturer’s specific instructions. Do not flood the area. The water activates the polymer, causing the sand to harden. This forms a strong barrier against weeds. This is a crucial step in maintaining a clean pool deck.
Regularly inspecting your pavers and addressing small weed or moss patches early prevents them from becoming major problems. A well-maintained joint system is your best defense.
Sealing Pavers for Long-Term Protection
After all your hard work cleaning, you want to keep your pavers looking great. Sealing them is the best way to do this. Sealing pavers creates a protective barrier on the surface. This barrier helps prevent stains and makes future cleaning much easier. It also enhances the color of your pavers. I always recommend sealing my own pavers around the pool. It is worth the effort.
Choosing the right sealer and applying it correctly are important steps. Let us explore the benefits and the process of sealing.
Benefits of Sealing Pool Pavers
Sealing provides many advantages for your pool area pavers:
- Stain Resistance: The sealer acts as a barrier. It prevents oil, grease, rust, and other liquids from soaking into the porous paver material. Spills sit on top, making them easier to wipe away.
- Weed and Moss Inhibition: Some sealers penetrate the paver joints. This makes it harder for weeds and moss to root and grow. It works in conjunction with polymeric sand.
- Color Enhancement: Many sealers, especially wet-look or enhancing sealers, can deepen and enrich the natural colors of your pavers. They bring out the vibrancy that may have faded over time.
- Erosion Protection: Sealing helps to lock the joint sand in place. This reduces the risk of sand erosion from rain or pressure washing. It maintains the stability of your paver system.
- UV Protection: Sealers can protect pavers from the damaging effects of UV rays. This helps prevent fading and degradation over time.
- Easier Maintenance: With a sealed surface, dirt and grime do not stick as easily. Routine cleaning becomes much simpler and faster.
Types of Paver Sealers
There are different types of sealers available:
- Acrylic Sealers: These are film-forming sealers. They create a protective layer on top of the paver. They offer good stain resistance and color enhancement. They come in matte, semi-gloss, or high-gloss finishes.
- Penetrating Sealers: These sealers soak into the paver material. They do not form a film on the surface. They provide excellent stain protection without changing the paver’s appearance or creating a slippery surface. They are often water-based.
- Polyurethane Sealers: These are more durable than acrylic sealers. They offer very strong protection and a high-gloss finish. They are often used in high-traffic areas.
- Water-Based vs. Solvent-Based: Water-based sealers are easier to apply and clean up. They have low VOCs (volatile organic compounds). Solvent-based sealers often offer deeper penetration and higher durability but have stronger fumes.
Always choose a sealer designed for pavers. Ensure it is suitable for your specific paver material (e.g., concrete, natural stone).
How to Apply Paver Sealer
Applying sealer correctly ensures maximum benefits.
- Clean Pavers Thoroughly: This is critical. Pavers must be completely clean and free of dirt, stains, efflorescence, weeds, and moss. Any trapped dirt will be sealed in.
- Ensure Pavers are Dry: Pavers must be bone dry before sealing. This can take 24-72 hours after cleaning, depending on humidity and temperature. Moisture can cause the sealer to turn milky or peel.
- Check Weather Conditions: Apply sealer on a clear, dry day. Temperatures should be between 50-80°F (10-27°C). Avoid direct hot sun, rain, or heavy dew within 24-48 hours of application.
- Protect Nearby Areas: Cover plants, pool water, and other surfaces you do not want to seal. Use painter’s tape or plastic sheeting.
- Apply Sealer Evenly: Use a high-quality roller, sprayer, or brush. Work in small sections. Apply a thin, even coat. Avoid puddling. Overlapping strokes slightly ensures full coverage.
- Apply Second Coat (Optional): Many sealers benefit from a second, thin coat applied after the first coat is dry to the touch (usually 2-4 hours). Read product instructions for specific recommendations.
- Allow to Cure: Let the sealer cure completely before walking on the pavers or returning furniture. This can take 24-72 hours. Avoid pool splashes during this time.
Sealing is an investment in your pavers’ longevity and appearance. It makes maintaining your pool deck much easier in the long run.
Regular Maintenance Tips for Sparkling Pool Pavers
Maintaining clean pavers around your pool is an ongoing process. It is not just a one-time job. Regular upkeep prevents dirt and grime from building up. This saves you time and effort in the long run. Think of it as preventative care for your outdoor space.
I have found that small, consistent actions make a huge difference. These tips will help keep your pool pavers sparkling and inviting all season long.
Daily and Weekly Habits
- Sweep Regularly: Make it a habit to sweep your pool deck every few days, or at least once a week. This removes loose leaves, dirt, sand, and other debris. It prevents organic matter from breaking down and staining your pavers. Pay attention to corners and areas under furniture.
- Quick Rinse: After sweeping, a quick rinse with a garden hose can wash away fine dust and residues. This is especially helpful after heavy use of the pool or during windy days. This simple step prevents dirt from settling into the paver pores.
- Wipe Up Spills Immediately: Accidental spills of food, drinks, or pool chemicals should be addressed right away. Blot them up with a clean cloth. Then, rinse the area with water. Prompt action prevents stains from setting in.
- Check for Standing Water: After rain or pool use, look for areas where water tends to pool on your pavers. Standing water encourages algae and moss growth. Address any drainage issues if possible.
Seasonal Maintenance Tasks
- Mid-Season Check-Up: Halfway through the pool season, perform a more thorough inspection. Look for any signs of new algae, mold, or light stains. Address them promptly with a mild cleaning solution or targeted spot treatment. This prevents small problems from becoming big ones.
- Deep Cleaning (Annually/Bi-Annually): Depending on your climate and usage, plan for a deep clean once or twice a year. This involves the full cleaning process, including scrubbing with stronger solutions or pressure washing. This deep clean restores the pavers’ original look.
- Reapply Joint Sand: After a deep clean or if you notice sand disappearing from the joints, reapply polymeric sand. This is crucial for maintaining paver stability and preventing weed growth. Ensure pavers are dry before applying.
- Inspect and Reseal (Every 2-5 Years): If your pavers are sealed, check the sealer’s effectiveness every couple of years. Water should bead up on the surface. If it soaks in, it is time to reapply the sealer. The frequency depends on the type of sealer and traffic. Re-sealing protects your investment.
General Tips for Longevity
- Use Pool Mats: Place absorbent mats around high-traffic areas, especially where people exit the pool. This helps absorb excess water and reduces the amount of chlorine or pool chemicals carried onto the pavers.
- Trim Overhanging Branches: If trees or shrubs hang over your pool deck, trim them back. This increases sunlight and improves air circulation, reducing moisture that encourages algae and moss.
- Proper Pool Chemistry: Maintaining balanced pool chemistry reduces the likelihood of chemical stains or calcium buildup on nearby surfaces. For issues like calcium, you might look at how to clean calcium buildup on pool tile for more ideas.
- Avoid Harsh Chemicals: While some strong cleaners are needed for specific stains, avoid using undiluted acids or abrasive cleaners regularly. They can damage the paver surface or sealant over time.
- Protect from Furniture: Use furniture pads under table and chair legs. This prevents scratches and rust stains from metal furniture.
By integrating these simple maintenance habits, your pool pavers will stay clean and inviting. This allows you to fully enjoy your outdoor oasis without worrying about unsightly or unsafe surfaces.
Frequently Asked Questions About Cleaning Pool Pavers
Cleaning pavers around a pool often brings up common questions. I get asked these all the time. Here are some quick answers to help you with your paver maintenance.
Is it safe to use bleach on pavers?
Yes, you can use bleach on pavers for mold, mildew, and algae. Always dilute it with water, typically one part bleach to two parts water. Test a small, hidden area first to ensure it does not discolor your pavers. Rinse thoroughly after application to remove all residue.
How often should I clean my pool pavers?
For basic cleaning, I recommend sweeping them weekly and rinsing them monthly. For a deeper clean, especially if you see algae or stains, perform it seasonally or at least twice a year. If your pool area is heavily used or prone to dirt, increase the frequency as needed.
Can I use a regular pressure washer on pavers?
You can use a pressure washer, but with caution. Use a wide-angle nozzle (25 or 40 degrees) and keep the pressure below 2000 PSI. Hold the wand at least 12-18 inches from the surface. Always keep the wand moving to avoid damaging the pavers or blasting out joint sand.
What is polymeric sand, and do I need it?
Polymeric sand is a mixture of sand and special polymers. When wet, it hardens, forming a flexible, durable bond between pavers. You need it because it stabilizes pavers, prevents weed growth, and deters ants. It is highly recommended, especially after deep cleaning or pressure washing.
How do I remove white stains (efflorescence) from my pavers?
Efflorescence is a white, chalky mineral deposit. First, brush away any loose powder when dry. For light efflorescence, use a 50/50 white vinegar and water solution. For stubborn cases, a commercial efflorescence remover
- pool deck cleaning
- paver maintenance
- remove algae from pavers
- outdoor cleaning solutions