· Home Maintenance · 22 min read
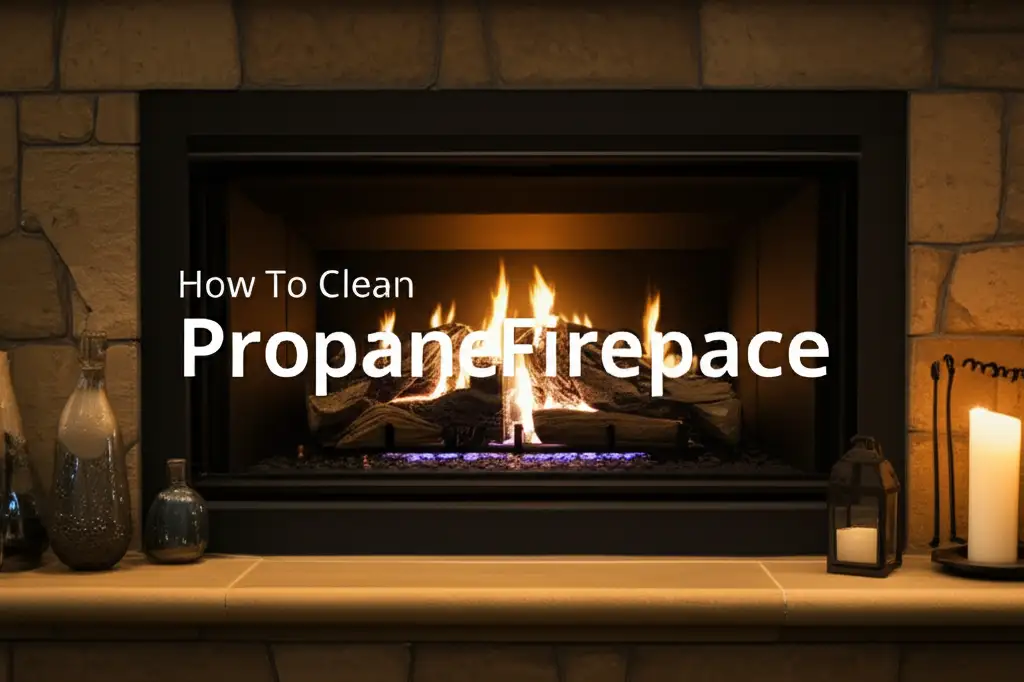
How To Clean Pilot Light On Gas Fireplace
How To Clean Pilot Light On Gas Fireplace
Have you ever tried to light your gas fireplace, only to find the pilot light flickers or fails to stay lit? This can be a frustrating experience, especially when you want to enjoy a cozy fire. Often, the cause is a dirty pilot light assembly. Learning how to clean pilot light on gas fireplace units is a simple maintenance task you can do yourself. This guide provides clear steps to clean your gas fireplace pilot light safely and effectively. We will cover necessary tools, safety precautions, and a detailed cleaning process. You will learn to bring your fireplace back to life.
Takeaway:
- Turn off gas and power before you start.
- Gather tools like a soft brush, compressed air, and fine-grit sandpaper.
- Carefully clean the pilot opening, thermocouple, and thermopile.
- Relight the pilot and check for a strong, blue flame.
- Perform regular cleaning to prevent future issues.
To clean a pilot light on a gas fireplace, you first turn off the gas and power. Then, use a soft brush or compressed air to remove dust and debris from the pilot assembly and thermocouple. For stubborn grime, gently clean with fine-grit sandpaper. This ensures a clear gas flow and proper flame detection.
Why Your Gas Fireplace Pilot Light Needs Cleaning
A gas fireplace pilot light is a small flame that stays lit constantly. It ignites the main burners when you turn on your fireplace. Over time, dust, soot, and other debris build up around this tiny flame. This buildup can block the gas flow or cover the flame sensor. When this happens, the pilot light may become weak, flicker, or even go out.
A dirty pilot light often leads to your fireplace not lighting properly. The flame sensor, called a thermocouple or thermopile, needs to detect a strong pilot flame to keep the main gas valve open. If debris covers the sensor, it cannot sense the flame correctly. This tells the fireplace to shut off the gas as a safety measure. Cleaning your pilot light restores its proper function. It ensures the gas flows freely and the sensor works well. A clean pilot light means a reliable fireplace.
Beyond not lighting, a dirty pilot light can also burn inefficiently. An orange or yellow pilot flame often shows soot or dust. A healthy pilot flame is strong and blue. An inefficient flame uses more gas and can create more soot inside your fireplace. Regular cleaning prevents these problems. It keeps your fireplace running safely and efficiently. You extend the life of your fireplace components.
Safety Measures Before You Begin Cleaning
Safety must be your top concern when working with gas appliances. Natural gas and propane are highly flammable. Ignoring safety steps can lead to serious injury or fire. Always follow these rules before you start any cleaning or maintenance. This protects you and your home. My own experience tells me that rushing these steps is never worth the risk.
First, turn off the gas supply to your fireplace. Find the gas shut-off valve. This valve is usually a small handle or knob located on the wall near the fireplace or directly on the gas line behind the fireplace access panel. Turn the handle perpendicular to the gas pipe to shut off the gas. If you cannot find it, turn off the main gas supply to your house. This prevents any accidental gas leaks during the cleaning process.
Next, turn off all electrical power to the fireplace. Some gas fireplaces have an electrical ignition system or blowers. Unplug the fireplace if it has an electrical cord. If it is hardwired, flip the circuit breaker that controls the fireplace power in your home’s electrical panel. This prevents electric shock or accidental ignition during your work. Confirm both gas and power are off before touching any part of the pilot assembly. Do not skip this critical step.
Allow the fireplace to cool completely before you begin. Even if it has been off for a while, parts can retain heat. A cooled fireplace prevents burns. It also makes it easier to handle parts. Make sure the glass door and interior components are cool to the touch. This can take an hour or more, depending on how recently you used the fireplace. Never clean a hot fireplace.
Finally, ensure good ventilation in the room. Open windows and doors if possible. This helps dissipate any lingering gas fumes if a small amount escapes during work. Although you turn off the gas, a well-ventilated area is always a good safety practice. Have a fire extinguisher nearby for added safety. These basic steps are essential for a safe cleaning experience.
Essential Tools For Cleaning Your Pilot Light
Having the right tools makes the job easier and more effective. You do not need many specialized tools for this task. Most items you might already have around your house. Using the correct tools prevents damage to delicate fireplace parts. I always find a well-prepared workstation makes any DIY project less stressful. Gathering everything beforehand saves time.
Here is a list of essential tools you will need:
- Flashlight or Headlamp: The pilot light area is often dark and cramped. A good light source helps you see clearly. This ensures you do not miss any debris and clean thoroughly.
- Small Wire Brush or Toothbrush: A soft-bristled toothbrush works well to gently scrub away dust and light soot. For more stubborn grime, a small brass wire brush, often found in gun cleaning kits, can be useful. Do not use a large, stiff wire brush, as it can damage parts.
- Compressed Air Can: A can of compressed air, like those used for cleaning computer keyboards, is excellent for blowing away loose dust and debris from small openings. Aim the nozzle carefully to avoid damaging components.
- Fine-Grit Sandpaper or Emery Board: This is for gently cleaning the thermocouple or thermopile sensor. These sensors need a clean surface to detect the pilot flame properly. A small piece of 400-grit sandpaper or a nail emery board works perfectly.
- Soft Cloths or Rags: Keep a few clean, soft cloths handy. You can use these to wipe down parts or clean up any dust.
- Small Vacuum with Hose Attachment: A small shop vac or a regular vacuum with a narrow attachment can help suck up loose dust and debris from the fireplace floor and around the pilot assembly. This is more effective than just brushing for initial cleanup.
- Gloves (Optional but Recommended): Wearing gloves protects your hands from dust and grime. They also provide a better grip on tools and parts.
Make sure your tools are clean before you start. You do not want to introduce more dirt into the fireplace. These simple tools will help you effectively clean pilot light on gas fireplace without major hassle. For other general cleaning tasks, sometimes simple household items like vinegar and baking soda can be very effective.
Step-by-Step Guide to Cleaning Your Gas Fireplace Pilot Light
Once you have gathered your tools and taken all safety precautions, you are ready to clean the pilot light. Follow these steps carefully to ensure a thorough and safe cleaning. Remember, patience is key. Cleaning a pilot light on gas fireplace systems requires attention to detail.
Access the Pilot Light Assembly:
- First, open the glass door of your gas fireplace. Most models have latches or clips that hold the door in place. Release these and carefully swing the door open or lift it off its hinges. Set it aside safely.
- Next, remove any decorative logs or stones that cover the pilot light assembly. These are usually loose and lift right off. Take note of how they are arranged so you can put them back correctly.
- Locate the pilot light assembly. It is a small cluster of metal tubes and wires. You will see a tiny opening where the pilot flame comes out. You will also see the thermocouple or thermopile—a thin, often copper-colored rod that sits directly in the pilot flame.
Initial Debris Removal:
- Use your small vacuum cleaner with a hose attachment to suck up loose dust, pet hair, and debris from around the pilot assembly. This removes surface dirt before you start closer work.
- Take your can of compressed air. With short bursts, blow air directly at the pilot opening and around the thermocouple. This dislodges dust and cobwebs that might be blocking the gas flow or sensor. Keep the nozzle a few inches away to avoid damaging delicate parts.
- Use your small wire brush or toothbrush to gently scrub any visible soot or dirt from the metal parts of the pilot assembly. Pay close attention to the pilot opening itself.
Clean the Thermocouple/Thermopile:
- This component is vital for safety. It generates a small electrical current when heated by the pilot flame. This current keeps the main gas valve open. If it is dirty, it cannot sense the flame properly.
- Take your fine-grit sandpaper or emery board. Gently, but firmly, rub the surface of the thermocouple or thermopile rod. You only need to clean the part that sits in the flame. You are trying to remove any oxidation or carbon buildup. Do not bend or force the rod. Its surface should look shiny and clean after this step. This step is similar to how one might clean other sensitive components without removal, such as cleaning an AC blower wheel without taking it out.
Clean the Pilot Orifice (Optional, if accessible):
- The pilot orifice is the tiny hole from which the pilot gas flows. Sometimes, it can become partially clogged.
- If you can see the small opening, use a very fine wire (like a guitar string or a thin wire from a bread tie) to carefully poke into the orifice. Do not use anything larger than the hole, and do not force it. This helps clear any blockage. Be gentle. Some models may not allow easy access to this part.
Reassemble and Test:
- Once everything is clean, put back any logs or stones you removed. Make sure they are in their original positions.
- Carefully replace the glass door and secure its latches or clips.
- Turn the gas supply back on at the shut-off valve. Make sure the handle is parallel to the gas pipe.
- Turn the electrical power back on at the breaker or plug in the fireplace.
- Follow your fireplace’s instructions to relight the pilot light. This usually involves pressing a button and turning a knob. Hold the pilot button down for 30-60 seconds after the pilot lights to allow the thermocouple to heat up.
- Observe the pilot flame. It should be a strong, steady blue flame. If it is still weak, orange, or flickers, you may need to repeat the cleaning or consider professional help. A healthy pilot flame means you have successfully completed the task to clean pilot light on gas fireplace.
Troubleshooting After Cleaning the Pilot Light
You have cleaned the pilot light assembly. You have put everything back together. Now you try to light it, but it still does not work perfectly. Do not worry. Sometimes, a few small issues can remain. Troubleshooting helps you identify if the problem is solved or if something else is wrong. My advice is to approach this systematically.
First, check the pilot flame. A healthy pilot flame is strong and blue, like a tiny torch. If your pilot flame is weak, yellow, or orange, it means gas flow is still restricted or there is incomplete combustion. Revisit the cleaning steps. Make sure no debris blocks the pilot opening. Ensure the thermocouple or thermopile is perfectly clean and sitting directly in the flame. Sometimes, even a tiny amount of soot can affect its function. For issues like stubborn soot, specific cleaning methods for black soot from inside a fireplace might offer further insight into related fireplace cleanliness.
Next, confirm the thermocouple or thermopile alignment. This sensor must be fully enveloped by the pilot flame. If it is too far away, it will not heat up enough to generate the required voltage. Gently adjust its position if it seems out of place, but do not force it. It should be just above the flame, with the tip glowing red when heated. If the pilot lights but then goes out when you release the pilot button, a faulty or improperly heated thermocouple is the most common reason.
Check the gas supply. Is the main gas shut-off valve fully open? Is there gas flow to other appliances in your home? Sometimes, a valve might not be fully open, or a line could have air in it after a shutdown. If you suspect an issue with the gas supply beyond the fireplace, contact your gas company. Do not attempt to fix gas lines yourself.
Consider the igniter. If the pilot light does not spark when you try to light it, the igniter might be faulty. This component creates the spark that lights the pilot flame. It is usually a small ceramic part with a metal tip. You can try to clean the tip of the igniter gently with a toothbrush to remove any carbon buildup. If it still does not spark, it may need replacement.
Finally, think about gas pressure. If the gas pressure is too low, the pilot flame will be weak, no matter how clean it is. This is a rare issue for residential lines but can happen. This is not something you can fix yourself. If you suspect low gas pressure, you must call a qualified gas technician or your gas utility company. Never tamper with gas pressure regulators.
Preventive Maintenance for Your Gas Fireplace Pilot Light
Cleaning your pilot light is a great step. But regular preventive maintenance keeps your gas fireplace running smoothly year after year. It also reduces the need for frequent deep cleaning. Think of it like taking care of your car. Small, regular checks prevent big problems later. I make it a point to perform these checks before each heating season.
First, make it a habit to inspect your pilot light assembly at least once a year. The best time for this is before the heating season begins, usually in early fall. When you check, look for any visible dust, soot, or debris accumulating around the pilot opening or on the thermocouple. A quick visual inspection can tell you if a full cleaning is needed. This proactive approach saves you from cold nights later.
Second, consider vacuuming the area around your pilot light and inside your fireplace box regularly. Dust, pet hair, and lint are common culprits for pilot light clogs. Using a small vacuum with a brush attachment can remove these particles before they build up. Do this monthly during the heating season, or more often if you have pets. This simple step goes a long way in preventing blockages.
Third, ensure your fireplace glass and logs are clean. While not directly related to the pilot light, a dirty fireplace indicates overall lack of maintenance. Soot buildup on logs or glass can become airborne and settle on the pilot assembly. Cleaning the fireplace interior regularly helps keep the air cleaner around the pilot. For specific cleaning solutions for tough grime, remember that vinegar and baking soda are versatile for many household cleaning needs.
Fourth, check your home’s air filters. If your furnace or HVAC system shares ductwork or draws air from the same living space, dirty air filters can increase airborne dust. Cleaner air in your home means less dust settling on your fireplace components. This is an indirect but effective way to maintain cleanliness inside your fireplace. Change your furnace filter every 1-3 months.
Finally, avoid using chemical sprays or cleaners near your fireplace. These products can leave residues that attract dust or even damage components. Stick to dry cleaning methods for the pilot light area. If you need to clean the glass, use a dedicated fireplace glass cleaner. By following these preventive steps, you significantly reduce the chances of your pilot light getting dirty. You ensure your gas fireplace is ready to provide warmth when you need it most.
When to Call a Professional for Your Gas Fireplace
While cleaning a pilot light is a task many homeowners can do, some situations require a professional. Knowing when to call an expert ensures safety and prevents further damage. Do not hesitate to seek help if you feel unsure or if the problem persists. My rule of thumb is: if it involves actual gas lines or persistent issues, call a pro.
Call a professional if you smell gas. If you detect the odor of natural gas or propane at any time, immediately shut off your gas supply. Then, evacuate everyone from your home and call your gas utility company or a qualified HVAC technician. Do not try to find the leak yourself. Gas leaks are extremely dangerous and require immediate expert attention.
Contact a professional if the pilot light still does not work after multiple cleaning attempts. If you have followed all the steps to clean pilot light on gas fireplace and it still will not light, or stays lit, the issue might be more complex. It could be a faulty thermocouple, thermopile, gas valve, igniter, or a blockage deeper in the gas line. These parts often require specialized tools and knowledge to diagnose and replace. Attempting repairs yourself can be risky.
A professional technician can accurately diagnose the problem. They have diagnostic equipment to test gas pressure, valve function, and electrical components. They can also access parts that are difficult or unsafe for a homeowner to reach. Their expertise ensures the repair is done correctly and safely, restoring your fireplace’s function.
Call a professional for annual maintenance. Even if your fireplace seems fine, a yearly service by a qualified technician is highly recommended. During this service, they will:
- Inspect the entire gas line and connections for leaks.
- Check and clean all burners and pilot assemblies.
- Test gas pressure and combustion efficiency.
- Inspect the chimney or vent for blockages.
- Ensure all safety controls work correctly.
This annual check-up catches small issues before they become major problems. It prolongs the life of your fireplace and ensures its safe operation. Investing in professional maintenance provides peace of mind. It also ensures your fireplace operates at peak efficiency. This is especially true if you are concerned about maintaining components without full removal, a common consideration for professional services, similar to how one might approach cleaning certain components without disassembly. Do not compromise on safety or the longevity of your gas fireplace.
Advanced Tips for Gas Fireplace Maintenance
Beyond cleaning the pilot light, there are other aspects of gas fireplace maintenance you should know. These tips help keep your fireplace in top shape. They ensure efficient operation and extend its lifespan. A little extra care goes a long way for any appliance in your home.
First, pay attention to the main burner. Over time, the burner ports can accumulate dust and debris, just like the pilot light. This can lead to an uneven flame or reduced heat output. Use a soft brush or a vacuum cleaner with a brush attachment to gently clean the burner ports. Make sure the gas is off before you do this. This simple step can improve your fireplace’s performance.
Second, check your fireplace’s venting system. Gas fireplaces produce combustion byproducts that must vent safely outside your home. Ensure the vent pipe is clear of obstructions, such as bird nests, leaves, or debris. A blocked vent is dangerous and can lead to carbon monoxide buildup inside your home. If your fireplace shares a chimney with another appliance, ensure that the chimney liner is clean and intact. This is often a job for a professional, but a visual check from the outside can alert you to obvious blockages.
Third, inspect the glass panel. Many gas fireplaces have a sealed glass panel. Over time, a white film or soot can build up on the inside surface of the glass. This reduces visibility and can be a sign of improper combustion. Use a specialized gas fireplace glass cleaner (not window cleaner) to clean the inside of the glass. Always ensure the fireplace is cool and the gas is off before opening the glass panel. If you see significant soot inside, like black soot from inside a fireplace, it might point to a bigger combustion issue requiring professional inspection.
Fourth, consider replacing decorative media if needed. Gas fireplaces use ceramic logs, glass embers, or stones. These can accumulate soot or degrade over time. If your logs look heavily sooted, chipped, or are no longer vibrant, replacing them can improve the aesthetic and sometimes indicate better combustion if the soot issue persists. Always use media designed for your specific fireplace model.
Finally, keep your fireplace area clean. Dust and pet hair in the living space can easily be drawn into the fireplace through air vents. Regular vacuuming around the fireplace and cleaning the surrounding floor helps minimize the amount of debris that can enter the unit. These advanced tips, combined with regular pilot light cleaning, contribute to a safer, more efficient, and more enjoyable gas fireplace experience.
Optimizing Gas Fireplace Performance Through Cleanliness
A clean gas fireplace does more than just light reliably. It performs better overall. Optimizing your gas fireplace performance means getting the most heat for your fuel, reducing wear on parts, and ensuring safe operation. Cleanliness is a cornerstone of this optimization. I have seen firsthand how a little cleaning effort makes a big difference.
When the pilot light and burners are clean, gas flows without obstruction. This means the flame is strong, blue, and consistent. A consistent flame ensures complete combustion of the gas. Incomplete combustion, often caused by dirt, produces more soot and can be less efficient. This wastes gas and costs you money. Clean components ensure you get the maximum heat output for every unit of gas consumed.
Furthermore, cleanliness extends the life of your fireplace components. Soot and carbon buildup act as insulators. They can cause parts like the thermocouple and thermopile to overheat or fail prematurely. Dirt also adds friction to moving parts, like gas valves, reducing their lifespan. Regular cleaning prevents this wear and tear. You avoid costly repairs and replacements down the line. It is a simple investment of time that yields significant returns.
A clean fireplace also contributes to better air quality. When soot and dust burn, they release fine particles into your home’s air. While gas fireplaces are designed to vent outside, some particles can escape, especially if the system is not burning efficiently. A clean pilot light and burner reduce these emissions. This creates a healthier indoor environment for you and your family.
Moreover, a clean fireplace is safer. A dirty pilot light can fail, leading to gas buildup if safety sensors do not function properly. Obstructions in the venting system can lead to dangerous carbon monoxide levels. Regular cleaning and maintenance ensure all safety features are operational. They confirm gas flows correctly and combustion byproducts vent properly. Your peace of mind is worth the effort.
In essence, optimizing your gas fireplace performance is a continuous process. It involves consistent cleaning, regular inspections, and knowing when to call a professional. By keeping your pilot light and the entire fireplace assembly clean, you ensure it functions reliably, efficiently, and safely. You get to enjoy the warmth and ambiance without worry. This thorough approach makes sure your fireplace remains a comfortable and safe focal point in your home.
Frequently Asked Questions (FAQ)
How often should I clean my gas fireplace pilot light?
You should inspect your pilot light annually, ideally before the heating season starts. Clean it if you see visible dust, soot, or debris. If your pilot light flickers or does not stay lit, clean it immediately. Regular cleaning prevents issues.
What causes a gas fireplace pilot light to get dirty?
Dust, pet hair, lint, and even microscopic particles from burning gas or surrounding air can accumulate. This buildup often clogs the tiny pilot orifice or coats the flame sensor (thermocouple/thermopile). Air currents within the fireplace can carry these particles.
Can I use water to clean my pilot light?
No, do not use water to clean gas fireplace components. Water can damage sensitive electrical parts and cause rust on metal components. Always use dry methods like brushes, compressed air, and fine-grit sandpaper. Moisture can lead to corrosion and electrical shorts.
What if my pilot light still won’t stay lit after cleaning?
If cleaning does not solve the problem, the issue might be a faulty thermocouple, thermopile, or gas valve. These parts may need replacement. It is best to call a qualified gas fireplace technician for diagnosis and repair. Do not attempt complex repairs yourself.
Is cleaning the pilot light safe to do myself?
Yes, cleaning the pilot light is safe if you follow all safety precautions strictly. Always turn off the gas supply and electrical power to the fireplace first. Allow the unit to cool completely. If you are uncomfortable, always call a professional.
What does a healthy pilot flame look like?
A healthy gas fireplace pilot flame is strong, steady, and blue. It should not be yellow, orange, or flickering. A blue flame indicates complete combustion and proper gas flow. Any deviation suggests a problem, often due to dirt or poor gas mixture.
Conclusion
Cleaning the pilot light on your gas fireplace does not have to be a daunting task. By following the clear steps outlined in this guide, you can safely and effectively restore your fireplace’s functionality. We covered the importance of safety, the tools you need, and a detailed cleaning process for the pilot light and its components. Remember, a clean pilot light is essential for reliable ignition and efficient operation.
Regular maintenance, including annual inspections and basic cleaning, can prevent many common fireplace problems. It extends the life of your unit and ensures your home remains safe and warm. While DIY cleaning is often sufficient, always know when to call a professional, especially for gas smells or persistent issues. Taking good care of your gas fireplace means you can enjoy its comforting warmth for years to come. Do not let a flickering pilot light keep you from a cozy evening. Take action today to clean pilot light on gas fireplace and enjoy consistent warmth.
- gas fireplace maintenance
- pilot light cleaning
- fireplace troubleshooting
- DIY cleaning
- home safety