
· Plant Care · 12 min read
How To Clean Plant Roots
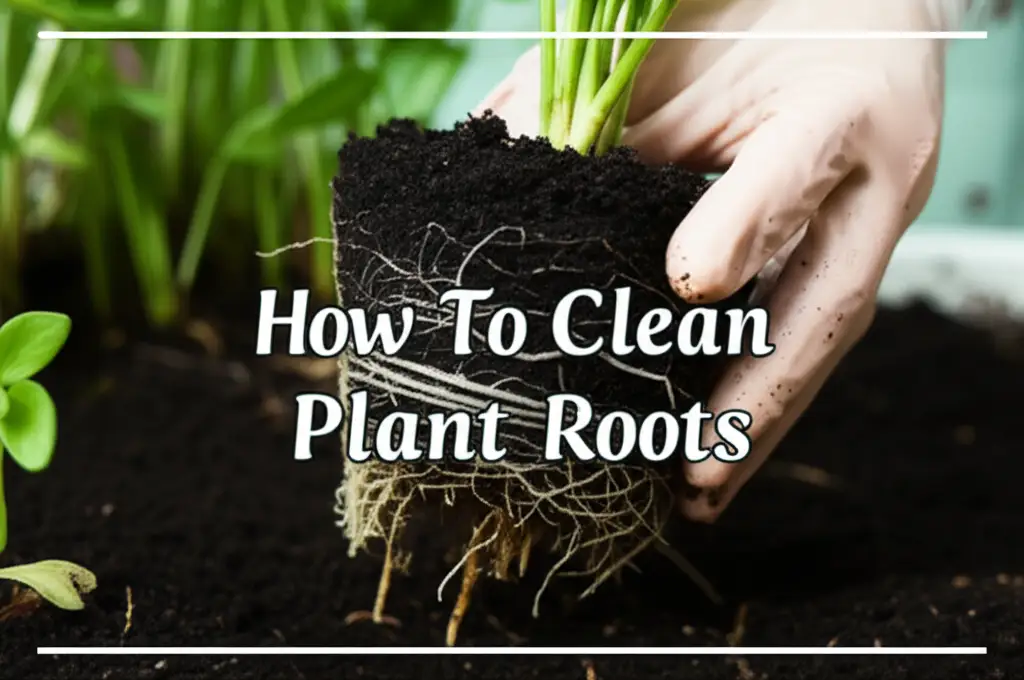
How To Clean Plant Roots for Healthy Growth
Have you ever wondered if your plant’s roots need a good cleaning? Many plant parents focus on leaves, but roots are equally important. Cleaning plant roots is a vital step for plant health. It helps remove old soil, dead material, and even disease. Understanding this process keeps your plants strong and happy.
This guide will show you exactly how to clean plant roots. We will cover why root cleaning matters and when to do it. You will learn about the right tools and techniques for different plant types. We will also discuss how to handle common root problems. By the end, you will feel confident caring for your plant’s hidden foundation.
Takeaway:
- Clean plant roots to remove old soil and debris.
- This process prevents disease and promotes new growth.
- Always be gentle when handling plant roots.
- Repot plants into fresh soil after cleaning.
To clean plant roots, gently remove the plant from its pot. Shake off loose soil. Rinse the roots under slow, room-temperature water. Carefully untangle roots and trim any dead or mushy sections. Repot the plant into fresh, appropriate soil. This helps ensure healthy plant growth and prevents issues.
Why Clean Plant Roots? Essential Benefits for Plant Health
Cleaning plant roots offers many benefits. It is more than just making them look tidy. This process directly impacts your plant’s overall well-being. Healthy roots mean a healthy plant.
When you clean plant roots, you remove old, compacted soil. Old soil can hold too much moisture or become depleted. This affects how roots absorb water and nutrients. Fresh, clean roots breathe better. They can also spread out more easily in new soil.
Root cleaning also helps identify problems early. You can spot signs of root rot or pests. Addressing these issues quickly prevents them from spreading. Clean roots also allow for better aeration. Roots need air to function properly. Without enough air, roots can suffocate. This leads to slow growth or plant decline.
Consider your plant’s roots as its stomach. You would not want to eat from a dirty plate. Roots need a clean environment to take in food. This practice improves nutrient uptake. It also supports strong, vigorous plant growth. A clean root system is a thriving root system.
When to Clean Plant Roots: Recognizing the Right Time
Knowing when to clean plant roots is important. It is not a task you do very often. Cleaning roots usually happens during specific plant care events. These events are often linked to your plant’s growth cycle.
One key time is during repotting. When a plant outgrows its pot, it becomes root-bound. Roots circle around the pot’s interior. This makes it hard for the plant to get enough water and nutrients. Repotting offers the perfect chance to inspect and clean the roots. It also helps you move the plant into a bigger space.
Another time to clean roots is when you see signs of disease. Soft, mushy, or discolored roots indicate root rot. A foul smell also points to problems. Cleaning these roots can save your plant. You remove the diseased parts before they spread further. This is a critical rescue mission for your plant.
You might also clean roots when pests are present in the soil. Some pests, like fungus gnats, lay eggs in damp soil. Cleaning removes these pests and their larvae. This helps protect your plant from future infestations. Always check your plant’s roots if you suspect problems. Regular checks keep your plants strong.
Essential Tools and Supplies for Cleaning Plant Roots
Gathering the right tools makes root cleaning easier. You do not need many special items. Most of these tools you might already have at home. Having them ready prevents stress during the process.
You will need a clean workspace. Lay down newspaper or a tarp. This protects your surfaces from soil and water. A clean surface also prevents spreading any plant diseases. Keep your area organized.
A bucket or basin is very useful. You will use it to hold water for rinsing. Make sure it is clean before you start. Dirty water can introduce new problems to your roots. A watering can with a gentle flow is also helpful. This allows for controlled rinsing.
You will also need sharp, clean pruning shears or scissors. These are for trimming dead or diseased roots. Clean tools prevent disease spread. Always sterilize them before and after use. Rubbing alcohol works well for this task. You can learn more about general cleaning tools and their care by reading How To Clean A Ceiling.
Finally, have fresh potting mix ready. This is crucial for repotting after cleaning. Choose a mix appropriate for your plant type. Also, have a new pot if you are upsizing. A clean pot helps ensure a healthy start.
- Workspace: Newspaper or tarp.
- Water Containers: Clean bucket or basin.
- Rinsing Tool: Watering can or gentle faucet.
- Trimming Tools: Sharp, sterilized pruning shears or scissors.
- Post-Cleaning: Fresh potting mix, new pot (if needed).
How to Clean Soil-Bound Plant Roots Gently
Cleaning roots from soil-bound plants requires care. You must be gentle to avoid damage. The goal is to remove old soil without harming the delicate root system. This method applies to most houseplants.
First, carefully remove the plant from its pot. Turn the pot on its side. Gently tap the bottom or squeeze the sides if it is a plastic pot. This helps loosen the soil ball. You might need to gently pull the plant by its base. Avoid pulling on the stem.
Once out, gently shake off loose soil. Use your fingers to loosen more soil. Do not yank or pull hard. The goal is to remove as much old soil as possible. This reveals the root structure.
Next, rinse the roots under a slow stream of room-temperature water. A kitchen sink faucet works well. Use a gentle flow. You can also dunk the root ball into a bucket of water. Swirl it gently to dislodge more soil. This step washes away fine soil particles. It also helps untangle roots. This process is similar to how you might carefully clean other delicate household items, ensuring no residue is left behind.
Inspect the roots after rinsing. Look for any damaged or unhealthy sections. Remove only what is necessary. Healthy roots are usually firm and white or light in color. This gentle cleaning prepares your plant for a fresh start. Remember to always be patient during this step.
Cleaning Hydroponic Plant Roots: Algae and Buildup
Hydroponic systems grow plants without soil. This means root cleaning differs for these plants. Hydroponic roots live directly in water or a nutrient solution. They face different challenges, like algae or nutrient film buildup.
Algae growth is common in hydroponic systems. Light exposure encourages algae to grow on roots. Algae competes with the plant for nutrients. It can also reduce oxygen levels in the water. Regularly checking and cleaning helps.
To clean hydroponic roots, first remove the plant from its system. Gently rinse the roots under cool, running water. This washes away any loose algae or slime. Avoid using harsh chemicals or soaps. Pure water is best for this task.
Use your fingers to gently rub away stubborn algae. You can also use a soft cloth or sponge. Be very gentle not to break the roots. Healthy hydroponic roots are typically white or cream-colored. Brown or mushy roots indicate a problem.
Nutrient buildup can also occur on hydroponic roots. This appears as a crusty residue. Rinsing usually removes this. For persistent buildup, a very dilute hydrogen peroxide solution (3% food grade) can help. Mix one part peroxide with ten parts water. Dip roots briefly, then rinse thoroughly with clean water. This helps prevent issues and keeps your system running smoothly, much like how specific solutions are used to clean mold with vinegar in a different context. Always ensure you thoroughly rinse afterwards.
Regular cleaning prevents future issues. It keeps your hydroponic system efficient. This also ensures your plants receive maximum nutrients. Clean roots are happy roots, whether in soil or water.
Dealing with Diseased Plant Roots: Root Rot and Pests
Discovering diseased roots can be alarming. However, prompt action often saves your plant. Root rot and pests are the most common root problems. Knowing how to deal with them is key.
Root rot is a fungal disease. It happens when roots sit in too much water. Oxygen levels drop, and fungi attack. Diseased roots are usually mushy, brown, or black. They may also smell foul. Healthy roots are firm and white or light in color.
To treat root rot, first remove the plant from its pot. Gently rinse the roots clean. Use sterilized pruning shears to cut away all diseased parts. Make sure no mushy sections remain. Cut back to healthy, firm root tissue. This is a critical step in stopping the spread.
After trimming, you can dip the remaining healthy roots. Use a fungicide solution or a dilute hydrogen peroxide solution. Mix one part 3% food-grade hydrogen peroxide with ten parts water. Soak for 15-20 minutes, then rinse. This helps kill remaining fungal spores.
For root pests, such as fungus gnats, cleaning is also effective. Fungus gnat larvae live in the soil and feed on roots. Cleaning the roots removes these larvae. Repotting into fresh, sterile potting mix is crucial. Avoid overwatering to prevent future infestations. This can prevent issues similar to how you’d work to clean mold in shower areas, by addressing the source of the problem. Always ensure thorough cleaning and sanitation.
Always repot into fresh soil and a clean pot. Do not reuse old, contaminated soil. Monitor your plant closely after treatment. Proper care helps prevent a relapse.
After Cleaning: Repotting and Post-Care for Healthy Roots
Cleaning plant roots is only half the job. What you do after cleaning matters just as much. Proper repotting and post-care ensure your plant recovers well. These steps help the plant thrive in its new environment.
First, choose the right pot size. If you trimmed many roots, you might use the same size pot. If roots were healthy and you want growth, go up one pot size. Ensure the pot has good drainage holes. Proper drainage prevents future root rot.
Use fresh, high-quality potting mix. The new soil provides essential nutrients. It also offers good aeration and drainage. Do not reuse old soil, especially if you treated root disease. Old soil can harbor pathogens or pests. Fill the new pot with some fresh soil.
Center your plant in the pot. Then, gently fill around the roots with more soil. Do not pack the soil too tightly. Leave some space at the top for watering. Water the plant thoroughly after repotting. This helps the soil settle around the roots. It also provides immediate hydration.
Place your newly repotted plant in a suitable location. Keep it in a spot with indirect light for a few days. This helps reduce transplant shock. Avoid direct, harsh sunlight immediately after repotting. Reduce watering slightly for the first week or two. The roots need time to establish themselves. Watch for signs of new growth. This indicates a successful root cleaning and repotting. Caring for your roots helps the entire plant, similar to how cleaning house plant leaves improves overall plant health and appearance.
FAQ Section
Why do plant roots need cleaning?
Plant roots need cleaning to remove old soil, dead material, and potential pathogens. This process improves root aeration, nutrient absorption, and helps prevent diseases like root rot. It allows the plant to access water and nutrients more efficiently, promoting overall health and vigorous growth.
How often should I clean my plant’s roots?
You do not need to clean your plant’s roots very often. Typically, you clean roots only when repotting the plant, usually every 1-2 years. You should also clean them if you suspect root rot, pest infestations, or if the plant shows signs of distress related to its roots.
Can I clean roots with soap or chemicals?
No, you should not clean plant roots with soap or harsh chemicals. These can damage the delicate root cells and harm your plant. Always use plain, room-temperature water for rinsing. For specific issues like fungal diseases, use plant-safe fungicides or very dilute hydrogen peroxide solutions, followed by thorough rinsing.
What are signs of unhealthy plant roots?
Signs of unhealthy plant roots include a mushy or slimy texture, brown or black discoloration, and a foul odor. Healthy roots are usually firm, white, or light in color. Slow growth, wilting leaves despite adequate watering, and yellowing leaves can also indicate root problems.
What should I do after cleaning diseased roots?
After cleaning diseased roots, you must repot the plant into a new pot with fresh, sterile potting mix. Discard the old soil and thoroughly clean or sanitize the old pot if you plan to reuse it. Provide appropriate watering and light conditions to help the plant recover from the stress.
Can cleaning roots hurt my plant?
Cleaning roots can harm your plant if done improperly. Being too rough can break or damage delicate root hairs, leading to transplant shock. Always be gentle when handling roots. Use sharp, clean tools for trimming. Proper technique minimizes stress and helps your plant thrive.
Conclusion
Cleaning plant roots is a vital step in plant care. It helps keep your green friends healthy and vibrant. We have covered why this process is important, from promoting growth to fighting disease. You now know when to clean roots, how to gather your tools, and the best techniques.
Remember to be gentle with soil-bound roots. Hydroponic roots need different care for algae and buildup. Addressing root rot and pests quickly can save your plant. Finally, proper repotting and post-care ensure a smooth recovery. Taking time to clean plant roots directly supports your plant’s longevity. This hidden effort brings visible rewards. Your plants will thank you with lush foliage and robust growth. Give your plants the best chance to thrive with clean, healthy roots.
- plant root care
- healthy plant roots
- repotting plants


